A verified knowledge base about padel for players of all levels
Welcome to the Padel Encyclopedia — a structured knowledge base about everything related to padel.
Our Goal
To collect, organize, and verify as much information about padel as possible — from basic rules to advanced tactics, from the history of the sport to injury prevention.
Principles
Verification — every fact is confirmed by at least two sources
Structure — information is organized by topic and skill level
Trilingual — all content is available in English, Russian, and Portuguese
Up-to-date — rules, rankings, and results are updated regularly
[UNVERIFIED] — fact not confirmed by independent sources
[DISPUTED] — contradictory data exists
[OUTDATED] — information may be outdated (rules, rankings)
[EXPERT OPINION] — subjective recommendation
Support the project
This encyclopedia is free and open — no ads, no paywalls, no mandatory sign-ups. The project runs on volunteer effort and reader support. If you find it useful, consider buying us a coffee.
We are a small team of enthusiasts, not a newsroom with lawyers and fact-checkers on staff. We do our best to verify everything we publish, but we can’t guarantee that every number and every detail is perfect. If you spot a mistake, we’d genuinely appreciate a heads-up.
Texts and photos come from open sources (photos via Unsplash). We don’t sell anything and we don’t profit from anyone else’s content.
Got questions, ideas, or feedback? Drop us a line at [email protected] — we read everything and we reply.
Subsections of Padel Encyclopedia
Basics
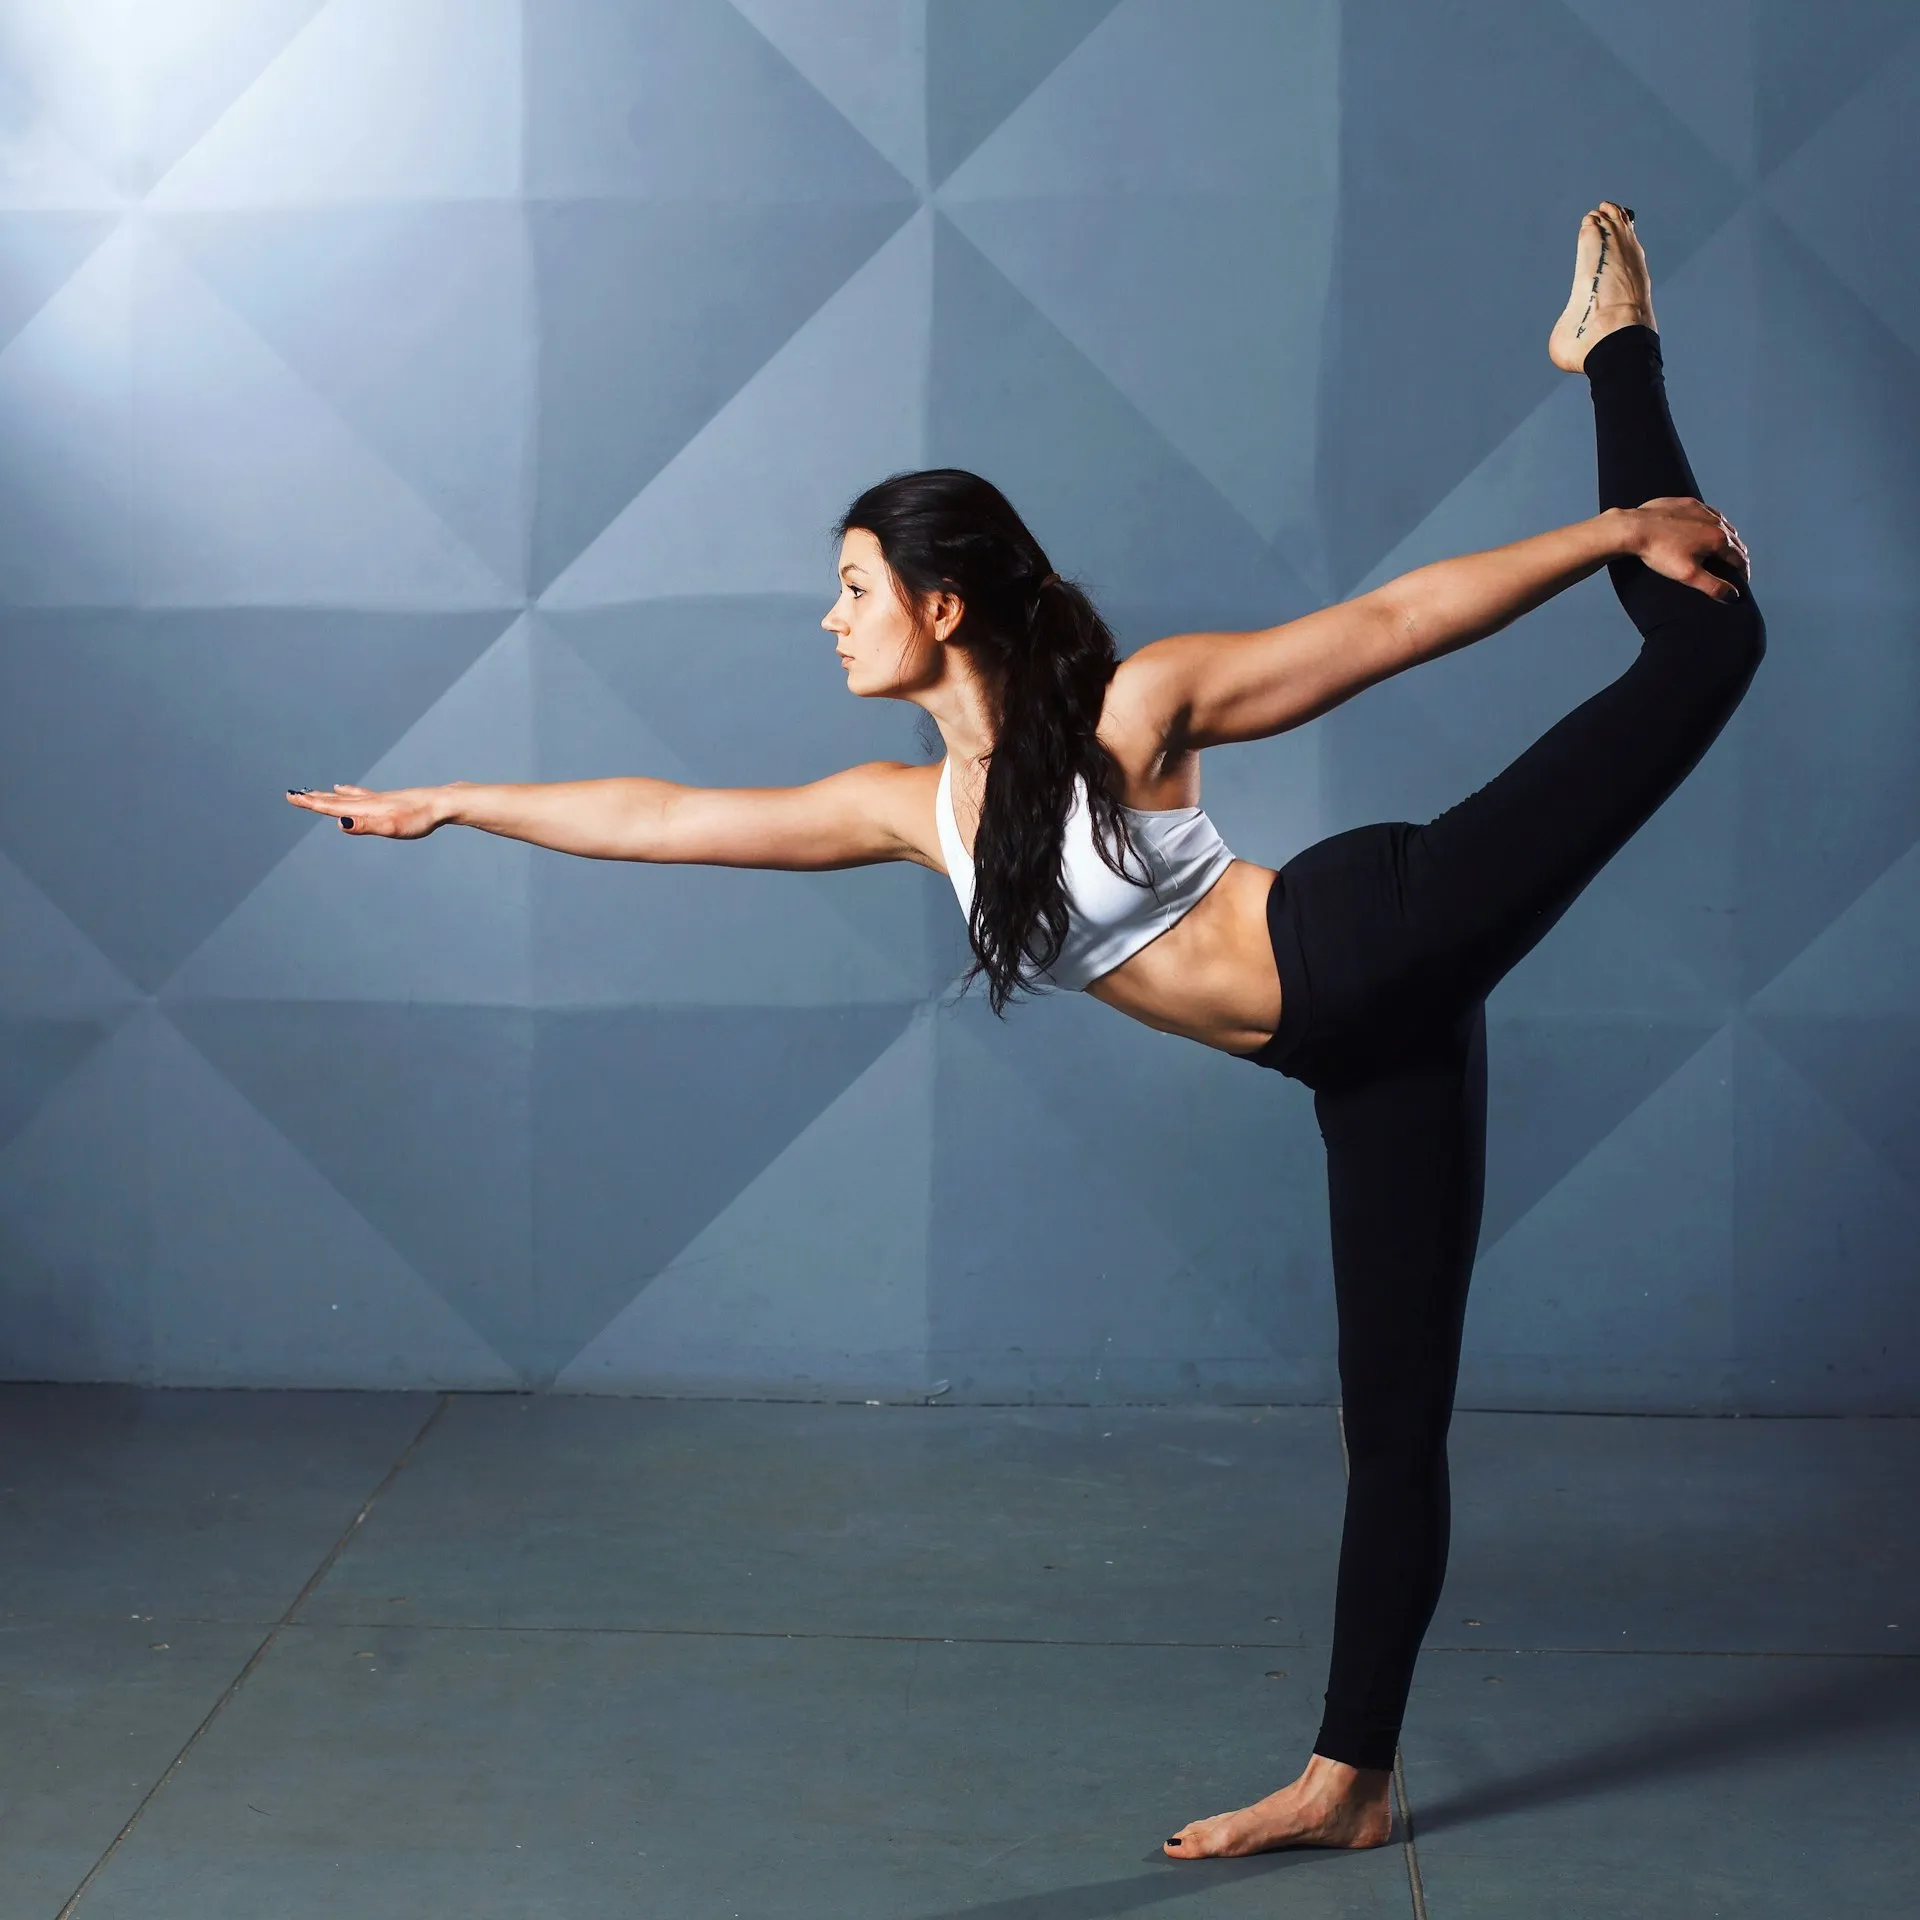
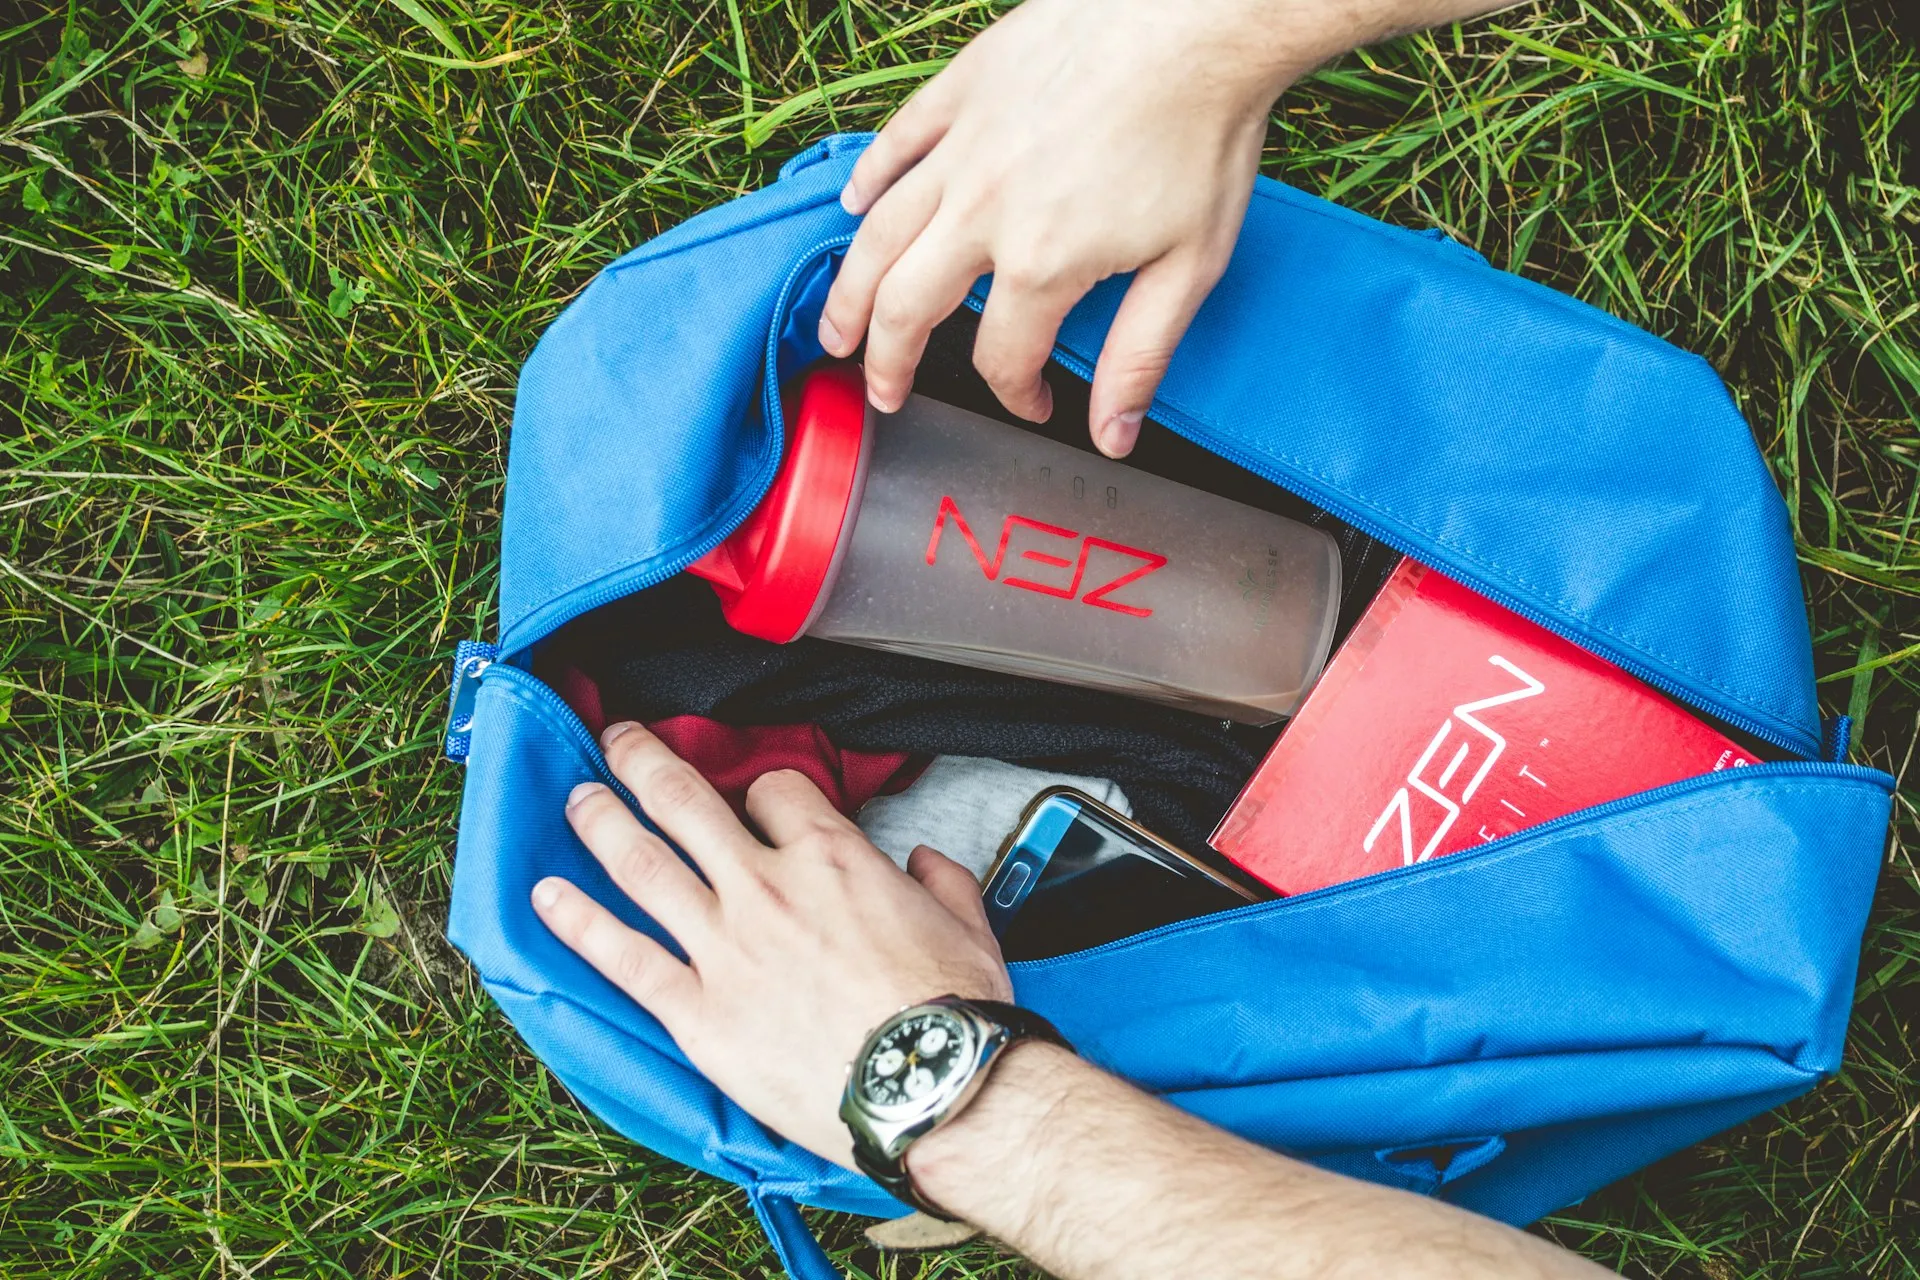
What is padel and how to start playing
Everything a beginner needs to know about padel: from your first introduction to the sport to your first match.
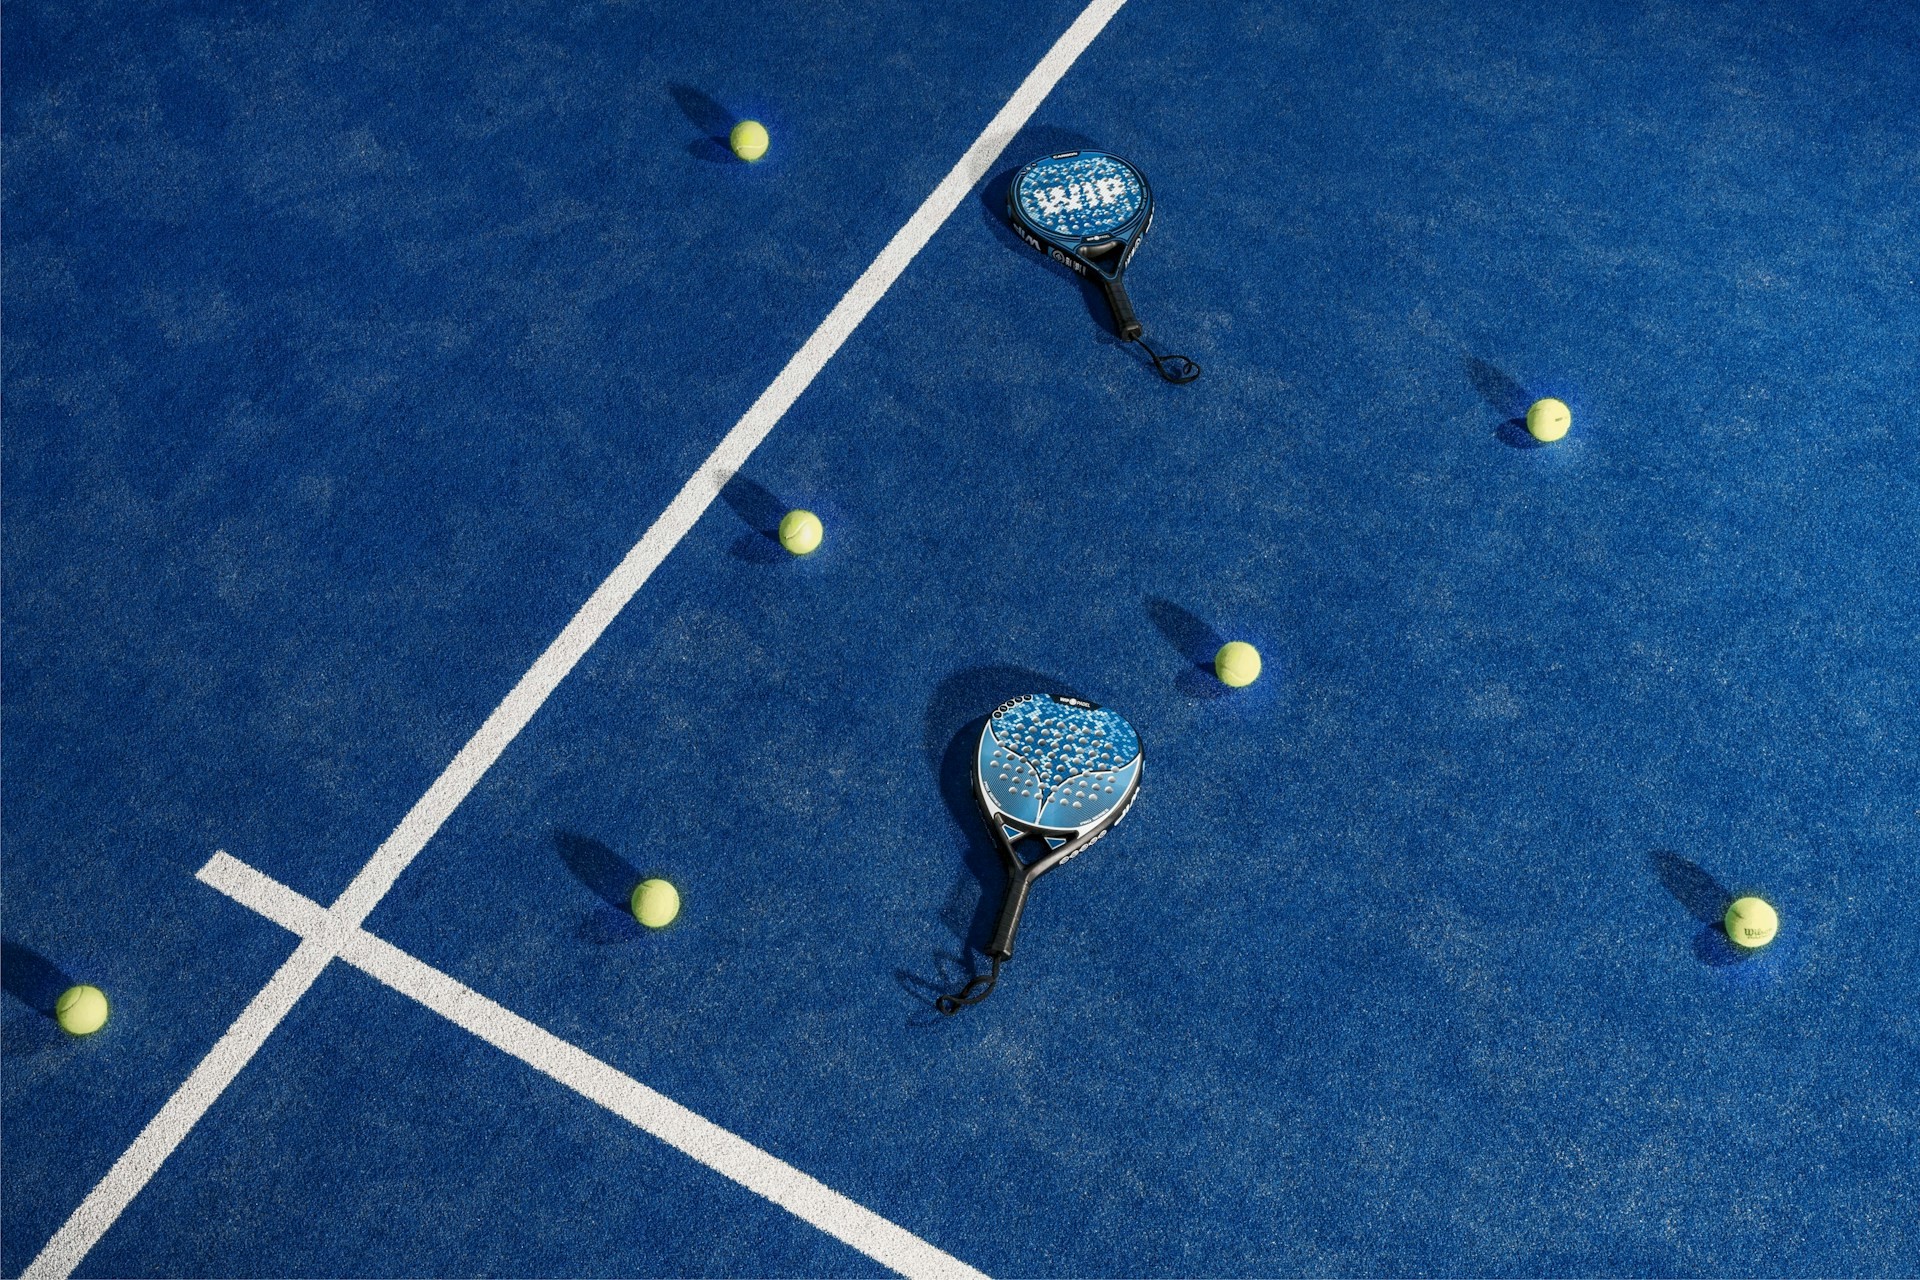
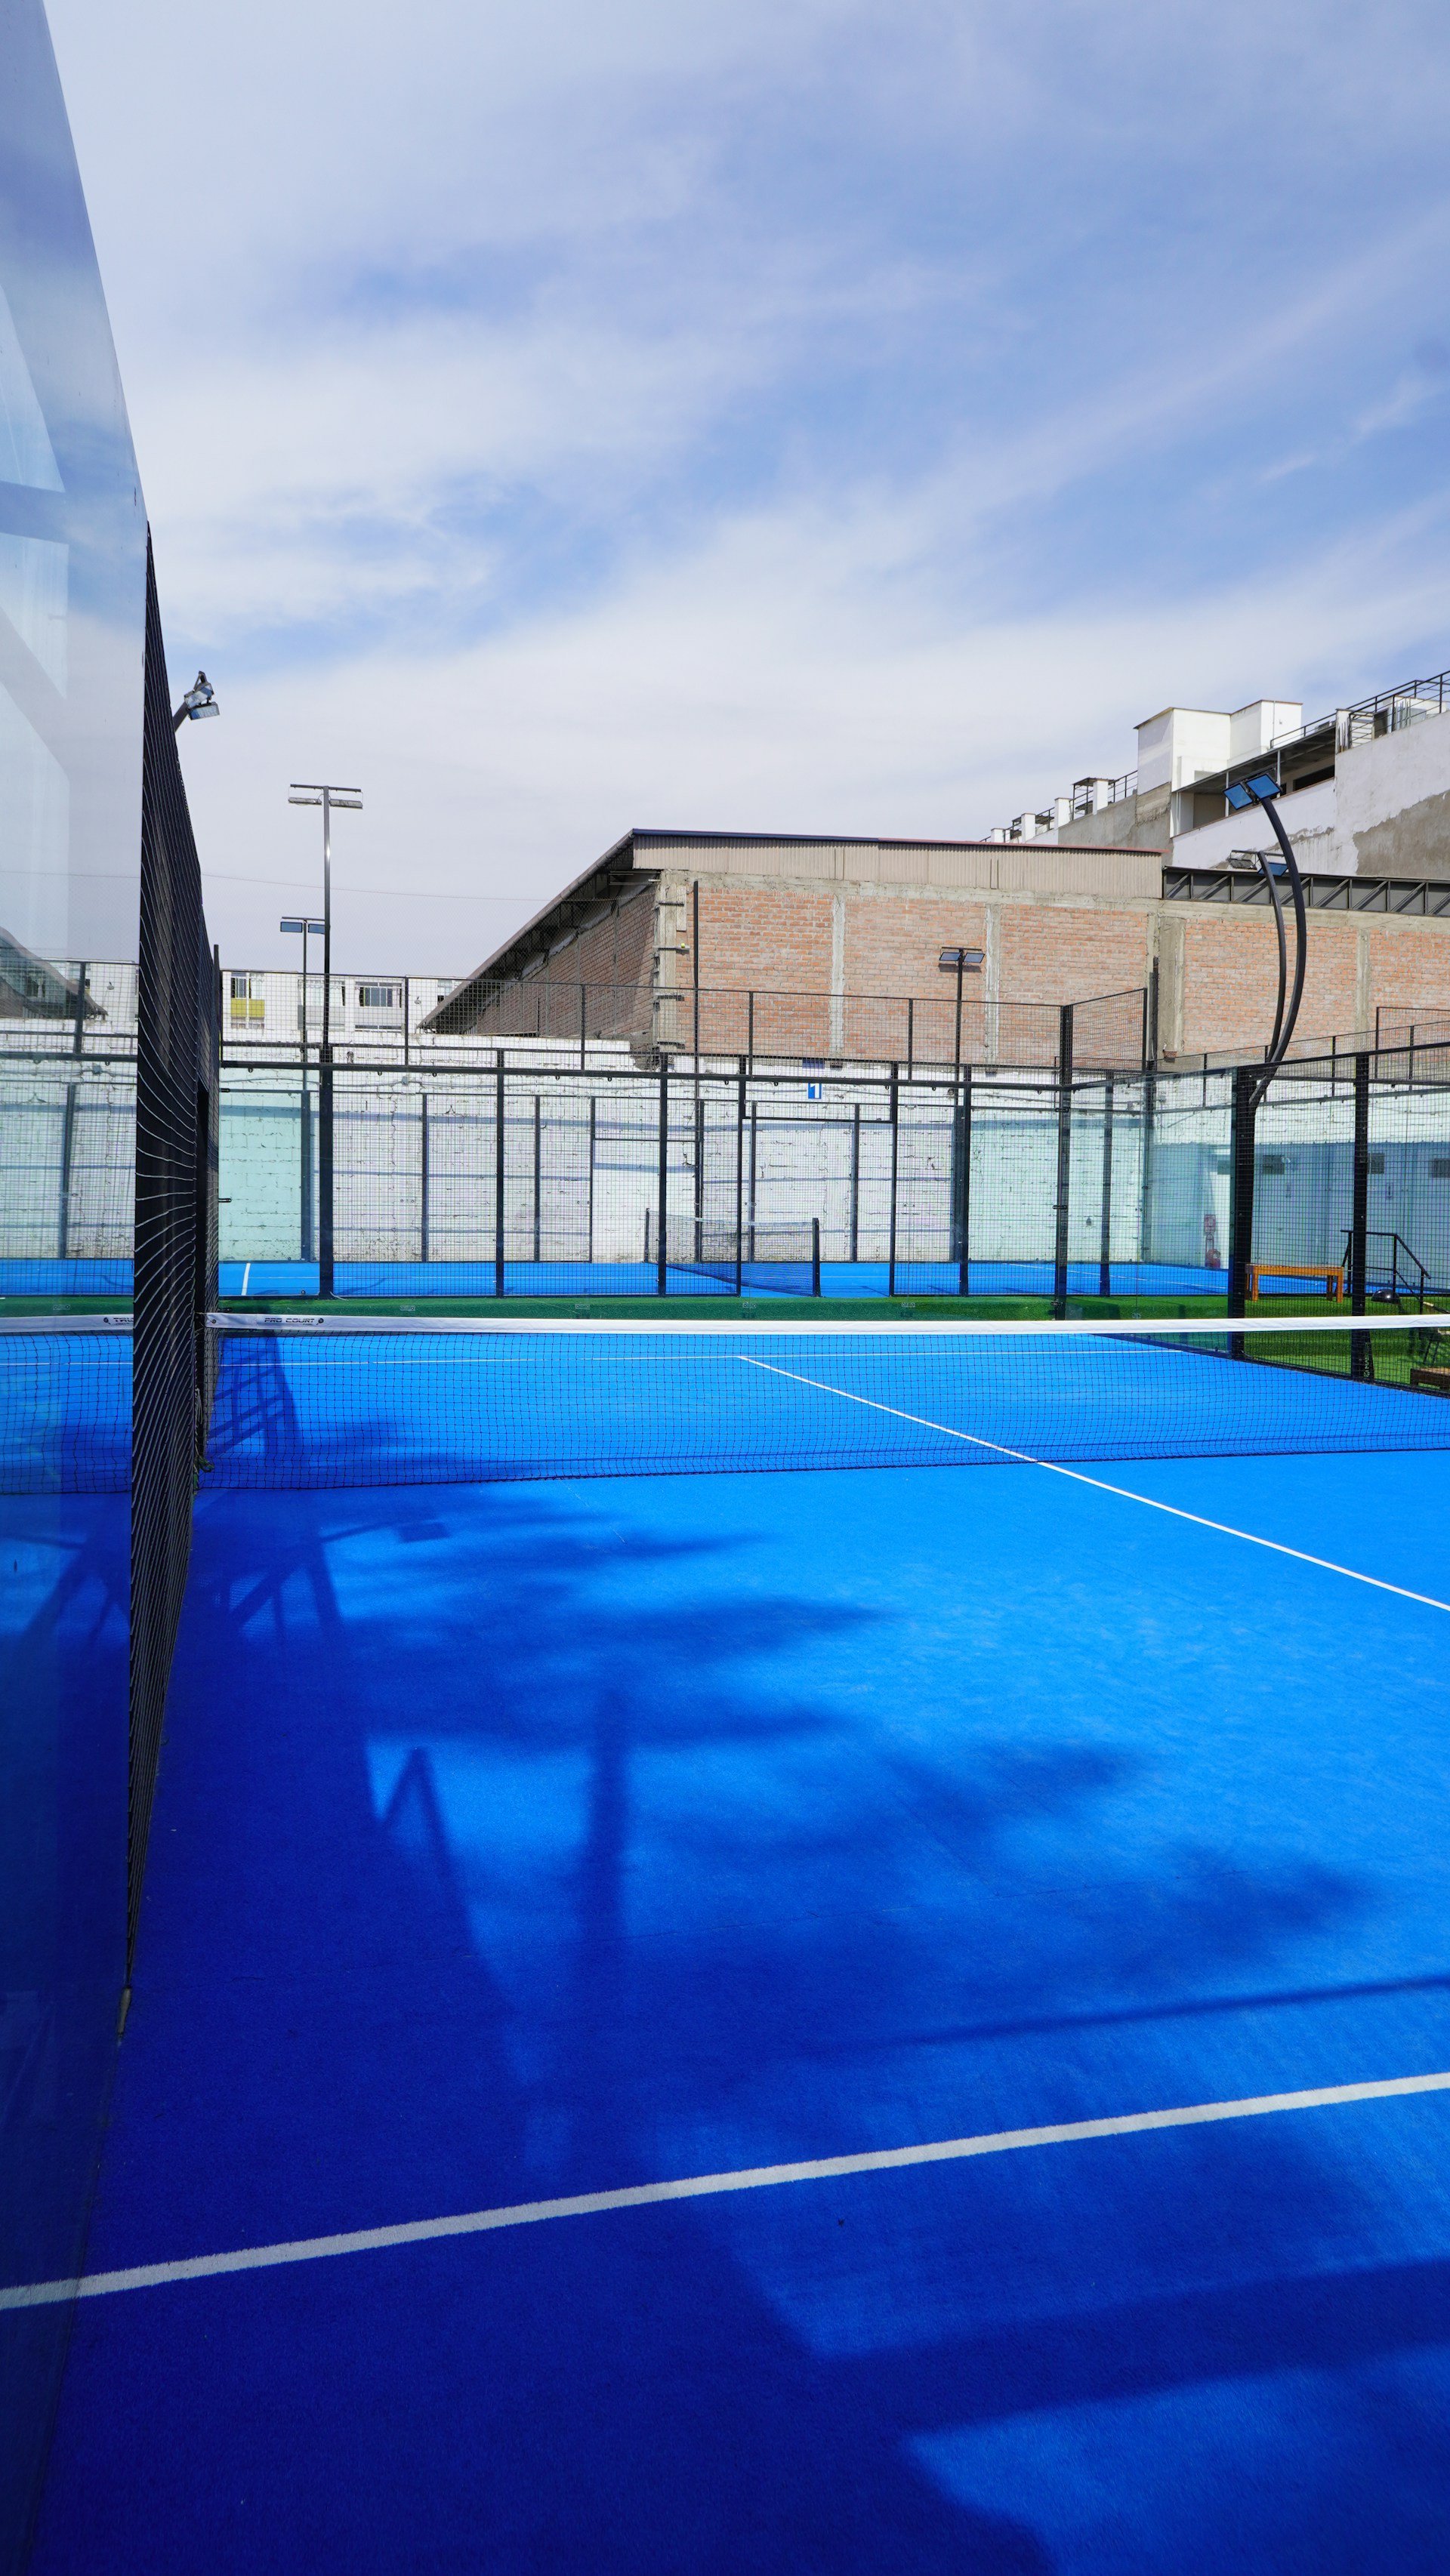
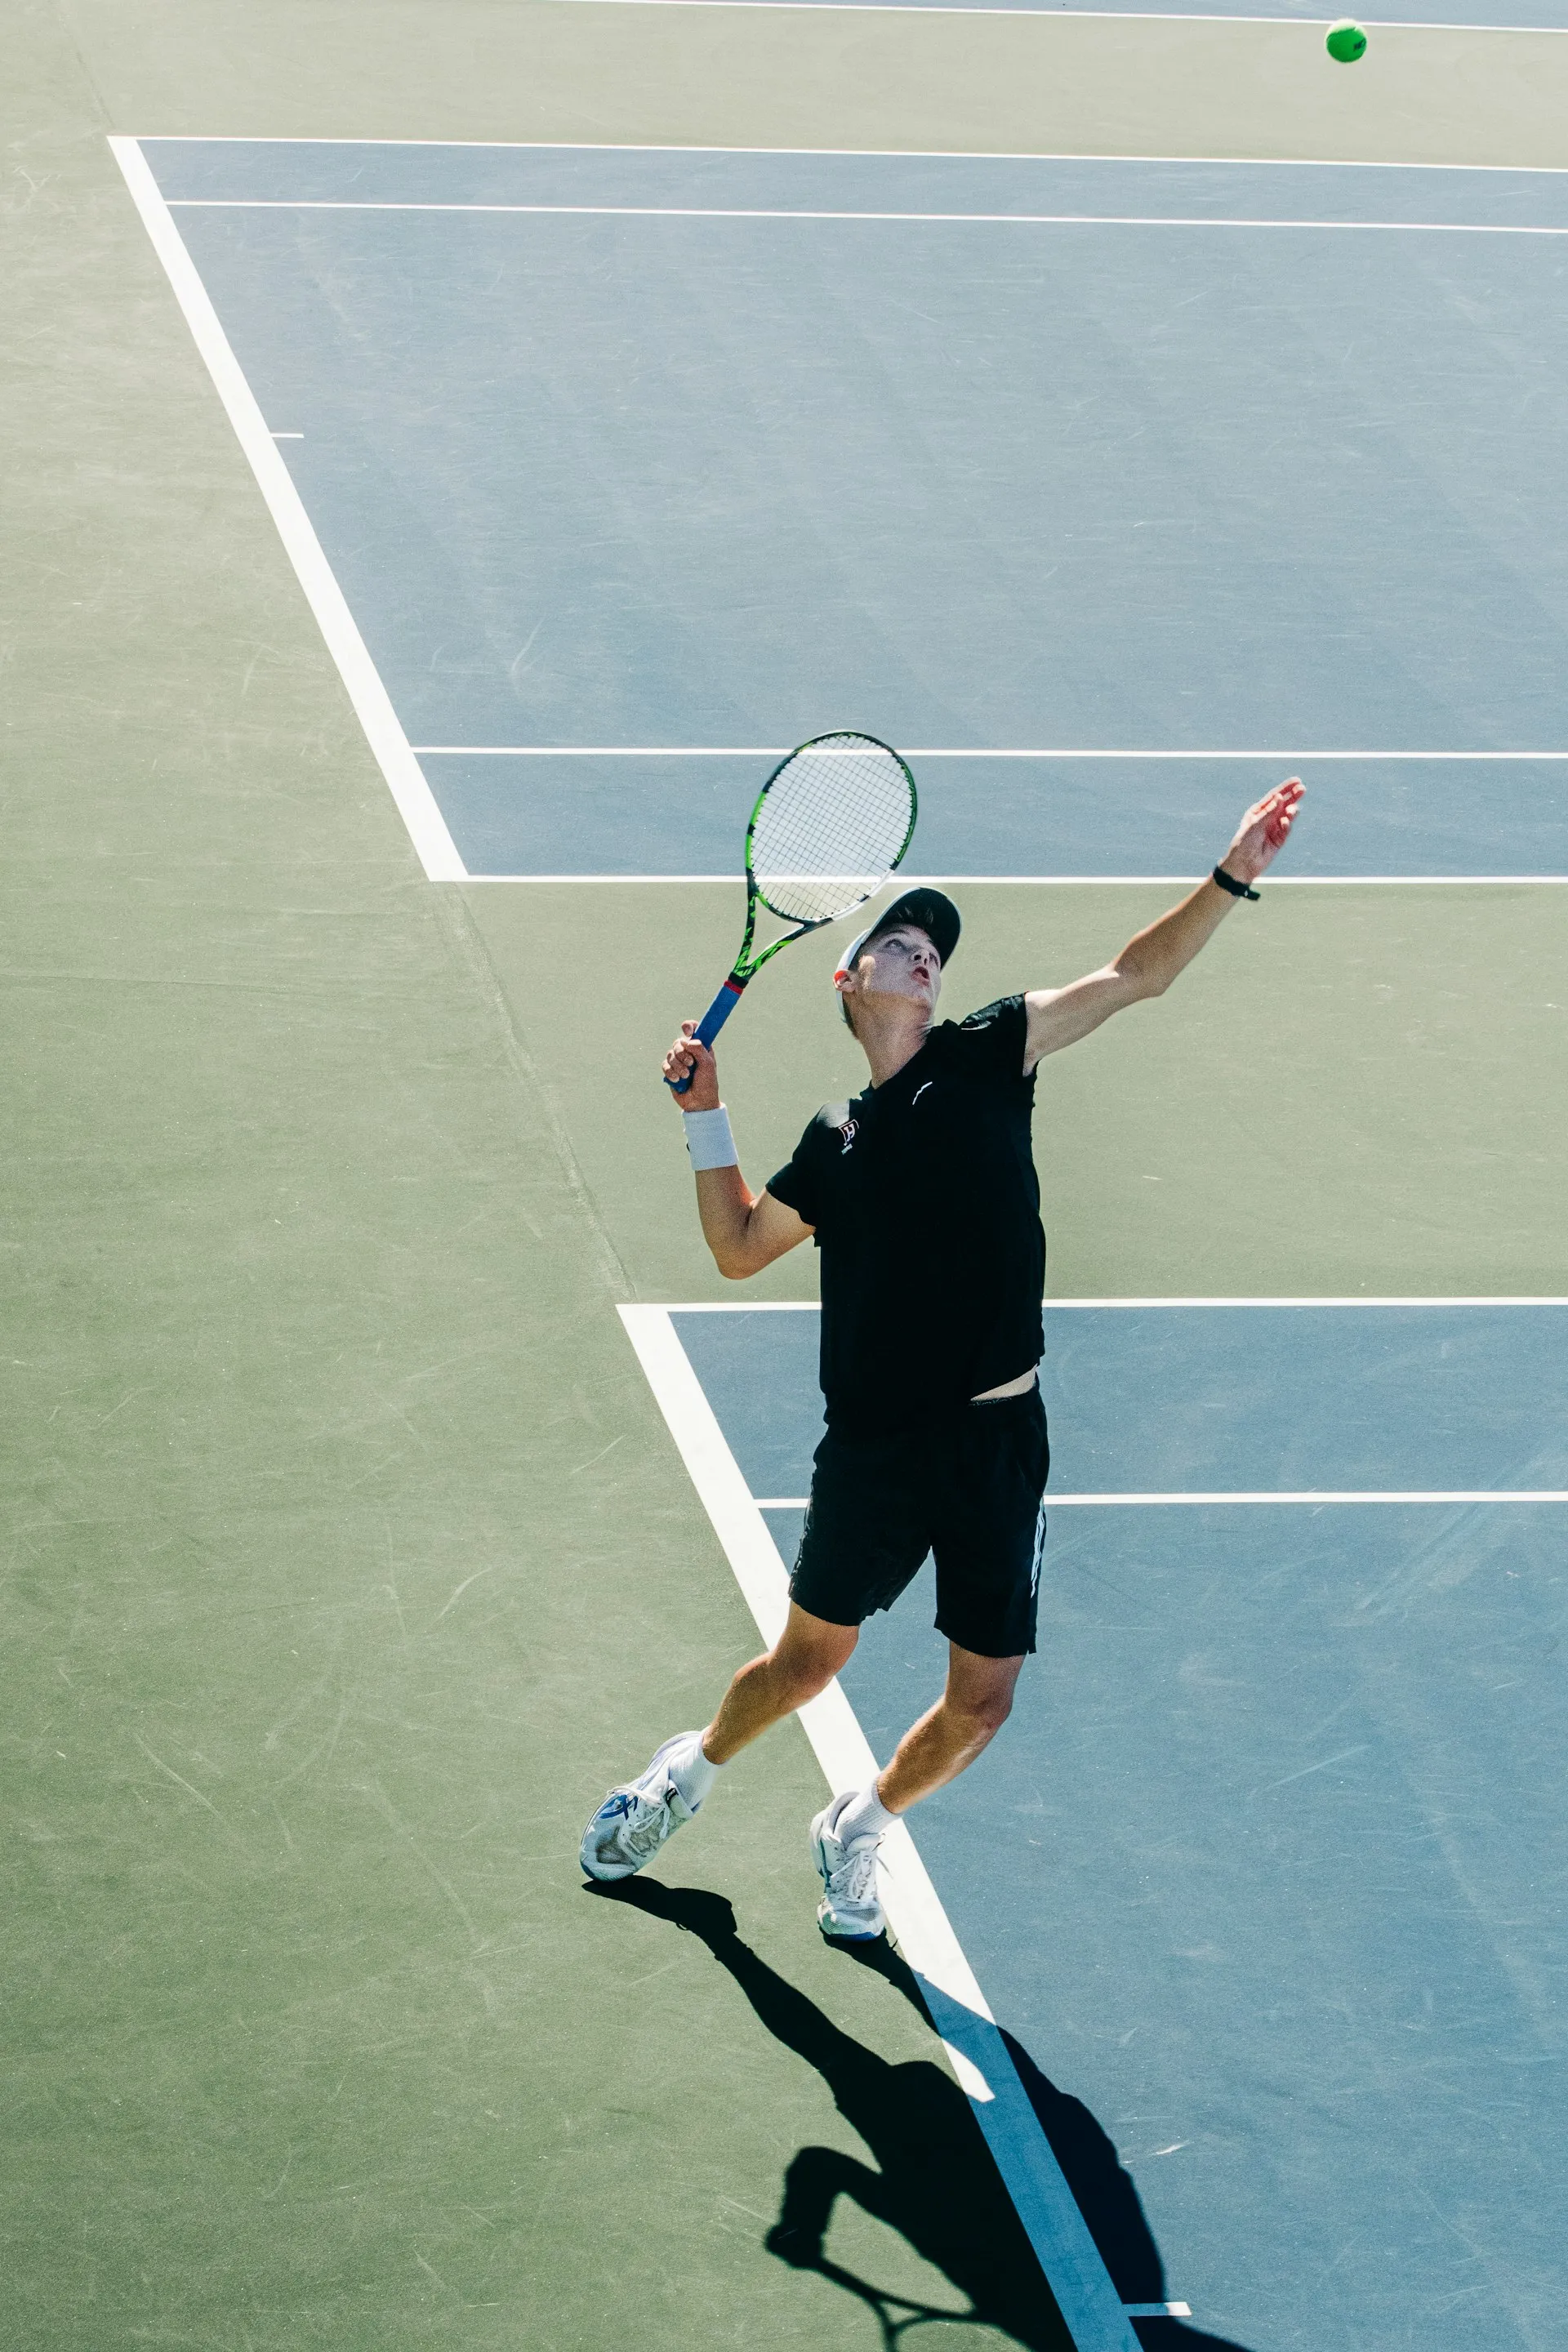
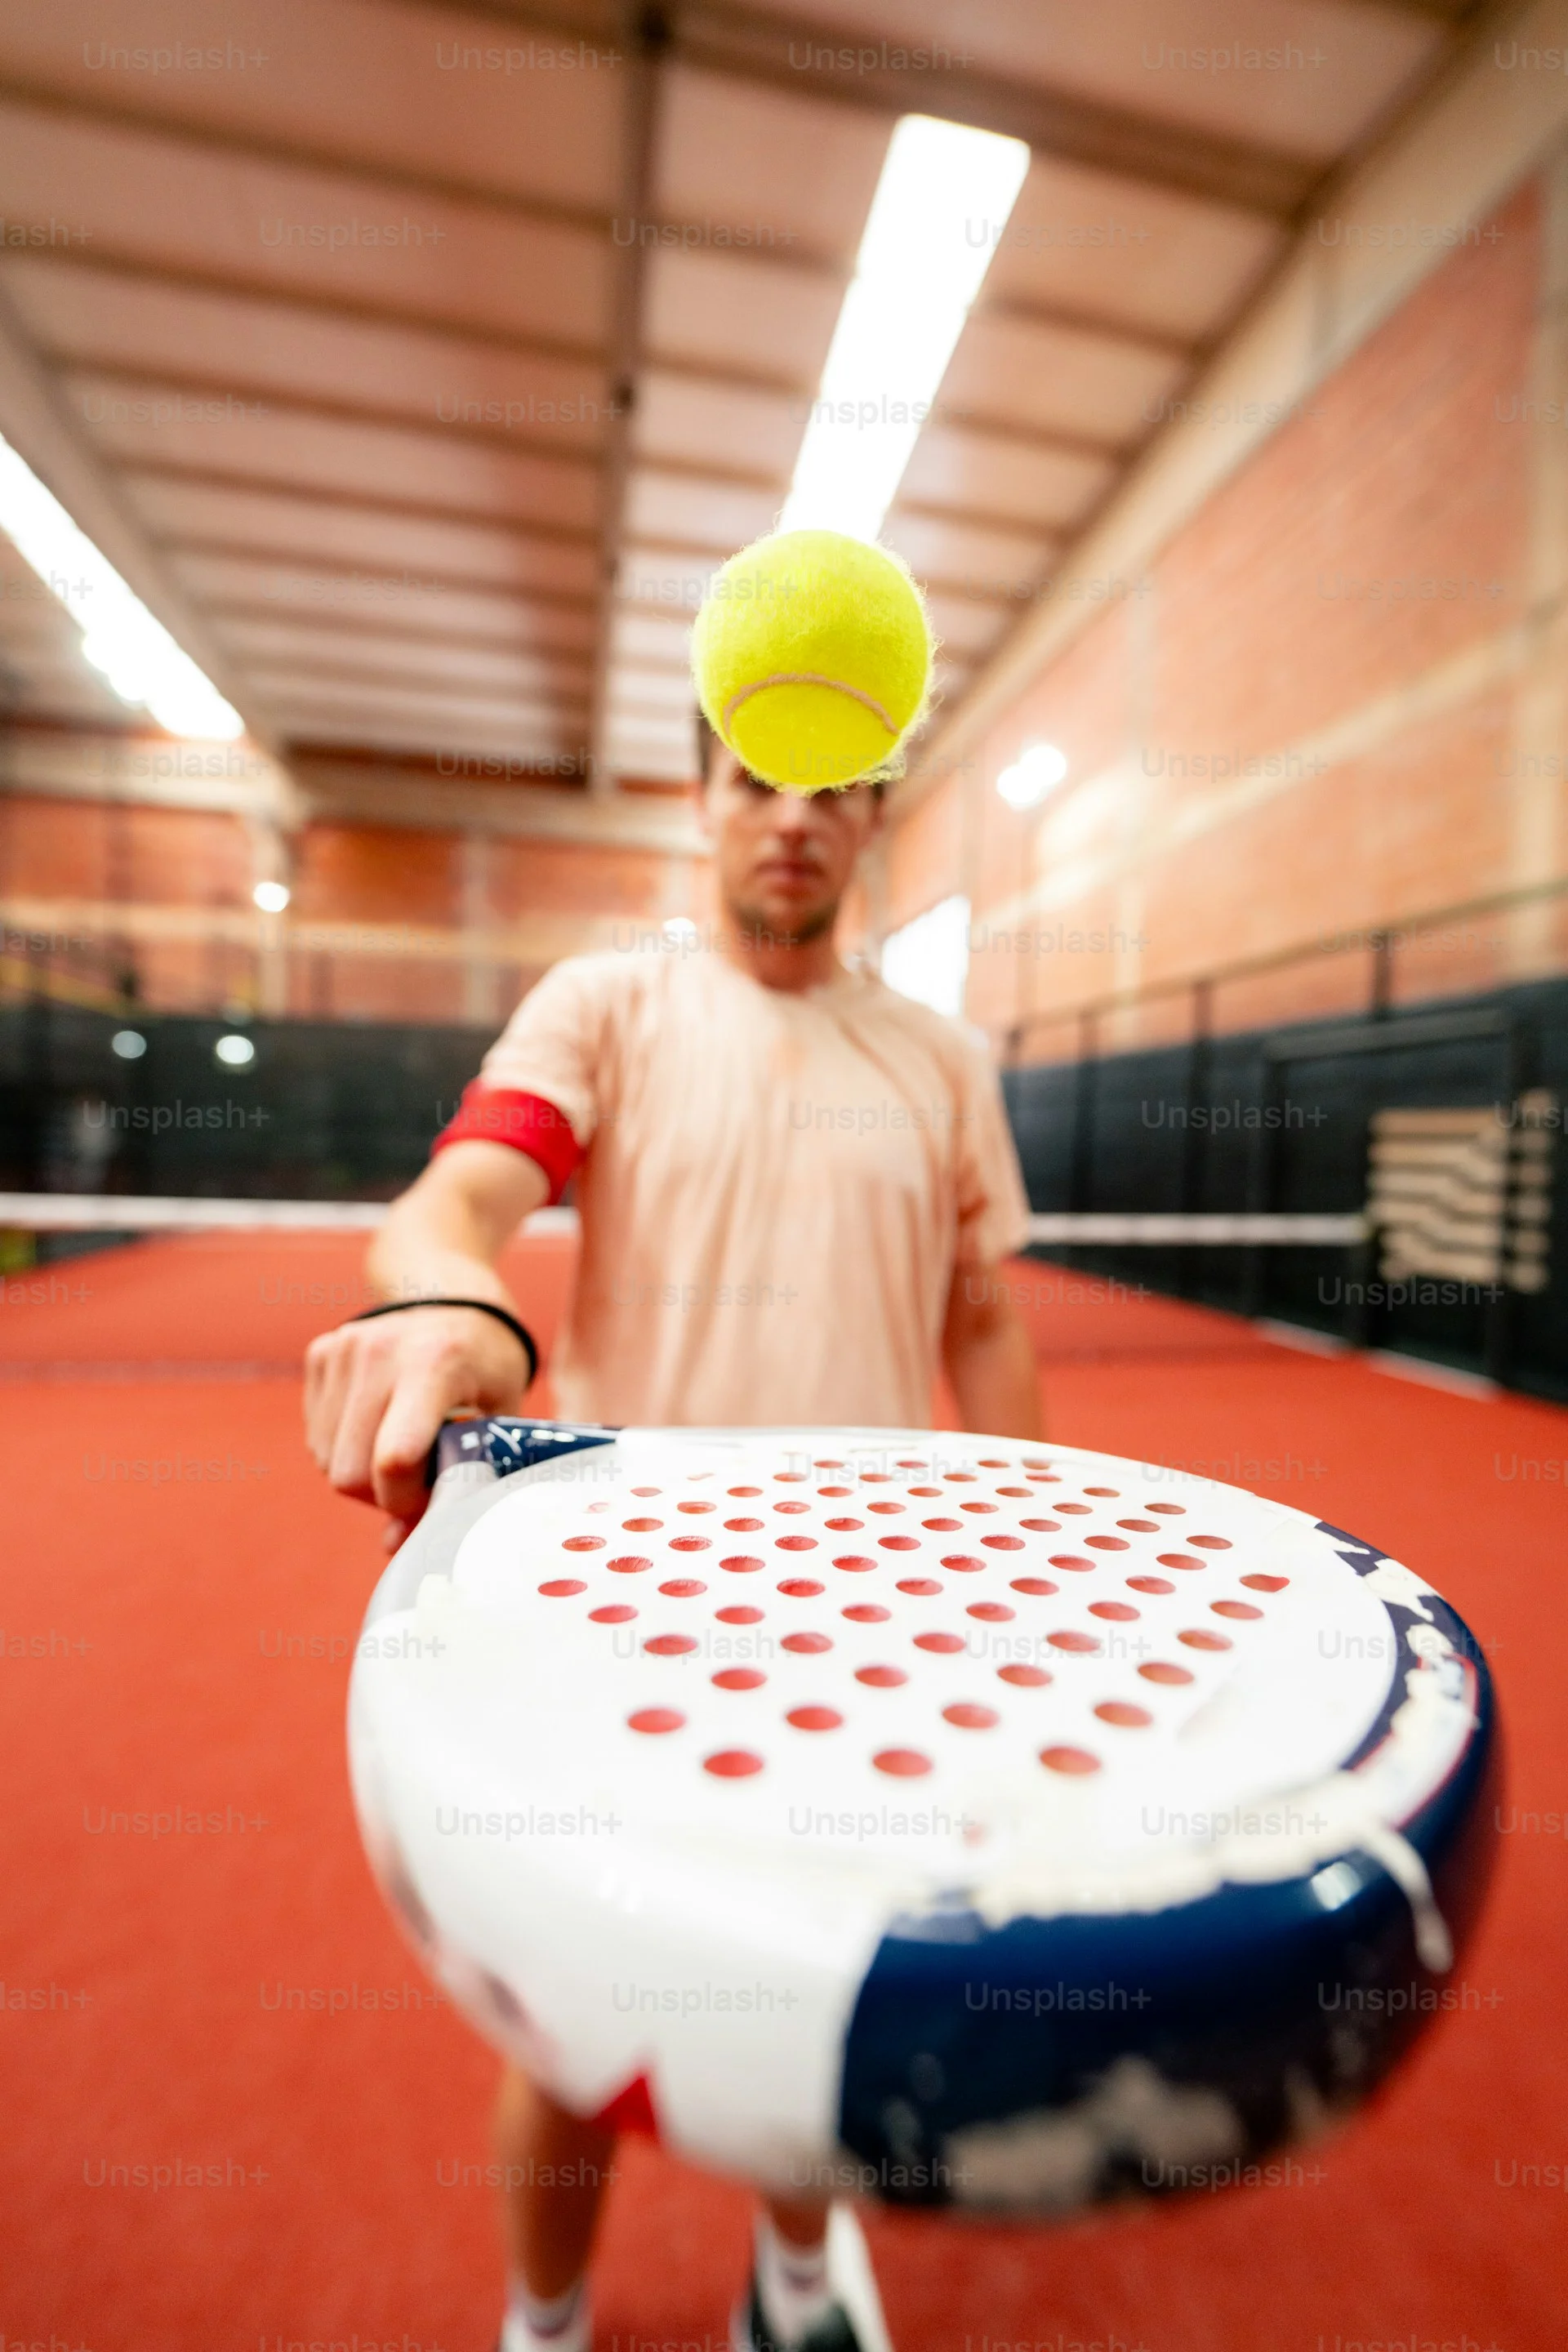
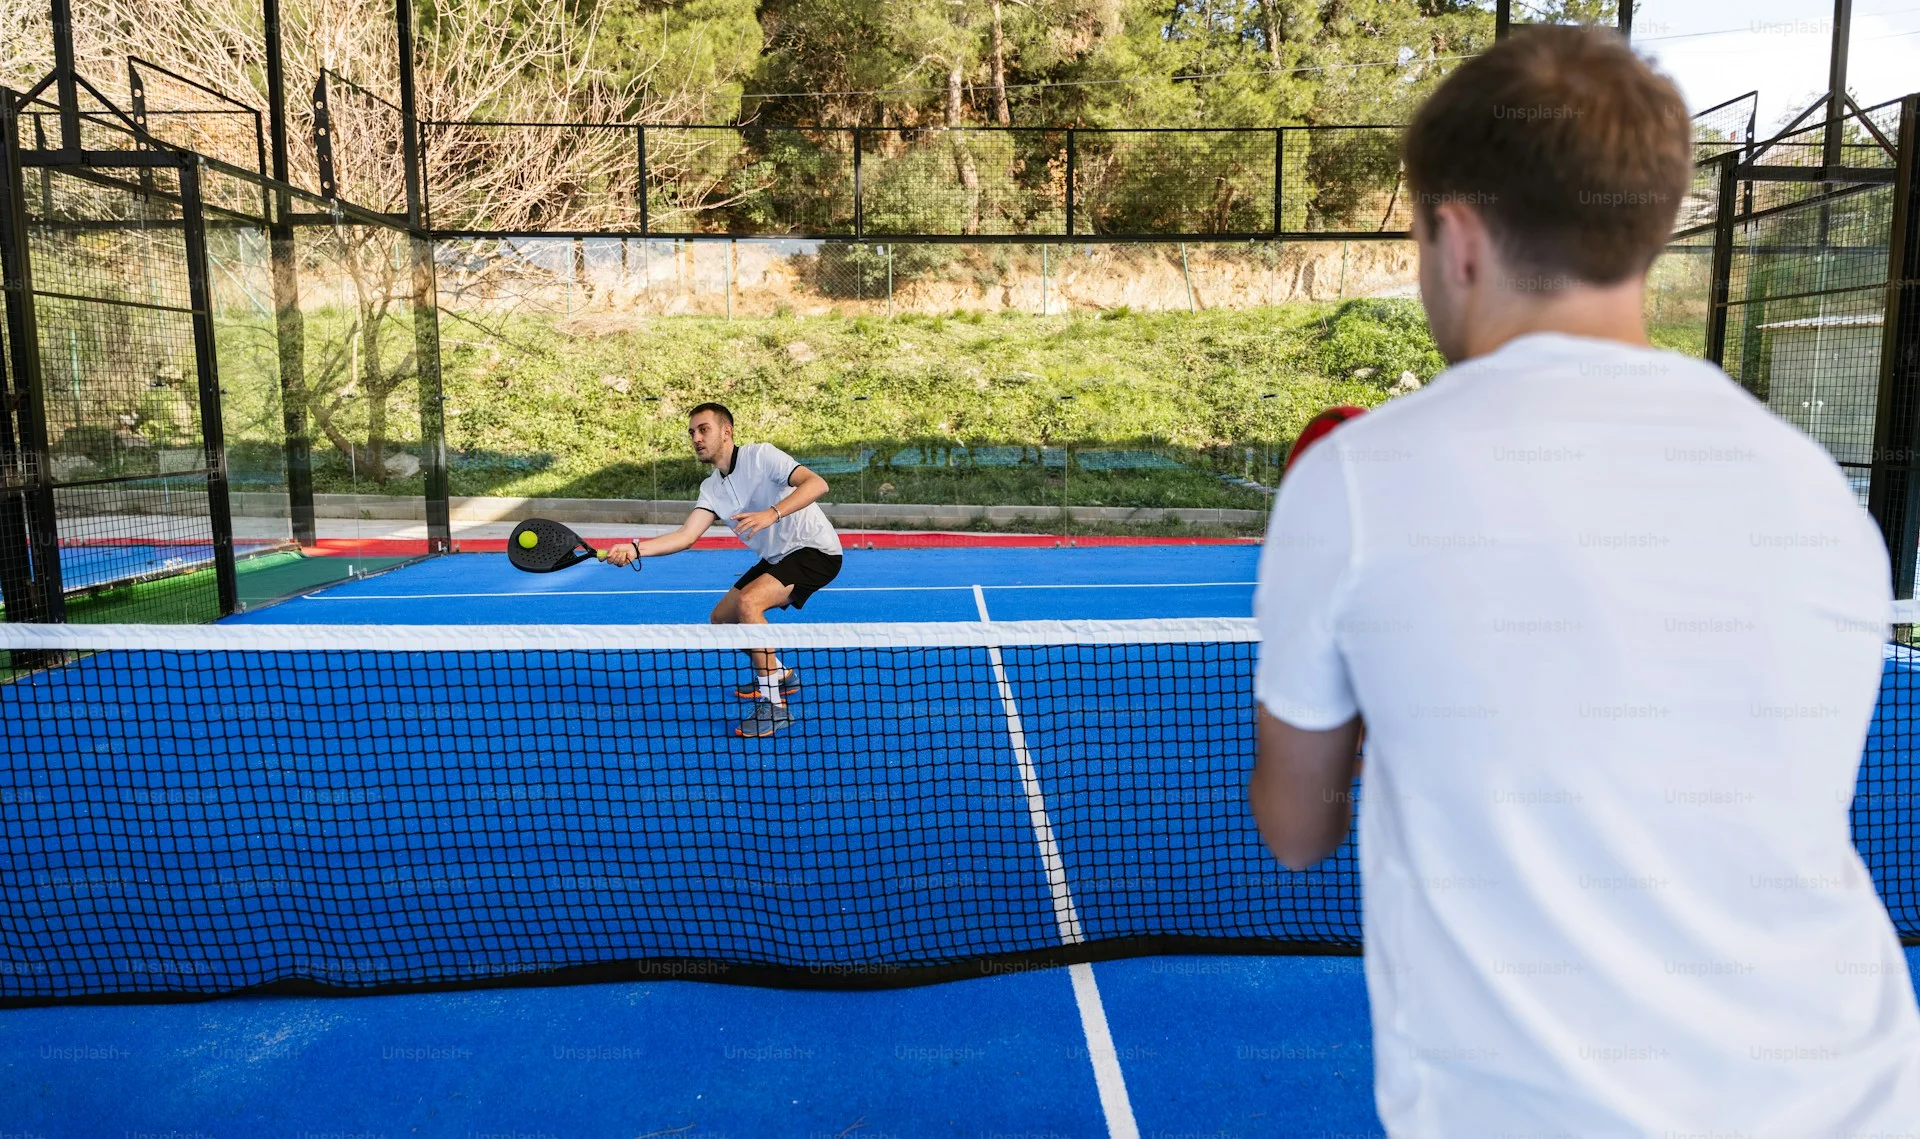
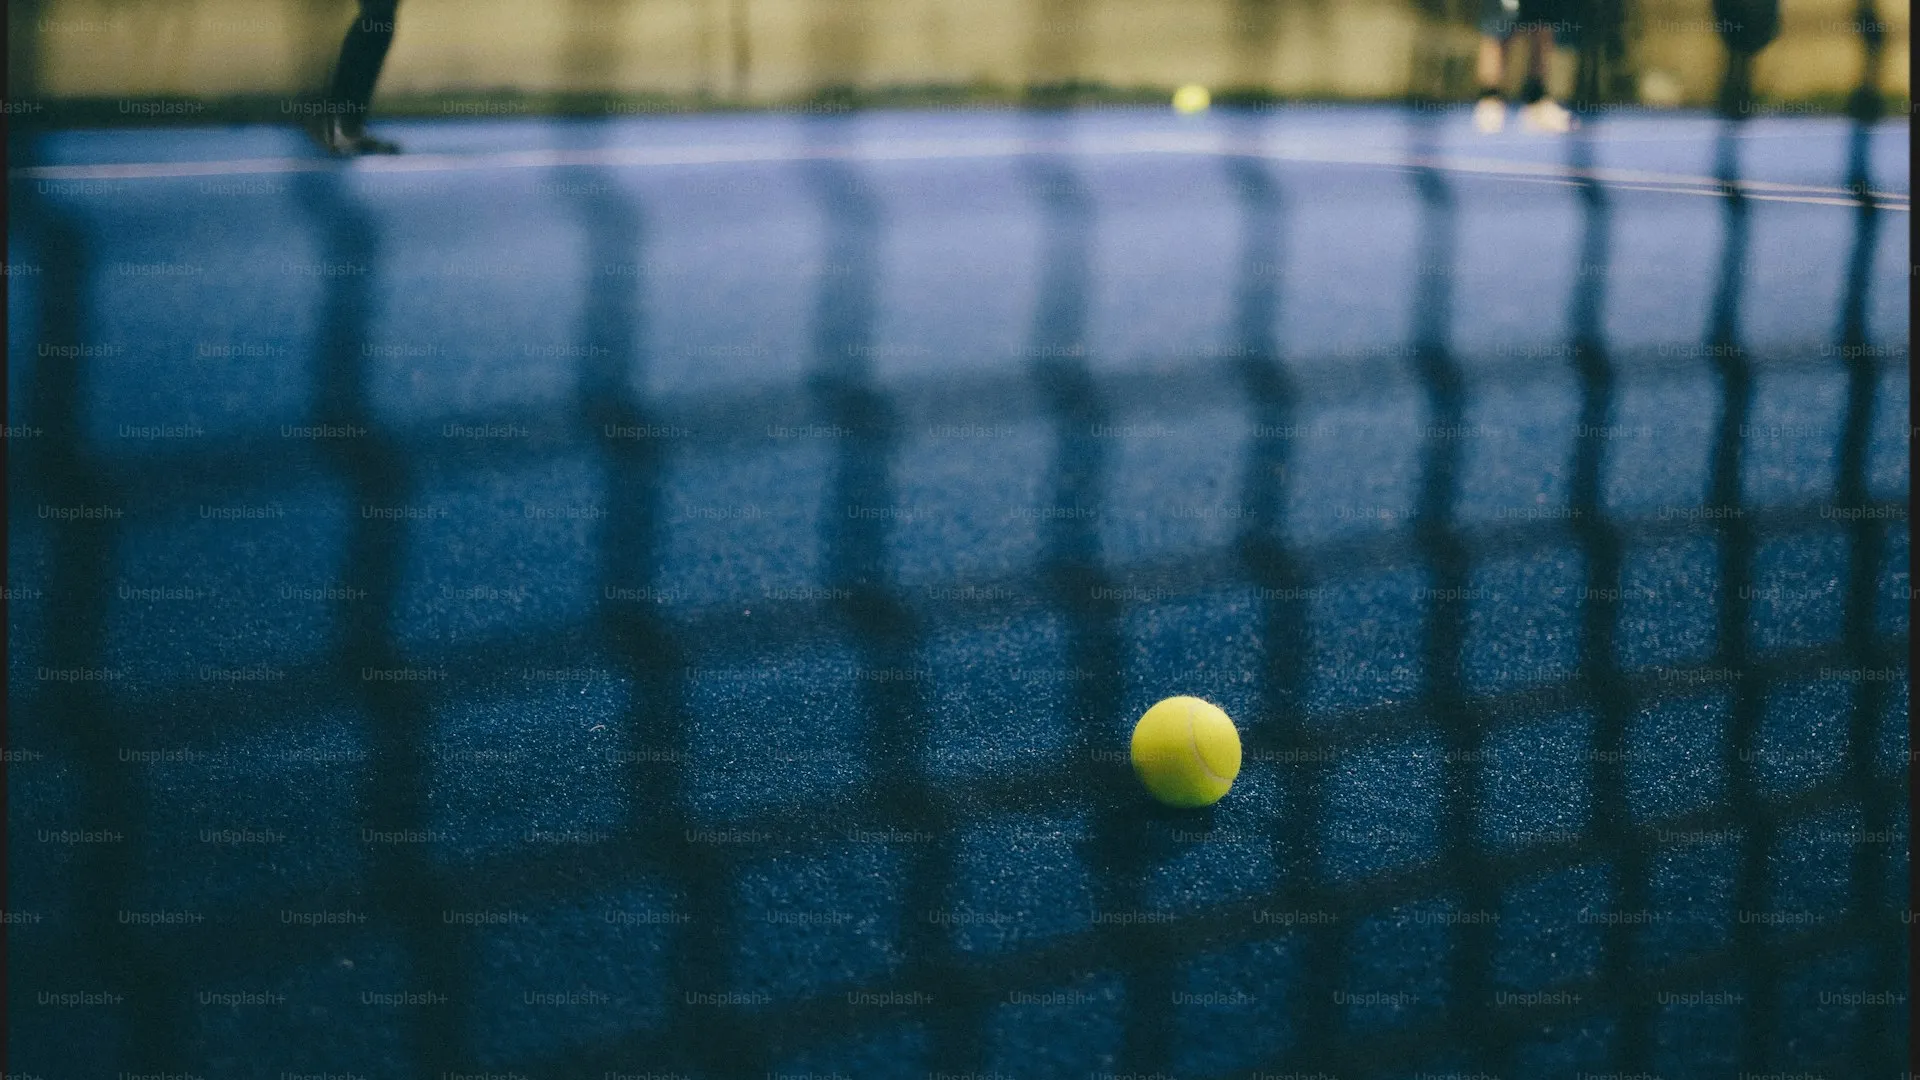
Padel (pádel) is a racket sport that combines elements of tennis and squash. It is played on an enclosed court in doubles format and is known for its accessibility, dynamic gameplay, and strong social appeal.
Photo: Bruno Vaccaro Vercellino / UnsplashPhoto: Bruno Vaccaro Vercellino / Unsplash / Unsplash License
Definition
Padel is a team racket sport in which two players face off against two others on a compact court surrounded by walls made of glass and metallic mesh. Unlike tennis, the ball can bounce off the walls and remain in play, adding strategic depth and dynamics reminiscent of squash. The padel racket is solid (no strings), with a perforated surface, which makes ball control more predictable for beginners.
Padel combines the tactical thinking of tennis, the wall play of squash, and the social atmosphere characteristic of team sports. It is this unique combination that makes it one of the fastest-growing sports in the world.
Brief History
Padel was invented in 1969 by Mexican entrepreneur Enrique Corcuera in Acapulco, Mexico. Corcuera enclosed a playing area at his home with walls, creating the first padel court. He adapted tennis rules to the new format: a compact space, underhand serve, and wall play.
In 1974, Alfonso de Hohenlohe-Langenburg, having visited Mexico and discovered padel, built the first two courts in Spain at the Marbella Club on the Costa del Sol. Spain became the main hub for padel’s development and remains so to this day.
In 1991, the International Padel Federation (FIP) was founded. It now unites approximately 100 national federations and organizes world championships.
Padel has several defining features that set it apart from other racket sports:
Doubles format. Padel is played exclusively as 2 vs 2. This makes the sport inherently social and team-oriented.
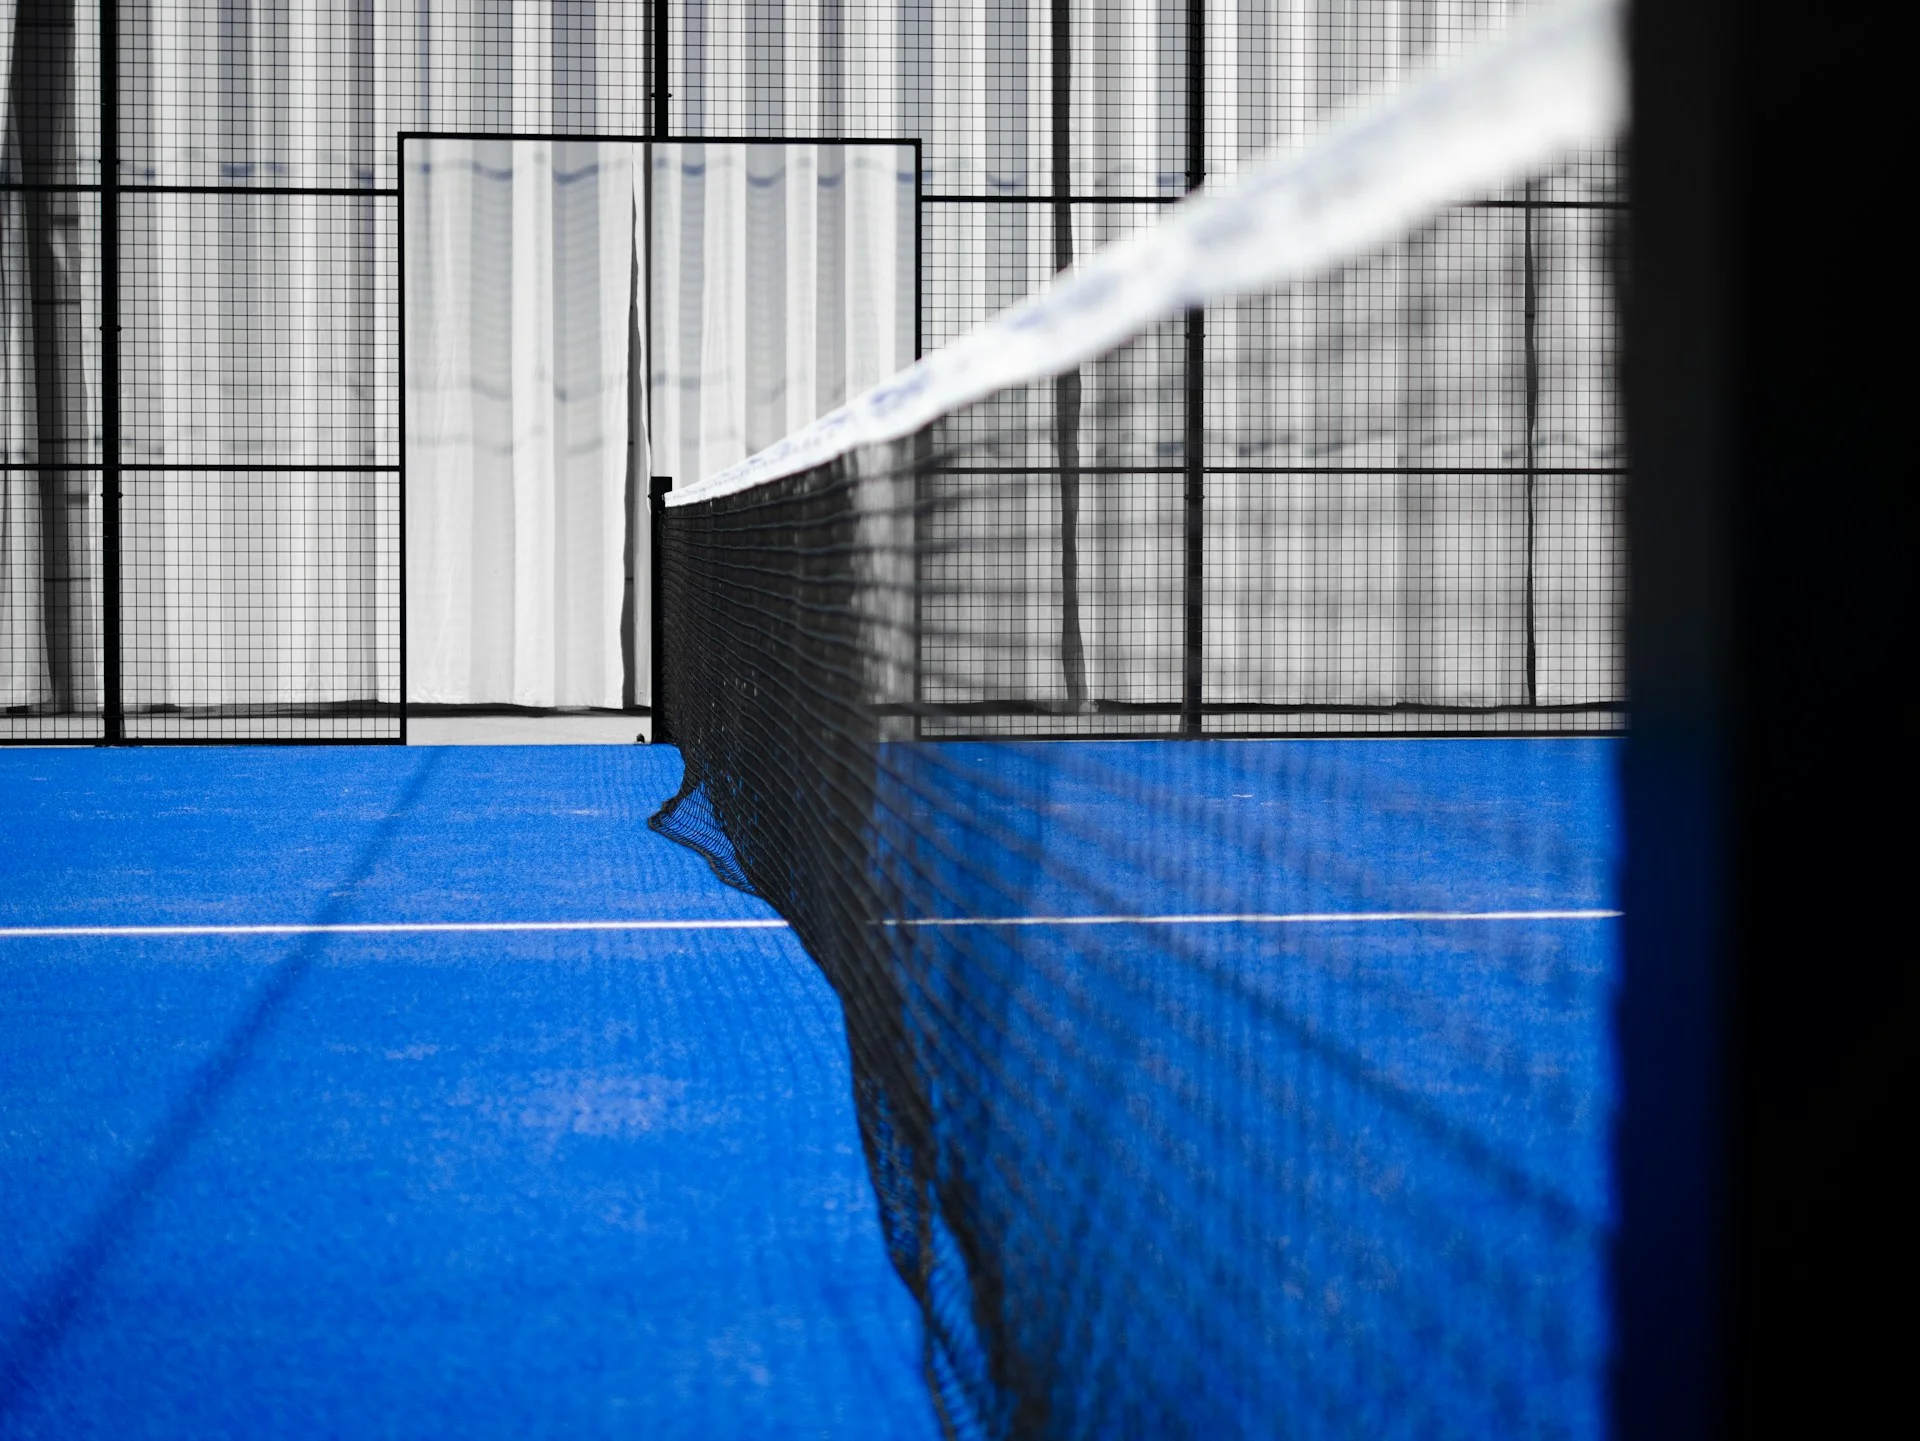
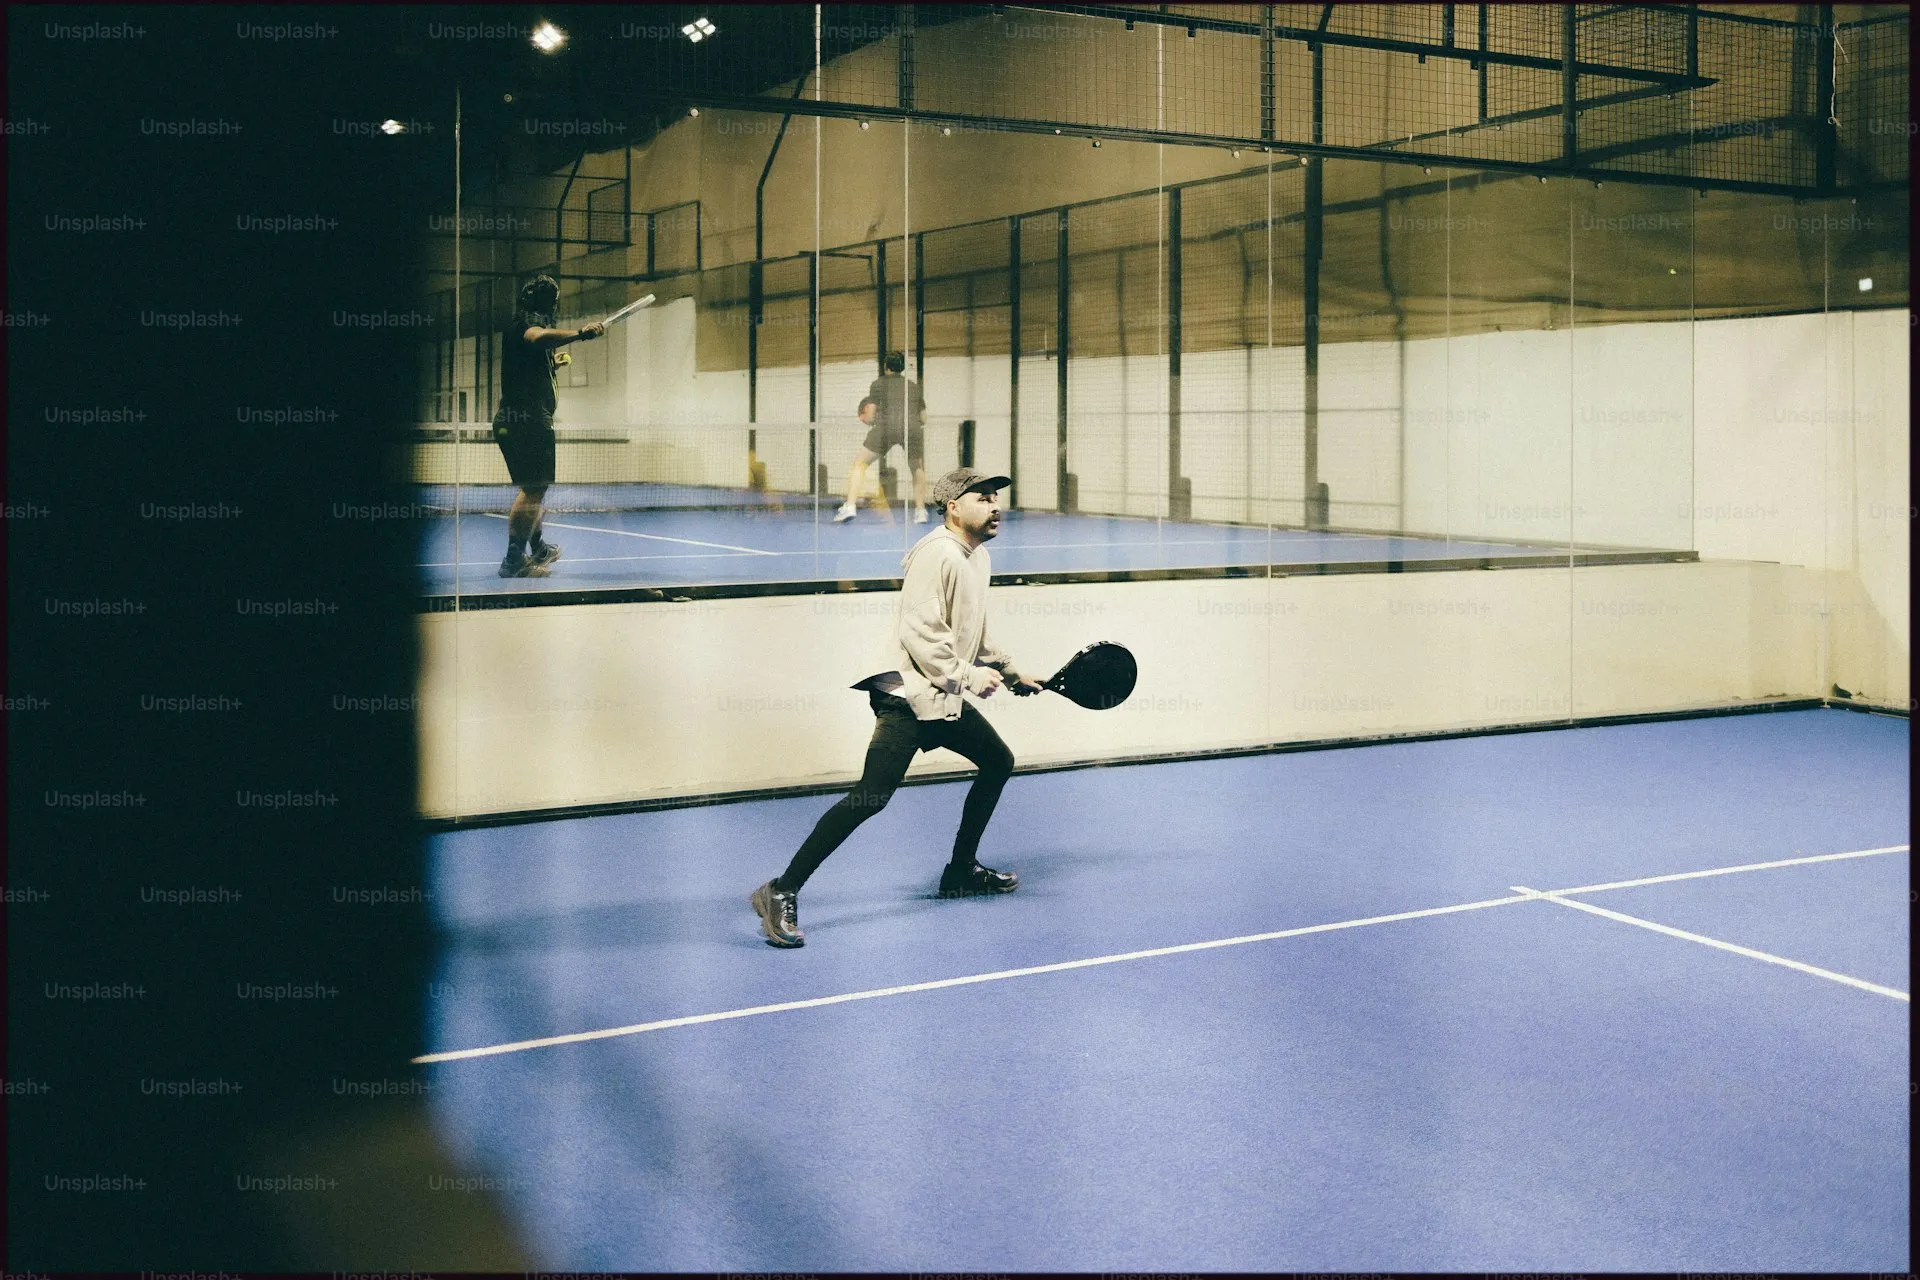
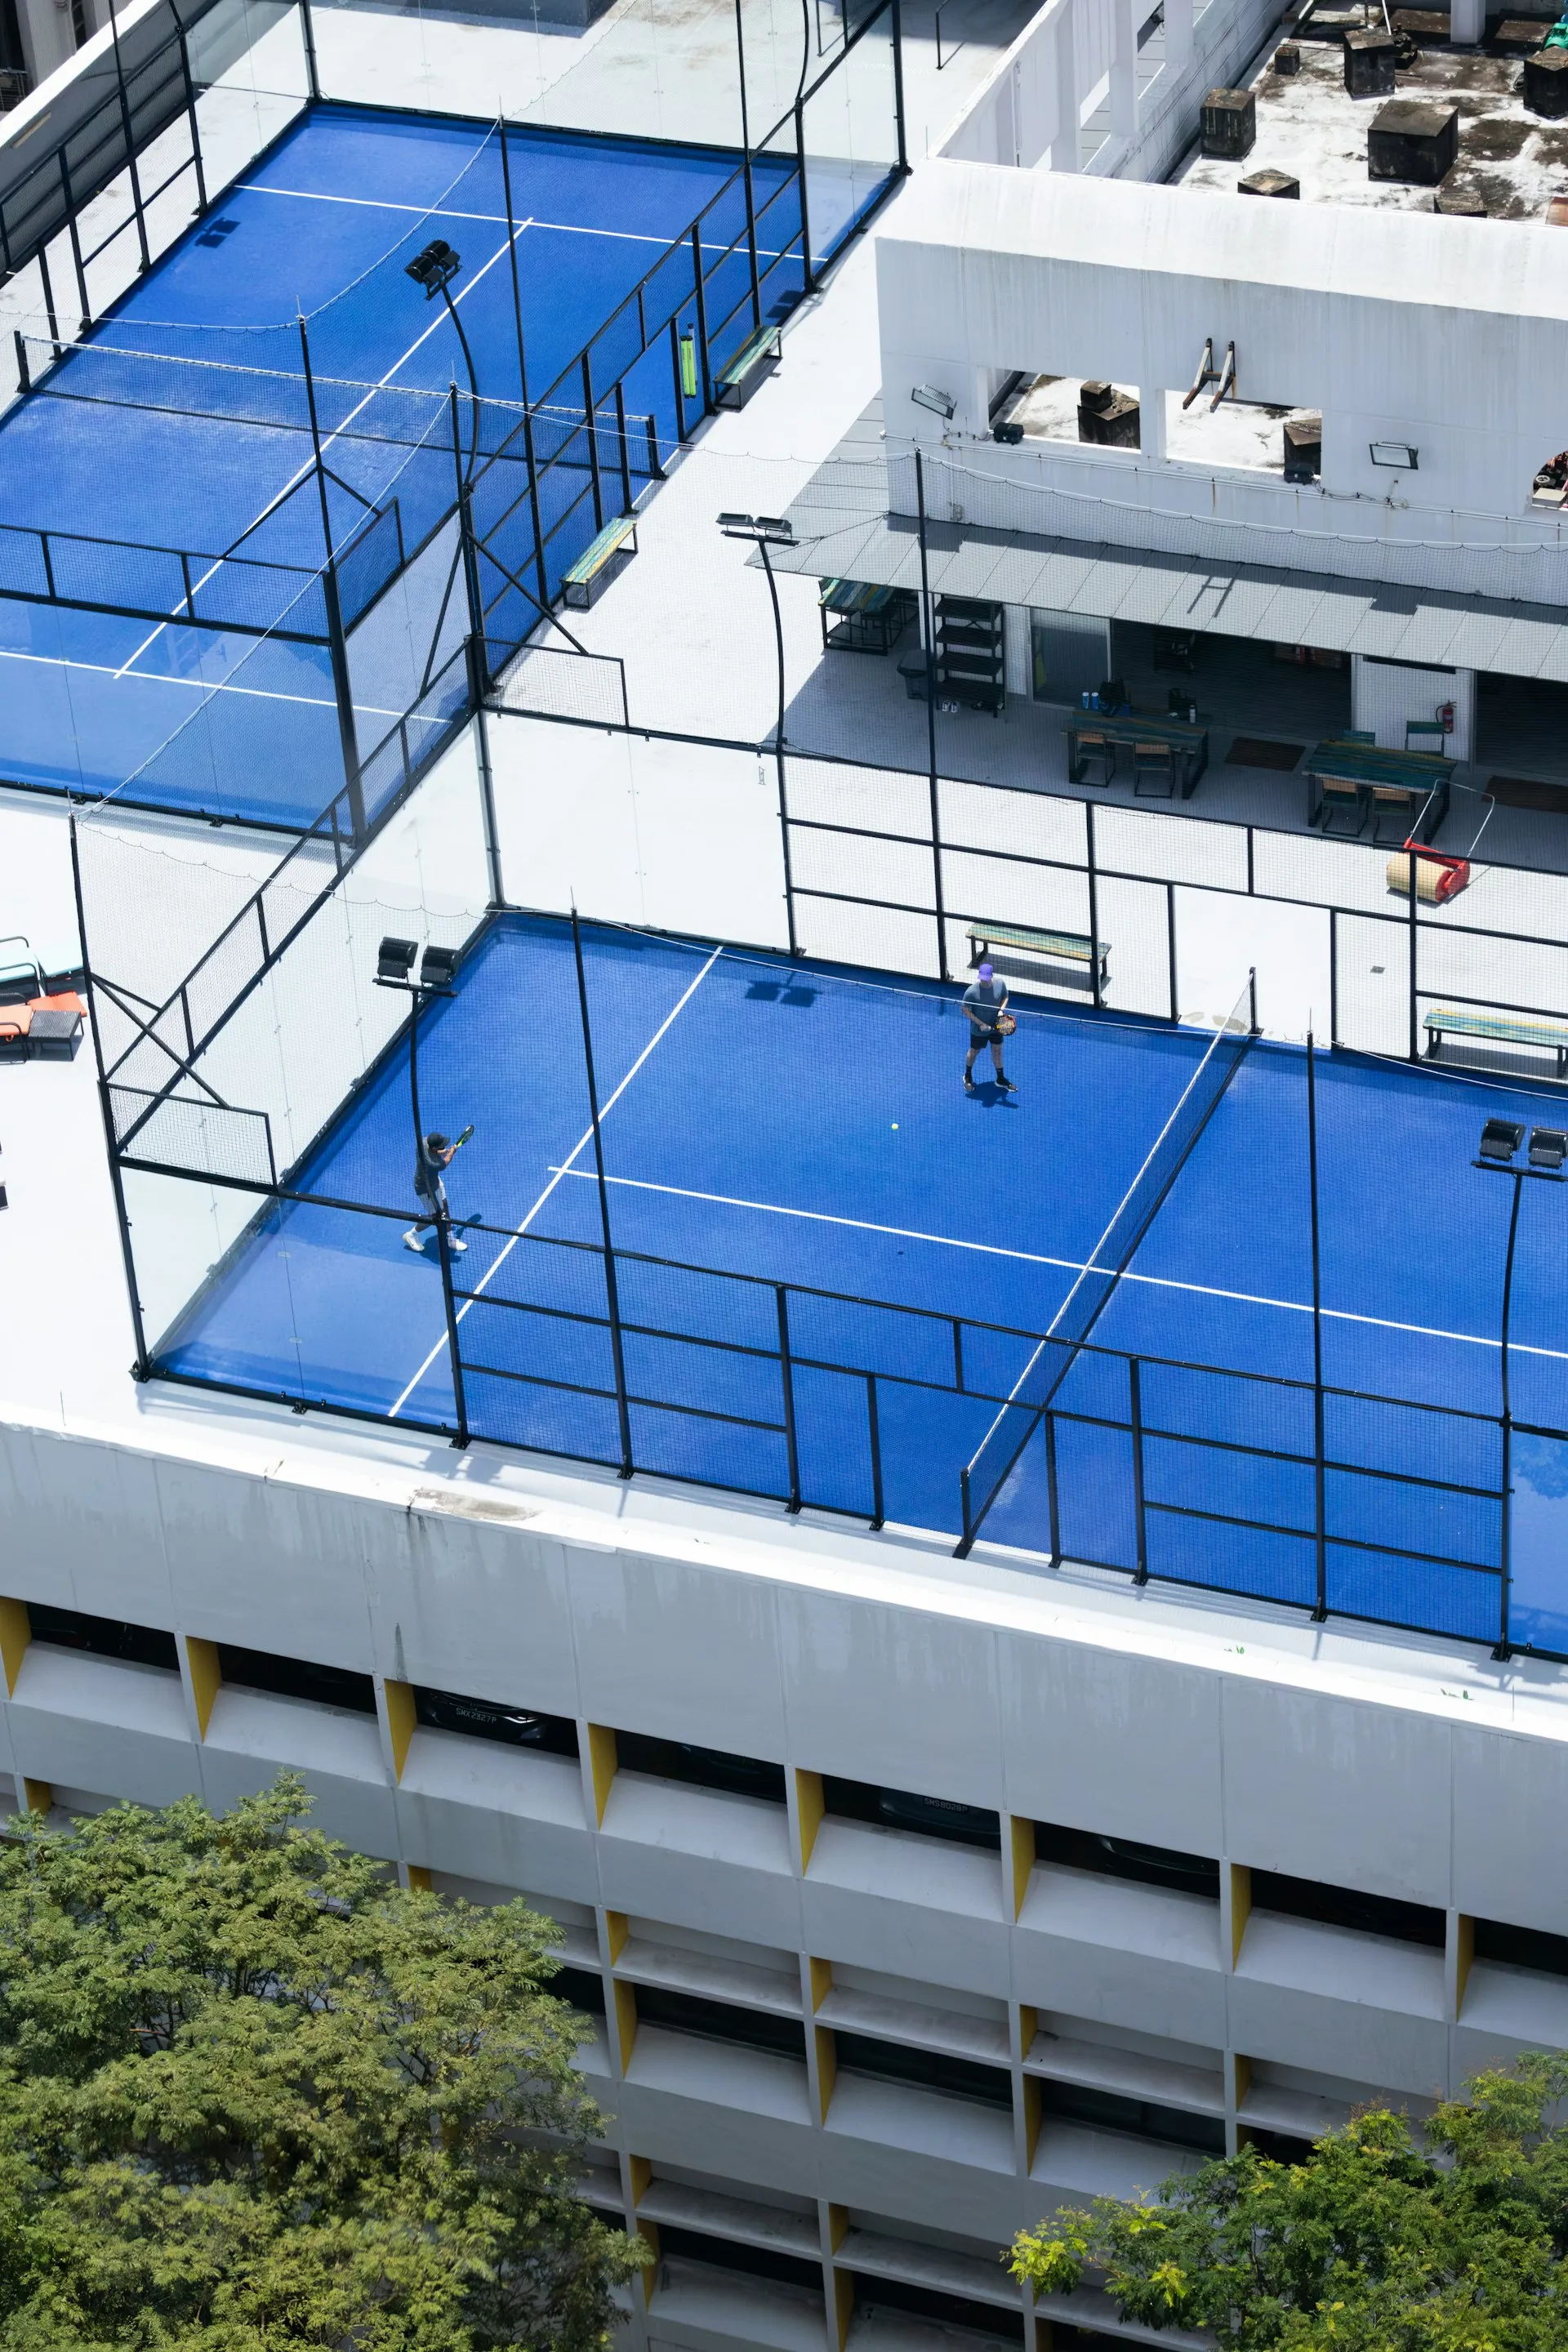
Enclosed court with walls. The court is surrounded by a combination of glass walls and metallic mesh. A ball that bounces off the wall after hitting the floor remains in play.
Underhand serve. Unlike tennis, the serve must be hit from below waist height. This lowers the barrier to entry and levels the playing field between players of different skill levels.
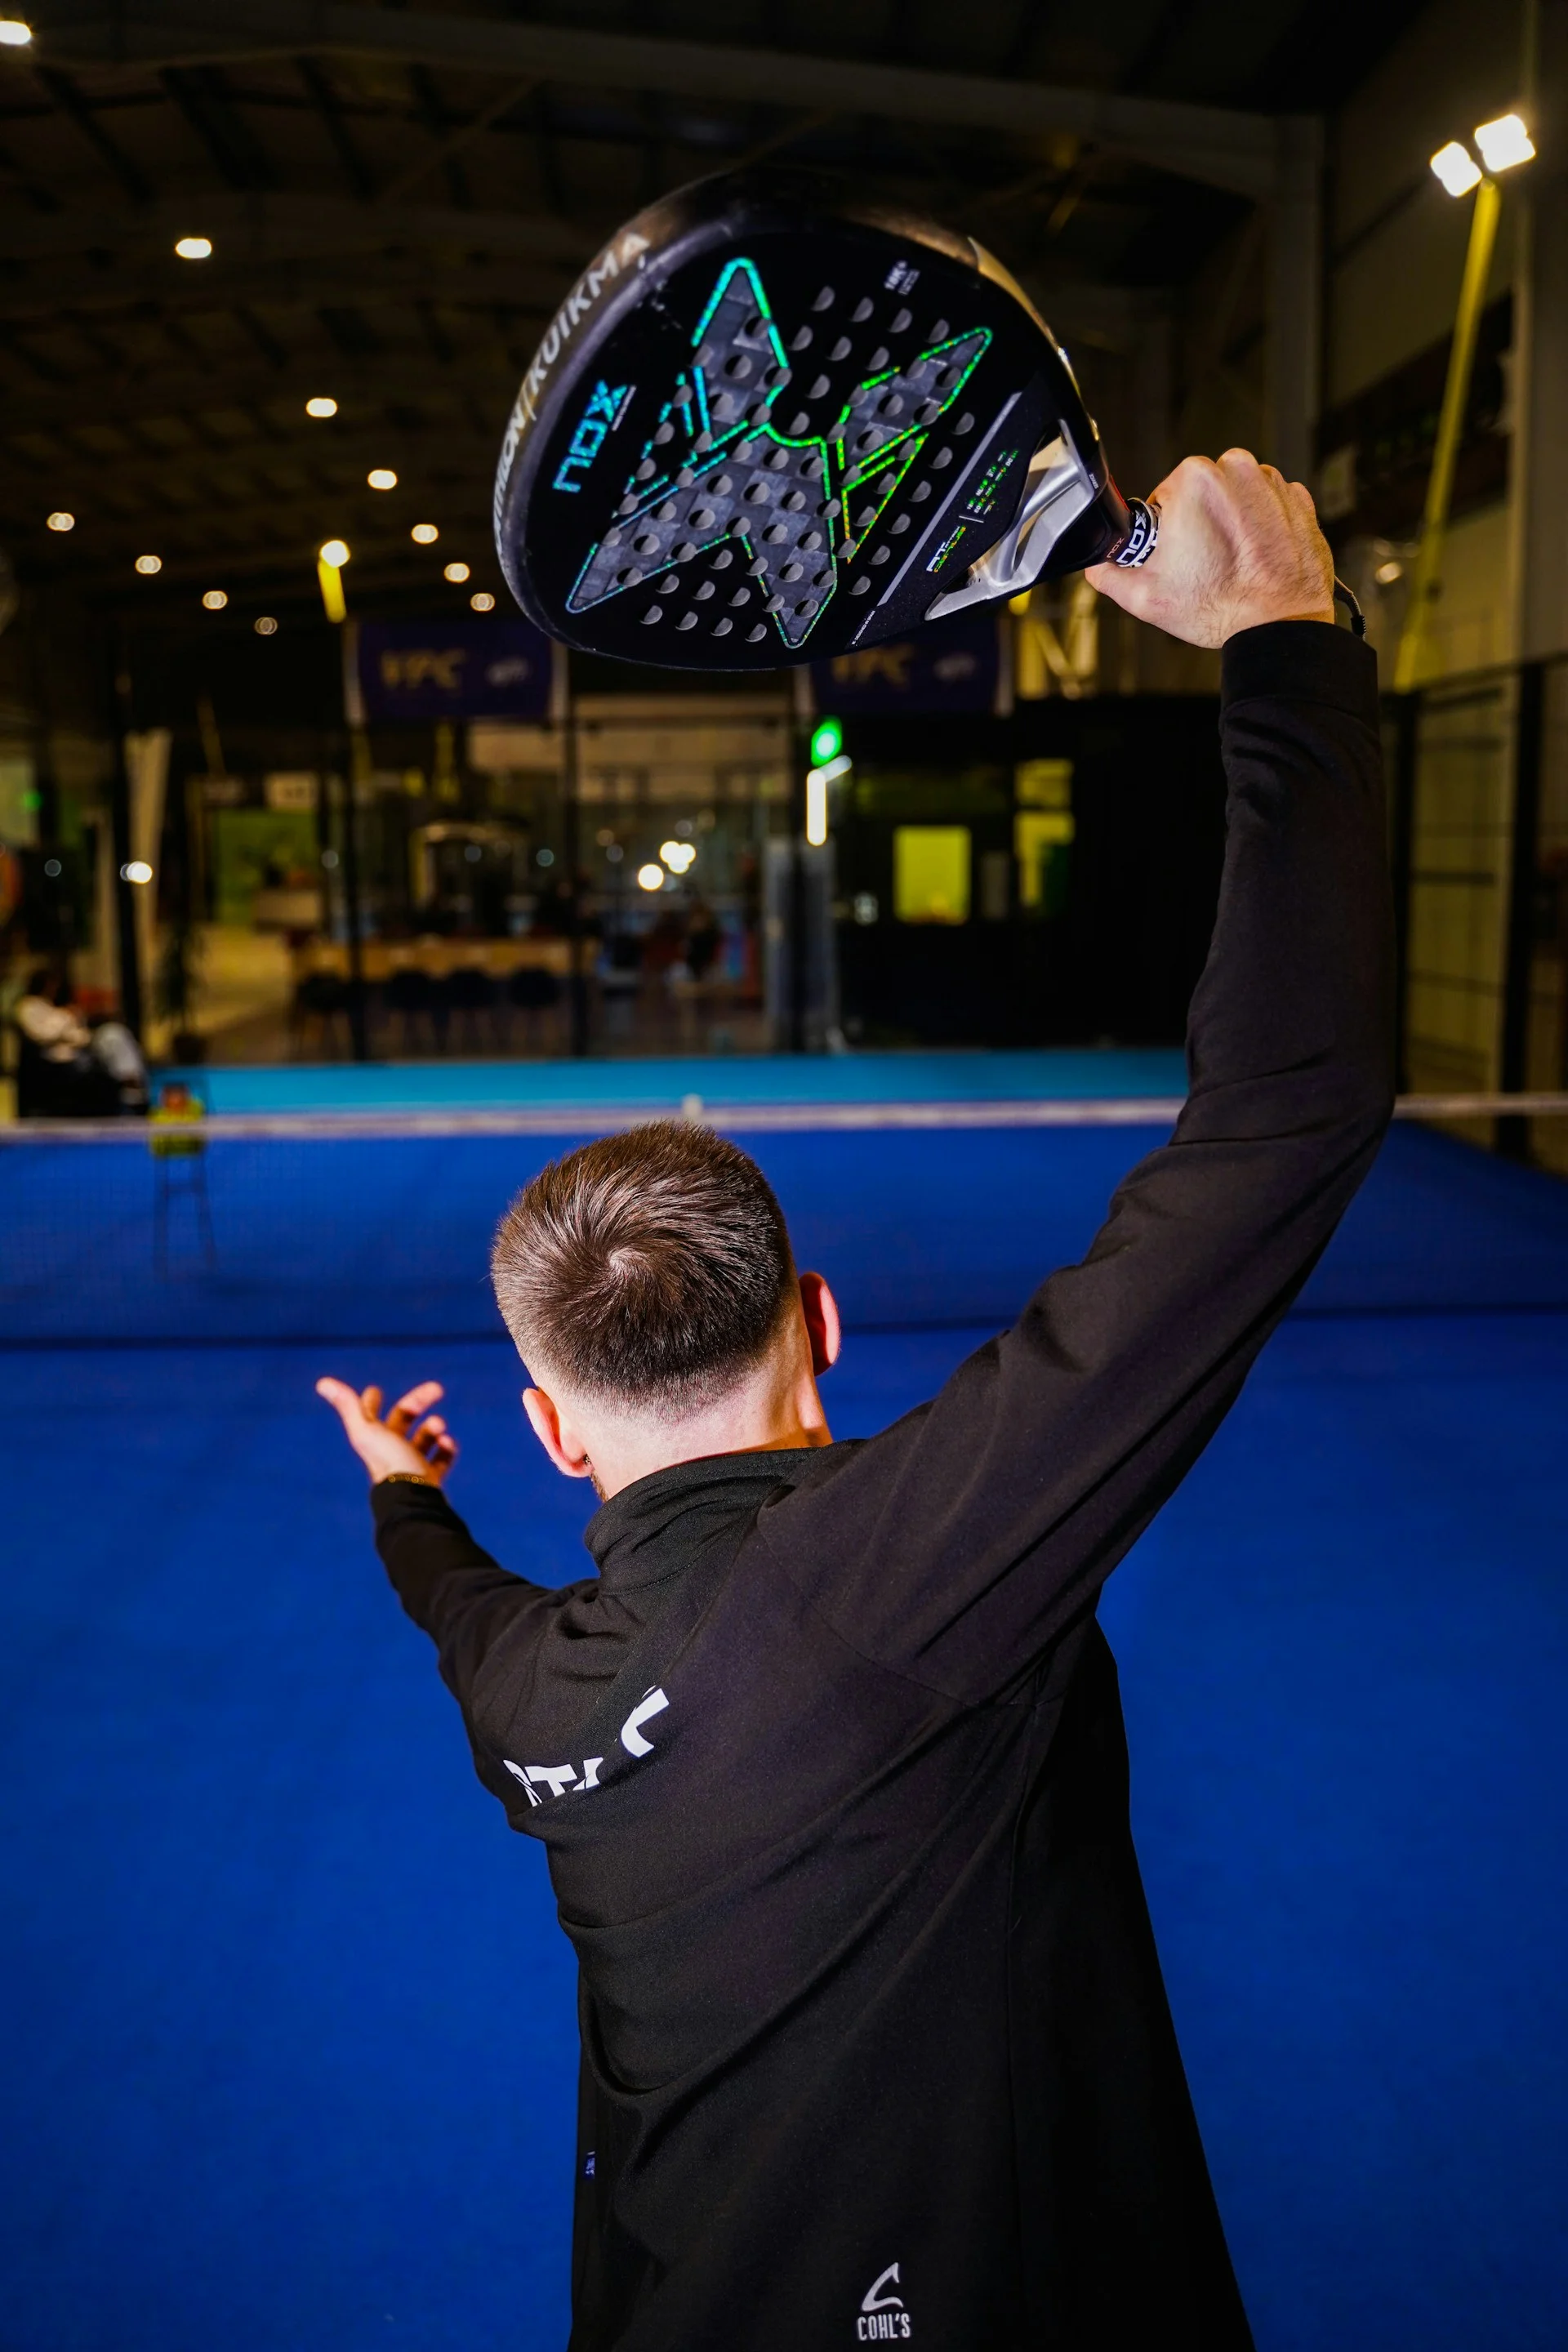
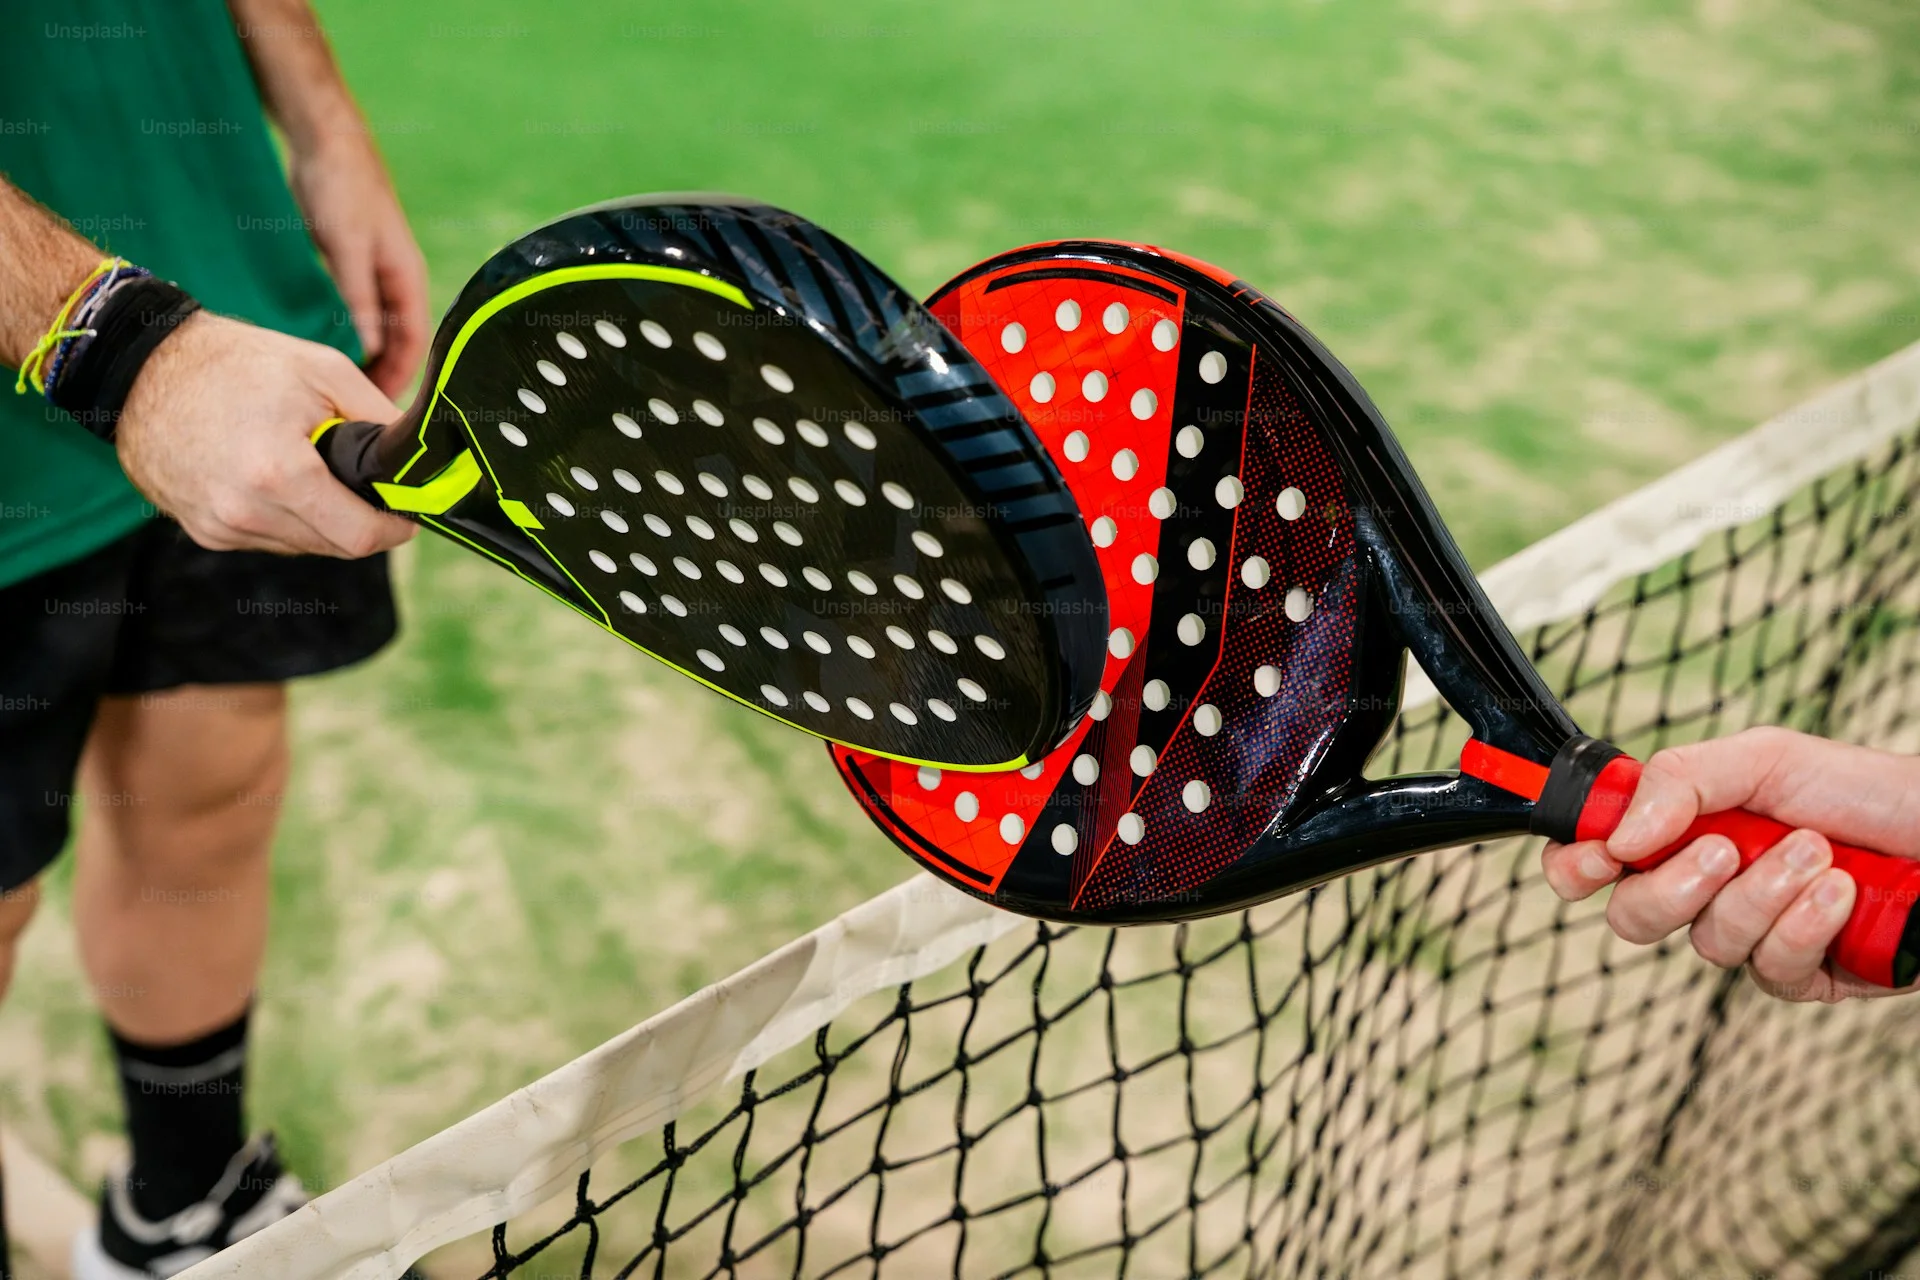
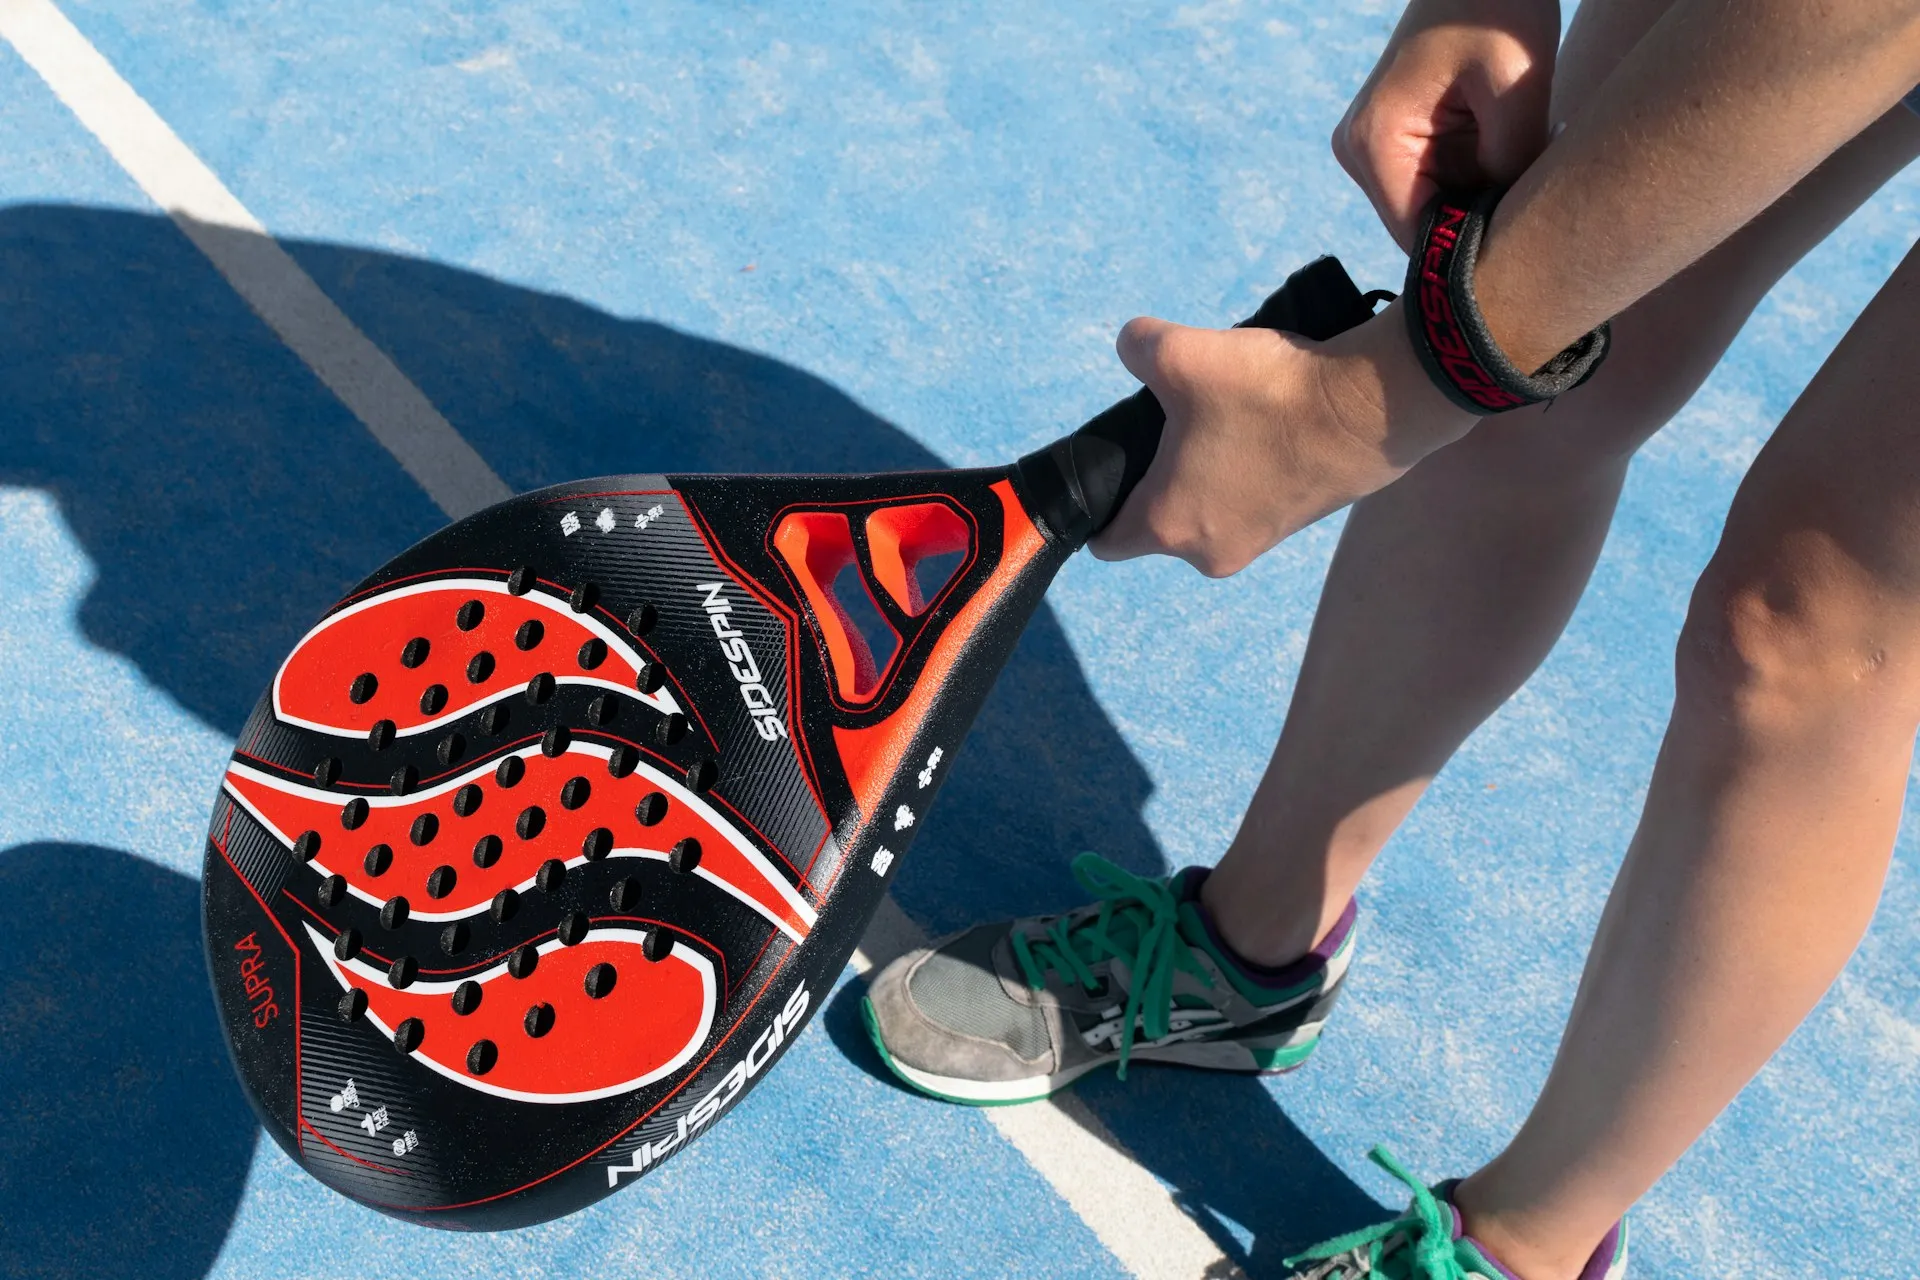
Solid racket. The padel racket has no strings — it is made from composite materials with a perforated surface.
Strategy and positioning. Due to the walls and compact court, positional play and tactics matter more than raw hitting power.
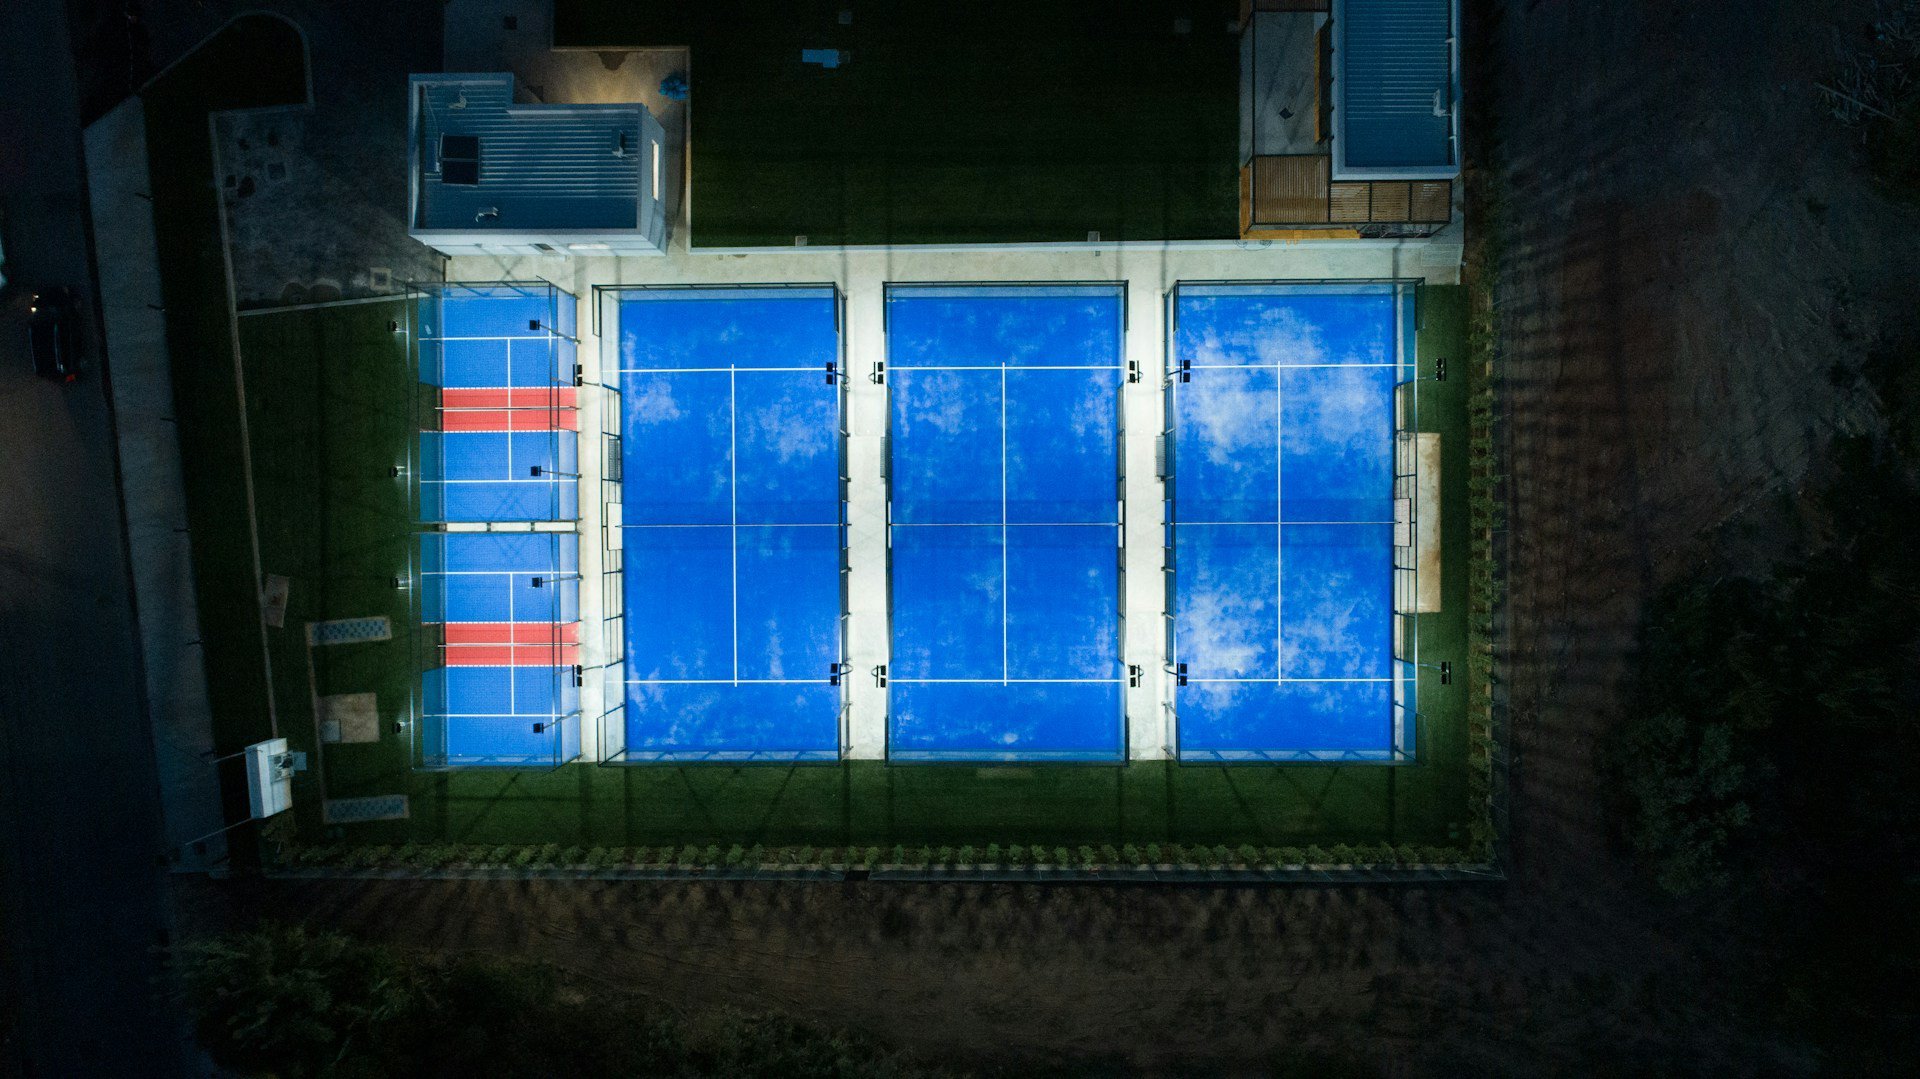
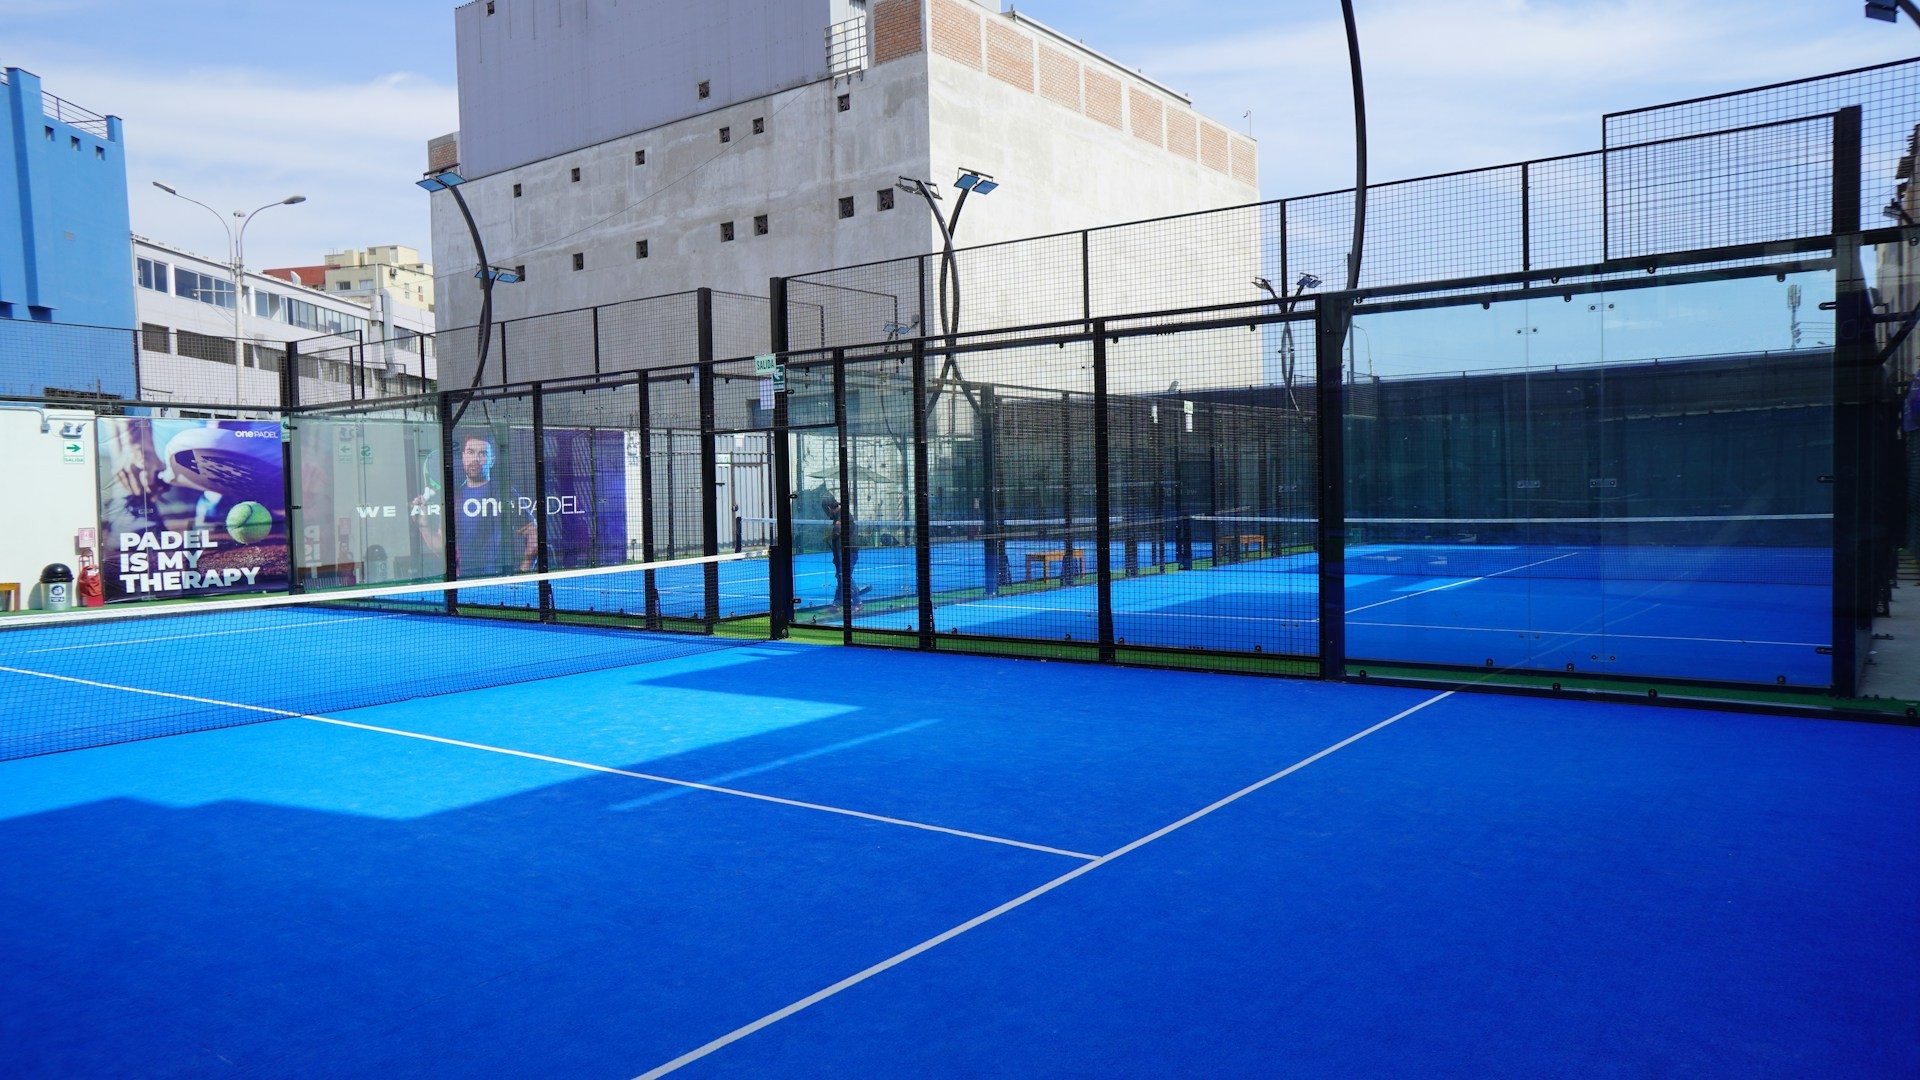
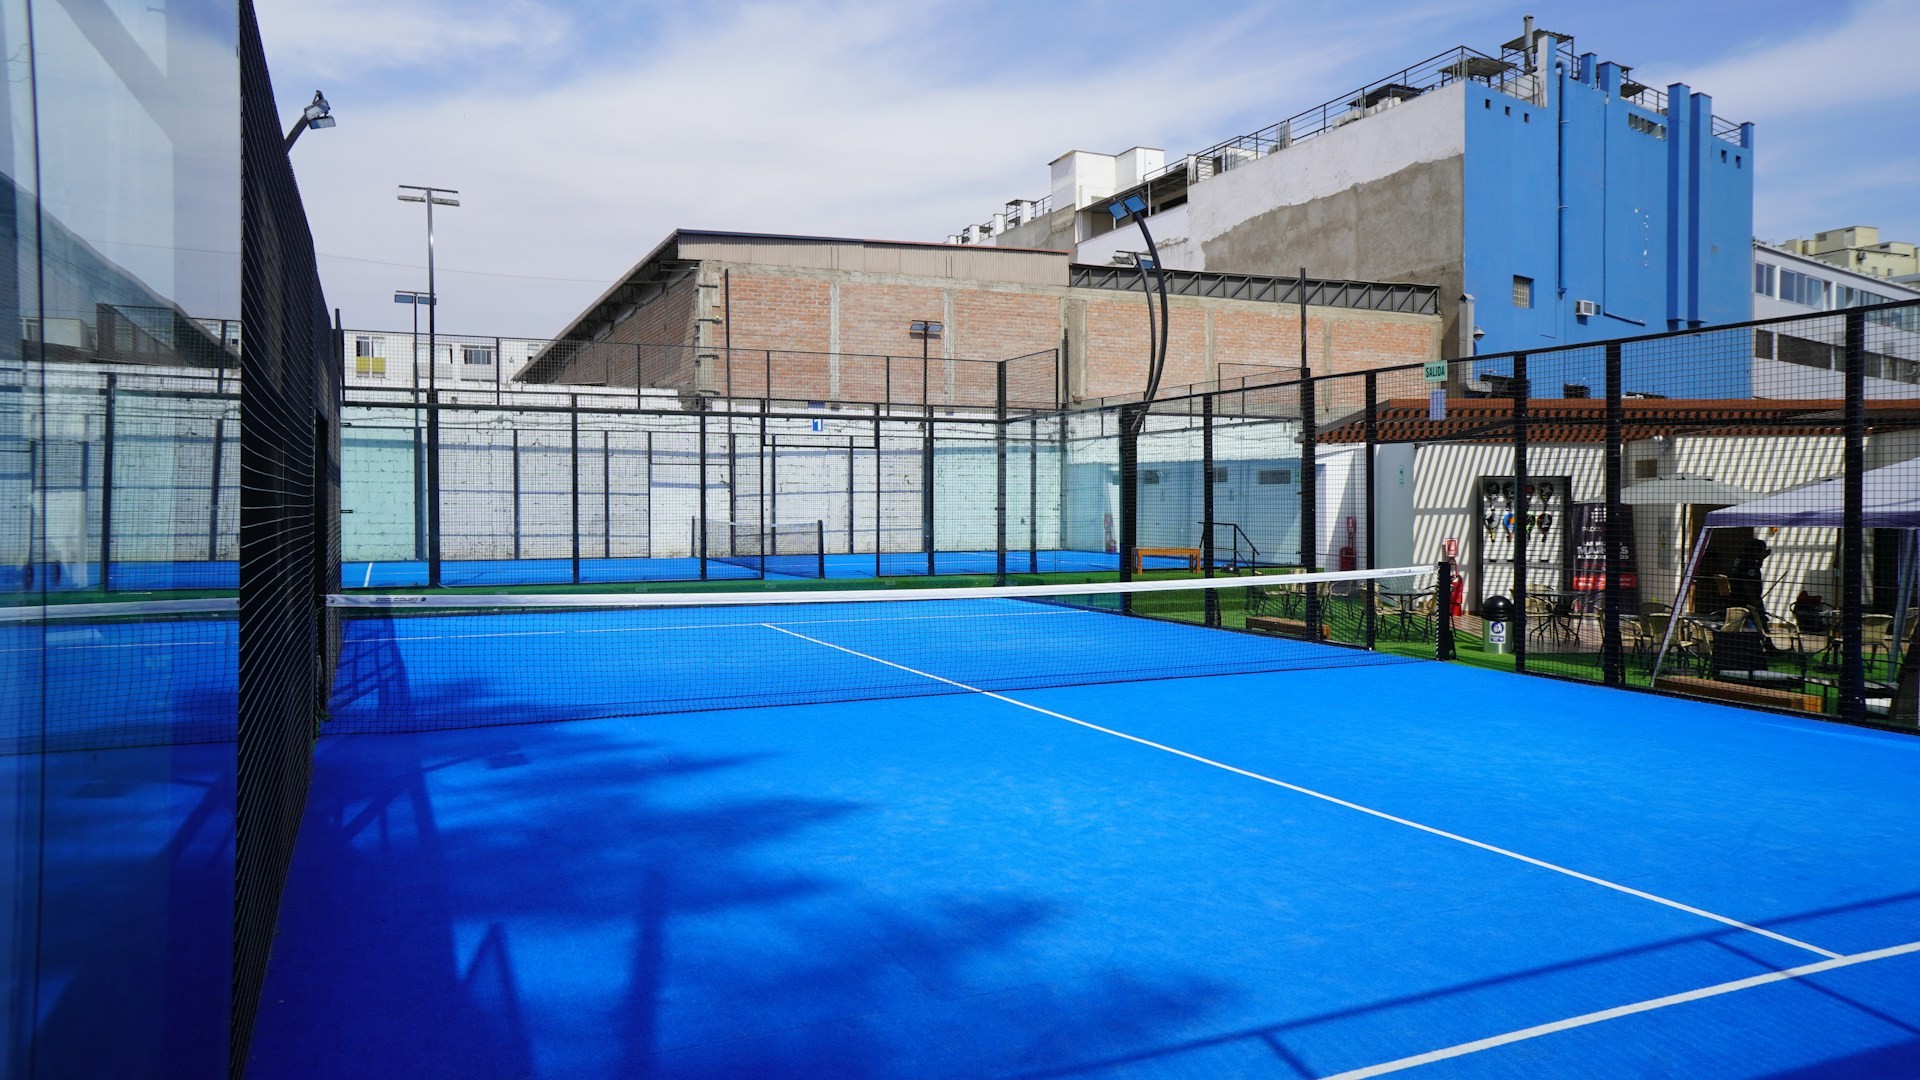
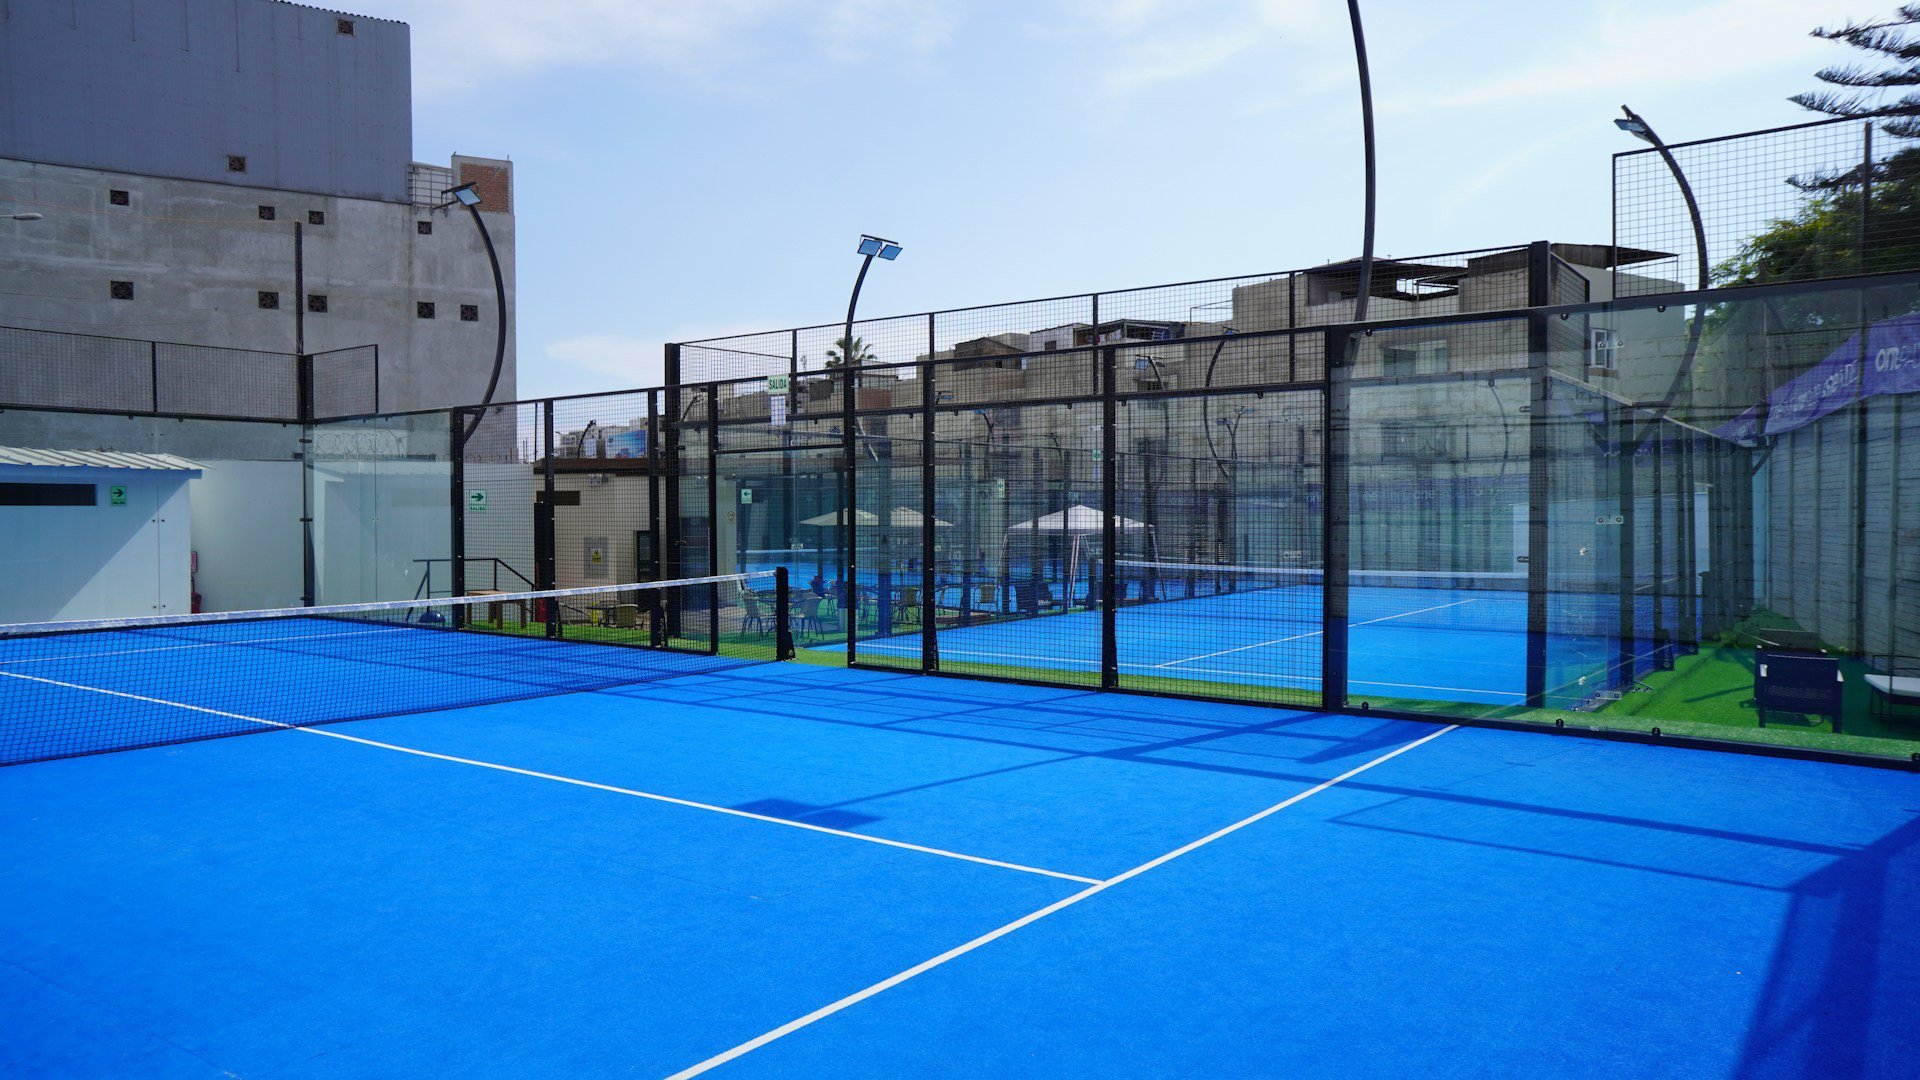
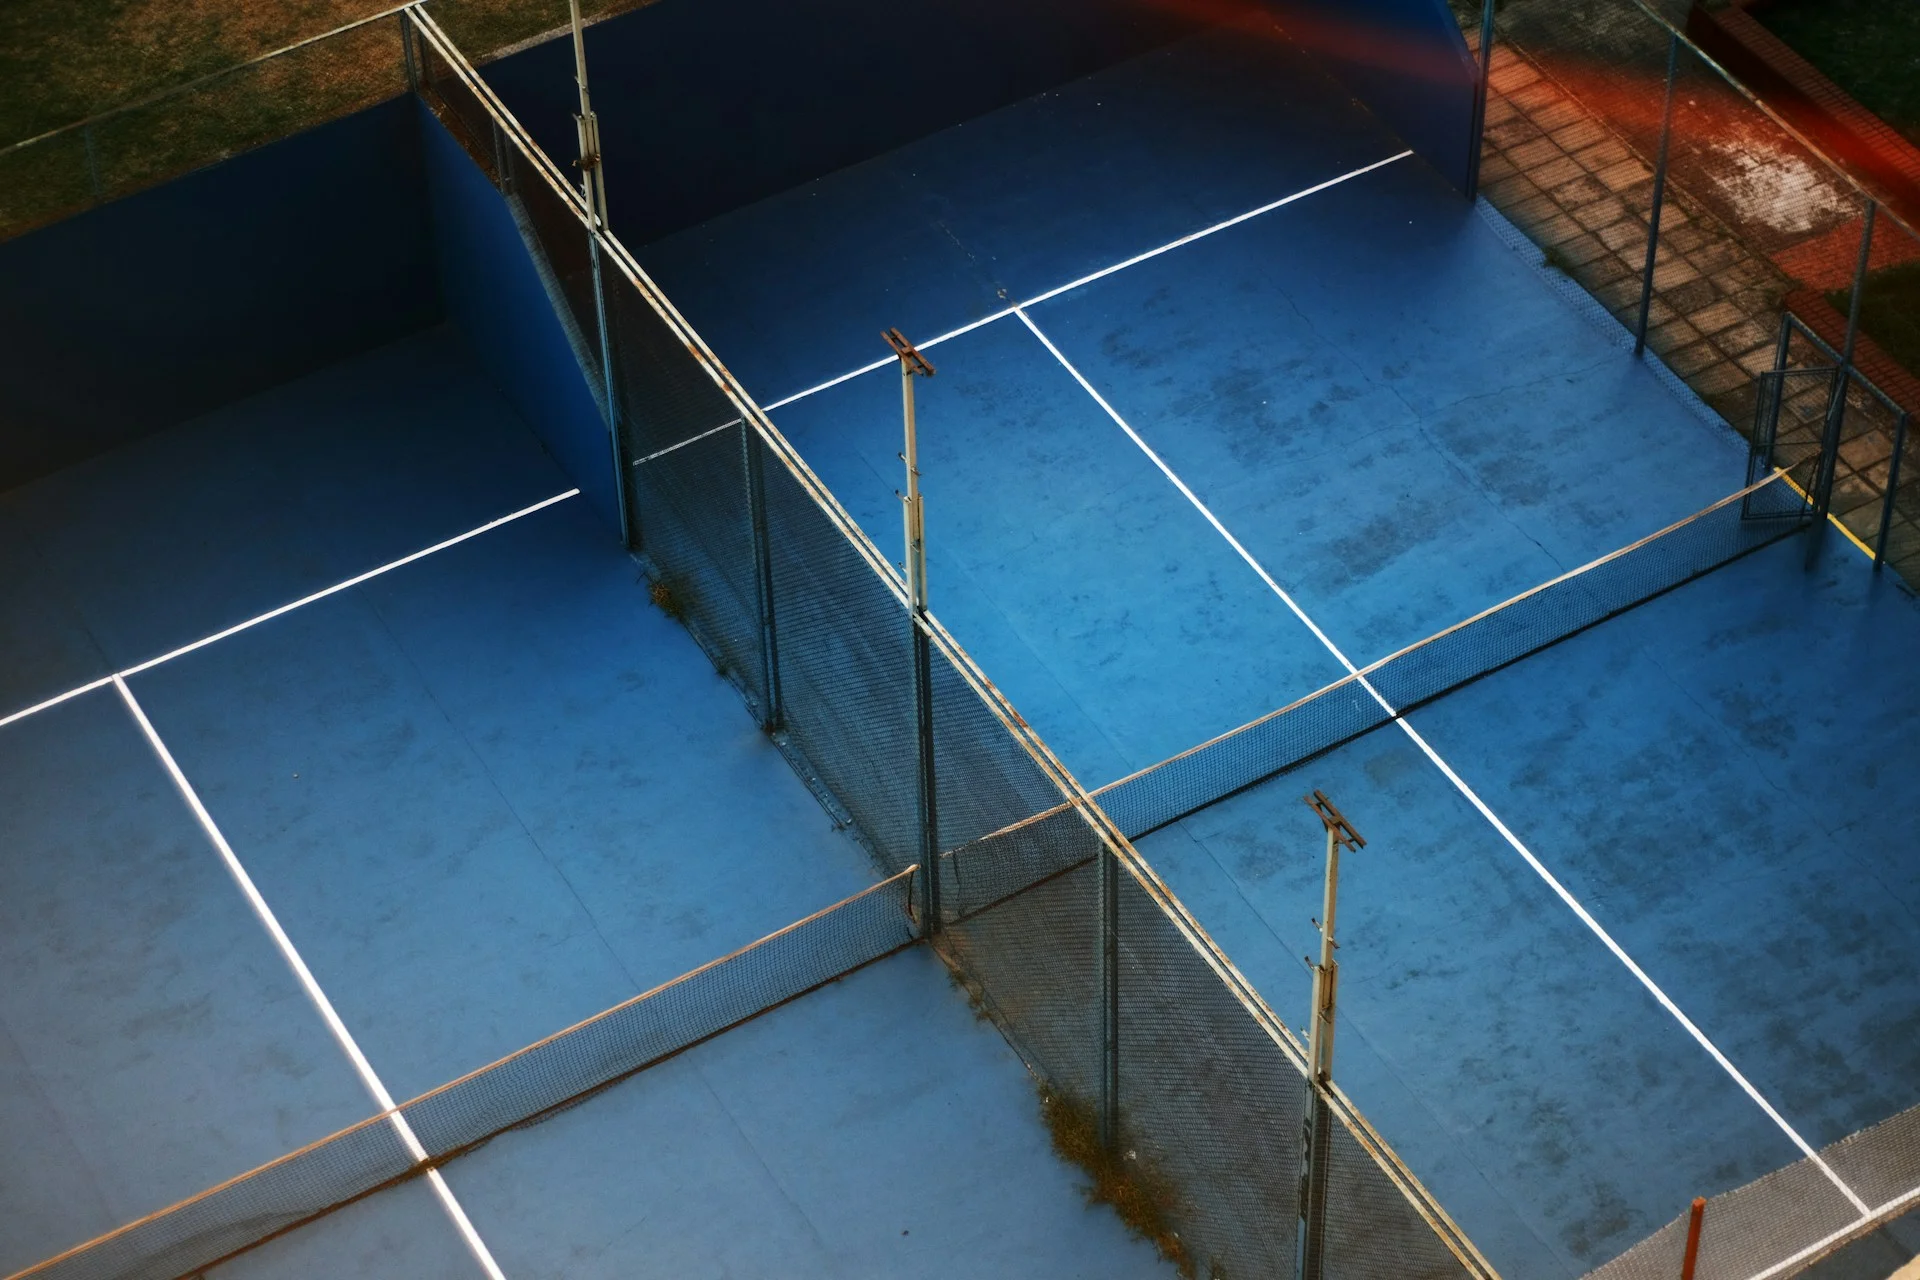
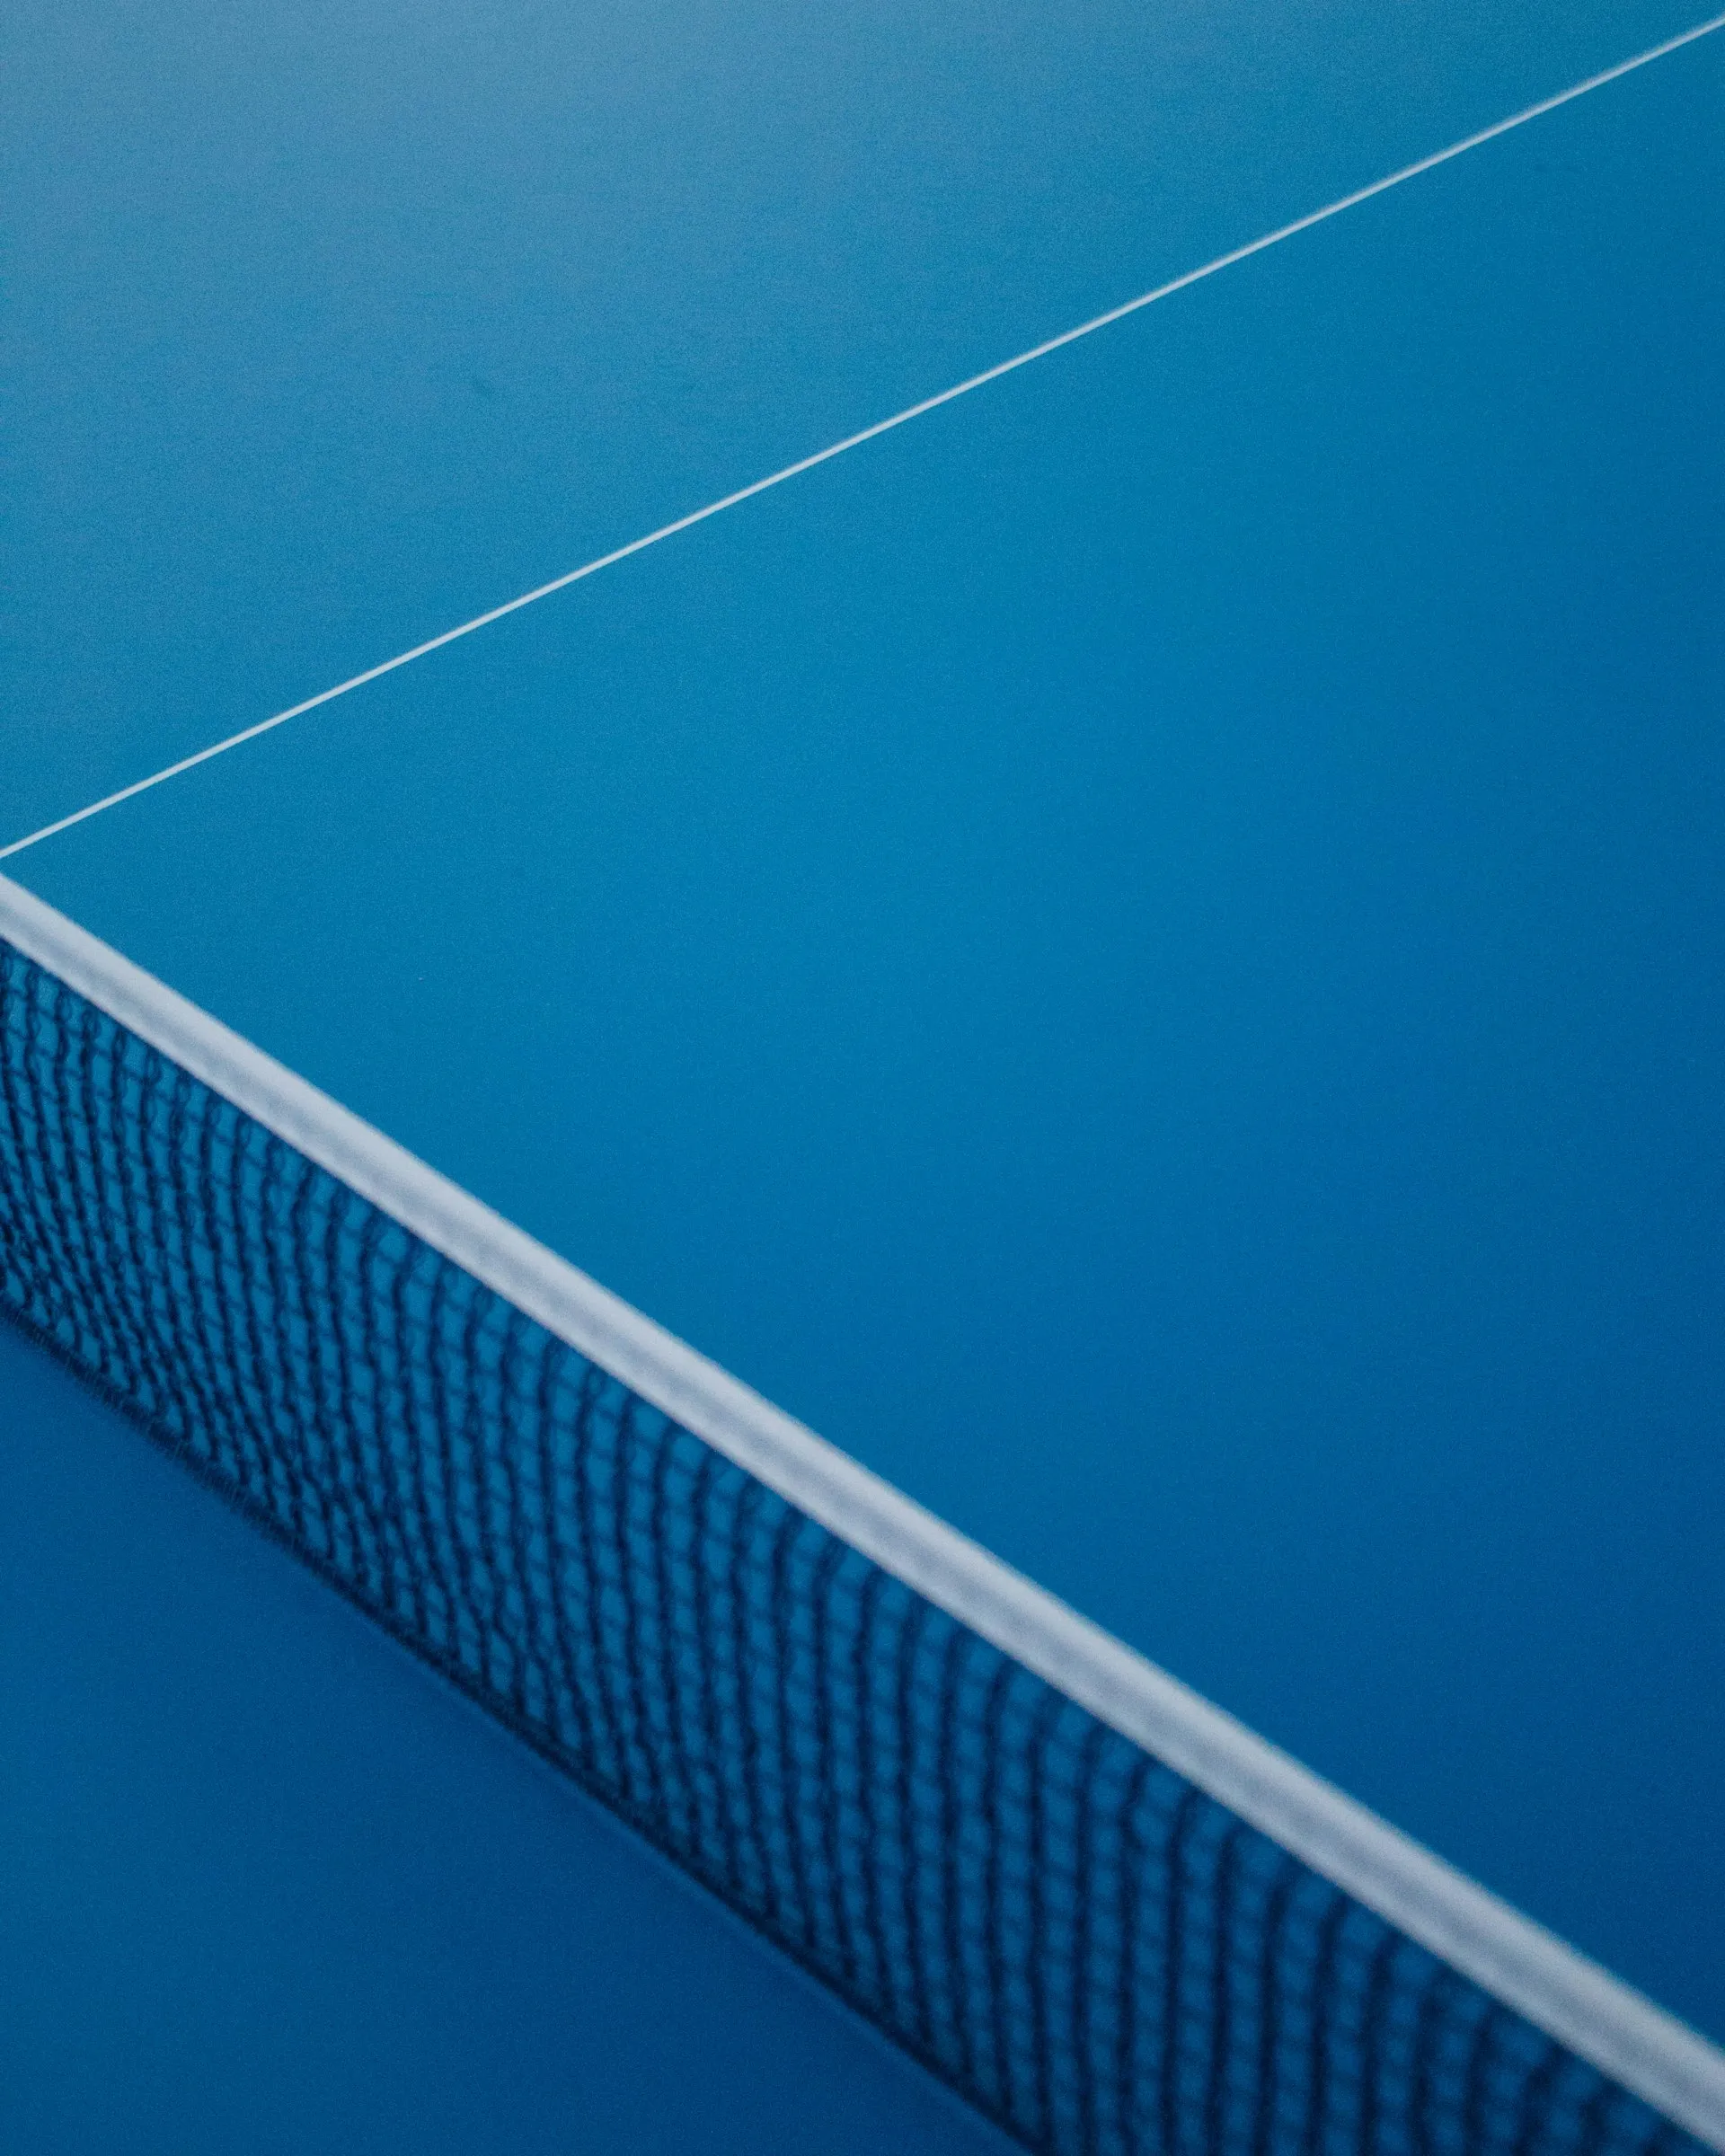
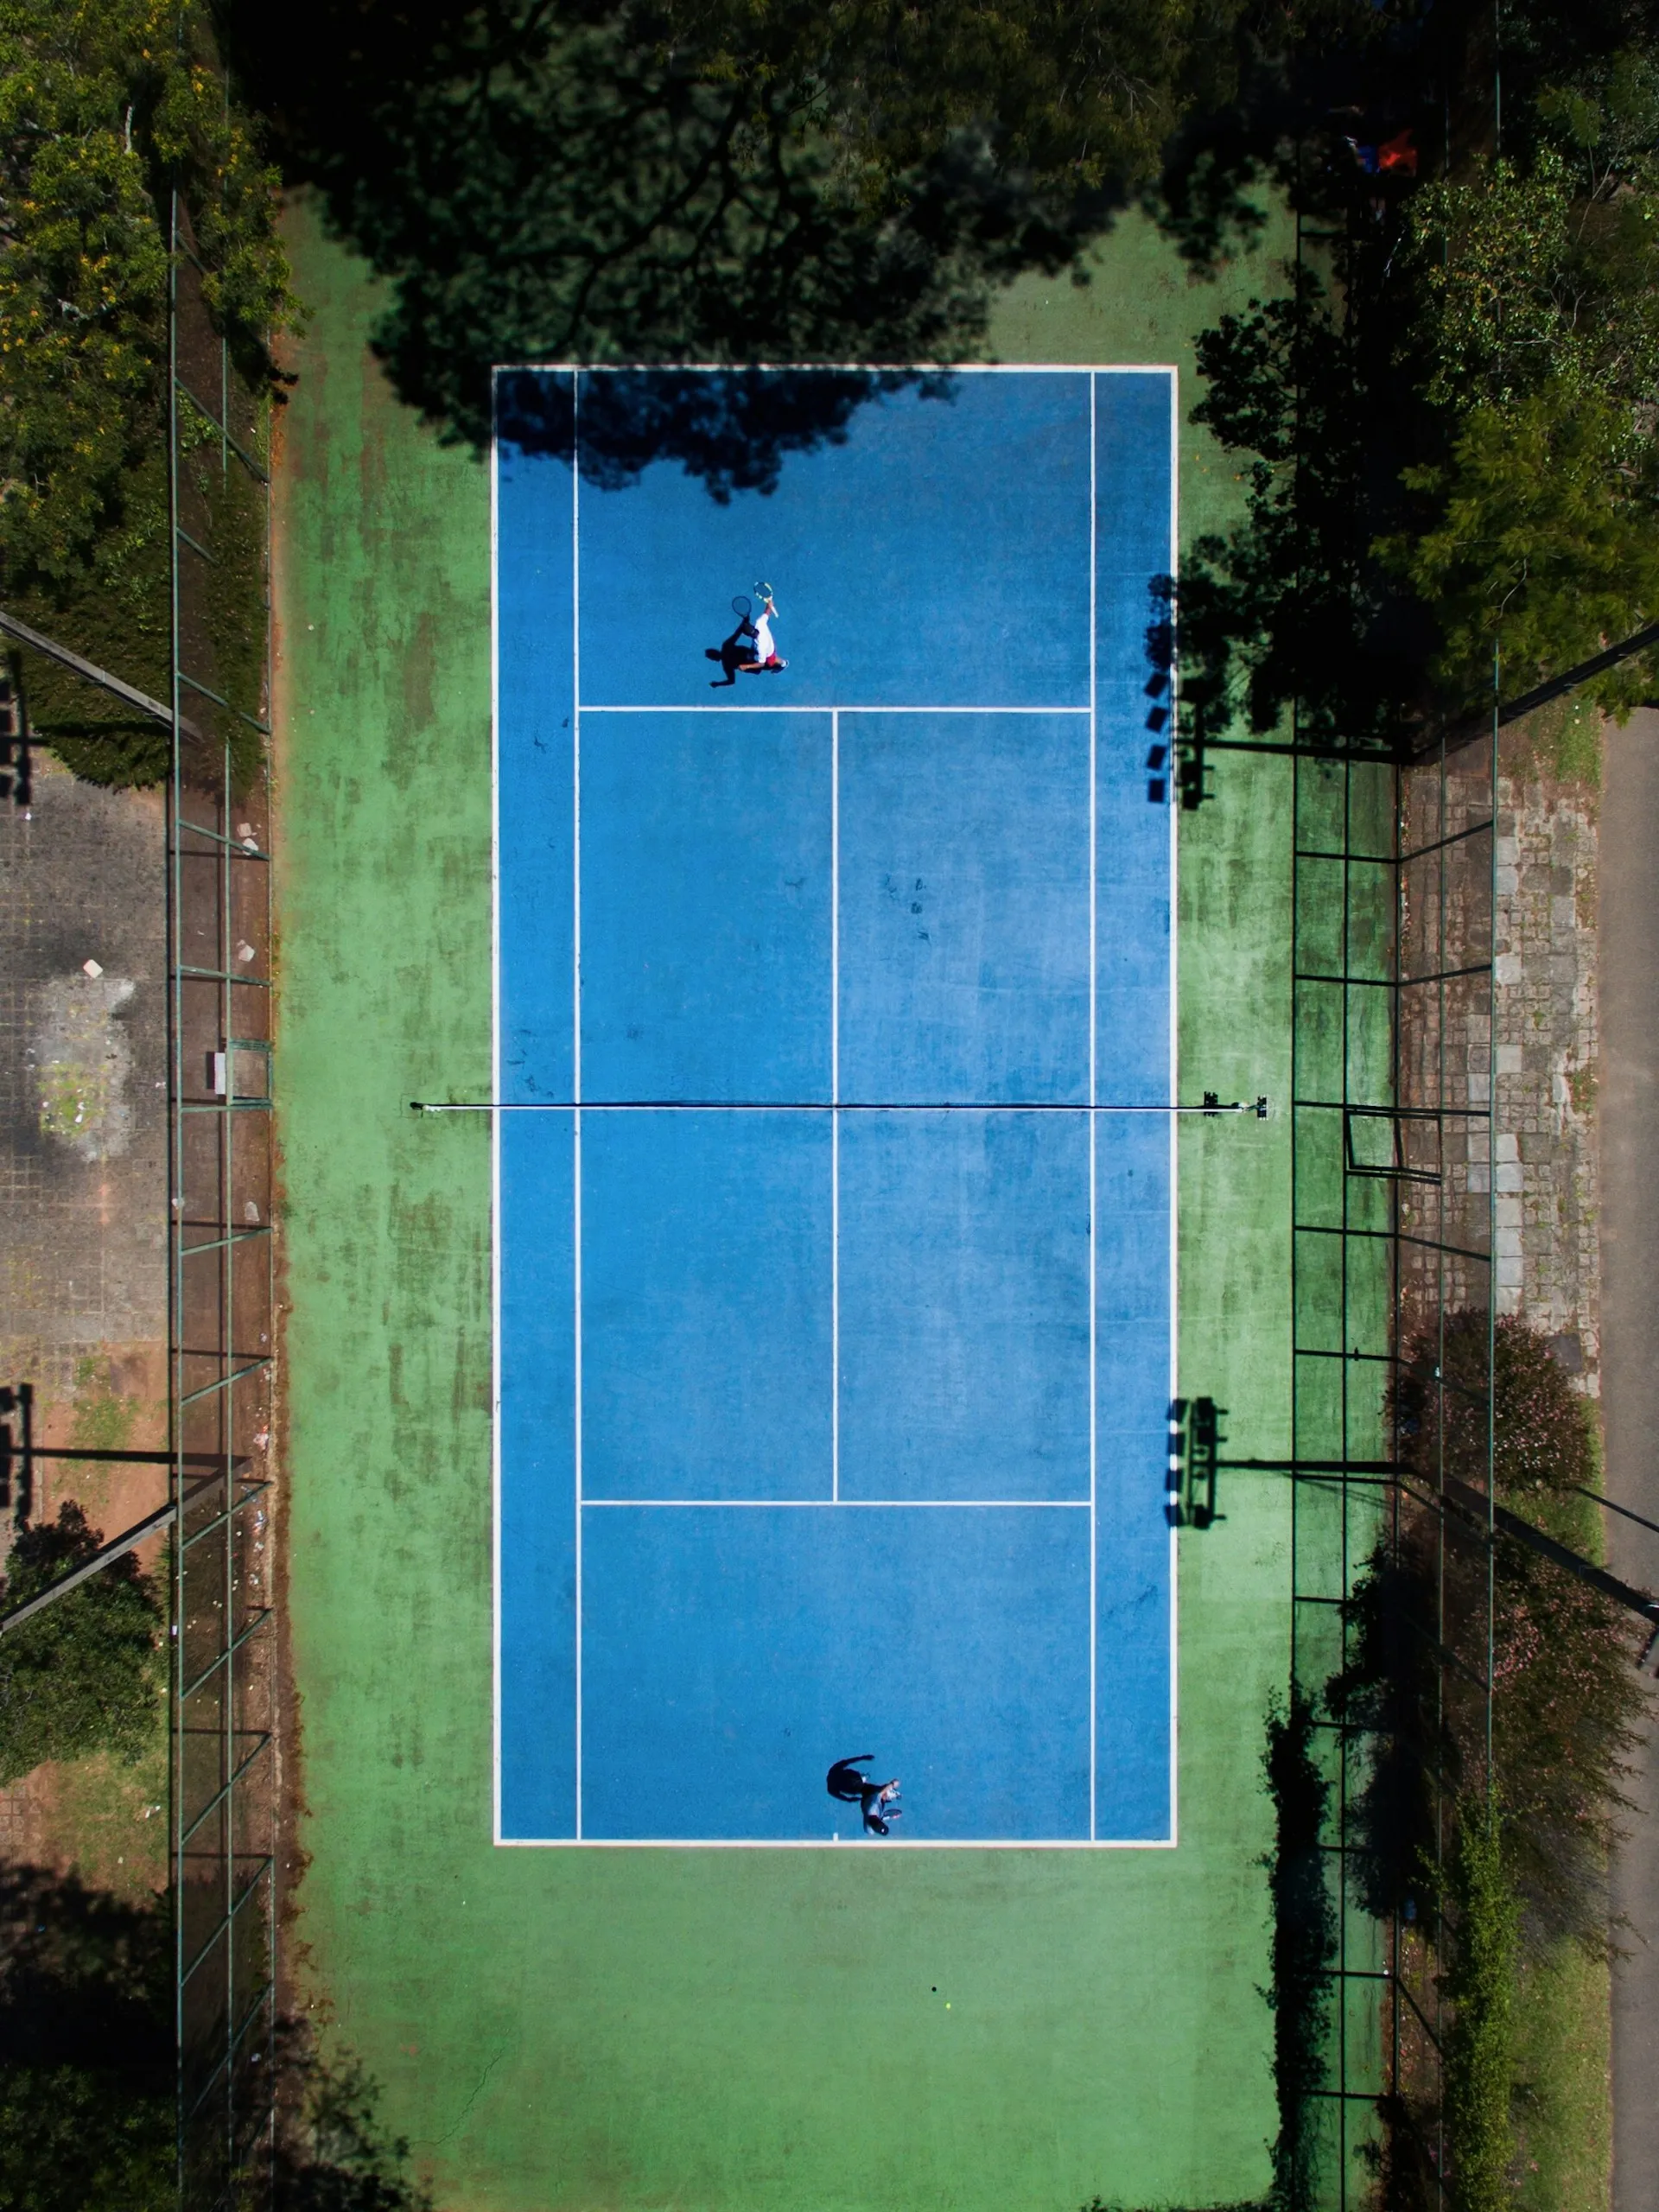
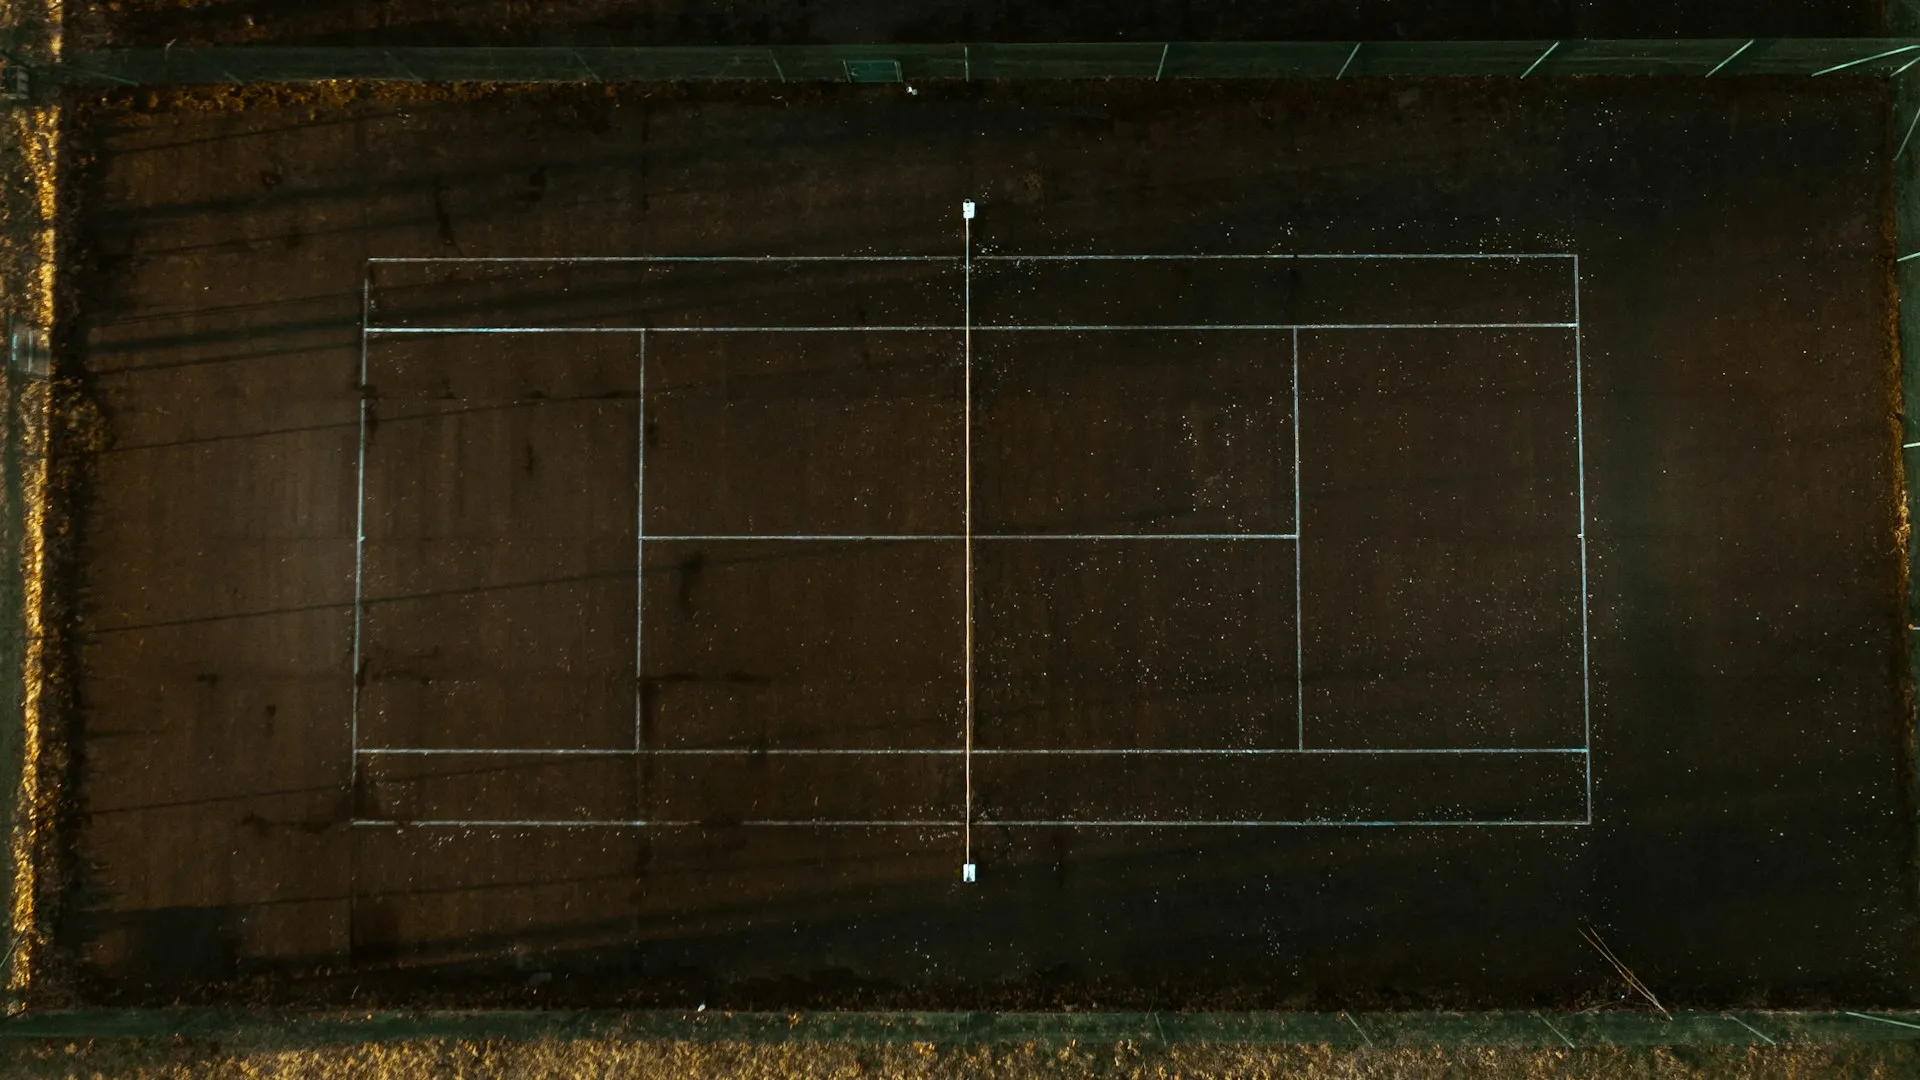
The Padel Court
The padel court is a rectangular playing area measuring 10 by 20 meters, divided by a net into two equal halves.
Key court specifications:
Dimensions: 10 m wide, 20 m long
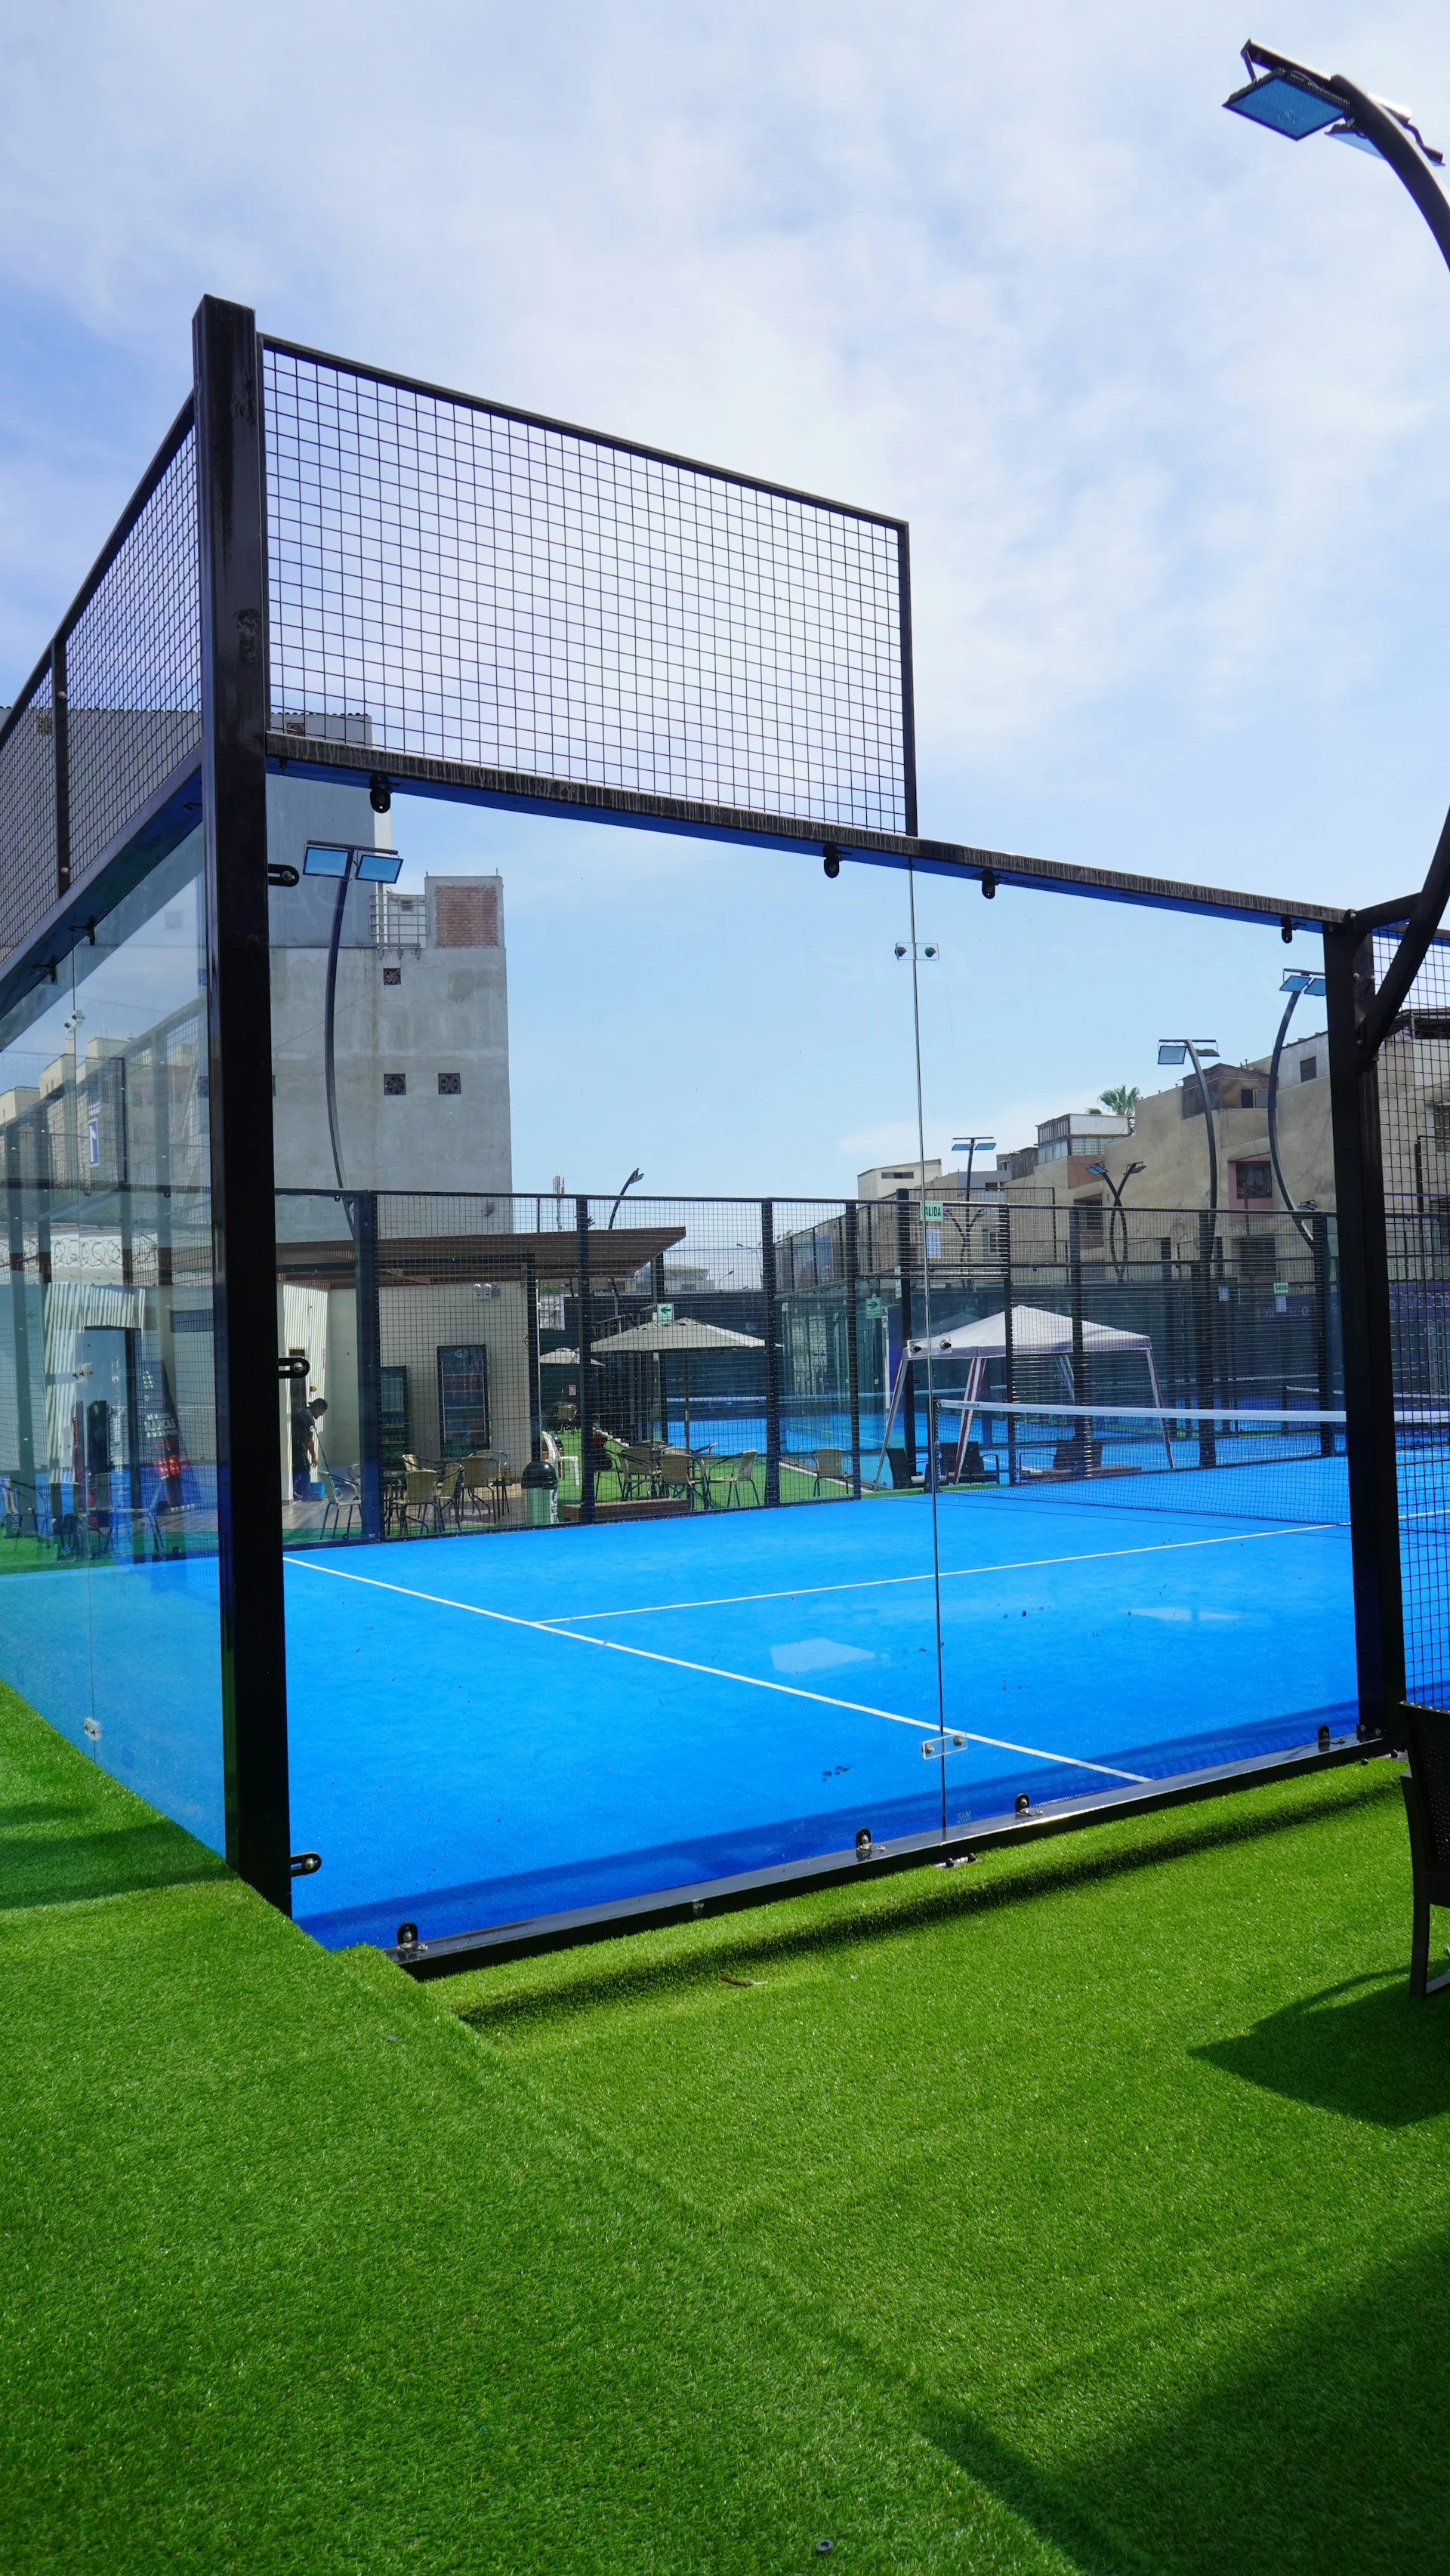
Walls: back walls 4 m high (typically glass), side walls — a combination of glass (3 m) and metallic mesh (1 m on top)
Surface: artificial grass with sand infill or concrete
Net: 88 cm high at the center, up to 92 cm at the posts
Service boxes: similar to tennis, positioned diagonally
The court is significantly smaller than a tennis court (which measures 10.97 by 23.77 m for doubles), reducing the physical endurance requirements and allowing players to enjoy the game from the very first session.
Why Padel is Growing
Padel is experiencing explosive growth in popularity worldwide. Several factors contribute to this trend:
Low barrier to entry. Thanks to the underhand serve, compact court, and solid racket, beginners start enjoying the game after their very first session. Years of training are not required to reach a basic level.
Social nature. The 2 vs 2 format makes padel an ideal way to spend time with friends, colleagues, or family. The atmosphere on the court is less formal than in tennis.
Accessibility. A compact court requires less space and investment to build than a tennis court. Padel clubs are appearing in urban areas where a full-size tennis facility would be impossible.
Physical activity without excessive strain. Padel provides a solid cardio workout and develops coordination while being gentler on joints than tennis, thanks to the smaller court and less aggressive movements.
Entertainment value. Fast-paced rallies, wall play, and team dynamics make padel engaging both for players and spectators.
Padel by the Numbers
The scale of padel’s spread is impressive (FIP World Padel Report 2025):
Over 35 million active players worldwide
Approximately 100 national federations within FIP
More than 77,000 courts in 150 countries
Padel is recognized as the fastest-growing sport in Europe by the rate of new player growth
Premier Padel and World Padel Tour are the largest professional tours, broadcast internationally
Where Padel is Most Popular
Padel’s development is uneven across the globe, but its geographic reach is expanding rapidly:
Spain — the undisputed leader: over 6 million players, padel is the second most popular sport after football
Argentina — home to many top professional players, padel is deeply rooted in the country’s sports culture
Italy — one of the fastest-growing markets in Europe, with the number of courts doubling every few years
Sweden — the Scandinavian leader, padel is popular in both indoor and outdoor formats
UAE and Qatar — actively investing in padel infrastructure and hosting international tournaments
Russia and CIS — an early-stage market, but the number of clubs and players is growing
[UNVERIFIED] Among the new regions of active growth are the United Kingdom, Germany, the Netherlands, Belgium, and Asian countries including Japan, South Korea, and India.
How to Get Started
Getting started with padel requires minimal preparation:
Find a nearby club with padel courts
Rent a racket (most clubs provide equipment for beginners)
Wear athletic shoes with non-slip soles
Find partners — you need 4 people for a full game
Start with basic strokes and the serve — an instructor can teach you the fundamentals in a single session
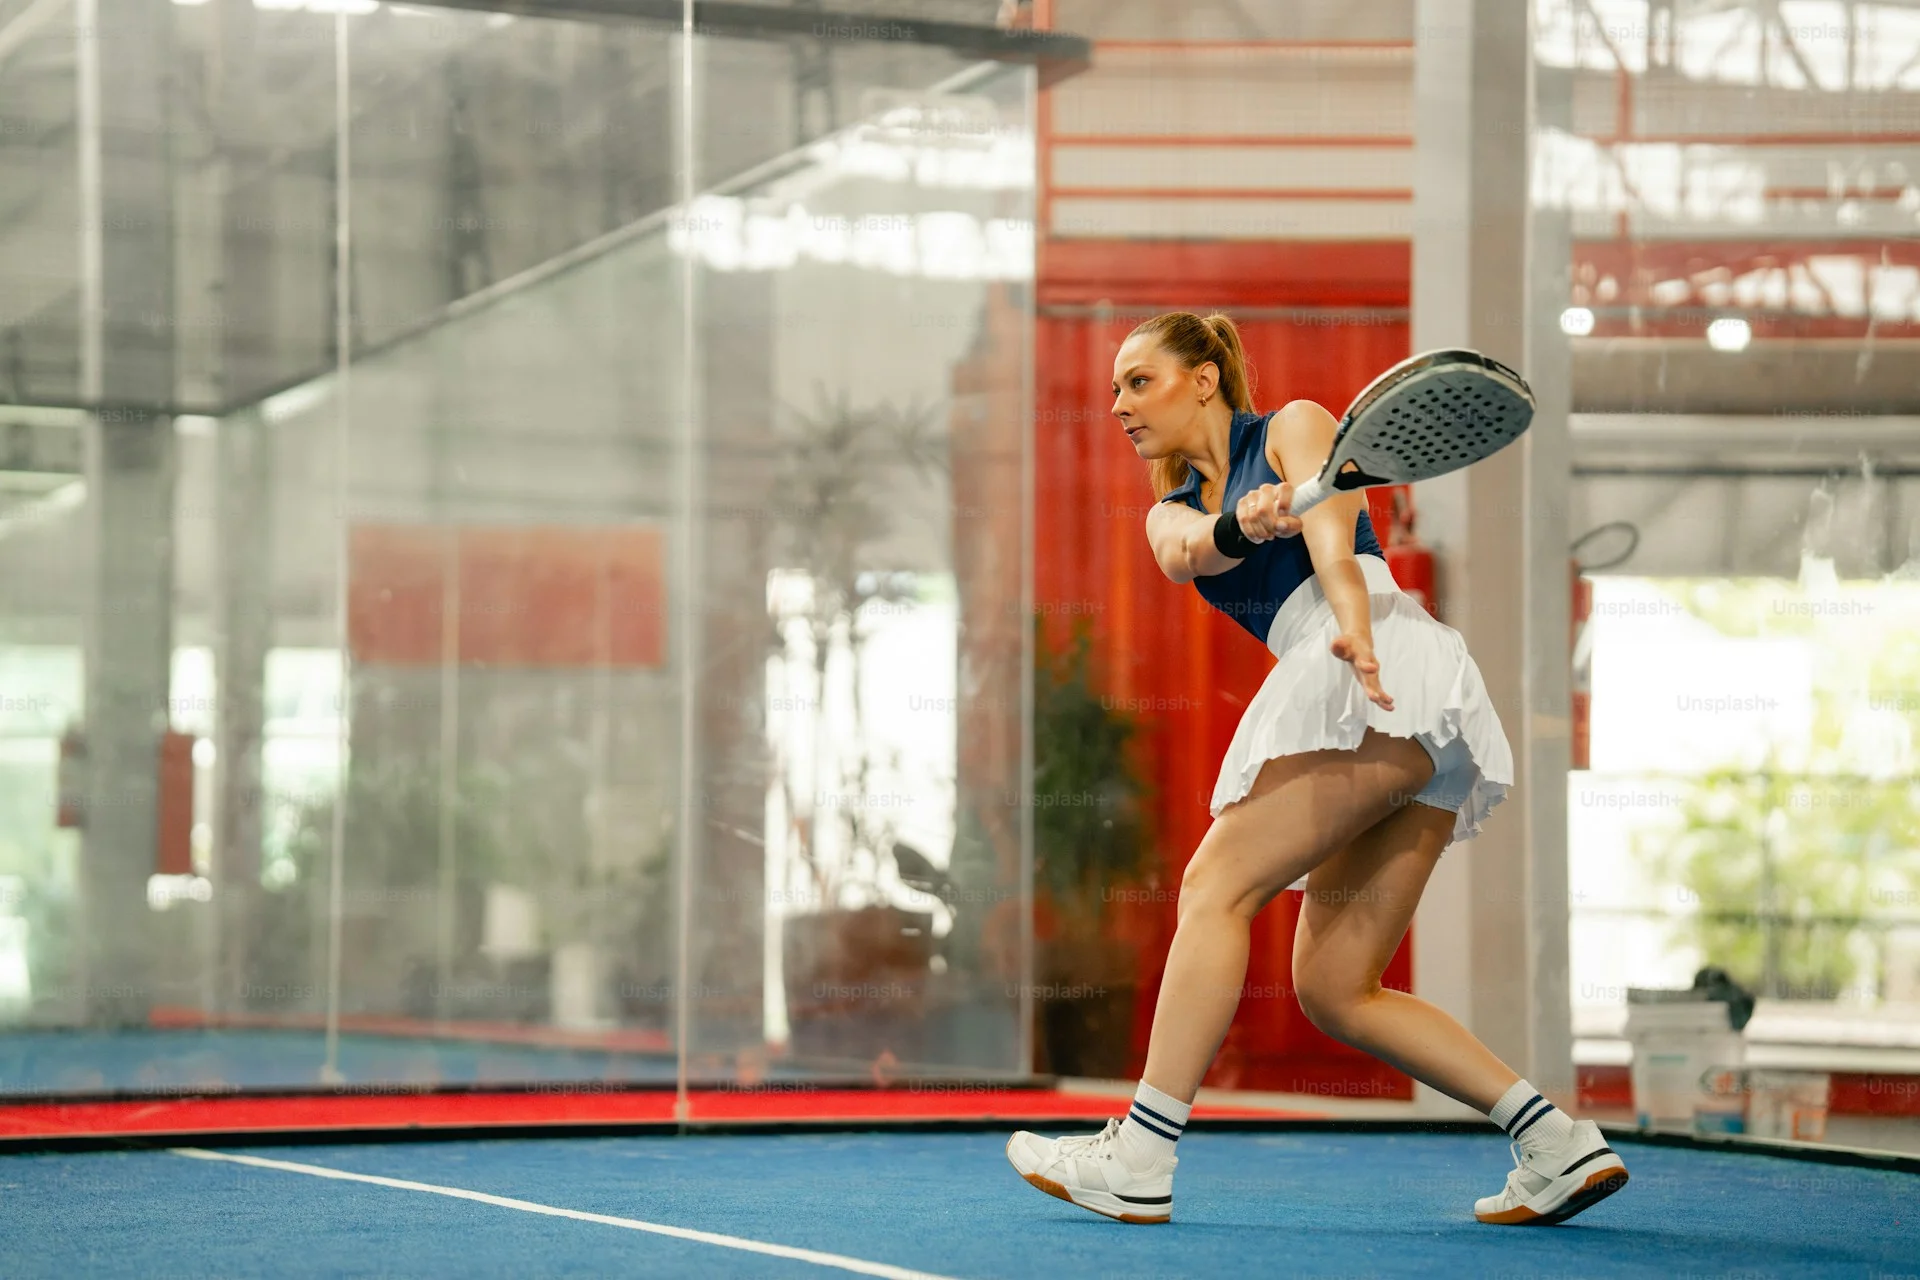
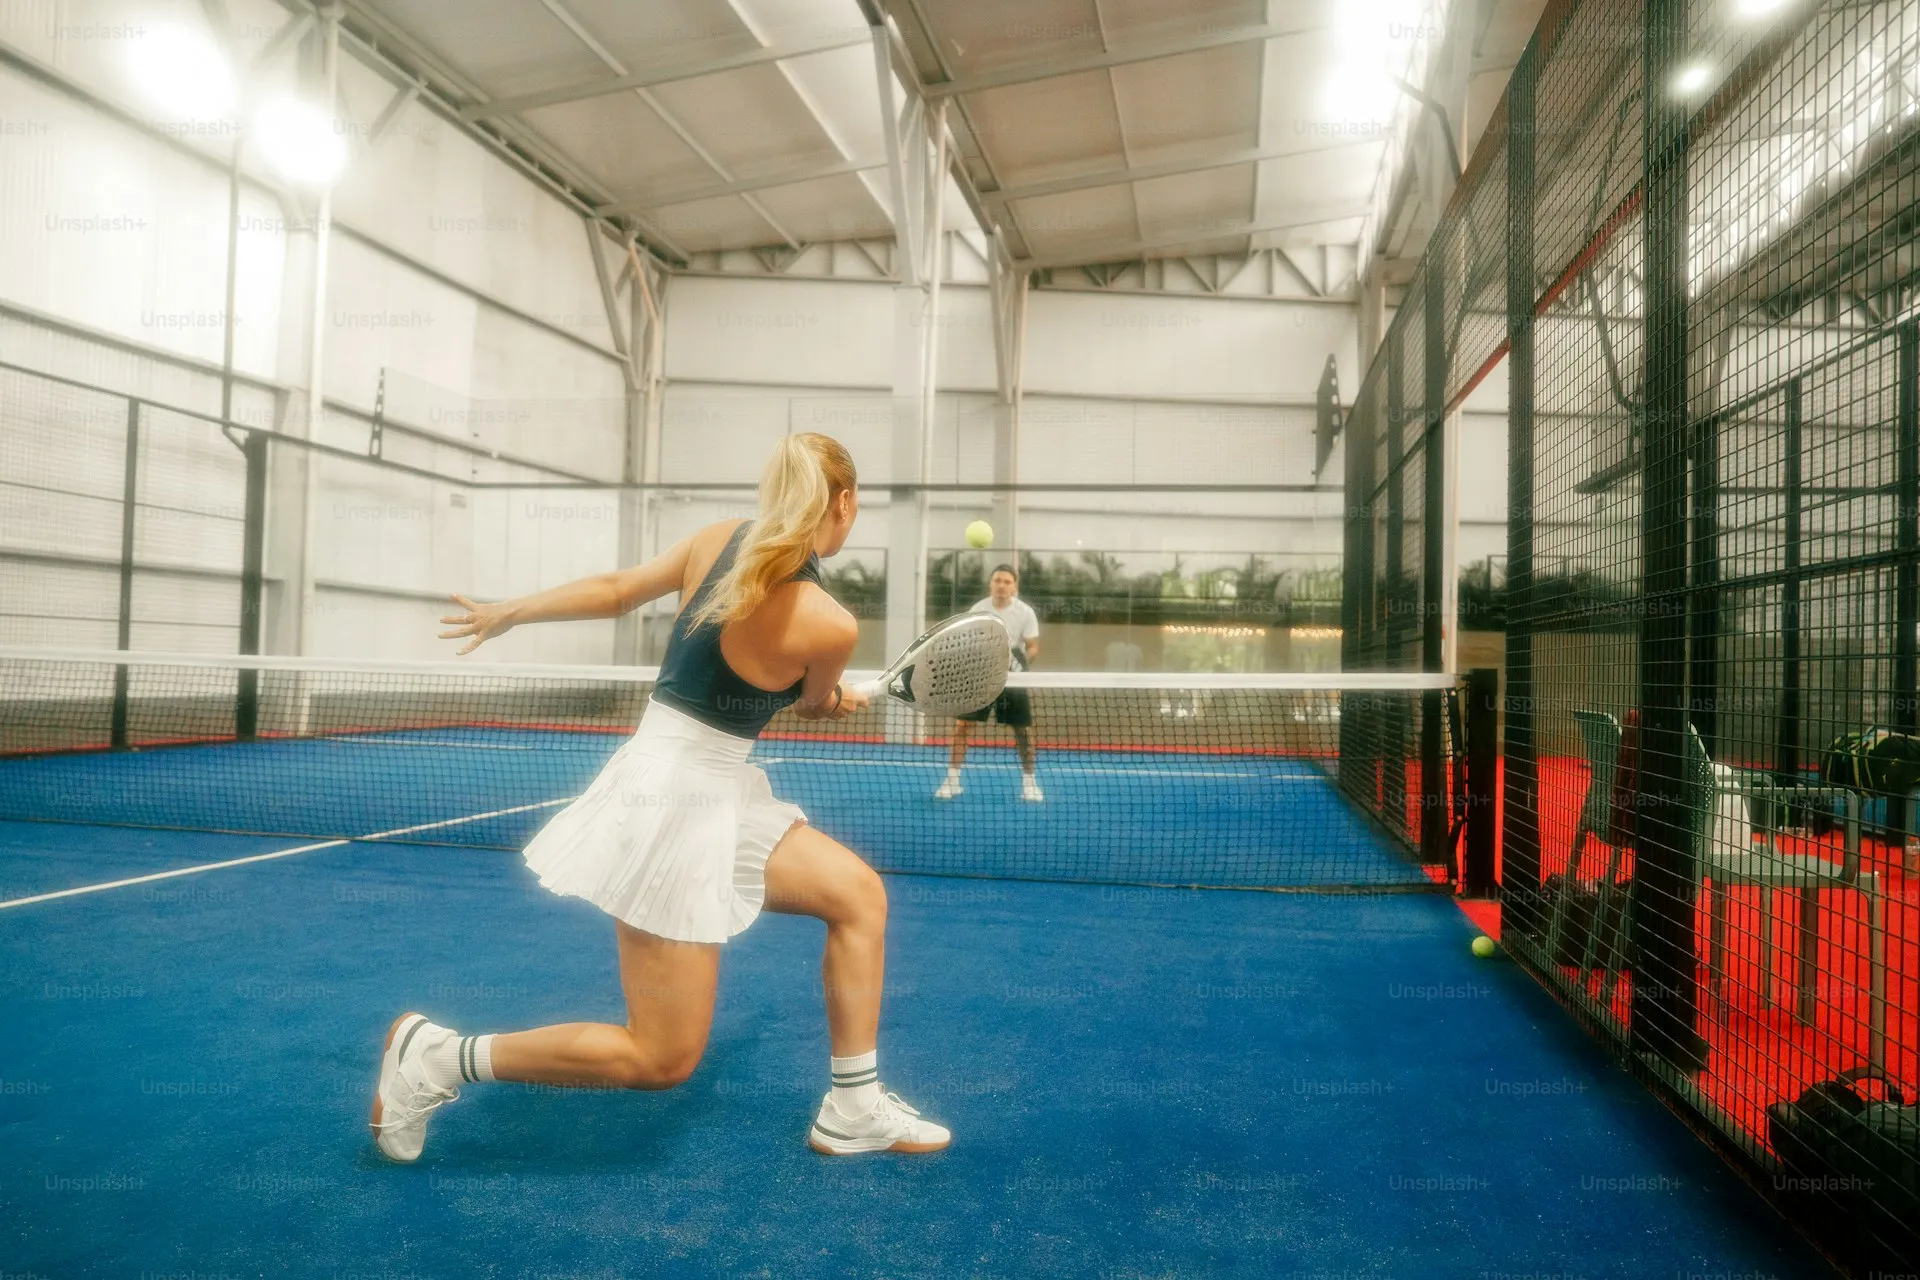
Padel and tennis are related racket sports, but there are fundamental differences between them: from court dimensions and racket type to serving rules and game format. Understanding these differences will help tennis players adapt to padel more quickly, and newcomers choose the right sport.
Photo: Bruno Vaccaro Vercellino / UnsplashPhoto: Bruno Vaccaro Vercellino / Unsplash / Unsplash License
Quick Comparison Table
Parameter
Padel
Tennis
Court
10 x 20 m, enclosed by walls
23.77 x 10.97 m (doubles), open
Walls
Yes, ball can be played off walls
No
Racket
Solid, no strings, perforated
Strung, oval head
Ball
Slightly lower pressure
Standard pressure
Serve
Underhand, below waist level
Overhead
Scoring
15, 30, 40 (often golden point)
15, 30, 40 (classic deuce/advantage)
Format
Doubles only (2 vs 2)
Singles and doubles
Physical demands
Less running, more tactical
More running and athleticism
Learning curve
Low, easy to start
Medium, requires technique
Court: Enclosed vs Open
One of the most visible differences is the court itself. A padel court is significantly more compact than a tennis court: it measures 10 x 20 meters, while a doubles tennis court is 23.77 x 10.97 meters. The tennis court area is roughly one and a half times larger.
The defining feature of a padel court is its walls. The court is enclosed on all sides: back walls (usually made of glass or concrete, 3-4 meters high) and side walls with metal mesh. A ball that bounces off a wall remains in play — this is a fundamental part of padel rules, entirely absent in tennis. For more details on court specifications, see court dimensions and markings.
Racket: Solid vs Strung
Tennis uses a racket with a strung hitting surface and a long handle (total length up to 73.7 cm). The strings create a trampoline effect and allow players to generate significant spin.
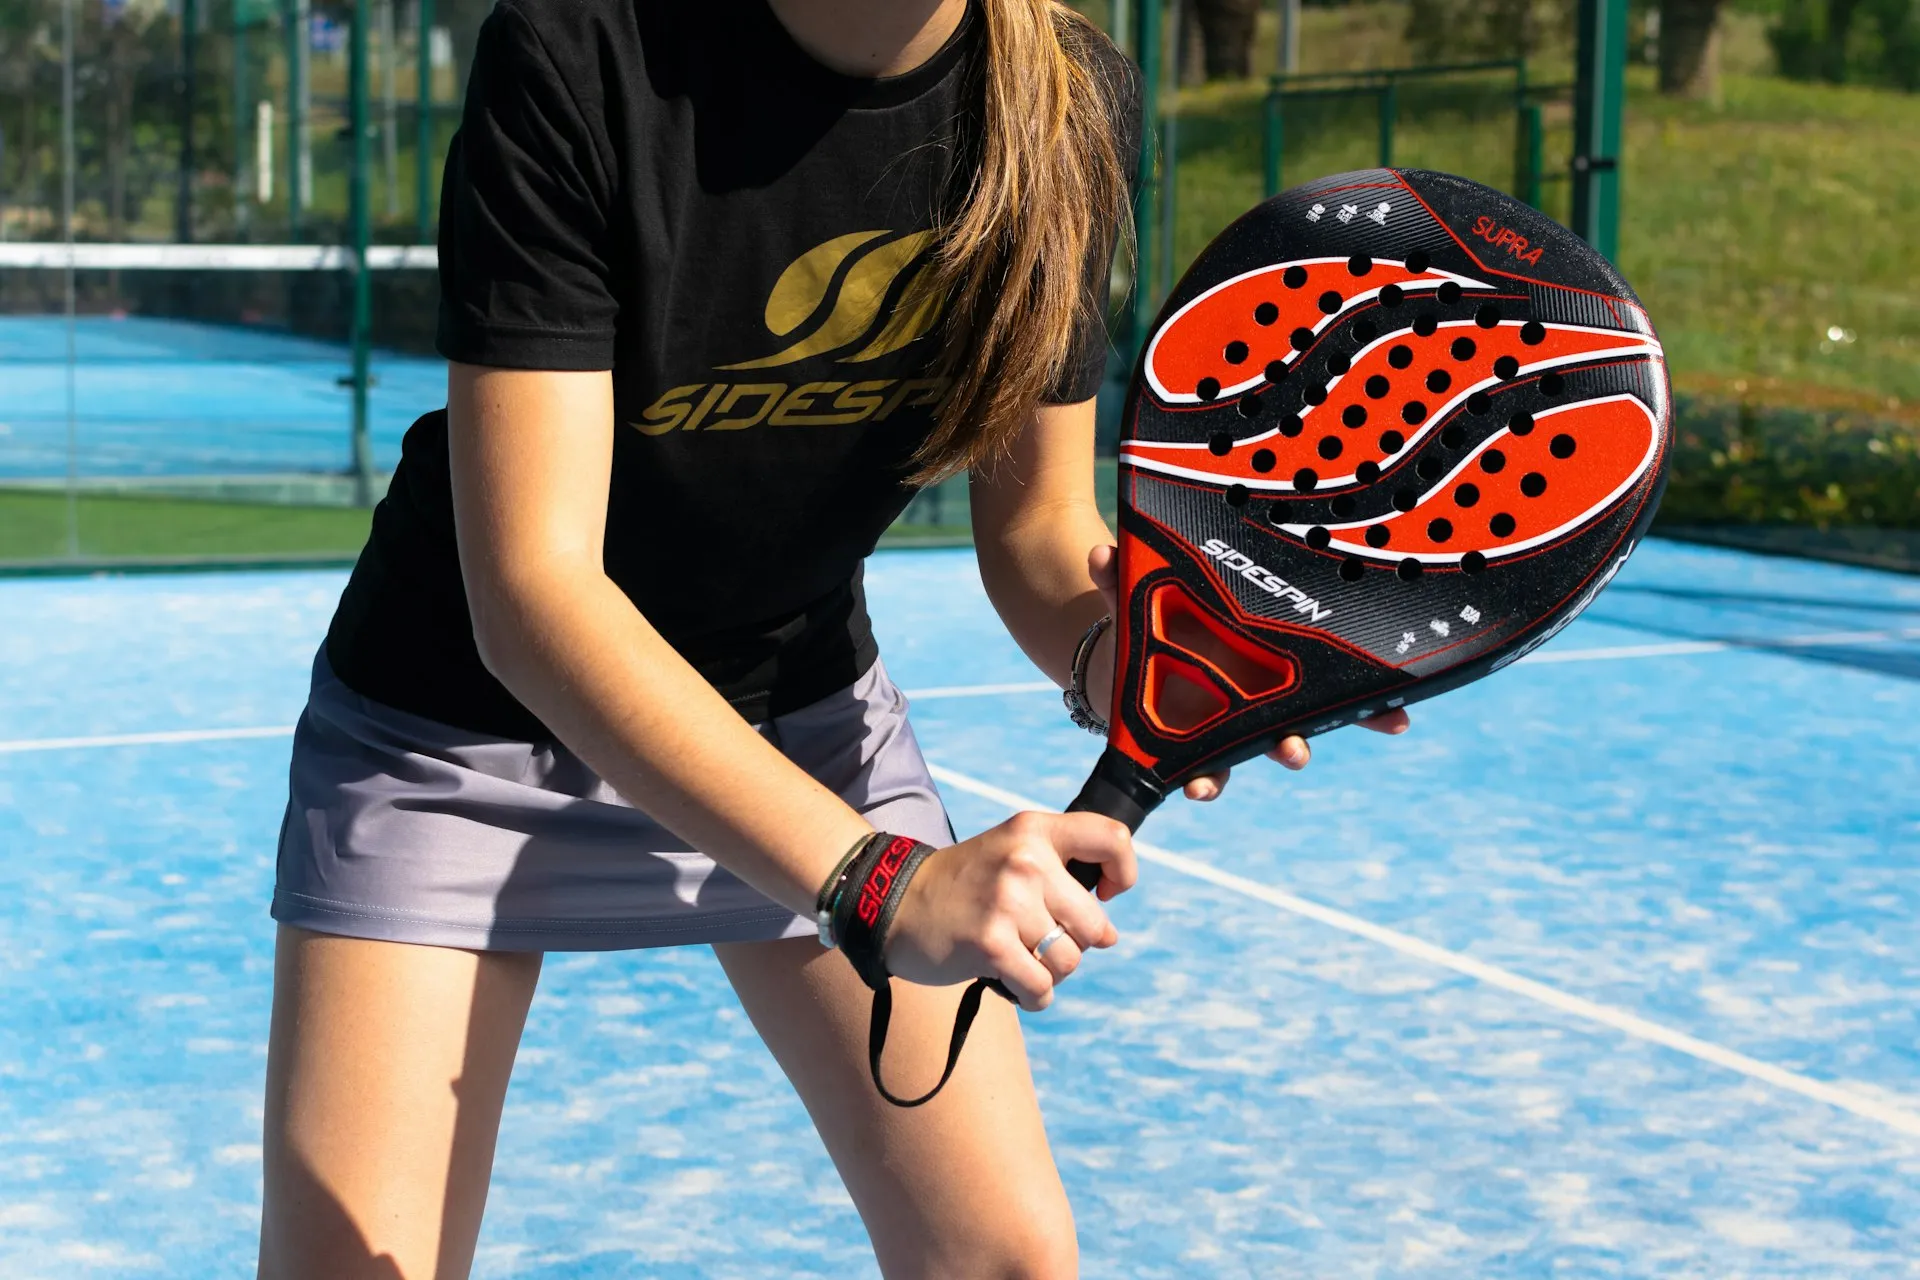
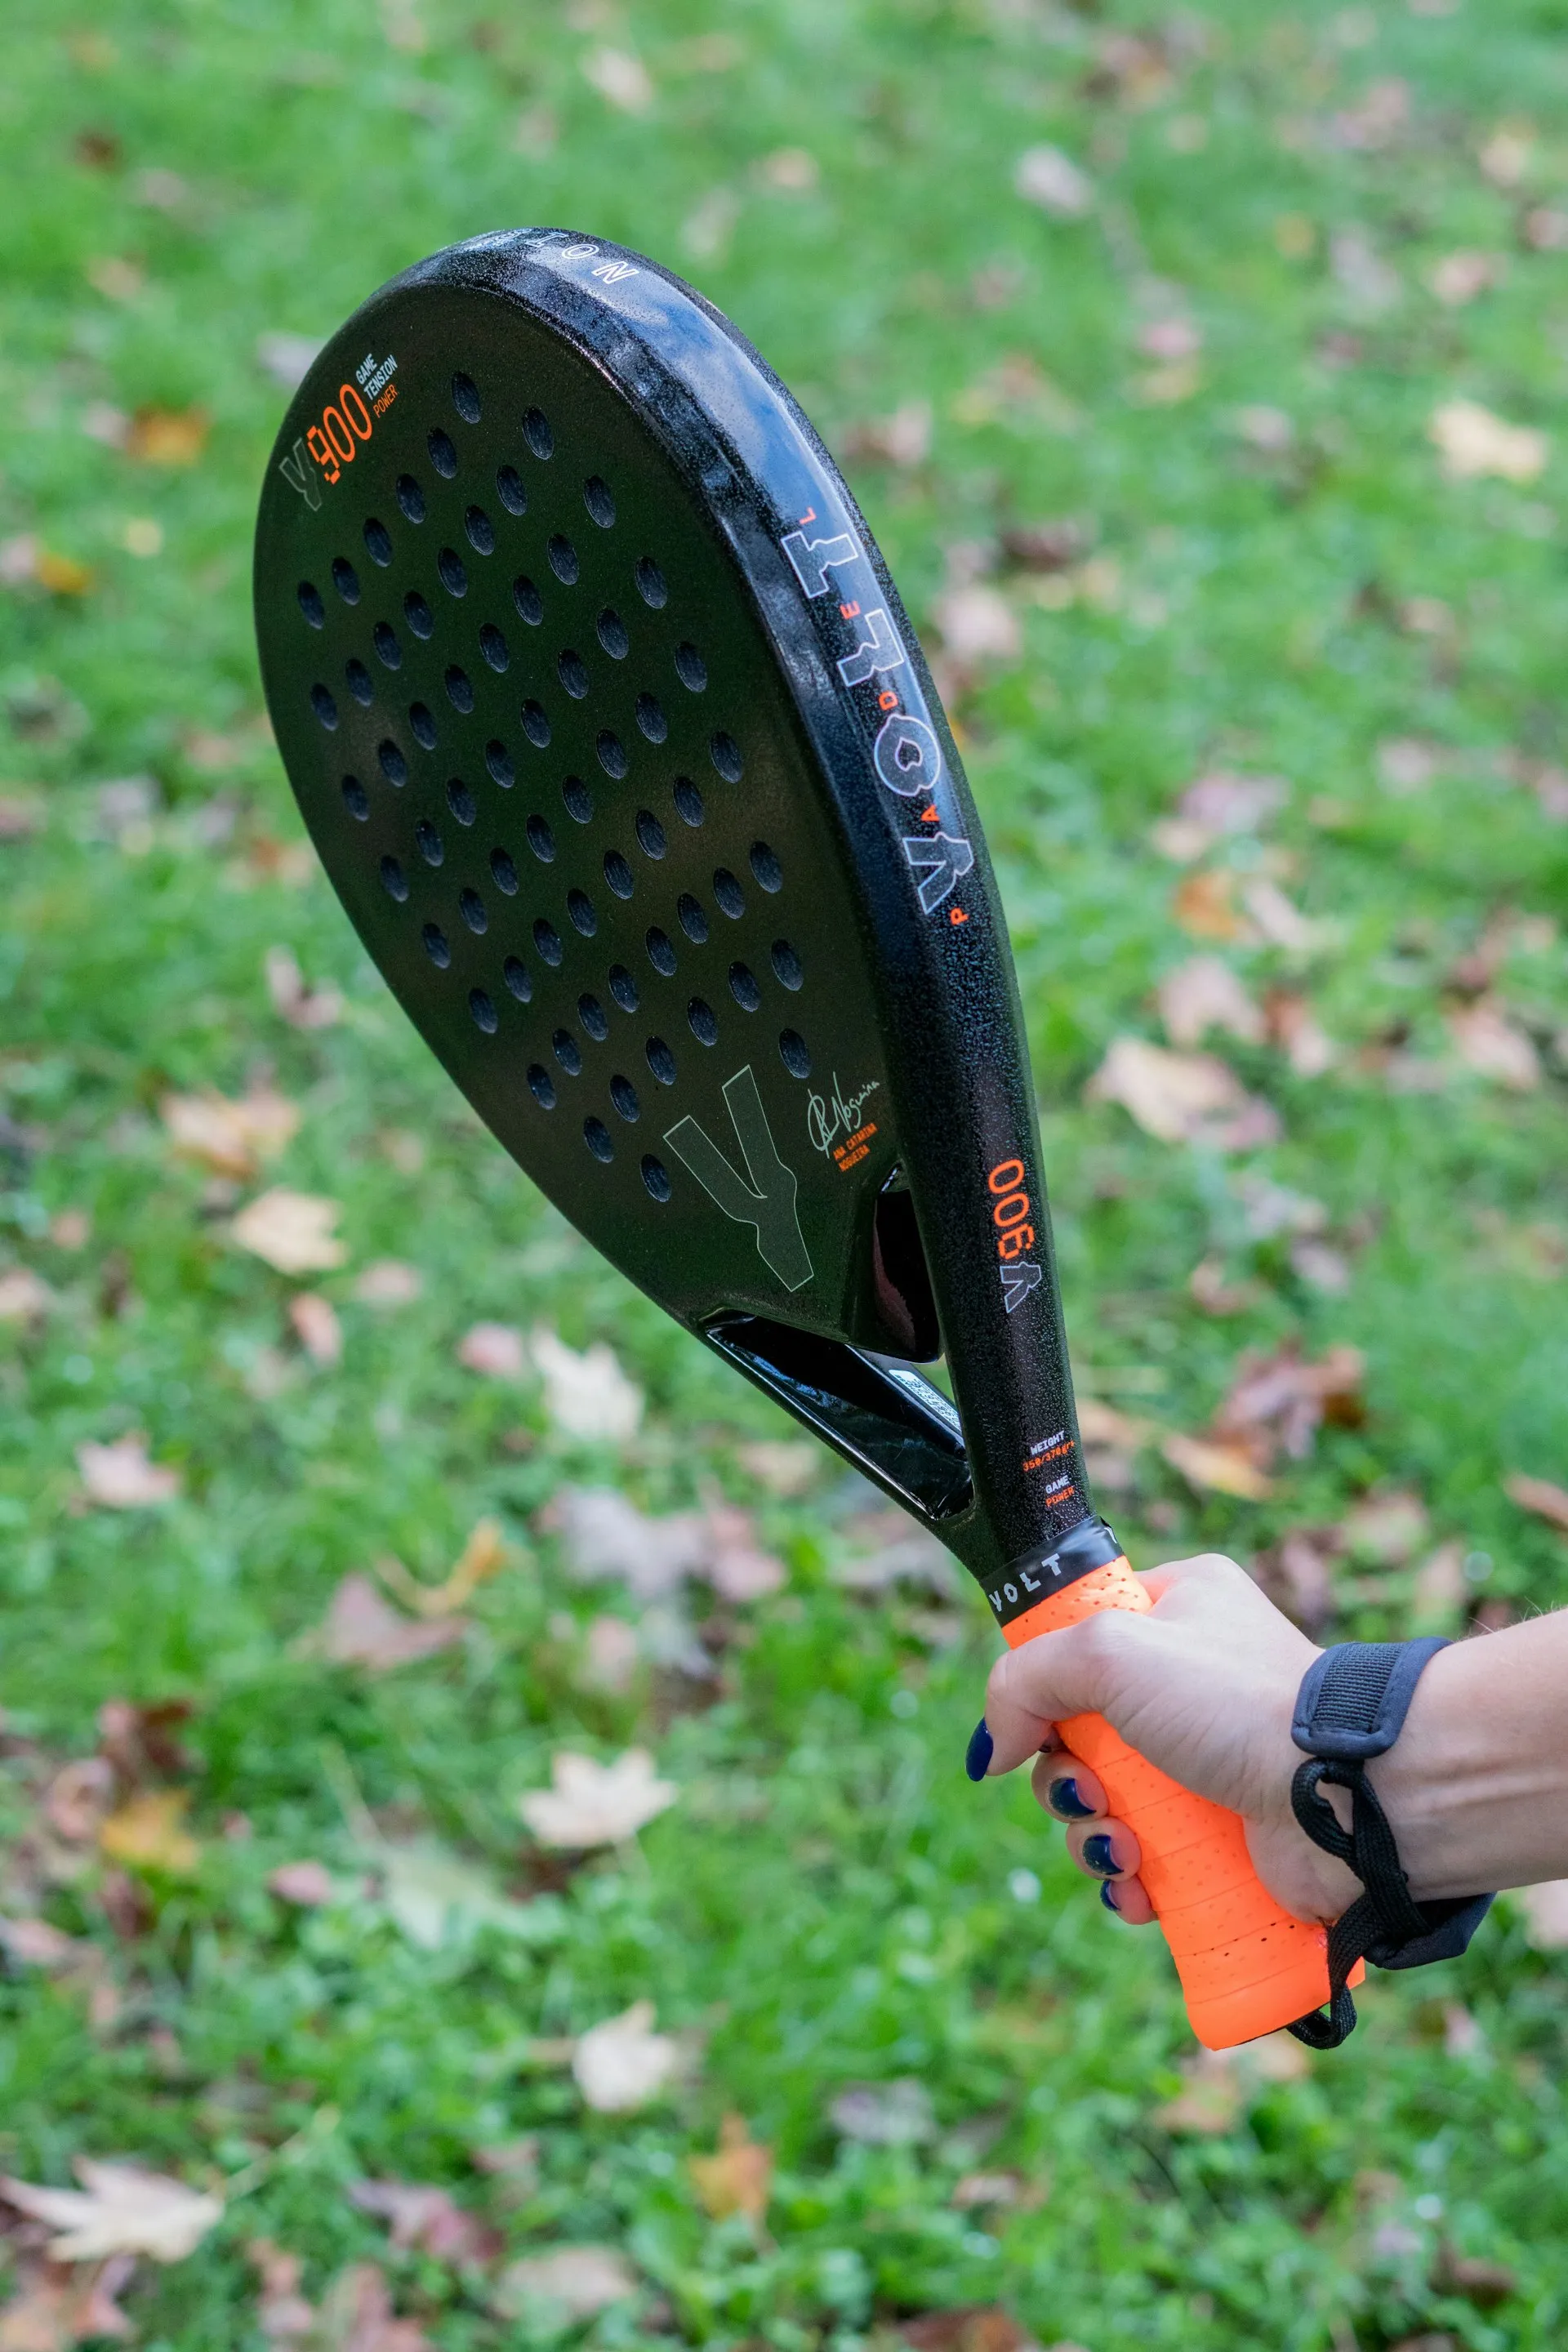
The padel racket is fundamentally different: it is a solid construction made from composite materials (carbon fiber, fiberglass) with a foam core (EVA or FOAM). Instead of strings, the hitting surface has perforations (holes). A padel racket is up to 45.5 cm long and typically weighs 340-380 grams. An unstrung tennis racket weighs 260-340 grams. For a more detailed guide on racket selection, read how to choose a racket.
Ball: Almost Identical, but Not Quite
At first glance, padel and tennis balls are virtually indistinguishable. They are the same size and color. However, a padel ball has slightly lower internal pressure (4.6-5.2 kg/cm² versus 5.6-6.3 kg/cm² for a tennis ball). This means the padel ball bounces slightly lower, making the game more controlled on a compact court with walls.
In practice, many recreational players use tennis balls for padel, but at the professional level the pressure difference plays a significant role.
Serve: Underhand vs Overhead
In tennis, the serve is one of the most powerful shots. The player tosses the ball and strikes it overhead, with professional serve speeds reaching 200-250 km/h. The serve in tennis is often a decisive weapon.
In padel, it is the opposite: the serve must be performed underhand. The ball must bounce on the ground first, and the strike must occur below waist level. This makes the serve a far less aggressive element of the game. In padel, the serve functions more as a way to start the rally rather than a means of scoring directly. For more on serving rules, see serving rules.
Scoring: Similar, but with Nuances
The basic scoring system in padel and tennis is identical: 15, 30, 40, game. A set is played to 6 games with a tiebreak at 6-6. A match is typically played as best of three sets.
The key difference is the golden point (punto de oro). At many padel tournaments, when the score reaches deuce, a single decisive point is played instead of the classic advantage system. The receiving pair chooses which side to receive from. The golden point speeds up play and adds drama.
Game Format: Doubles Only
Tennis offers both singles and doubles formats. Padel is played exclusively in doubles — 2 vs 2. This is one of the sport’s defining characteristics. Singles padel exists as an unofficial format, but standard courts and rules are designed for four players.
The doubles format shapes the tactics: coordination with your partner, positional play, and on-court communication are critically important skills. Learn more about the fundamentals in our article what is padel.
Walls: Padel’s Unique Element
The use of walls is what makes padel a truly unique sport. After bouncing off the floor, the ball may hit the back or side wall, and the player is allowed to play it after such a bounce. Moreover, in certain situations a player can hit the ball out of the court over the side wall and return it from outside (the so-called “salida de pared” or “going outside the court”).
This mechanic adds an extra dimension of tactics. Shots that would be winners in tennis can be “saved” off the wall in padel. This makes rallies longer and more spectacular.
Physical Demands
Tennis is an extremely athletic sport. The large court requires intensive movement: sprints, sharp changes of direction, and long lunges toward the ball. Professional tennis matches can last several hours and demand outstanding endurance.
Padel, thanks to its compact court, requires less running. However, this does not mean padel is less intense. The emphasis shifts to quick reactions, reflexes, shot precision, and tactical thinking. The physical load in padel is more evenly distributed and puts less stress on joints, making the sport accessible to a wide age range.
Learning Curve
[EXPERT OPINION] Padel is considered one of the most accessible racket sports for beginners. The compact court, underhand serve, solid racket, and walls that “help” keep the ball in play — all of this allows newcomers to enjoy the game from the very first minutes.
In tennis, the learning curve is considerably steeper. Comfortable play requires mastering basic stroke technique, learning to control a strung racket, and developing sufficient fitness to move around a large court. This typically takes months of regular practice.
The doubles format makes padel inherently more social. There are always four people on court, creating a relaxed and friendly atmosphere. Many padel clubs organize the “americano” format — tournaments with rotating partners, which encourages meeting new people and expanding your social circle.
Tennis, especially in singles, is a more individual sport. Although doubles tennis exists, padel culture is built from the ground up around playing together and socializing.
Who Is Padel Right For
Padel is especially suitable for:
Former tennis players — basic racket sport skills transfer easily
Beginners — low barrier to entry, quick progress
Older adults — less stress on joints
Those seeking a social sport — doubles format and club culture
Padel is one of the most accessible racket sports. To start playing, all you need is minimal equipment, a partner, and a willingness to move. This article is a step-by-step guide for anyone looking to step onto the court for the first time.
You do not need much for your first time on the court. Here is the essentials checklist:
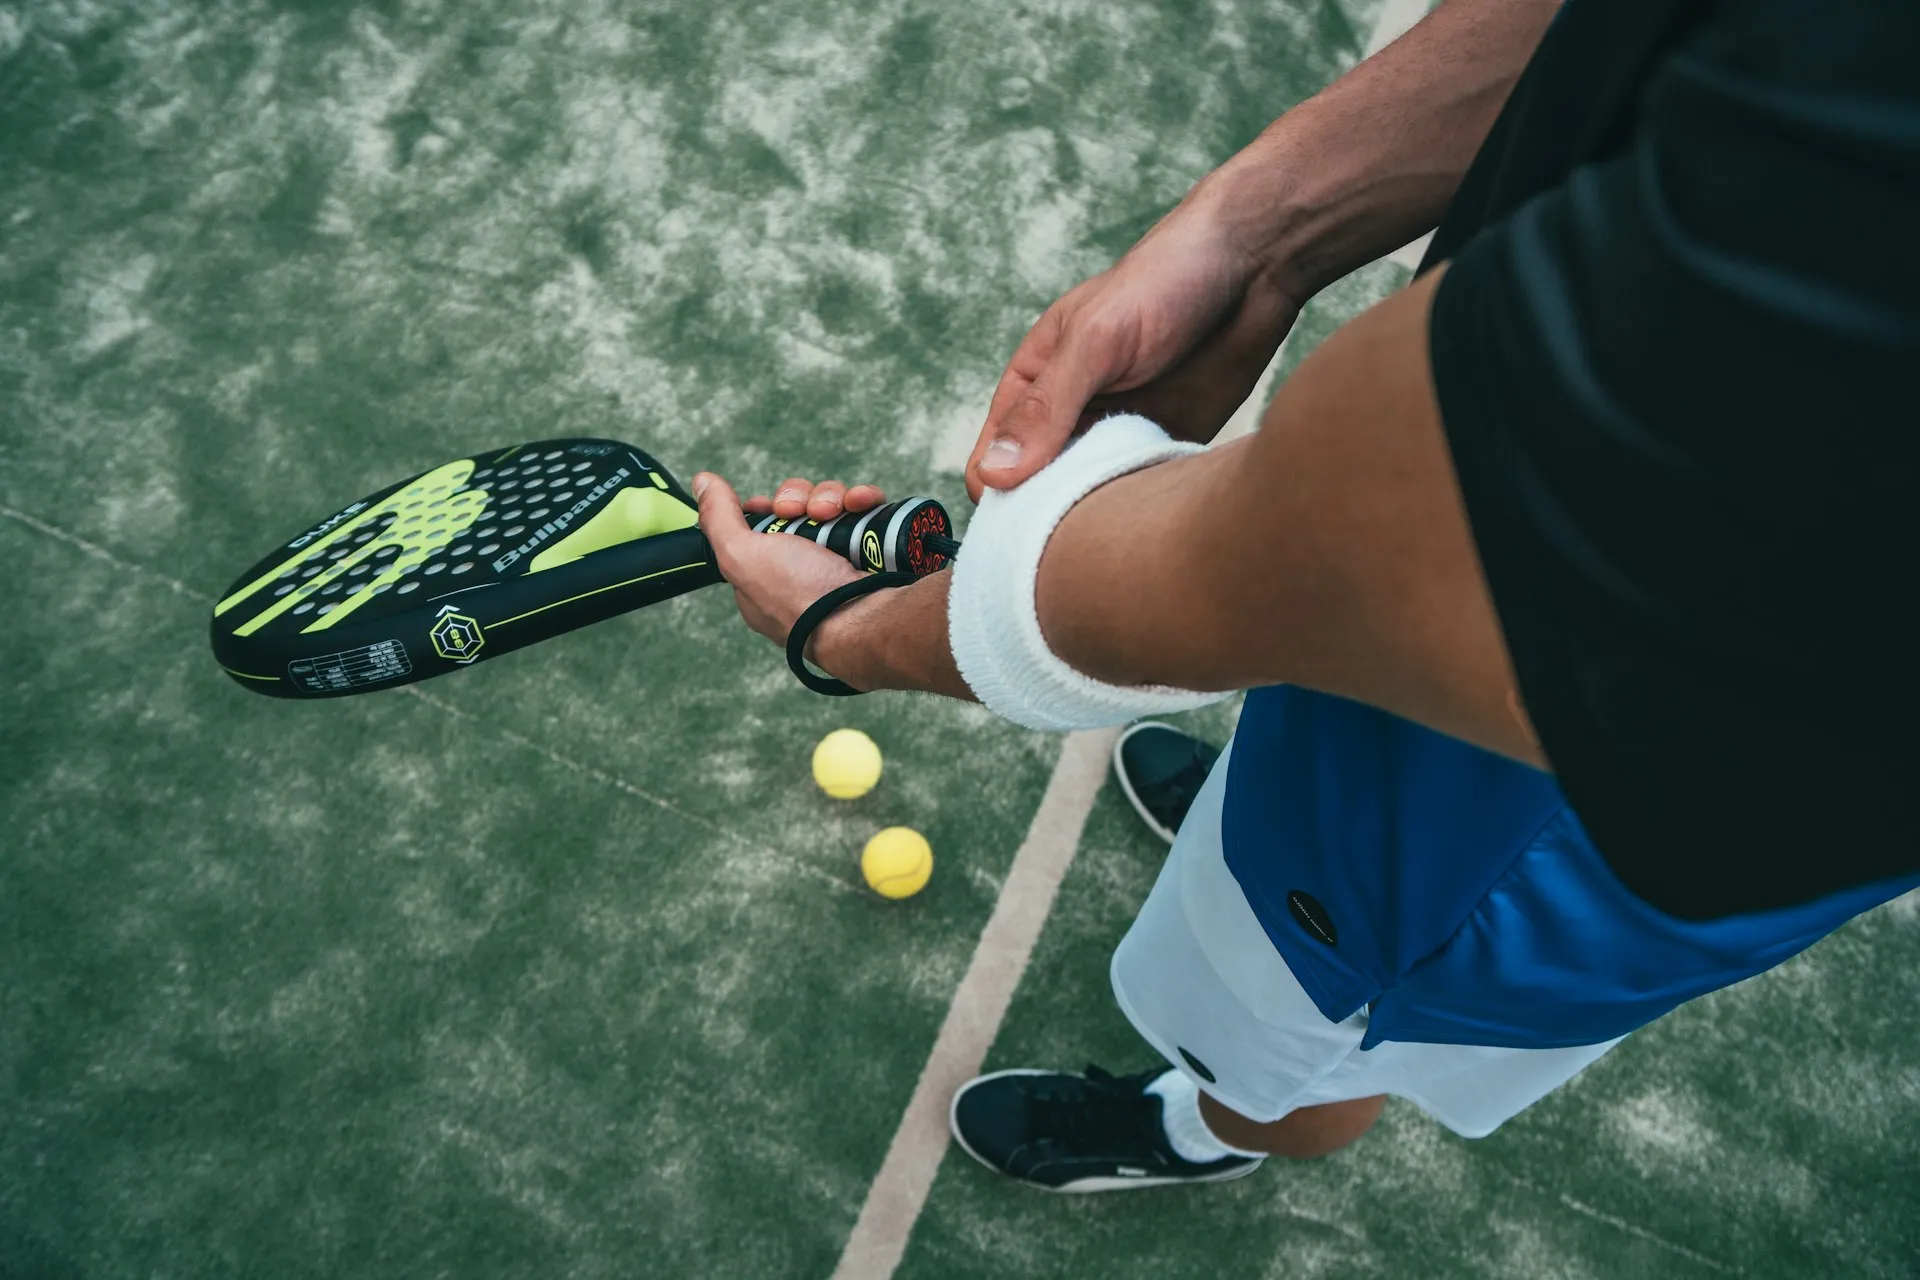
A padel racket. Most clubs offer racket rental for your first session — a great option to try the sport without spending upfront. A padel racket is shorter than a tennis racket, has no strings, and is made of composite materials with a perforated surface.
Balls. Padel balls look similar to tennis balls but have slightly lower pressure, resulting in a lower bounce. Usually balls are provided by the club or split among players.
Sports shoes. Ideally, specialized padel shoes with a herringbone sole that provides excellent grip on artificial grass. For your first few sessions, any indoor court shoes with non-slip soles will work. Avoid running shoes — they lack lateral support.
Comfortable sportswear. No special requirements — shorts and a t-shirt or tracksuit depending on the weather.
[EXPERT OPINION] For beginners, round-shaped or teardrop-shaped rackets with a soft EVA core are the best choice — they offer more control and are forgiving on off-center hits. Do not spend more than 50-80 EUR on your first racket — at the beginner level, the difference between a budget and premium model is barely noticeable. For more details, see How to Choose a Racket.
Where to Find a Court
Padel is growing rapidly, and courts are appearing in more and more cities:
Dedicated padel clubs — the best option. They offer coaching, equipment rental, and a community of players.
Multi-sport centers — many tennis clubs are adding padel courts to their facilities.
Booking apps. Services like Playtomic, Matchi, and local alternatives let you find nearby courts, book time slots, and even find playing partners.
If there is no padel court in your area yet, keep an eye out — the number of facilities is growing every year worldwide.
First Steps: Where to Begin
The most common mistake beginners make is jumping straight into a match. Instead, we recommend starting with structured instruction:
Group lesson — the optimal starting point. A coach will explain the basic rules, show you the grip, stance, and fundamental strokes. In a group of 4-8 people, you will be among fellow beginners, which removes the psychological barrier.
Private lesson — if you want faster progress or feel self-conscious in a group. Typically, 2-3 private sessions are enough to learn the basics.
Playing with an experienced friend — if your friend is willing to patiently show you the ropes, this works too, but a coach is more efficient.
After 3-5 training sessions, you can start playing full matches.
Basic Skills to Learn First
Padel is easier to pick up than tennis, but the foundation is built right at the beginning:
Grip. The continental grip is the standard in padel. Hold the racket as if you are shaking hands with it. This grip allows you to execute most shots without switching.
Ready position. Face the net, feet shoulder-width apart, knees slightly bent, racket held in front of you at chest level. From this position, you can react quickly to any ball.
Forehand and backhand. The two fundamental strokes from the right and left sides. In padel, the swing is shorter than in tennis, and control matters more than power.
Serve. In padel, the serve is underhand — the ball must bounce on the ground before being struck with the racket. This is significantly easier than a tennis serve and is accessible from the very first lesson.
Playing off the walls. The unique feature of padel — the ball can bounce off the glass walls. Learning to read wall bounces is a key skill that develops with practice.
Padel is a social and partner-based sport. Knowing the etiquette will help you integrate into the community faster:
Communicate with your partner. Padel is a team game (2 vs 2). Agree on who takes the ball, encourage each other. Calling “Mine!” or “Yours!” is standard practice.
Collect the balls. After each point, gather the balls on your side and pass them to the serving team. Do not hit balls across the court — roll or toss them gently.
Switch sides. Players change sides after every odd game (after the 1st, 3rd, 5th, etc.).
Respect the time. Arrive on time — court time is usually limited. If you are running late, let the others know.
Be friendly. Padel is valued for its welcoming atmosphere. Do not criticize your partner for mistakes, especially when playing with a beginner.
How Much Does It Cost
Approximate costs to help you plan your budget:
Expense
Approximate Cost
Court rental (1 hour)
20-60 EUR (for 4 players)
Racket rental
3-5 EUR per session
Buying a racket (beginner level)
30-80 EUR
Balls (can of 3)
5-10 EUR
Group lesson
10-25 EUR per person
Private lesson
30-60 EUR (45-60 min)
Padel shoes
50-150 EUR
[UNVERIFIED] Prices can vary significantly depending on the region and the level of the club. Data is approximate as of early 2026 for Western Europe.
Per player, court rental works out to 5-15 EUR per hour — comparable to other sports.
Tips for Tennis Players
If you already play tennis, you have a significant advantage — coordination, ball sense, and an understanding of racket sports. But there are key differences to adapt to:
Shorten your swing. In padel, the walls limit space and the racket is shorter — a long tennis swing will get in the way.
Underhand serve. Forget about the powerful overhead serve — padel only allows underhand serving. Focus on accuracy and spin instead.
Walls are your friend. A ball heading toward the wall is not out — it is a continuation of the rally. Learn to wait for the wall bounce instead of trying to intercept every ball in the air.
Net position. In padel, the winning position is at the net, not at the baseline. Aim to take a position closer to the net together with your partner.
Less power, more tactics. Padel is a placement game, not a power game. A well-placed lob is more effective than a powerful smash.
Tips for Complete Non-Athletes
Never played a racket sport before? That is not a problem:
Padel is made for everyone. The court is smaller than a tennis court, the serve is easier, and the walls keep the ball in play longer. Rallies are longer — you have more time to react.
Start with coordination. In your first sessions, the coach will work on making contact with the ball and basic movement. Do not aim for complex shots right away.
Do not compare yourself to others. Everyone progresses at their own pace. Many beginners play comfortably after 5-10 sessions.
Build fitness gradually. Padel is a good cardio workout. If you have not exercised in a while, start with 30-40 minutes on the court and increase gradually.
Warm up. Before playing, spend 5-10 minutes on a light warm-up — joint mobility, light jogging, stretching. This will reduce the risk of injury.
Building a Regular Playing Routine
Consistency matters more than intensity. Here is how to make padel part of your routine:
Play 2-3 times per week. This is enough for steady progress. Once a week is the minimum to retain skills.
Find regular partners. Join your club’s chat group, connect through social media groups, or use apps to find players.
Alternate training and matches. One coached session plus one or two free play sessions per week is the ideal formula for beginners.
Track your progress. Pay attention to specific skills: serve consistency, shot accuracy, confidence at the net.
Join the community. Participate in amateur tournaments and social games (americano format) — this accelerates improvement and makes the sport part of your social life.
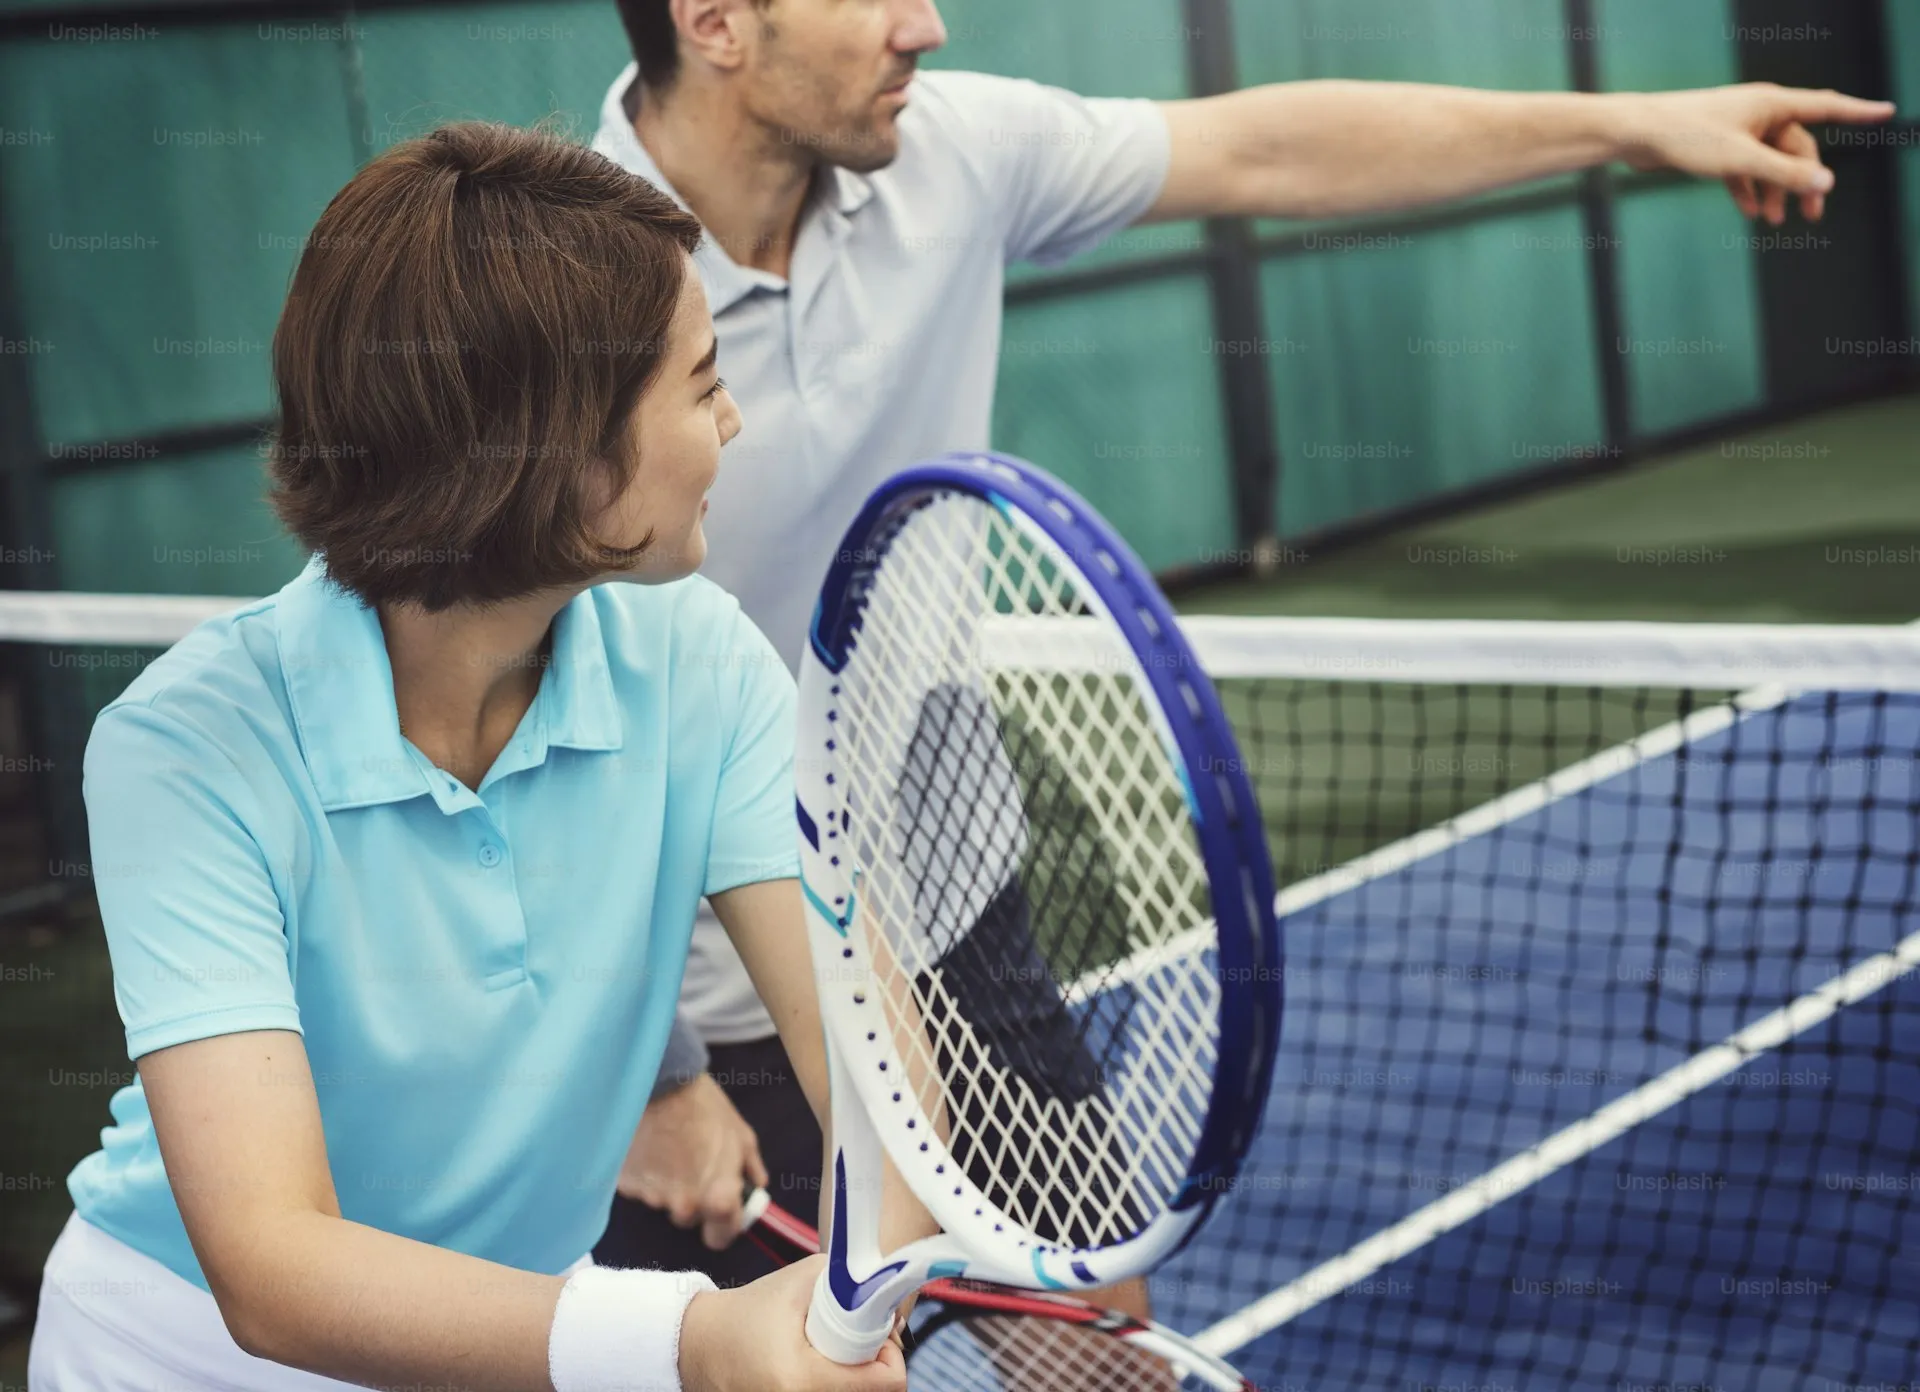
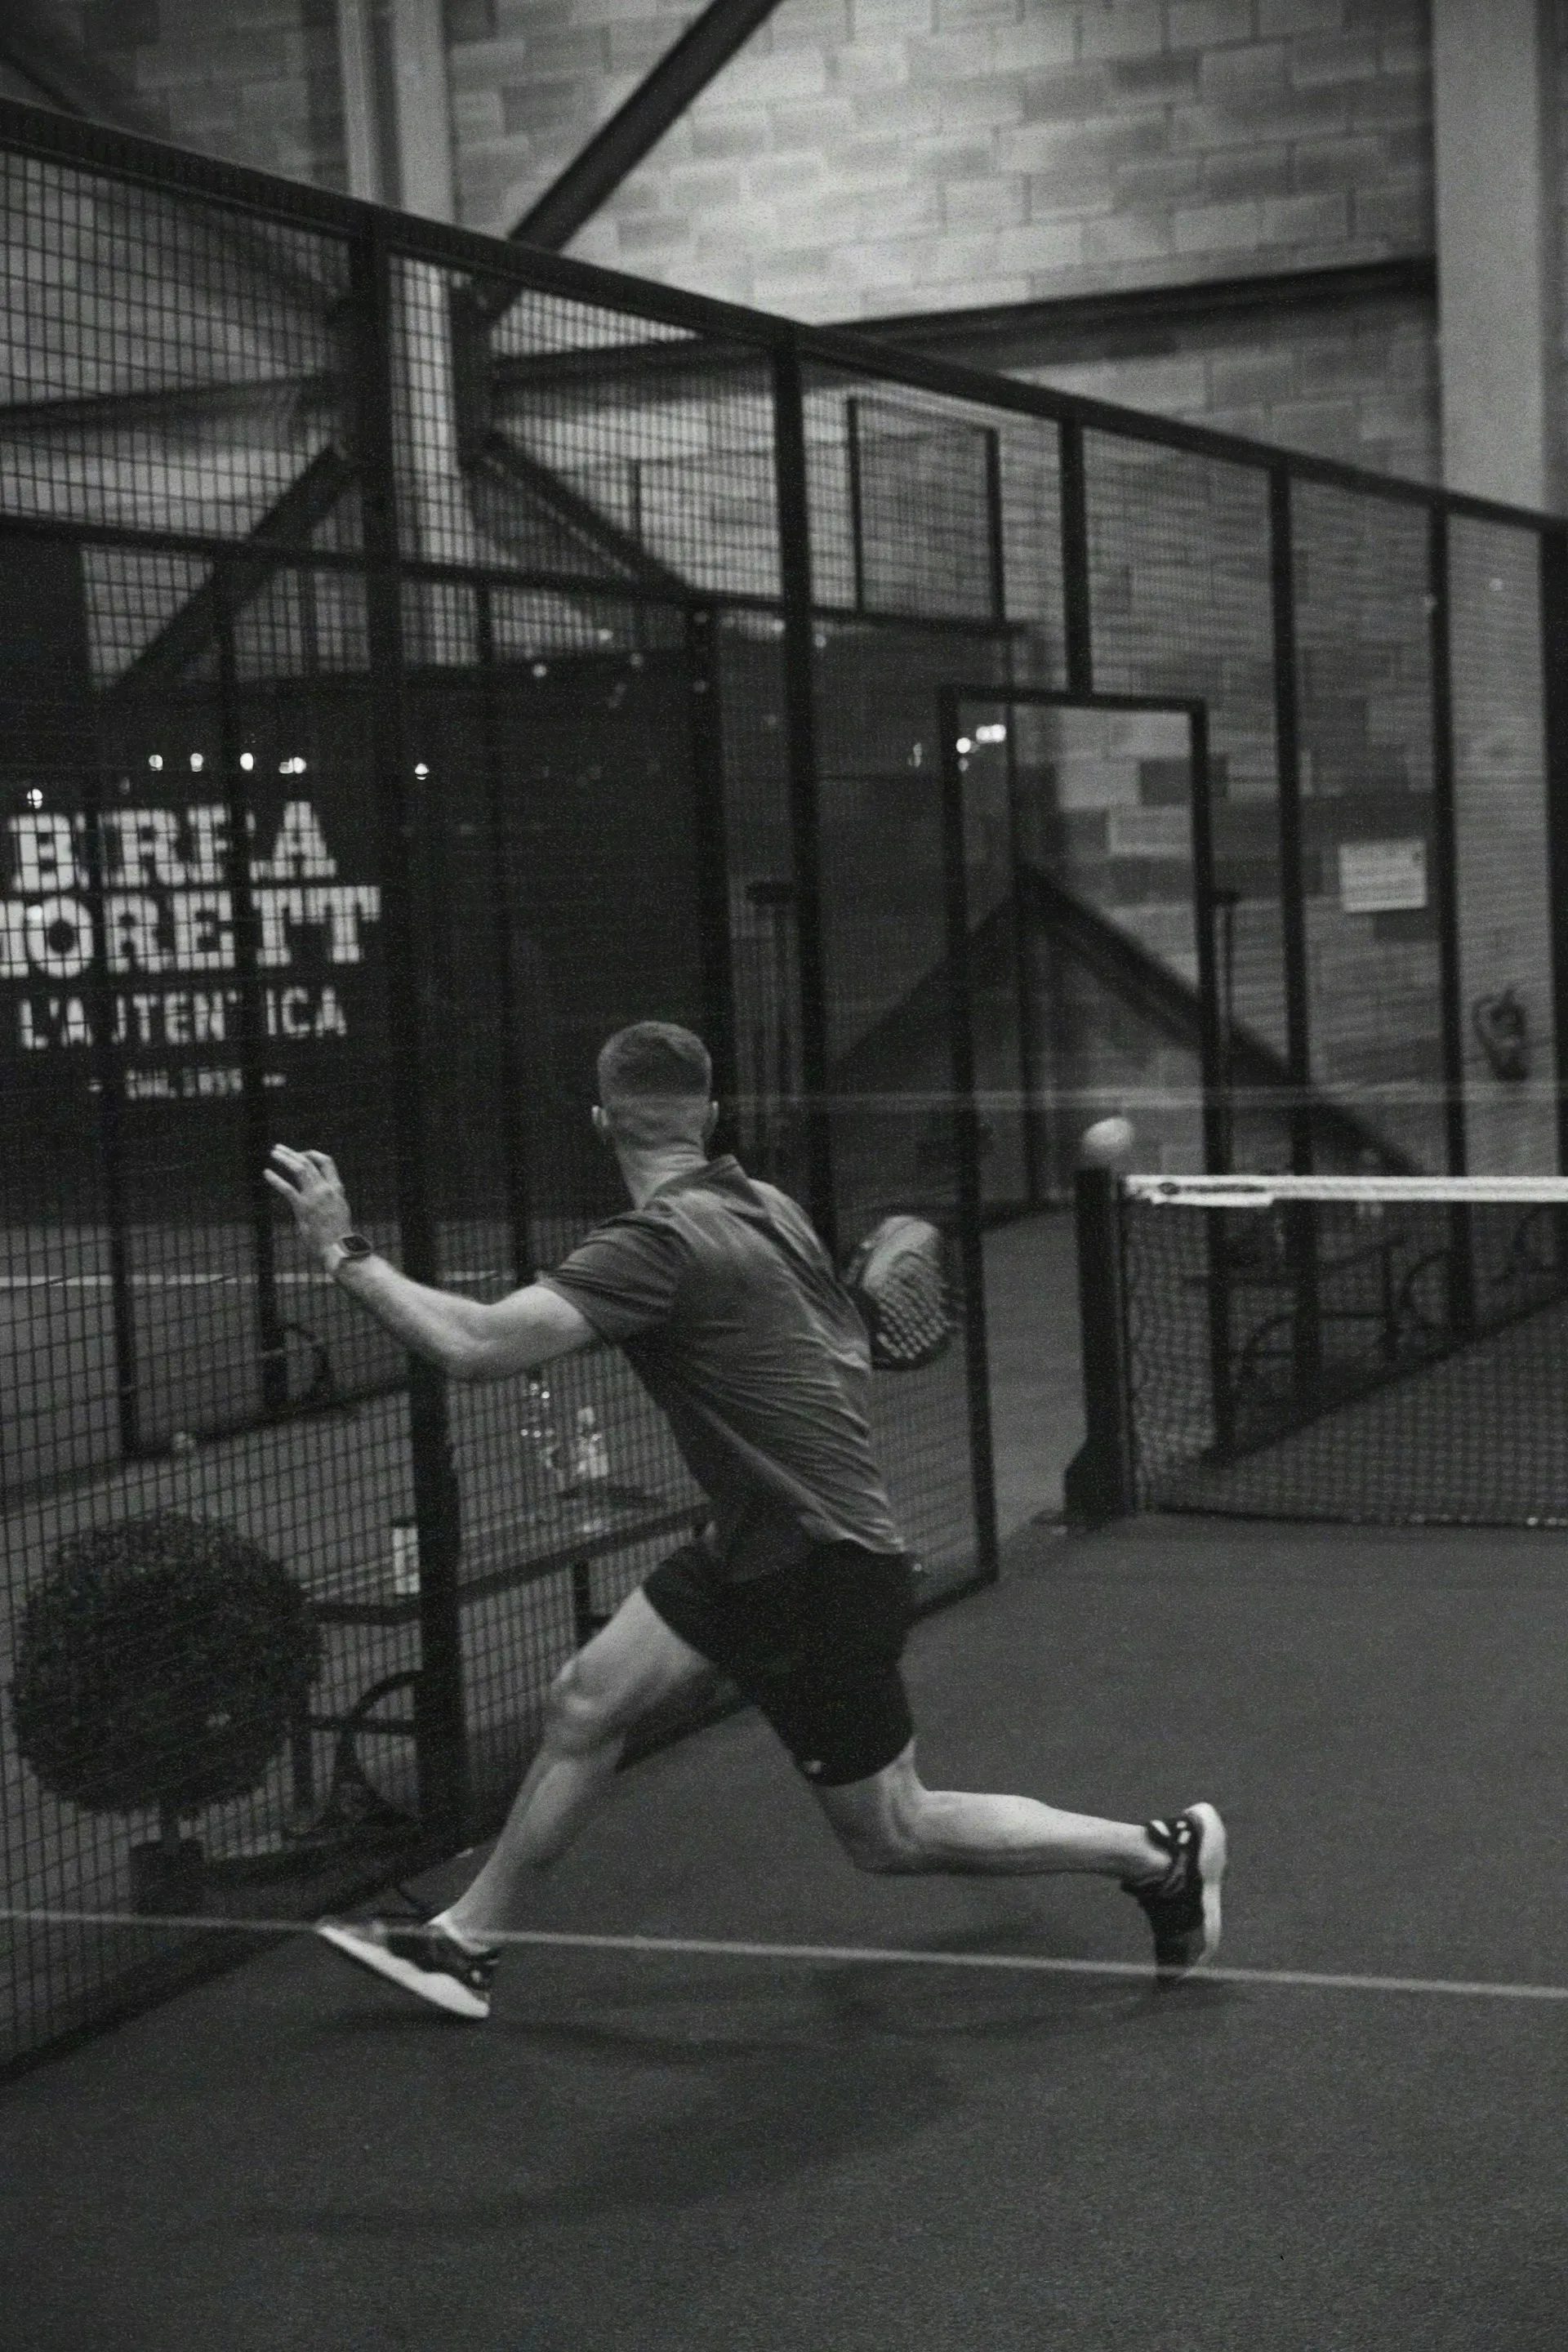
Padel is a friendly and dynamic sport, but it has its own unique characteristics that are important to know before your first match. These ten rules will help you feel confident on court from your very first game.
Photo: Oskar Hagberg / UnsplashPhoto: Oskar Hagberg / Unsplash / Unsplash License
1. Padel is always a doubles game
There are always four players on court: two versus two. Unlike tennis, padel has no singles format — the game is designed as a team sport. This means you always need a partner, and teamwork within your pair is one of the key skills to develop. If you show up with just one friend, simply find another pair — this is part of padel culture, and meeting new people on court happens easily and naturally.
2. The serve is underhand
The padel serve is fundamentally different from a tennis serve. You must hit the ball with your racket below waist level, after bouncing it on the ground. The serve is played diagonally — from the right service box to the opponent’s left service box (and vice versa). This rule levels the playing field: a powerful overhead serve offers no advantage here, and a beginner can comfortably return the serve of an experienced player.
3. The ball must bounce on the floor first
Before the ball touches a wall, it must first bounce on the floor on your side of the court. If the ball hits the wall without bouncing on the floor first, the point is lost. This rule applies to receiving: you cannot play a ball that flies directly into the wall without touching the floor. After the ball bounces off the floor, it may then hit the wall, and you can play it off the wall.
4. The walls are part of the game
This is arguably the defining feature of padel. After the ball has bounced off the floor, it can hit the glass wall — and you have every right to play it after such a rebound. In fact, the ability to read wall bounces and play the ball off them is one of the most important skills in padel. Do not be afraid of the walls: over time, you will learn to use them as your ally.
5. Scoring works just like tennis
The scoring system in padel is identical to tennis: 15, 30, 40, game. Six games won (with a two-game lead) make a set. A match is played as best of three sets. At 40:40 (deuce), you need to win two consecutive points, although some amateur tournaments use the “golden point” — a single deciding point. If you are familiar with tennis scoring, you will adapt in minutes.
6. The ball can leave the court — and play continues
The padel court is enclosed by walls and metal fencing, but above the fence on the sides there are open sections. The ball can fly out through them beyond the court boundaries. In this case, play does not stop: you have the right to run outside the court through the side door and return the ball, as long as it has not bounced on the ground twice. These rallies are among the most spectacular moments in padel.
7. You cannot touch the net or cross to the opponent’s side
As in tennis, the net divides the court and is untouchable. You cannot touch the net with your racket, body, or clothing. You are also prohibited from reaching over to the opponent’s side with your racket when hitting the ball. If the ball clips the net during a serve but lands in the correct service box, the serve is replayed (a let). This rule rarely causes confusion, but it is important to remember during fast exchanges at the net.
8. Communication with your partner is essential
Padel is a team sport, and communication within your pair is critically important. Before every shot, make sure to let your partner know who is taking the ball: call “mine!” or “yours!” This is especially important for balls hit down the middle of the court, where zones of responsibility overlap. [EXPERT OPINION] Experienced pairs agree on strategy before the match and constantly encourage each other. Even a simple “nice shot!” after your partner’s good play strengthens team spirit.
9. Return to your position after every shot
In padel, positioning matters more than power. After each rally, return to your position and maintain your formation with your partner. The fundamental principle: both players in a pair move in sync, as if connected by an invisible rope. If one moves forward to the net, the other follows. If one retreats, the partner retreats as well. This allows you to cover the entire court and avoid leaving gaps in your defence.
10. Have fun — padel was made for it
Padel is one of the most social sports in the world. It was conceived as a game for friends and family, and that spirit endures to this day. Do not fixate on results, especially in your first matches. Mistakes are a natural part of learning. Laugh at your mishits, praise great shots (yours and everyone else’s), and get to know your opponents after the game. It is precisely this atmosphere of friendliness and enjoyment that makes padel one of the fastest-growing sports on the planet.
Summary
You do not need to memorise all the rules at once — they sink in quickly through playing. The essentials for your first matches: serve underhand, let the ball bounce on the floor before the wall, communicate with your partner, and remember that the walls are your friends, not obstacles. Everything else will come with practice.
Padel is one of the most social sports in the world, and on-court etiquette plays a role no less important than shot technique. Knowing the unwritten rules of behaviour will help you integrate quickly into the community and get the most enjoyment out of every match.
Good manners in padel begin well before the first rally.
Punctuality. Arrive at the court 5-10 minutes before your booked time. Courts are typically rented for 90-minute slots, and one player’s tardiness shortens the playing time for all four.
Booking responsibility. If you have reserved a court but cannot attend, cancel well in advance. At popular clubs, available slots are scarce, and an empty booked court is disrespectful to other players waiting to play.
Balls. Bring new or reasonably fresh balls. The common practice: each pair brings one can of balls, or costs are split evenly. Playing with flat, depressurised balls is not only uncomfortable but detracts from the experience for everyone.
Attire. Wear proper sports clothing and shoes with court-appropriate soles (typically herringbone or “omni” tread). Shoes that leave black marks can damage the surface and will rightly upset club owners.
The Warm-Up
Before the match, a joint warm-up of 5-10 minutes is customary. The warm-up is preparation, not competition.
Control your shots. Warm-up rallies should be played at a comfortable pace. Do not hit smashes or try to “kill” the ball – the goal is for all four players to get warmed up.
Play to your partner, not past them. Direct the ball so it is convenient to return, not into corners and walls.
Take turns. Give every player the chance to practise shots from both sides: forehand, backhand, volley, lob.
Finish on time. When everyone is ready, suggest starting the match. Do not let the warm-up eat into playing time.
During the Match
Amateur padel is almost always played without a referee. This means that honesty and self-regulation rest entirely on the players’ shoulders.
Honest line calls. If a ball lands on or near the line and you are unsure, give the point to your opponent. In padel, the accepted principle is: “If in doubt, the ball is in.” This is especially important for balls landing in the service box.
Disputed calls. If the sides cannot agree, the standard practice is to replay the point. Do not turn a disagreement into a conflict: one point is not worth spoiling the mood of four people.
Announcing the score. The server calls out the score before each serve. This prevents confusion and shows respect for the opponents.
Pace of play. Do not drag out pauses between rallies. If the ball has gone far, quickly get a new one. Constant delays frustrate everyone involved.
Do not distract opponents. Avoid loud conversations, movements, or gestures while an opponent is striking the ball. This is considered a serious breach of etiquette.
Support your partner. An encouraging word after an error matters more than congratulations after a winner. “No worries, next one!” is a phrase you will hear on every padel court in the world.
Do not show frustration. Eye-rolling, heavy sighs, and demonstrative gestures after your partner’s miss are among the worst etiquette violations in padel. Your partner is already disappointed; do not make it worse.
Discuss tactics constructively. If you want to suggest a change in strategy, do so at a changeover, calmly and respectfully: “Maybe we could try more lobs?” rather than “You always hit it into the net!”
Adjust to your partner’s level. If you are playing with a less experienced partner, calibrate your expectations accordingly. Patience and encouragement in this situation are your responsibility.
Neighbouring Courts
Padel clubs typically have several courts situated close together. Mutual respect between neighbouring courts is an important part of the culture.
Do not interfere with other matches. If a ball from your court lands on an adjacent court, wait until their rally ends before asking for it back.
Return balls politely. If a ball from another court comes to you, pick it up and toss or roll it back gently. Do not smash it back at full force – that is not a display of skill, it is rude.
Mind the volume. Emotions on court are natural, but constant shouting and loud arguments disturb neighbouring courts.
Walk behind courts, not in front. If you need to pass an occupied court, walk behind the back wall rather than along the net to avoid distracting the players.
After the Match
How you finish the game is just as important a part of etiquette as the game itself.
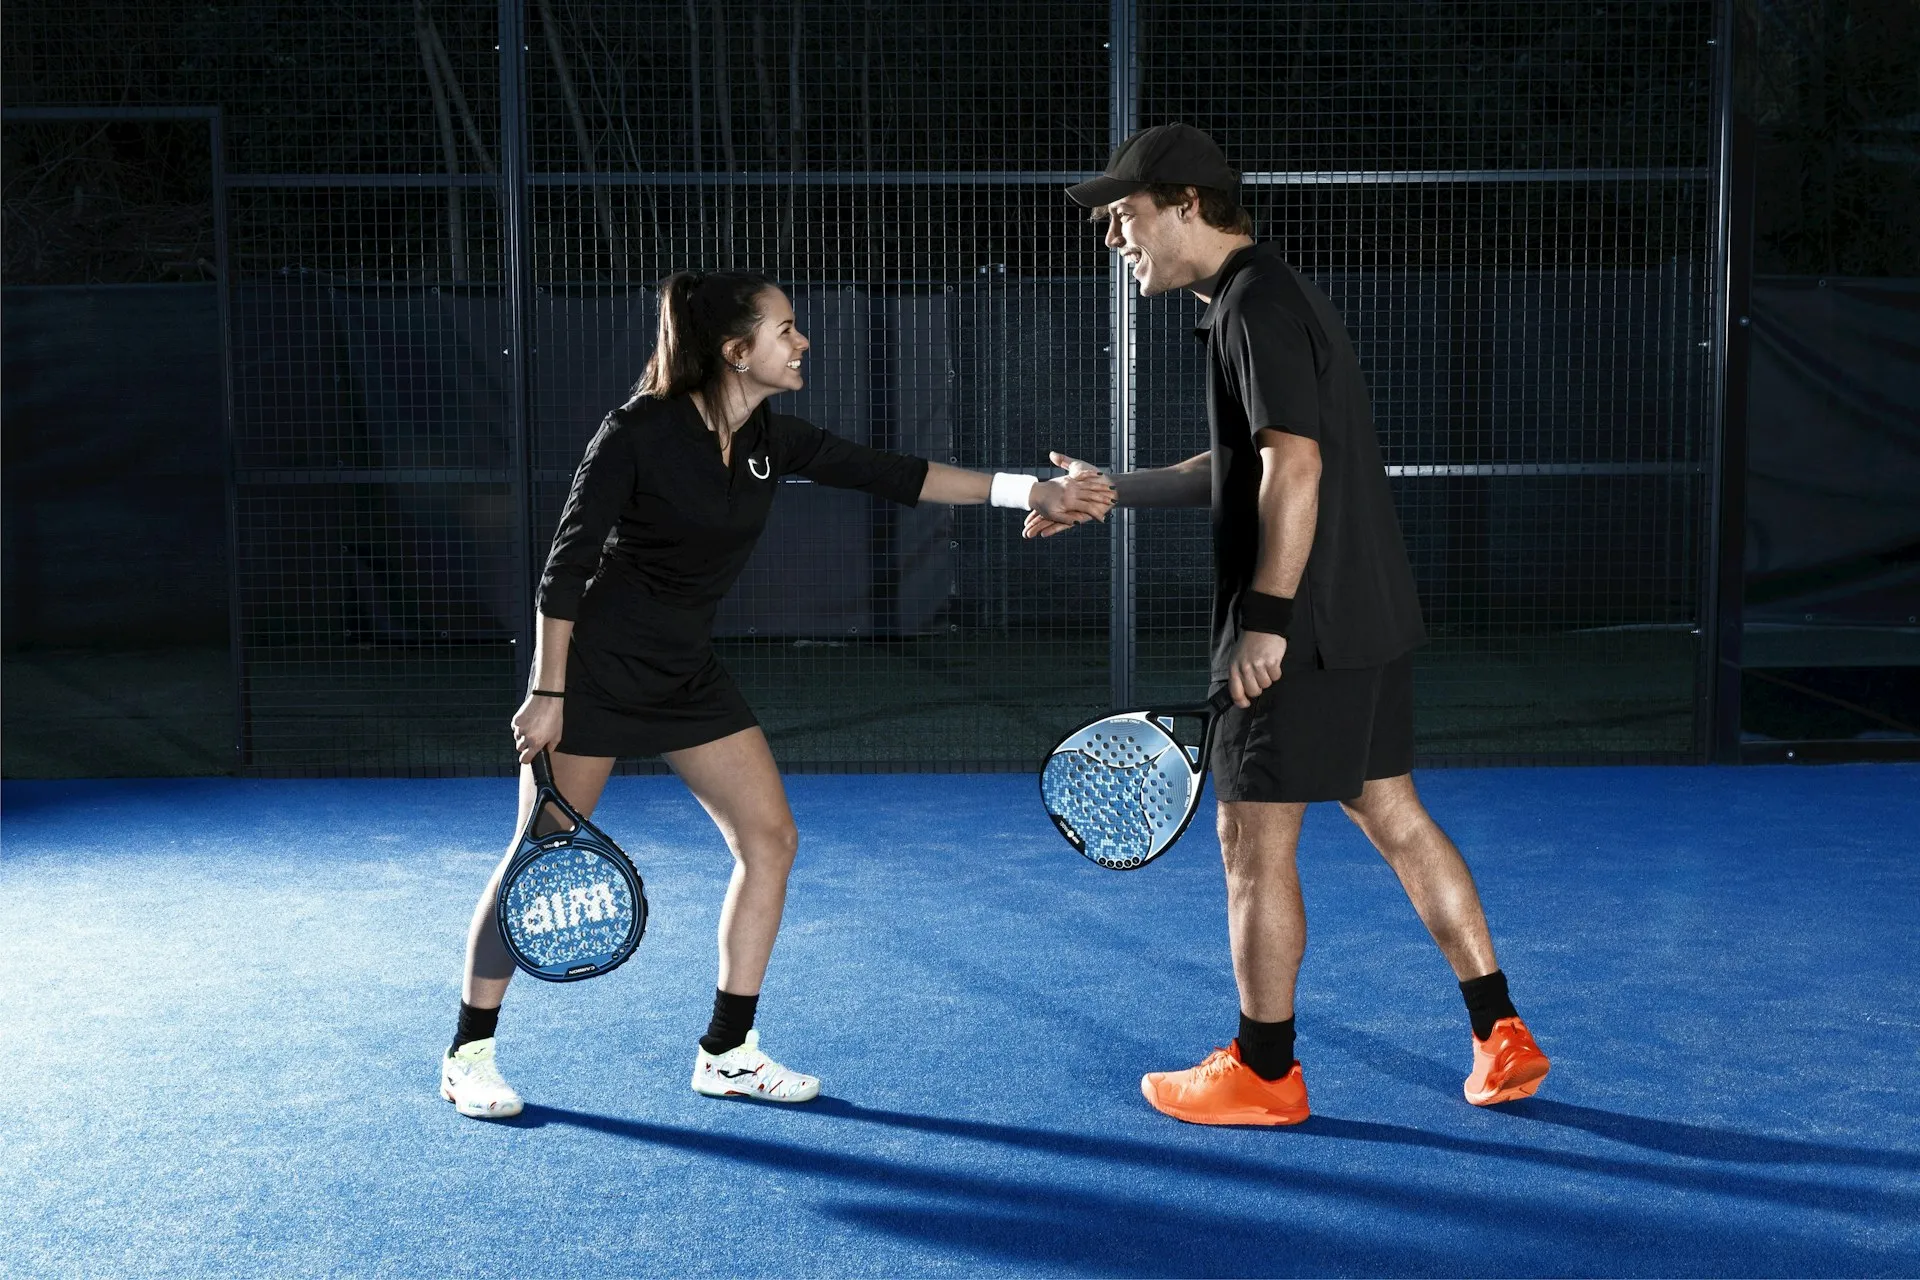
Handshake. At the end of the match, all four players approach the net and shake hands. This is a universal tradition inherited from tennis and obligatory in padel.
Say thank you. Thank your opponents for the game, regardless of the result. A simple “thanks for the match” or “good game” is the standard courtesy.
Score discussion. If you lost, do not make excuses. If you won, do not gloat. A brief exchange of impressions – “Great lob in the third set!” – is appropriate and welcome.
Clean up the court. Collect all the balls, pick up your water bottles and any rubbish. Leave the court in the condition you would want to find it.
The Social Culture of Padel
Padel is more than a sport. In many countries, especially Spain, Argentina, and Portugal, padel is an integral part of social life.
After a match, it is customary to spend time together: have a coffee or a beer at the club bar, discuss the game, and arrange the next session. This tradition is so deeply rooted that many clubs purposefully design lounge areas with a bar and terrace.
The padel court is a place where friendships and business connections are made. Many venues have messenger groups where players find partners and organise matches. Do not hesitate to join: openness to meeting new people is one of the core values of the padel community.
[EXPERT OPINION] It is precisely this social dimension that makes padel one of the fastest-growing sports in the world. People come for the sport and stay for the community.
“What level am I?” is one of the most frequent questions on padel forums. An objective assessment helps you find suitable partners, choose the right tournament, and understand what to work on.
Not sure where you stand? Take this 10-question quiz to get an approximate assessment of your level:
Find Your Padel Level
1 / 10
Why Know Your Level
Finding partners. Playing with players of your level is the fastest path to improvement. Opponents who are too strong demoralise you; those who are too weak offer no challenge.
Tournaments.Tournament formats require a stated level for category placement.
Training planning. Each level has its focus areas: at 2.0 there is no point working on the vibora, and at 5.0 there is no need to drill basic grip technique.
The 1.0–7.0 Scale
The most widely used system, based on the NTRP (National Tennis Rating Program) adapted for padel:
Tactical mastery: adapts strategy during the match
All shots at the highest level
Capable of competing at regional tournaments
Elite and Professional (6.0–7.0)
6.0–6.5 — Elite:
Regularly competes in national tournaments
All aspects of the game at the highest level
7.0 — Professional:
Competes in international tournaments (Premier Padel, FIP Tour)
Self-Assessment Checklist
Answer “yes” or “no” to each question. The first question you answer “no” to is approximately your current level:
Skill
Level
I can serve into the service box 7 out of 10 times
1.5+
I consistently keep the ball in play (forehand)
2.0+
I play the backhand with control
2.5+
I can volley at the net without panic
3.0+
I read rebounds off the back wall
3.5+
I use the lob as a tactical weapon
3.5+
I can execute a bandeja after a lob
4.0+
I control the pace of the rally
4.5+
I adapt tactics to the opponent
5.0+
I command the vibora, rulo, and other advanced shots
5.5+
Rating Platforms
Playtomic
The most popular court booking platform automatically calculates ratings:
Initial level determined by a registration questionnaire
Adjusted based on match results
Beating a higher-rated opponent raises your rating
NPRP (National Padel Rating Program)
A self-assessment system based on skill descriptions:
8 categories from Exploratory (1.0) to Professional (7.0)
Detailed skill descriptions for each level
Used in a number of clubs and leagues
[EXPERT OPINION] Do not fixate on numbers. A rating is a tool for finding suitable partners and tournaments, not a measure of your worth as a player. Play for enjoyment and progress will follow.
From Tennis to Padel: 10 Habits That Hold You Back
★ Beginner
4 min read
Last updated: 08.03.2026
Tennis experience is both a blessing and a curse when transitioning to padel. Reaction speed, coordination, and ball-reading help, but habits around swing length, power, and mentality work against you.
Padel looks similar to tennis: a racket, a net, a ball. But it is a different sport with a different philosophy. In tennis, the player who hits harder and more precisely wins. In padel, the pair that makes fewer errors and controls court position wins.
The problem: tennis habits have been reinforced over years. Your brain automatically launches familiar movements — long backswing, powerful shot, attempting to pass the opponent. In padel, all of this works against you.
10 Habits You Need to Change
1. Overpowering Every Shot
Problem: In tennis, a powerful shot wins the rally. In padel, a hard shot bounces off the glass and returns to your opponent at a comfortable height.
Solution: Aim for placement, not power. A soft shot at the opponent’s feet is more effective than a hard drive.
2. Ignoring the Walls
Problem: Tennis players try to hit the ball before it touches the wall. In padel, the wall is your friend: it gives you extra time.
Solution: If the ball is heading for the wall — let it bounce. Step back 1–2 metres and play after the rebound.
3. Tennis Grip
Problem: The eastern or semi-western grip limits versatility. It is awkward for volleys, the bandeja, and wall play.
Solution: Switch to the continental grip — the “hammer.” It covers 90% of situations in padel.
4. Long Backswing
Problem: On a 10×20 m court with four players, there is no time for a big swing. The ball will be past you before you finish your backswing.
Solution: Short, compact racket movements. The volley — the most frequent shot in padel — is executed with minimal backswing.
5. Attempting Passing Shots
Problem: In tennis, a passing shot wins the point. In padel, the court is small and the walls limit angles — passing shots are nearly impossible.
Solution: Use the lob to push opponents away from the net. The lob is not a weak shot — it is the primary tactical weapon in padel.
6. The “Domination” Mentality
Problem: In tennis, you hold the initiative until the end of the rally. In padel, both pairs switch between attack and defence multiple times in a single rally.
Solution: Patience. Work the rally, wait for the right ball to finish the point. Do not try to end every rally with one shot.
7. Two-Handed Backhand
Problem: In padel, space is limited; the ball often arrives close to your body and near the wall. A two-handed backhand is awkward in these conditions.
Solution: Develop a one-handed backhand with the continental grip. It is more compact and allows you to play in tight spaces.
8. Powerful Serve
Problem: In padel, the serve is hit underhand; the ball must bounce on the floor before being struck. An overhead tennis serve is not allowed under the rules.
Solution: Work on accuracy and placement of your serve. The padel serve starts the rally — it is not an ace weapon.
9. Standing Behind the Baseline
Problem: In tennis, the baseline is the default position. In padel, that is the defensive zone, not the attacking one. The pair controlling the net dominates.
Solution: Aim for the net position. Play from defence to attack: chiquita or lob → move to the net.
10. Playing as an Individual
Problem: Tennis singles is an individual sport. Padel is exclusively a doubles game. If you do not communicate with your partner, you lose.
Solution: Talk on court: “Mine!”, “Yours!”, “Switch!”. Move with your partner as if connected by an invisible rope.
What Tennis Skills Help
Not everything from tennis is useless. These skills accelerate your progress:
Ball reading — anticipating trajectory from the opponent’s swing
Footwork — lateral movement, split-step
Touch — controlling power and direction
Net reflexes — reactions for volleys
Competitive experience — performing under pressure
[EXPERT OPINION] A 5.0-rated tennis player can expect a starting level of 2.5–3.5 in padel. Tennis experience accelerates progress but does not replace padel-specific technique training.
Adaptation Plan
Weeks 1–2: Forget about power. Every shot — soft and controlled. Goal: keep the ball in play.
Weeks 3–4: Master the continental grip and a compact swing. Practise volleys.
Weeks 5–6: Wall work. Spend 15 minutes each session observing rebounds without hitting.
Weeks 7–8: Tactics. The lob as a weapon, the chiquita for net approaches, and partner communication.
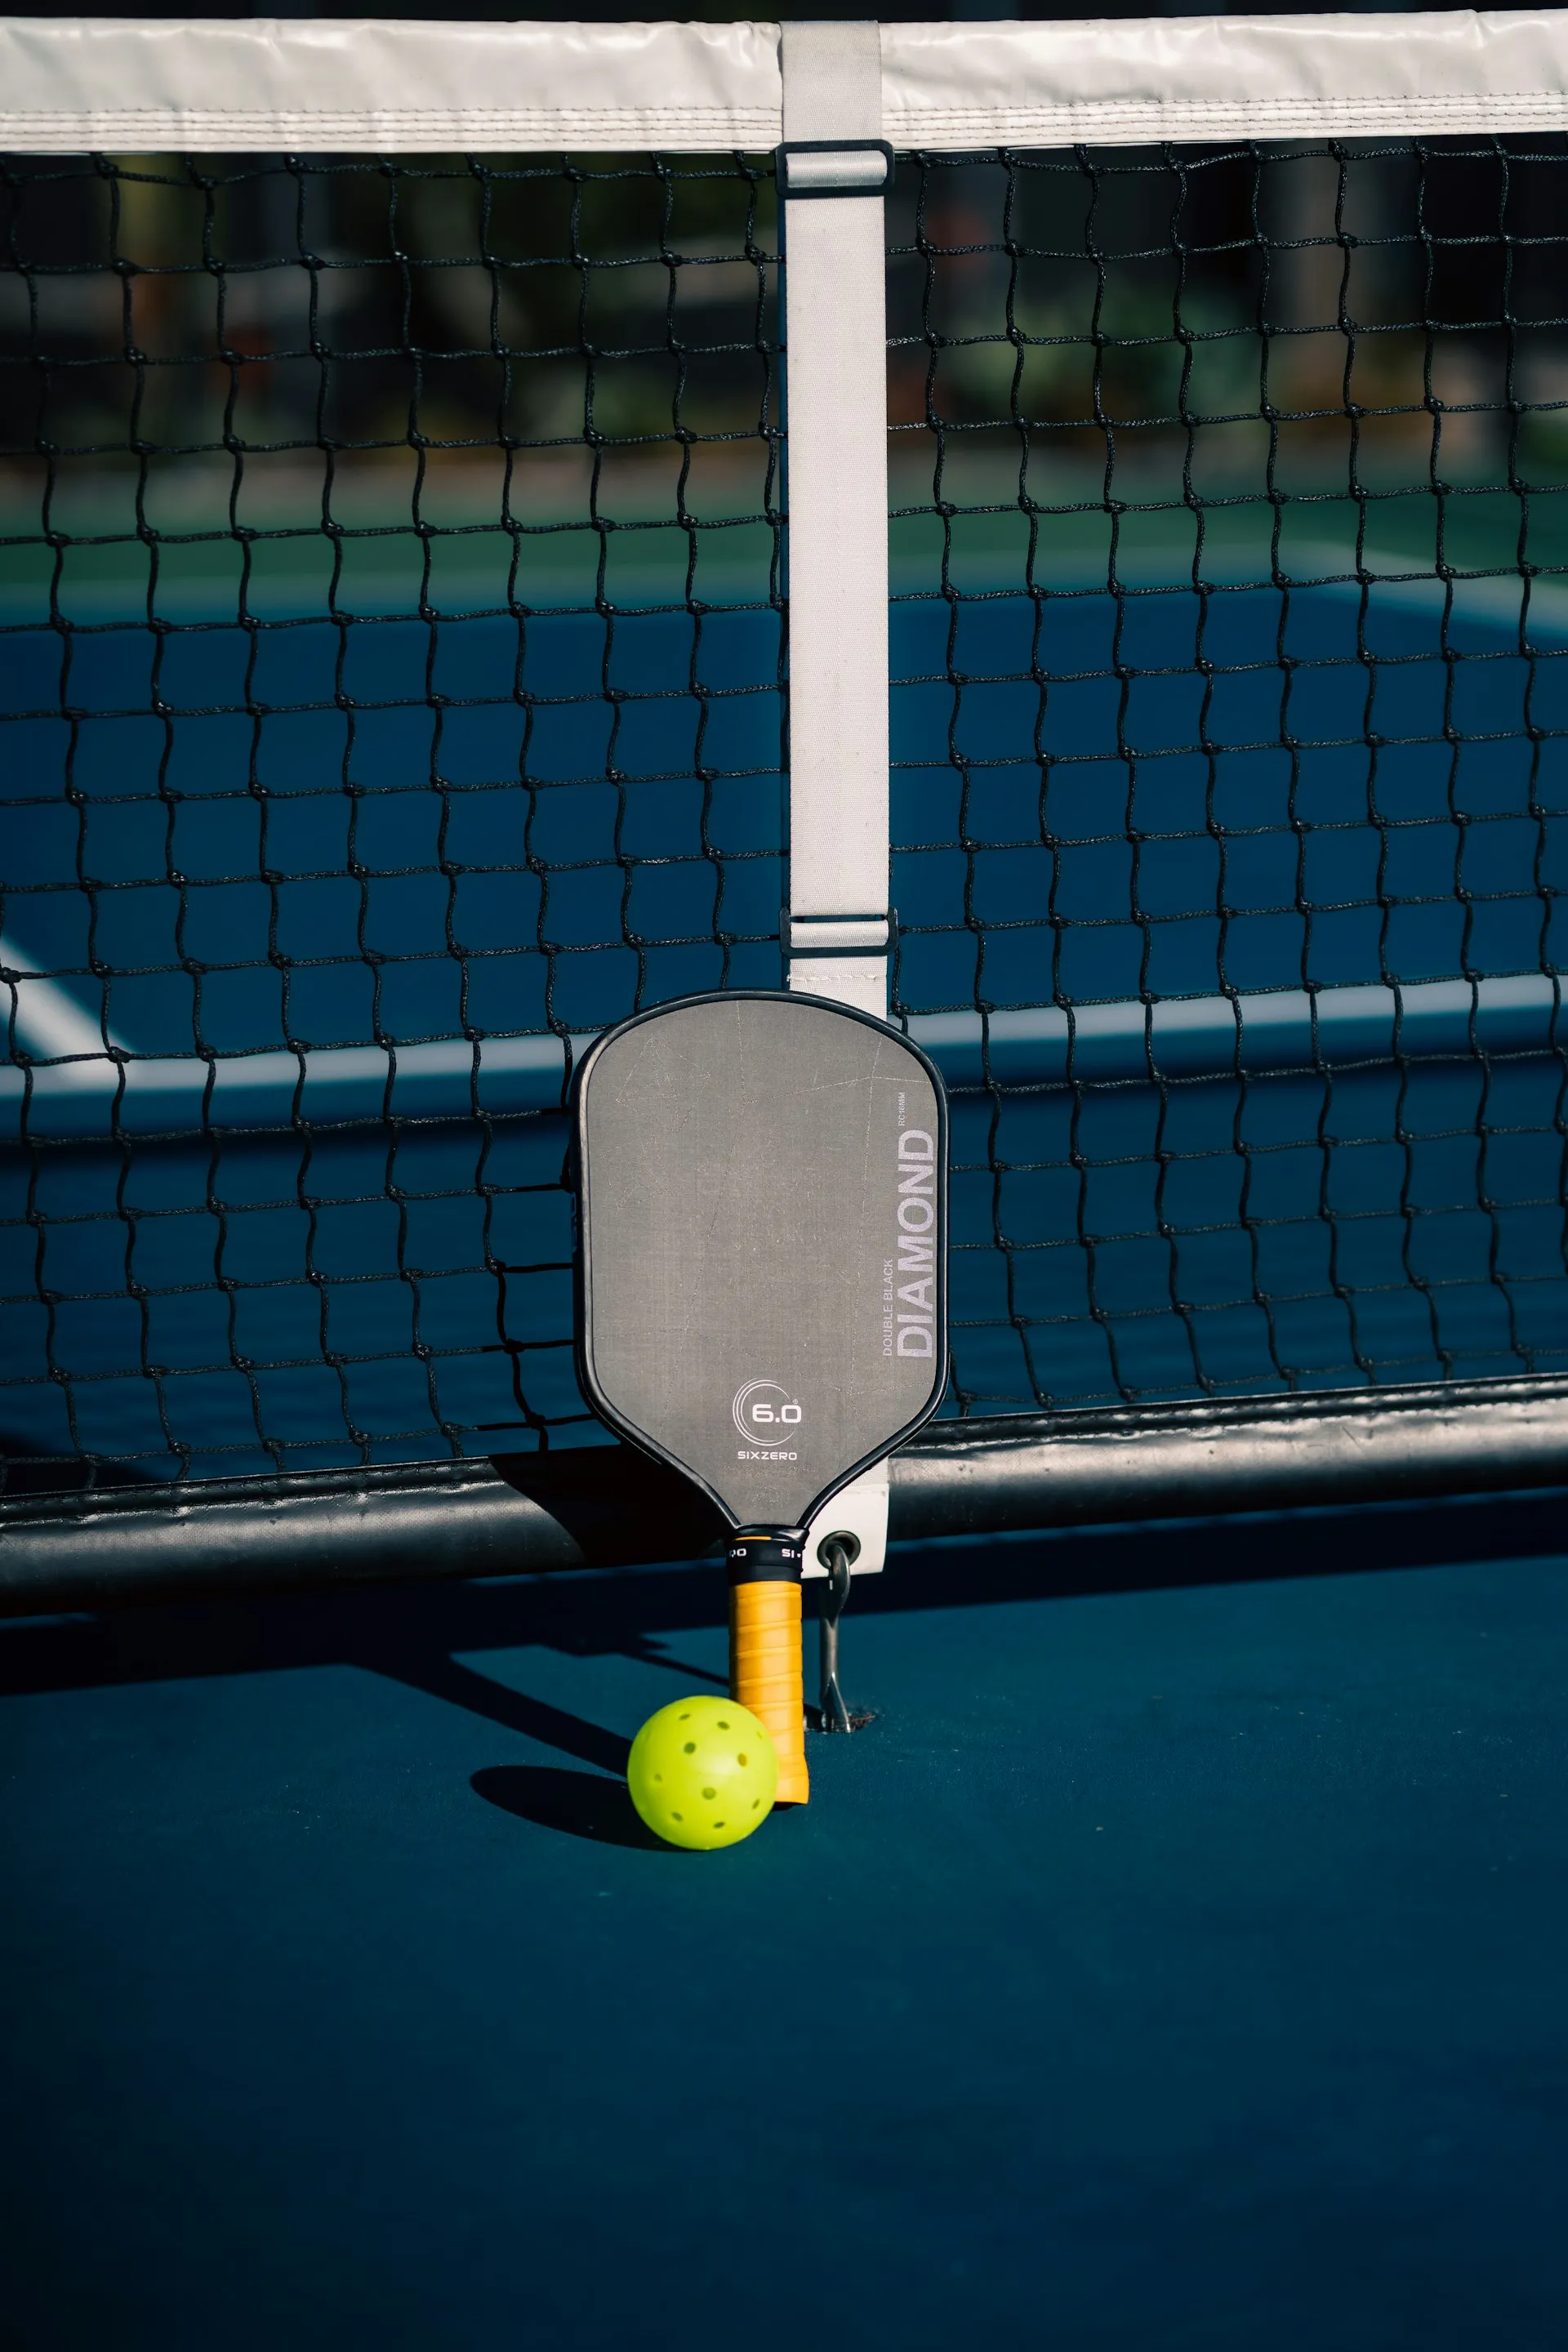
Padel and pickleball are two of the fastest-growing racket sports in the world. While they share some surface similarities — both are played on smaller courts with solid-faced rackets — the actual gameplay, strategy, and culture are remarkably different.
Two Sports, One Boom
Both padel and pickleball have exploded in popularity in the 2020s. Padel dominates in Europe and Latin America with over 30 million players worldwide across 130+ countries, while pickleball has taken the United States by storm with nearly 20 million players. Despite occasional media framing as rivals, the two sports appeal to somewhat different audiences and can coexist comfortably.
Court Comparison
The most visible difference is the court itself.
Feature
Padel
Pickleball
Dimensions
20 × 10 m (66 × 33 ft)
13.4 × 6.1 m (44 × 20 ft)
Walls
Glass + metal mesh enclosure
None (open court)
Net height
88 cm centre, 92 cm sides
86 cm centre, 91 cm sides
Surface
Artificial grass, concrete, or synthetic
Hard court (concrete, asphalt)
Construction cost
€20,000–100,000
Can use existing tennis courts
The padel court’s glass walls and metal mesh are not decorative — they are integral to gameplay. Balls can be played off the walls after bouncing, creating unique angles and rallies that do not exist in pickleball.
Pickleball courts are much simpler to set up. A standard tennis court can be converted into two or more pickleball courts with minimal effort, which partly explains the sport’s rapid growth in the US where tennis infrastructure is widespread.
Equipment Differences
Feature
Padel
Pickleball
Racket
Solid, perforated (no strings), 360–380 g
Solid paddle, lighter, ~200–250 g
Ball
Similar to tennis ball, slightly less pressure
Plastic with holes (wiffle-style)
Shoes
Padel/clay court shoes (herringbone sole)
Court shoes (non-marking)
Padel rackets (also called “palas”) are thicker and heavier than pickleball paddles. They have no strings — power comes from the foam or EVA core and the fibreglass or carbon fibre faces. Pickleball paddles are thinner, lighter, and typically made from composite or graphite.
The balls differ dramatically. A padel ball looks like a tennis ball but with slightly lower pressure, producing a slightly lower bounce. A pickleball is a hollow plastic ball with holes, producing a distinctive low-bounce, slower-flight trajectory.
Rules and Scoring
Padel uses a tennis-based scoring system: 15-30-40-game, sets to 6, with Star Point at deuce (as of 2026 rules). Matches are typically best of 3 sets. Only doubles format is standard.
Pickleball uses rally scoring to 11 points (win by 2). In traditional rules, only the serving team can score. Both singles and doubles are played.
Serving also differs significantly:
In padel, the serve must bounce before being struck underhand, and it goes diagonally to the opposite service box
In pickleball, the serve is hit underhand diagonally, and the ball must clear the “kitchen” (no-volley zone)
Gameplay and Strategy
Padel gameplay revolves around the walls. Playing off the back wall and side walls is a fundamental skill. Rallies tend to be longer. The pair that controls the net position typically wins the point. Strategy involves patience, positioning, and using lobs, “bajadas” from the wall, and precise volleys.
Pickleball gameplay centres on the “kitchen” — a 2.1 m no-volley zone on each side of the net. Players can’t volley from inside this zone, creating a unique dynamic of “dinking” (soft exchanges near the net). The plastic ball limits power play, so placement and reflexes matter more than strength.
Physical intensity: Padel generally involves more running and longer rallies. Pickleball is often described as gentler on the body, though competitive play can be intense.
Popularity and Growth
Metric
Padel
Pickleball
Global players
~30 million
~20 million (mostly US)
Key markets
Spain, Argentina, Italy, Sweden, UAE
USA, Canada
Courts worldwide
77,000+
44,000+ (US alone)
Growth rate
10–15% annually
40%+ annually (US)
Market size (2024)
~$225M
~$1.5B
Padel is growing steadily across Europe, the Middle East, and increasingly in the US. Pickleball has experienced explosive growth in North America but has more limited global reach. Interestingly, about 30% of US pickleball facilities now also offer padel.
Demographics and Accessibility
Age appeal: Pickleball has historically attracted older players (the median age has been dropping to ~35), while padel’s core demographic is 26–50. Both sports are broadly accessible to all ages.
Gender balance: Both sports perform well with roughly 40% female participation globally.
Cost of entry:
Pickleball: paddle $30–150, many free public courts in the US
Padel: racket €60–300, court rental €15–50/hour (varies by country)
Learning curve: Both are considered easier to pick up than tennis. Pickleball’s smaller court and lighter ball make it slightly more immediately accessible. Padel requires learning wall play, which adds a layer of complexity but also depth.
Which Sport Should You Choose?
If you…
Try padel
Try pickleball
Love longer rallies and strategic depth
✓
Want something easy to pick up immediately
✓
Enjoy playing off walls (like squash)
✓
Prefer a lighter, less physical sport
✓
Live in Europe or Latin America
✓
Live in the US or Canada
✓
✓
Already play tennis
✓
✓
Want the most social doubles experience
✓
The honest answer: try both. They are different enough that enjoying one doesn’t prevent you from enjoying the other. Many players play both sports depending on who’s available and what courts are nearby.
Padel is a doubles sport — you always need at least one partner and ideally three more players. Finding regular playing partners is one of the first challenges new players face, but there are more options than ever before.
Why It Matters
With a 92% return rate after first-time play, padel is one of the stickiest sports out there. The challenge is not getting people hooked — it is connecting them. Whether you are brand new or have recently moved to a new city, these methods will help you find partners and build a regular playing group.
Digital Platforms
Playtomic
Playtomic is the largest padel platform globally with 4.7 million connected players across 6,000+ clubs in 66 countries.
How it works:
Download the app (iOS/Android) and create a profile
Set your skill level using the 0–7 scale
Browse Open Matches — public games created by other players, filtered by level and location
Join a match or create your own and wait for others to join
The algorithm adjusts your level after each match — wins against stronger opponents raise your ranking faster
Playtomic’s level system has become a de facto standard:
Level
Description
Below 1.5
Beginner — learning the basics
1.5–2.5
Initiation Intermediate — consistent rallies
2.5–3.5
Intermediate — good court positioning
3.5–4.5
Intermediate High — tactical awareness
4.5–5.5
Advanced — strong all-round game
5.5+
Competition / Professional
Padel Mates
A newer platform focused on community and smart matching. Features include personalised match suggestions based on skill level and preferred club, a map for discovering nearby facilities and players, and in-app chat. Padel Mates has partnered with Rocket Padel across all their UK and Denmark clubs (2025).
Other Apps and Platforms
Platform
Best for
Padelist.net
Web-based, no download needed; filter by skill and location
Playmate App
Partner-finding focused
MeetUp
General platform with active padel groups in many cities
PadelMix
Americano tournament generation and organisation
Social Media and Online Communities
Beyond dedicated apps, social media is a powerful tool for finding partners:
Facebook groups — search “[your city] padel” to find local groups. Active communities exist in most European cities with daily partner requests
WhatsApp groups — many clubs maintain groups for their regular players. Ask at reception or check the club’s website
Telegram — popular in some regions for player coordination
Instagram — follow local clubs for event announcements and open play sessions
Tip: When posting in any group, always state your approximate level (use the 1–7 scale) and preferred playing times. For example: “Level 2.0, looking for similar players for weekday evenings in central Madrid.”
At the Club
Open Play Sessions
Most padel clubs organise regular open play or social play sessions where you show up without a pre-arranged partner. The club organises groups, usually by level. This is one of the best ways to meet regular partners.
Group Lessons
Taking group coaching sessions is an effective way to meet players at your level. You will practise together, learn together, and naturally form playing partnerships.
Club Staff
Do not underestimate the staff at your local club. Coaches and reception staff know the regulars and can often introduce you to players of similar ability looking for partners.
Notice Boards
Physical and digital notice boards at clubs remain a simple way to advertise your availability. Include your level, preferred days and times, and contact details.
The Americano Format
Americano is the ultimate social padel format. If you want to meet new players, an Americano evening is the single best way to do it.
How It Works
Players needed: 8, 12, 16, or 20 (multiples of 4 work best)
Courts: 1 court per 4 players
Partners rotate every round — you play with and against everyone
Individual scoring: typically 24 or 32 points per round
Serving rotates every 4 points (no traditional games or sets)
Duration: 1.5–2 hours for a full event
Winner: the player with the highest total individual score
Americano Variations
Format
Key difference
Classic Americano
Individual scoring, rotating partners and opponents
Team Americano
Fixed partner for the entire event; team score
Mixed Americano (Mixto)
Each pair must be one male + one female
Why Americano Is Perfect for Finding Partners
You do not need a pre-formed pair — you can come alone. You play with every participant, so you naturally discover who you enjoy playing with. The rotating format is an equaliser: everyone gets the same number of matches. And it is typically followed by drinks or food, reinforcing the social atmosphere.
Many clubs run weekly Americano evenings. Check your local club’s schedule.
Mixed Doubles
Padel has one of the highest female participation rates in racket sports — roughly 40% of players globally are women. The sport’s emphasis on strategy over power creates naturally balanced mixed-gender matches.
Mixed play is a great way to expand your circle of potential partners. The smaller court and the importance of positioning over raw strength mean that mixed doubles can be competitive and enjoyable for everyone.
Etiquette When Playing with New Partners
When you play with someone for the first time, a few unwritten rules help everything go smoothly:
Be punctual and bring balls — arriving early and offering a fresh can of balls makes a good first impression
Call your own fouls honestly — padel is largely self-governed; honesty builds trust and repeat invitations
Support your partner — fist bumps, encouragement, and never criticising mistakes. Everyone makes errors
Keep the game flowing — retrieve balls quickly, minimal long breaks between points
Read the energy — in casual games, do not smash directly at weaker players. Match the intensity of the group
Communicating Your Level
Be honest about your ability. Using the widely recognised 1–7 scale helps set expectations:
1.0–2.5: Beginner — still learning basic shots and positioning
4.0–5.5: Advanced — strong technique, good tactical game
5.5–7.0: Elite / Professional
Understating your level leads to mismatched games where others feel outclassed. Overstating it leads to frustration for everyone. Honesty produces the best matches.
Club Social Events
Beyond regular play, clubs typically offer a range of social events:
Event type
Description
Open Play
Drop-in sessions, no partner needed
Americano Nights
Weekly rotating-partner tournaments
Beginner Clinics
Introductory group lessons (60–90 min)
League Nights
Regular competitive play by level
Women’s Sessions
Dedicated sessions for female players
Open Days
Free introductory sessions for newcomers
Clubs with integrated social spaces (bar, lounge area) report significantly higher member retention. The social side of padel is not a bonus — it is core to the sport’s appeal.
Getting Started
Download Playtomic (or the dominant app in your area) and set your level honestly
Join an Open Match at a nearby club — the simplest first step
Attend an Americano evening — the best way to meet many players at once
Take a group lesson — meet partners while improving
Join local Facebook/WhatsApp groups — stay connected between sessions
Be consistent — showing up regularly is the fastest way to build a playing circle
The padel community is welcoming by nature. The hardest step is the first one — after that, the sport does the rest.
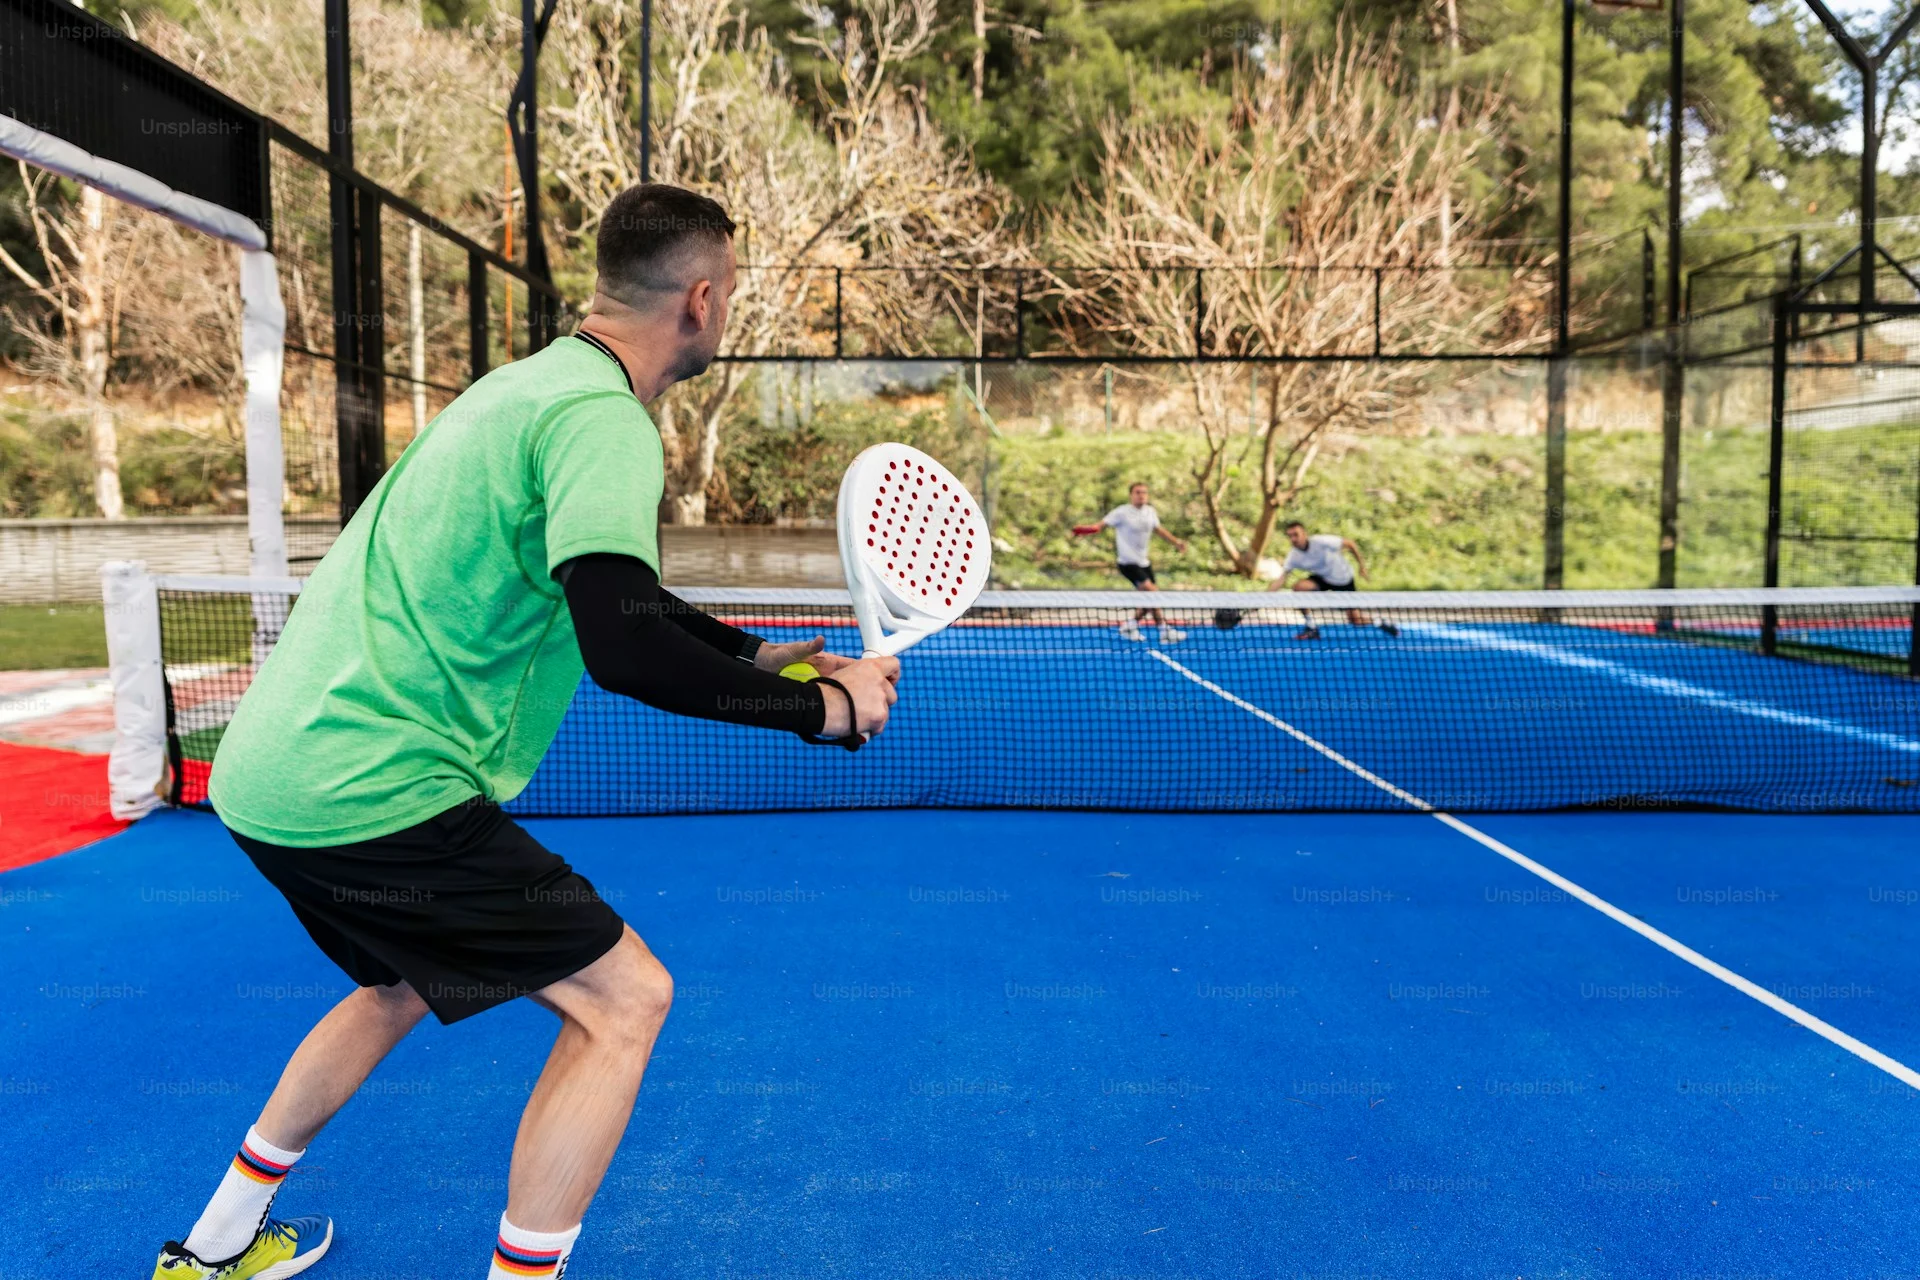
In brief: Padel is a doubles racket sport played on an enclosed court measuring 10 by 20 meters with glass and metal mesh walls. The rules are governed by the International Padel Federation (FIP) and cover court specifications, ball and racket requirements, service, rally play, and scoring. This article provides a structured overview of all the main sections of the official regulations.
Photo: José Alejandro Cuffia / UnsplashPhoto: José Alejandro Cuffia / Unsplash / Unsplash License
The Court
A padel court is a rectangle 10 m wide and 20 m long, divided by a net at the center. The net height is 88 cm at the center and 92 cm at the posts. The court is enclosed by walls: back walls are 4 meters high (the lower 3 meters made of glass, the upper meter of metal mesh), and side walls vary in height. The floor surface may be artificial grass, concrete, or another approved material.
On either side of the net, service boxes are formed by the center service line and the service line located 6.95 m from the net. All court lines are 5 cm wide.
FIP regulates the exact specifications of the ball for official competition:
Diameter: 6.35 to 6.77 cm
Weight: 56 to 59.4 g
Bounce height: 135 to 145 cm when dropped from a height of 2.54 m onto a hard surface
Pressure: 4.6 to 5.2 kg/cm² at sea level
Since 2026, the ball is no longer restricted to yellow or white — any color is acceptable provided it contrasts with the court surface. Only FIP-approved balls may be used at official tournaments. Balls are replaced at the referee’s discretion or per tournament regulations — typically after a set number of games.
The Racket
A padel racket differs significantly from a tennis racket. Key FIP requirements:
Maximum length: 45.5 cm (including the handle)
Maximum width: 26 cm
Maximum thickness: 38 mm
Hitting surface: perforated (holes 9–13 mm in diameter), no strings
Wrist strap: mandatory during play
The racket may be made from various materials — carbon fiber, fiberglass, EVA foam, or other composites. Playing without a wrist strap is a rule violation and may result in a warning.
Players
Padel is exclusively a doubles sport. There are always four players on court — two per team. Singles padel is not part of official FIP competition.
Before the match, each team determines the serving order and the players’ positions on the right and left sides of the court. The serving order is maintained throughout the set but may be changed at the start of a new set. Switching sides (right/left position) is only permitted between sets, provided the team notifies the umpire in advance.
For more on what padel is and how it works, see What Is Padel?.
The Serve
The serve is executed from behind the service line diagonally into the opponent’s service box. Key rules:
The ball must bounce on the floor before the server strikes it
The strike must be made at waist level or below
Both of the server’s feet must remain behind the service line (and its imaginary extension toward the side walls)
The ball must land in the correct service box and bounce on the floor before touching any wall
Each point begins from the right-hand side (from the server’s perspective)
Two attempts are allowed — if the first serve is a fault, the server may serve again
If the ball clips the net on a serve but lands in the correct service box, a let is called and the serve is replayed.
For a complete breakdown of serving rules, see Serving Rules.
Rally Play
After the serve, the ball is in play until a point is won or a let is called. Core principles:
The ball must cross the net and bounce on the opponent’s floor at most once before being returned
After bouncing on the floor, the ball may touch the walls, and players can return it after a wall bounce
The ball may only be struck with the racket; any contact with the body results in loss of point
The ball may leave the court over the top of the wall or through an open section of the enclosure; in this case, a player may run outside the court to retrieve and return the ball, provided it has not bounced on the ground twice
The use of walls is one of the defining tactical features of padel. For more details, see Wall Play Rules.
Scoring
The scoring system in padel is identical to tennis:
Points in a game: 0 (love) — 15 — 30 — 40 — game
At 40-all — deuce; a two-point advantage is required to win the game
A set is won by the first team to reach 6 games with a margin of at least 2
At 6-6 — a tiebreak to 7 points (with a 2-point margin)
A match is played as best of 3 sets
Since 2026, professional tournaments use the Star Point system: at 40-all, up to two advantage cycles are played. If the game remains undecided, a single Star Point rally determines the winner. This replaced the earlier “golden point” (immediate sudden death at deuce). See Rule Changes 2026 for details.
For a detailed breakdown of the scoring system, see Scoring System.
Loss of Point
A team loses the point in the following situations:
The ball bounces twice on the floor on their side of the court
The ball hits a player — if the ball strikes any part of a player’s body before bouncing on the floor
The ball strikes the player’s own side — if after being hit, the ball first contacts the floor, wall, or net on the hitter’s side rather than crossing the net
Touching the net — if a player, their racket, or clothing touches the net or net posts during a rally
Volleying before the ball crosses the net — if a player strikes the ball before it has fully crossed to their side
Double hit — if the ball strikes the racket twice
Service fault — double fault (two consecutive serve faults)
The ball hits the metal mesh fence on the hitter’s side before crossing the net
Walls and Bounces
Walls are an integral part of the playing area in padel. Key rules:
The ball remains in play after bouncing on the floor and then touching the back or side wall
A player may return the ball after any number of wall contacts, provided the ball has bounced on the floor only once
If the ball exits the court over the top of the wall after being struck — play continues as long as the ball has not bounced on the outside surface twice
A ball that hits the opponent’s wall directly (without first bouncing on the floor) means loss of point for the striking team
FIP sets standards for sportsmanlike behavior from all participants:
Sportsmanship: verbal abuse, obscene language, deliberate damage to equipment, and aggressive behavior are grounds for a warning, penalty point, or disqualification
Time-outs and breaks: a break between sets is permitted (up to 120 seconds), and changeovers occur every two odd games (up to 90 seconds); exceeding the time limit results in a warning
Warm-up: reduced from 5 minutes to 3 minutes (from 2026)
Eating and drinking: prohibited between points (only allowed during changeovers, from 2026)
Coaching: at most tournaments, on-court coaching during a match is prohibited, except in specifically designated formats
Medical time-out: one medical break per match is allowed, lasting up to 3 minutes
Safety cord: if the racket’s safety cord breaks or the racket leaves the player’s hand during a rally, the pair immediately loses the point (from 2026)
Rule Updates
Please Note
The rules of padel are maintained and updated by the International Padel Federation (FIP). Regulations may be revised annually. Always refer to the latest version of the rules on the FIP website before participating in official competitions or preparing for officiating certification.
In brief: The padel serve must be executed underhand after the ball bounces on the ground. The ball must be struck at or below waist level, and the serve is directed diagonally into the opponent’s service box. The server has two attempts; a double fault results in a lost point.
The serve is the only shot in padel that is entirely under the server’s control. Unlike tennis, where the serve can be a powerful attacking weapon, padel requires an exclusively underhand serve. This rule makes the game more accessible to beginners and shifts the emphasis from power to accuracy and tactical ball placement.
Serving rules are governed by the International Padel Federation (FIP) and are uniform across all official competitions.
Serve Execution Technique
A padel serve is executed as follows:
Ball bounce. The server must first drop (release) the ball and let it bounce on the court surface. Serving the ball directly out of the hand without a bounce is not permitted.
Underhand strike. At the moment of contact between the racket and the ball, the ball must be at or below the server’s waist level. An overhead strike, as in tennis, constitutes a violation.
At least one foot on the ground. At the moment of contact, the server must have at least one foot on the court surface (jumping is not allowed).
Server Position
The server must stand behind the service line, between the center line and the side wall (glass) on their side of the court. Stepping on or beyond the service line before the racket contacts the ball constitutes a foot fault.
Specifically:
The server’s feet must not touch or cross the service line before striking the ball.
The server must not step outside the imaginary extensions of the center line and the side wall.
Serve Direction
The serve is executed diagonally – just like in tennis. The ball must land in the service box located on the opposite side of the court, diagonally from the server.
Serve positions: server (1) on the right, partner (2) at the net, receivers (3, 4) on the opposite side
The diagram shows a typical serving formation: player 1 (server) is in the right back zone behind the service line, their partner (2) takes a position at the net on the left. The receivers (3, 4) position themselves in the back of their half of the court.
First and Second Serve
The server has two attempts to execute a valid serve:
First serve. If the ball does not land in the service box or another violation occurs, the server is entitled to a second attempt.
Second serve. If the second serve is also faulty, it is a double fault, and the point is awarded to the receiving team.
In practice, padel players rarely take as aggressive a risk on the first serve as tennis players do, since the underhand serve limits the potential for a powerful shot.
Net Serve (Let)
If the ball clips the net during a serve but still lands in the correct service box, a let is called (replay). The serve is replayed without penalty, and the attempt number remains the same: if the let occurred on the first serve, the server performs the first serve again.
If the ball clips the net and does not land in the service box, it counts as a regular serve fault.
Ball Behavior After Bouncing in the Service Box
After the ball correctly lands in the service box, special rules apply:
Side glass wall. If the ball hits the side glass wall after bouncing in the service box, the serve is valid. The receiver continues the rally.
Back glass wall. If the ball strikes the back glass wall after bouncing in the service box, the serve is valid and the receiver continues the rally. Only if the ball hits the metallic fence (malla/rejilla) after the bounce is the serve a fault.
Metal fence (malla / rejilla). If the ball hits the metal fence after bouncing in the service box before the receiver plays it, the serve is a fault.
Foot Fault
A foot fault is called when the server:
Touches or crosses the service line with a foot (or any body part) before the racket contacts the ball.
Steps outside the permitted serving area (between the center line and the side wall).
Moves excessively during the serve. The server may take small steps but must not run or jump while executing the serve.
A foot fault is treated as a regular serve fault. If it occurs on the first serve, the server performs the second serve; if on the second, a double fault is recorded.
Serving Order
The serving order in padel is strictly regulated:
Teams serve alternately. One team serves each game, the other team serves the next game.
Players within a team alternate. In the first game that a team serves, one player delivers the serve; in the next game that the same team serves, their partner takes over.
The order is fixed for the set. The chosen serving order is maintained until the end of the set. At the start of a new set, the team may change the serving order within the pair.
Common Beginner Mistakes
Striking the ball above waist level (a habit carried over from tennis).
Tossing the ball upward instead of letting it bounce on the ground.
Stepping on or beyond the service line.
Serving into the wrong box (not diagonally).
Attempting an overly powerful serve at the expense of accuracy.
In brief: In padel, the ball can bounce off walls and remain in play, but only under one mandatory condition – it must touch the floor first. Walls are an integral part of the court and make padel a unique racquet sport where the space behind you is not the end of a rally, but a tactical opportunity.
Photo: Bruno Vaccaro Vercellino / UnsplashPhoto: Bruno Vaccaro Vercellino / Unsplash / Unsplash License
The Fundamental Rule: Floor First, Then Wall
The core principle of wall play in padel is straightforward: the ball must bounce on the floor before hitting any wall. When the ball arrives on your side of the court, it must touch the playing surface first, and only then may it deflect off the back or side wall. The player has every right to play the ball after it rebounds off a wall – the rally continues.
If the ball strikes a wall before touching the floor, the point is lost. This rule applies to the receiving side: an incoming ball must land on the floor first.
An important clarification: on volleys and smashes, the ball crosses the net, bounces on the opponent’s side, and then hits their wall – this is a perfectly normal part of the rally. The “floor first” rule concerns the receiving player’s side.
Types of Walls on the Court
A padel court is enclosed by walls of different types, each with its own characteristics:
Back glass wall (cristal de fondo). A glass wall standing 3 metres high along the back line of the court. This is the primary wall that the ball bounces off most frequently. Glass provides a predictable, even rebound.
Side walls. A combined structure: the lower portion is made of glass (typically 3 metres), and the upper portion is metallic mesh (malla/rejilla) extending up to 4 metres total. In the section closer to the net, the side wall may be entirely metallic fence.
Metallic mesh (malla). Wire mesh fencing in the upper part of the walls and along the sides closer to the net. The rebound off the mesh is less predictable and absorbs more of the ball’s energy.
Front wall. There is no front wall as such – its role is played by the net that divides the court into two halves.
Legal Wall Rebounds
After the ball has bounced on the floor, it may strike the following surfaces and the rally will continue:
Back glass wall. The most common scenario. The ball lands on the floor and flies into the back wall, rebounds back into the court – the player returns it.
Side wall. The ball lands and travels into the side glass or mesh, rebounds – the rally continues.
Corner (rincón). The ball strikes the corner where the back wall meets the side wall. These rebounds are the most unpredictable and are considered one of the trickiest elements of padel.
Double wall rebound. The ball may hit the back wall and then the side wall in succession (or vice versa) – the rally remains live as long as the ball does not bounce on the floor a second time.
Ball Leaving the Court
A padel court is an enclosed structure, yet the ball can still leave it:
Ball flies over the back wall (above 4 m). If your shot sends the ball over the back wall and out of the court, the point goes to your opponents. The ball must stay inside the court.
Ball exits through side openings. The side walls (usually in the area closest to the net) have openings and doors for court access. If the ball exits through these side openings after bouncing on the floor, it can be played! The player is allowed to leave the court through the door and return the ball back through the opening or over the wall.
Salida por la Puerta – Exiting Through the Door
One of the most spectacular elements of padel is the salida por la puerta – a play in which a player runs out through the side door to retrieve a ball that has left the court.
The rules for this play are:
The ball must first bounce on the floor on your side of the court.
The ball exits through a side opening or over the side fence (in the area with lower fencing).
The player runs out through the door, chases the ball, and sends it back onto the court – through the side opening or lobbed over the wall.
The returned ball must cross the net and land on the opponent’s side.
The ball cannot be returned over the top of the back wall – only through the side openings or over the side fencing.
At professional tournaments, the salida por la puerta is a regular occurrence and never fails to electrify the crowd.
Corner Play (Rincón)
The corners of the court – where the back wall meets the side wall – create a particular challenge:
A ball striking the exact junction of two walls changes direction unpredictably.
The rebound trajectory depends on the angle at which the ball arrived and which wall it contacted first.
Hitting into the corner (jugar al rincón) is an effective tactical weapon, as the receiver struggles to read the rebound direction.
For beginners, corner balls are among the most difficult situations. It is advisable not to stand too close to the walls and to leave yourself room to react.
What You Cannot Do with Walls
Certain actions involving walls result in the loss of a point:
Hitting the ball off your own wall to send it over the net. You cannot strike the ball with your racket against a wall on your own side so that it crosses over to the opponent’s side. This is not a legal shot – the point is lost.
Ball hitting the wall before the floor (on reception). If an incoming ball touches the wall on your side before bouncing on the floor, the point is awarded to your opponents.
Ball leaving the court over the back wall. If your shot sends the ball above the back wall, you lose the point.
Glass vs Metallic Mesh Rebounds
The wall material significantly affects the ball’s behaviour:
Glass provides a smooth, predictable rebound, similar to a floor bounce. The ball retains most of its speed and spin.
Metallic mesh (malla) absorbs the ball’s energy. The rebound off the mesh is considerably weaker and less predictable – the ball may “stick” to the fence or bounce at an unexpected angle. Ball spin is almost entirely lost on contact with the mesh.
Understanding the difference between glass and mesh rebounds is an important skill that comes with practice.
Common Beginner Mistakes
Rushing towards the ball instead of waiting for the wall rebound. Newcomers often try to intercept the ball before it contacts the wall, even though waiting for the rebound is more advantageous.
Standing too close to the back wall. This leaves no room for a backswing after the ball bounces off the glass. The optimal position is roughly one metre from the back wall.
Ignoring the difference between glass and mesh. Expecting the same rebound from both materials and failing to adjust in time.
Panicking on corner balls. Instead of turning and tracking the ball, players swing blindly towards the wall.
Forgetting about salida por la puerta. Not leaving the court when the ball exits through a side opening, even though the rally is still live.
Hitting the ball against their own wall. Reflexively sending the ball into the nearest wall without realising this is an illegal shot.
The scoring system in padel is nearly identical to tennis: points, games, sets, and tiebreaks follow the same principles. The key difference is the Star Point system (introduced in 2026) used in professional tournaments to decide games at deuce.
Photo: Mario Gogh / UnsplashPhoto: Mario Gogh / Unsplash / Unsplash License
Match Structure
A padel match is played as a best of three sets. Each set consists of games, and each game consists of individual rallies that earn points. This three-tier structure — points, games, sets — forms the foundation of the scoring system.
Points Within a Game
Point scoring in padel is borrowed from tennis and follows this scale:
Rallies Won
Score
0
0 (love)
1
15
2
30
3
40
4
Game
The pair that wins the fourth point while leading in the score wins the game. For example, at 40–30 the next point won by the serving pair ends the game.
How to Announce the Score
The score is always announced with the serving pair’s score first, followed by the receiving pair’s score. If the serving pair leads 30–15, the umpire (or the server themselves in the absence of an umpire) announces: “thirty–fifteen.” When the score is tied, the call is “fifteen all,” “thirty all,” and so on.
Deuce and Advantage
When the score in a game reaches 40–40, the situation is called deuce. What happens next depends on the tournament format.
Traditional Format (with Advantage)
In the traditional format, at deuce a pair must win two consecutive points to take the game:
Advantage: The pair that wins a rally at deuce earns “advantage” (ad-in if it is the serving pair, ad-out if it is the receiving pair).
Game: If the pair with advantage wins the next rally, they take the game.
Back to Deuce: If the pair with advantage loses the next rally, the score returns to deuce.
In theory, a game at deuce can continue indefinitely until one pair wins two rallies in a row.
Star Point (from 2026)
Since 2026, professional padel (Premier Padel, CUPRA FIP Tour, FIP Promises) uses the Star Point system — a three-stage format that replaced the previous Golden Point rule:
First advantage: At deuce, a rally is played. The winning pair gains advantage. If they win the next rally, they take the game. If they lose, the score returns to deuce.
Second advantage: Another advantage rally is played. Again, winning the next rally secures the game, losing returns to deuce.
Star Point: If after two full advantage cycles the game is still not decided, a single decisive Star Point rally determines the winner.
On the Star Point, the receiving pair chooses which side of the court to receive from, but players are not allowed to switch positions for that deciding rally. In mixed doubles, the receiver must be the same sex as the server.
The Star Point system was introduced to:
Prevent excessively long games while preserving the advantage format
Make match duration more predictable
Create maximum tension at key moments
History: Golden Point (2020–2025)
Before 2026, professional padel used the Golden Point (Punto de Oro) — a single deciding rally immediately at 40–40, with no advantages. The Star Point system is a compromise between the Golden Point and the traditional advantage format.
Try It: Score Calculator
Practice tracking a match score with both the Star Point and traditional Advantage formats:
Format:
Set 1
Set 2
Set 3
Points
Pair A
0
0
0
0
Pair B
0
0
0
0
Games and Sets
How to Win a Set
To win a set, a pair must win 6 games with a lead of at least 2 games. A set can therefore end at 6–0, 6–1, 6–2, 6–3, or 6–4.
At 5–5, play continues. If one pair wins the next game (6–5), the other pair must win to stay alive. At 6–5 there are two possible outcomes: 7–5 (the leading pair wins the set) or 6–6 (tiebreak).
Tiebreak (at 6–6)
When the set score reaches 6–6, a tiebreak is played — a special shortened game:
The pair that first reaches 7 points with a lead of at least 2 points wins the tiebreak.
Points are counted with regular numbers: 1, 2, 3, 4, 5, 6, 7…
At 6–6 in the tiebreak, rallies continue until one pair leads by 2 points (for example, 8–6, 9–7, 10–8).
The serve alternates every 2 points (after the first serve).
Sides are changed after every 6 points played.
The pair that wins the tiebreak takes the set at 7–6.
How to Win a Match
A match is played as a best of three sets. The pair that first wins two sets takes the match. Possible results are 2–0 (a straight-sets win) or 2–1 (with one set lost).
Changeover
Pairs switch sides of the court after every odd-numbered game: after the 1st, 3rd, 5th, 7th, and so on. This rule ensures fair conditions, since sides of the court may differ in terms of sunlight, wind, and other factors. A changeover also takes place during the tiebreak — after every 6 points played.
Scoring Example Walkthrough
Let us walk through the start of a match between Pair A and Pair B step by step.
First Game (Pair A serving):
Rally
Won by
Score (A : B)
1
Pair A
15–0
2
Pair B
15–15
3
Pair A
30–15
4
Pair A
40–15
5
Pair B
40–30
6
Pair A
Game
Games score: 1–0 (Pair A leads). After the odd-numbered game — changeover.
Second Game (Pair B serving):
Rally
Won by
Score (B : A)
1
Pair A
0–15
2
Pair A
0–30
3
Pair B
15–30
4
Pair B
30–30
5
Pair A
30–40
6
Pair B
40–40 (deuce)
7 (Advantage)
Pair A
Advantage A
8
Pair B
40:40 (deuce)
9 (Advantage)
Pair B
Advantage B
10
Pair A
40:40 (deuce)
11 (Star Point)
Pair A
Game
Games score: 2–0 (Pair A leads). No changeover (even-numbered game).
In this example, the second game reached deuce twice. After two advantage cycles failed to decide the game, a Star Point was played. The receiving Pair A chose the side of the court and won the decisive rally, making a break — winning a game on the opponent’s serve.
Comparison with Tennis
The scoring systems in padel and tennis are nearly identical: the same points (love, 15, 30, 40), games to 6, sets to two wins, tiebreak at 6–6. The key differences are:
Star Point — in padel, deuce can lead to a maximum of two advantage cycles followed by a single deciding rally (Star Point), whereas in tennis the advantage system continues indefinitely.
Side selection — at the Star Point, the receiving pair chooses the side to receive on, adding a tactical element.
Match format — in professional padel, matches are always best of three sets, with no five-set formats.
Question: Who announces the score when there is no umpire?
Answer: The server is responsible for clearly announcing the score before each serve, starting with their own pair’s score.
Question: What happens when there is a dispute about the score?
Answer: If the players cannot agree on the score, they must go back to the last undisputed score and continue play from there.
Question: Is the Star Point used in all tournaments?
Answer: The Star Point is the standard in professional tournaments (Premier Padel, CUPRA FIP Tour) since 2026. Amateur matches and some national federations may still use the traditional advantage format or the older Golden Point rule.
The International Padel Federation (FIP) introduced several significant rule changes effective January 1, 2026. The headline change is the new Star Point scoring system, but the update also covers warm-up duration, service regulations, ball specifications, and player conduct.
Star Point: The New Scoring System
The Star Point is the most significant rule change of 2026, replacing the Golden Point (Punto de Oro) that was used in professional padel since 2020.
How It Works
The Star Point system activates when a game reaches deuce (40–40):
First advantage cycle: One pair wins the deuce rally and gains advantage. If they win the next rally, they take the game. If they lose, the score returns to deuce.
Second advantage cycle: Another advantage rally is played. Again, winning secures the game; losing returns to deuce.
Star Point: If after two full advantage cycles the game remains undecided, a single decisive Star Point rally determines the winner.
Star Point Rules
The receiving pair chooses which side of the court to receive from
Players are not allowed to switch positions for the Star Point rally
In mixed doubles, the receiver must be the same sex as the server
Why the Change?
Aspect
Golden Point (2020–2025)
Star Point (2026+)
At deuce
Immediate sudden death
Up to two advantage cycles first
Advantages
None
Two full cycles allowed
Philosophy
Maximum speed
Balance between rhythm and tension
Criticism
Too random, punished serving pair
Preserves advantage format
The Star Point is a compromise: it prevents indefinitely long deuce games (as in the traditional format) while giving players more chances than the immediate sudden death of the Golden Point.
Where It Applies
The Star Point system is used across all FIP-governed competitions:
Premier Padel (from the Riyadh Season P1)
CUPRA FIP Tour (from FIP Bronze Melbourne Padel Open)
FIP Promises
FIP Beyond (amateur circuit)
Warm-Up and Pace of Play
Shorter Warm-Up
Pre-match warm-up time has been reduced from 5 minutes to 3 minutes. Warm-up time following interruptions (rain, lighting issues) has also been shortened.
Eating and Drinking
Eating and drinking between points is now prohibited. Players may only eat and drink during changeovers and set breaks. This change aims to maintain the pace of play and prevent deliberate time-wasting.
Service Changes
Imaginary Line Extension
A clarification has been introduced for the service: an imaginary line extends the service line toward the side walls. The ball must not cross the service line, nor its imaginary extension, before impact. This provides a clearer definition of the legal service position.
Ball Specifications
Color Flexibility
The ball is no longer restricted to yellow or white. Any color is now acceptable, provided it provides sufficient contrast with the court surface. This change opens the door for colored balls that may improve visibility on certain surfaces or during televised matches.
Safety Rules
Outdoor Safety Zone
The minimum outdoor safety zone around the court has been increased from 2 meters to 3 meters, providing more space for players retrieving balls outside the court.
Racket Loss
If the safety cord breaks or the racket leaves the player’s hand during a rally, the pair immediately loses the point. Previously, this was handled less strictly; the 2026 rule makes the penalty automatic and immediate.
Tournament Organization
Daily match limit: Pairs cannot be required to play more than two matches per category daily without consent
Heat break: A mandatory 5-minute break between sets is now required during extreme heat conditions
Continental Tour Finals: Only the top 16 players per category qualify; competitors must participate in a minimum of five tournaments annually
Your grip determines the quality of every shot in padel. Choosing the right grip for each situation is the foundation of consistent and versatile play.
Photo: A. C. / UnsplashPhoto: A. C. / Unsplash / Unsplash License
Why Your Grip Matters
Your grip is the connection point between you and the racket. How you hold the racket determines the angle of the hitting surface, your degree of ball control, and the range of shots available to you. An incorrect grip limits your technical capabilities and can lead to wrist injuries.
In padel, unlike tennis, transitions between shots happen faster due to the compact court. This makes a versatile grip especially valuable — it allows you to react to the ball without unnecessary racket adjustments. Most professional players use the continental grip as their default and only switch to others for specific shots.
Main Grips
Continental Grip
The continental grip is the most important and versatile grip in padel. It is used for the vast majority of shots: volleys, bandeja, vibora, smash, and serve.
How to find the continental grip:
There are two simple methods:
The hammer method. Hold the racket as if you were hammering a nail. The edge of the racket should face downward, with your palm on the top bevel of the handle.
The handshake method. Reach out to the racket standing vertically on its edge and “shake hands” with it. This natural hand position is the continental grip.
With the continental grip, the base knuckle of your index finger (the V-shaped area between thumb and index finger) sits on the top bevel of the handle. The racket rests in your fingers, not clenched deep in your palm.
[EXPERT OPINION] If you are just starting to play padel, master the continental grip first. It will cover 70–80% of game situations, and in the beginning, you can get by using it alone.
The eastern forehand grip is used for forehand groundstrokes — drives and forehands from the baseline. It provides a flatter racket face, which delivers more power on shots from the back of the court.
How to find the eastern forehand grip:
From the continental grip, rotate the racket a quarter turn clockwise (for right-handers). The base knuckle of your index finger shifts to the right bevel of the handle. Your palm ends up nearly parallel to the racket’s hitting surface.
Used for:
Forehand drive
Forehand groundstrokes with maximum power
Attacking shots from the back of the court
Semi-Western Grip
The semi-western grip is an advanced grip for players seeking to add more spin to their arsenal. The racket is rotated even further than the eastern grip, and the hitting surface tilts more significantly.
How to find the semi-western grip:
From the eastern grip, make another quarter turn. The base knuckle of your index finger moves to the bottom bevel of the handle. Your wrist will be in a more closed position.
Used for:
Heavy topspin shots
Passing shots with a high ball
Defensive baseline shots requiring a high trajectory
[EXPERT OPINION] The semi-western grip requires significantly more wrist mobility. Beginners are advised to first master the continental and eastern grips confidently before experimenting with the semi-western.
Grip Changes During Rallies
In real match play, you will need to change grips between shots. This is one of the most challenging skills for beginners, but it becomes automatic with practice.
Principles of grip changes:
Relaxed hand between shots. Slightly loosen your grip between shots — this allows faster grip changes. Many professionals “roll” the racket in their fingers between rallies.
Non-dominant hand assists. Keep your non-dominant hand on the throat or frame of the racket — it helps control rotation and stabilizes the racket during grip changes.
Do not change grip for volleys. At the net, stay in the continental grip. There simply is not enough time for grip changes during fast net exchanges.
Only change grip when retreating. Switching to the eastern or semi-western grip is justified for baseline shots when you have more time to prepare.
Video Tutorial
7 technical padel basics almost everyone gets wrong, including grip: analysis by Otro Nivel Padel
Common Mistakes
Gripping the racket too tightly. Hold the racket firmly but not white-knuckled. Pressure scale: 4–5 out of 10 between shots, 7–8 at the moment of contact.
Tennis grip for volleys. Players coming from tennis often use the eastern grip for volleys. In padel, this prevents effective backhand volleys without a grip change.
Palm grip. The racket should rest in your fingers, not be clenched in your fist. A finger grip provides better control and feel.
Ignoring the backhand. Many beginners use the same grip for forehand and backhand. The continental grip works well for both sides, but the eastern grip is forehand-only.
Exercises
The hammer. Hold the racket with a continental grip and “hammer nails” into the wall, making light contact with the racket’s edge. This builds muscle memory for the correct hand position.
Wall rally count. Stand 2 meters from a wall and volley the ball, counting consecutive hits. Goal: 50 shots without losing the ball. Use only the continental grip.
Grip change on the move. Move along the back wall, alternating between forehand (eastern grip) and backhand (continental). A partner feeds balls alternately to each side.
Pressure control. Bounce the ball on the ground with your racket, consciously varying grip pressure: soft, medium, firm. Feel the difference in control.
Footwork is the invisible foundation of every shot in padel. Good movement allows you to always reach the right spot on court and execute shots from an optimal position.
Photo: Artur Kornakov / UnsplashPhoto: Artur Kornakov / Unsplash / Unsplash License
Why Footwork Matters
Padel is a game of positioning, not brute force. Even perfect stroke technique is useless if you have not reached the right position. On a compact 10-by-20-meter court, movements are shorter than in tennis but happen significantly more often and require greater precision.
Good footwork solves several problems simultaneously: you reach the optimal position for each shot, maintain balance during contact with the ball, recover quickly after shots, and control court zones together with your partner. According to coaching estimates, 80% of mistakes made by beginners are related not to hand technique but to incorrect foot positioning.
The Split Step
The split step is the foundational element of readiness — a small hop in place performed before every opponent’s shot. It is the cornerstone of all footwork in padel.
How to execute:
As your opponent begins their swing, make a small jump (literally 3–5 cm off the surface).
Land on both feet simultaneously, on the balls of your feet, with knees slightly bent.
Body weight on the balls of your feet, ready to move in any direction.
The split step activates your leg muscles and allows an instant reaction to the ball’s direction. Without it, you will get “stuck” in place and consistently arrive late to the ball.
[EXPERT OPINION] The split step is a habit that must be built consciously. In the beginning, say “hop” every time your opponent hits the ball and jump simultaneously. After a few training sessions, it will become automatic.
Lateral Movement
Lateral movement is the primary way of getting around in padel. You move with side shuffles along the net or the back wall, staying face-on to your opponent.
Shuffle technique:
Feet shoulder-width apart, knees slightly bent
The first step is taken by the foot closest to the direction of movement
The trailing foot slides to join but never crosses the lead foot
Center of gravity stays low, no “bouncing”
Feet do not lift high off the surface — use sliding steps
Key rule: avoid crossover steps during lateral movement at the net. Crossed feet rob you of balance and the ability to react instantly to a shot. Crossover steps are only acceptable during long runs to the back wall when you need to cover a large distance.
Approaching the Net
Moving forward to the net is one of the most important tactical movements. After a quality shot (a deep lob, an accurate drive), you and your partner should advance forward and take up an attacking position at the net.
How to approach the net correctly:
Hit a quality shot — deep, uncomfortable for your opponent.
Immediately after the shot, begin moving forward.
Move with small steps, ready for a split step.
Execute a split step at the moment your opponent makes contact.
Take up position 2–3 meters from the net.
Move forward together with your partner — you are connected by an “invisible rope.”
A common mistake is approaching the net after a weak shot. If your shot did not put pressure on the opponent, moving forward will backfire: you will be forced to play from an uncomfortable position.
Retreating Backward
Retreating is no less important a skill than moving forward. When opponents hit a deep lob or a high shot, you need to move back to the rear wall quickly.
Retreating technique:
Turn sideways (not with your back!) to the net
Use crossover steps for rapid backward movement
One hand controls the racket, the other helps with balance
Do not run to the ball — move to the point where the ball will be after the bounce
Let the ball bounce off the wall — use wall play to your advantage
[EXPERT OPINION] When retreating, the most common mistake is trying to hit while running with your back to the net. It is better to run past the ball, stop, turn, and hit from a balanced position.
Positioning after retreating:
If you were forced to retreat, settle behind the service line (approximately 1.8–2.5 m from the back wall). This gives you reaction time and space to use the walls. Do not get stuck in “no man’s land” between the service line and the net — this is the most vulnerable position on the court.
Video Tutorial
Padel footwork fundamentals by The Padel School
Common Mistakes
Flat feet. Stand on the balls of your feet, not your heels. Heels on the ground equals slow reaction.
No split step. Without a split step, your first step to the ball will be 0.3–0.5 seconds slower. On a compact court, that is decisive.
Crossing feet at the net. You lose balance and cannot change direction quickly.
Approaching the net alone. If you move up while your partner stays back, a “diagonal gap” forms in your defense. Move together.
Running to the ball instead of the position. Do not chase the ball — move to where the ball will be. This is a fundamental difference in wall sports.
High center of gravity. Straight legs while moving are a sure path to late reactions. Keep your knees slightly bent.
Exercises
Split step on command. A partner stands opposite and claps their hands. On each clap, execute a split step and a first step in a random direction. 3 sets of 20 repetitions.
Shuffles along the net. Stand at the net and shuffle from one side of the court to the other. Do not cross your feet. A partner feeds balls alternately left and right. 5 minutes without rest.
T-drill. Start from the center of the back wall. Sprint forward to the net, touch it, shuffle right, then left, return backward. Repeat 10 times.
Approach and retreat. A partner alternates between short feeds (you approach the net) and deep lobs (you retreat). Focus on smoothness of movement, not speed. 10 minutes.
Shadow practice with racket. Without a ball, simulate a full rally: split step — step right — volley — split step — step left — volley — retreat — wall shot — move forward. 3 sets of 2 minutes.
The serve in padel is not a weapon for instant point-winning but a tactical tool that sets the tone for the rally. Mastering different serve types allows you to control the opening of every point and create awkward situations for the opponent.
In tennis, the serve can be a finishing blow — an ace that wins the point outright. In padel, the situation is fundamentally different. According to the rules, the ball must be struck after bouncing off the floor at or below waist height, and the walls behind the receiver allow them to return even a powerful ball. The padel serve is therefore a tactical starter, not a weapon.
A good serve accomplishes three things:
Creates discomfort. Direction, spin, and depth force the opponent into a weak return
Buys time for the net approach. After the serve, both players on the serving team should take up a net position
Sets the rhythm. An aggressive or deceptive serve puts the opponent on the defensive from the very first shot
Flat Serve
The flat serve is the simplest option and a good starting point for learning serve technique.
The ball is dropped at waist level and bounces off the floor
The racket meets the ball with a straight forward motion, with minimal spin
Contact point — slightly in front of the body, at waist level or below
Follow-through — the racket moves forward in the direction of the shot
When to use:
As a second serve when reliability is the priority
Against opponents who read spin well
When the goal is to get the ball in play quickly and move to the net
Characteristics: the ball travels on a predictable trajectory with a straightforward bounce that is comfortable for the receiver. For this reason, the flat serve is rarely used as a primary option at intermediate and advanced levels.
Slice Serve
The slice serve is the dominant serve type in professional padel. [UNVERIFIED] By various estimates, up to 70% of serves at the professional level are hit with slice.
Technique:
Grip: continental
The racket moves under the ball from left to right (for a right-hander), “cutting” across it
Spin: sidespin + underspin
Contact: open racket face; the racket slides across the ball
Follow-through: the racket finishes moving sideways and downward
When to use:
As the primary serve in most situations
Aimed towards the side glass — after the bounce the ball drifts into the wall, creating a difficult return
Effective when serving to the centre and at the body — the spin makes it harder to read the direction
Characteristics: the ball veers sideways after the bounce, often into the glass. The receiver is forced to play from an awkward position or to take the ball after the wall rebound, giving the serving team extra time to reach the net.
Kick Serve / Topspin Serve
The kick serve is a more aggressive option that creates a high bounce and pressures the receiver.
Technique:
Grip: continental
The racket moves from low to high and forward, “brushing up” on the ball
Spin: topspin
Contact: closed racket face; wrist action drives the upward motion
Follow-through: the racket finishes moving up and forward
When to use:
Against shorter opponents — a high bounce above shoulder level creates discomfort
When serving to the second box (ad side) against a right-hander — the ball drifts into the backhand
For variety after a series of slices — the change of spin disrupts the receiver’s timing
Characteristics: requires good technique and wrist work. The ball travels more slowly than a slice but “kicks” off the bounce. The receiver finds it difficult to produce an aggressive return because the ball arrives at an uncomfortable height.
Body Serve
The body serve is not a separate spin type but a tactical direction. The ball is aimed directly at the receiver’s body, into the zone between the forehand and backhand.
Technique:
Any spin type: slice, flat, kick
Target: the ball arrives at the receiver’s hip or stomach area
Direction: straight at the body, preventing the opponent from committing to a shot
Especially effective with slice: the ball “sneaks” under the arms
When to use:
Against opponents with slow decision-making
When the opponent is positioned far from the centre — a body serve from the middle causes hesitation
As a tactical variation, alternating with serves to the glass and down the line
Characteristics: the receiver cannot decide quickly enough whether to play forehand or backhand, resulting in a weak or late return. The body serve is particularly effective at crucial moments (break point, set point).
Serve Comparison Table
Characteristic
Flat
Slice
Kick (Topspin)
Body
Spin
Minimal
Sidespin + underspin
Topspin
Any
Speed
High
Medium
Medium-low
Depends on type
Execution difficulty
Low
Medium
High
Medium
Bounce height
Medium
Low
High
Depends on type
Usage (pro level)
~10%
~60–70%
~10–15%
~10–15%
Best situation
Second serve
Primary serve
Into backhand
Crucial moments
Serving Tactics
Serving Zones
The receiver’s court is divided into three target zones:
T-zone (centre) — ball aimed at the centre line, limiting the angle of return
Glass zone — ball aimed at the side glass, creating a difficult rebound (best with slice)
Body zone — ball aimed at the body, causing indecision
Serving Patterns
[EXPERT OPINION] Effective serving is built on unpredictability. Recommended combinations:
3 slices to the glass → 1 flat down the centre — the opponent gets used to the slice and is caught off guard by the straight ball
Kick into the backhand → slice to the glass — the change of spin disrupts timing
2 serves to the glass → body serve — after two “escapes” towards the wall, the body serve catches the receiver off guard
Linking the Serve to the Net Approach
After the serve, your task is to reach the net alongside your partner as quickly as possible. A good serve is one that gives you time for 3–4 steps forward before the opponent’s return.
Video Tutorial
13 tips to serve like a pro by Otro Nivel Padel
Common Mistakes
Serving too hard. In padel, serve speed matters less than placement and spin. A powerful flat serve will bounce off the wall and come back to the opponent at a comfortable height.
Foot fault. Both of the server’s feet must be behind the service line, with at least one foot on the ground at the moment of contact. Stepping on the line means a lost serve.
Predictable pattern. Serving to the same zone with the same spin is a gift to the opponent. Vary both type and direction.
No net approach. A serve without a subsequent move forward loses half its effectiveness. Serve and go to the net.
Neglecting the second serve. The first serve can be aggressive, but the second must be reliable. A double fault is a free point for the opponent.
Ball toss too high. Under the FIP rules, the ball is struck after bouncing off the floor at or below waist level. A toss that is too high makes timing and control more difficult.
The return of serve is the first shot for the receiving pair in a rally. It is a moment when you can seize the initiative, move to the net, and turn the rally in your favour.
When: the serve is not aggressive; you simply need to return the ball
How: flat shot with control, no excess power
Result: ball in play, minimal risk
Attacking Return
When: weak serve; an opportunity to attack
How: deep shot with forward movement
Result: take the net position, apply pressure
Tactics: Lob or Chiquita?
Situation
Lob
Chiquita
Opponents tight to the net
✓ Pushes them back
✗ They will intercept
Opponents have moved back
✗ Ineffective
✓ Ball at their feet
Unsure what to do
✓ Safer
✗ Risk of error
Want to approach the net
Possible
✓ Ideal
Key principle: alternate. If you always lob, opponents will stop approaching the net. If you always play the chiquita, they will be waiting. Unpredictability is your weapon.
The Cardinal Rule of Returning
Keeping the ball in play matters more than shot quality.
An error on the return is a gifted point. A weak return is better than a beautiful attempt into the net. The serving pair received their serve for free — do not give them the point for free as well.
Common Mistakes
Hitting too hard. Loss of control; the ball rebounds off the opponents’ walls at a comfortable height. Focus on placement.
Standing right against the wall. The ball pins you to the glass with no space. Stand 1 m behind the service line.
Not moving after the return. A return without approaching the net is a missed opportunity. After the shot — move forward.
Trying to “kill” the ball. An aggressive return is the most common cause of errors on the return. Control, not power.
Ignoring your partner. Both players must move to the net in sync. If you advance but your partner stays back, a gap forms.
Always the same shot. If opponents know your return — they are prepared. Alternate lobs, chiquitas, and flat returns.
Drills
Return → net approach. Partner serves, you return with a lob and immediately move to the net. Partner plays a response — you play a volley. 10 rallies.
Lob/chiquita alternation. Partner serves. Return even-numbered serves with a lob, odd-numbered with a chiquita. Goal: confident switching between shots.
Return to target. Place a cone on the opponent’s baseline (for lobs) and 2 m behind the net (for chiquitas). Goal: 6 out of 10 balls within 1 m of the target.
Match-play rallies. 2 vs 2, focus on the return: the receiving pair counts how many rallies they win after returning. Goal: win 40%+ of rallies on return.
The volley is a shot struck before the ball bounces on the floor, typically played at the net. It is one of the most important and frequently used shots in padel, determining rally control and court dominance.
A volley is a shot that makes contact with the ball before it touches the floor. It is most commonly played from the net position, when a pair controls the front zone of the court. Unlike tennis, where the volley is just one of many tools, in padel it is the foundation of the game: the pair holding the net position has a significant advantage in the rally.
The volley is used in the following situations:
Applying pressure from the net. When you and your partner have taken the forward position and intercept balls before the bounce.
Responding to low shots. When the opponent sends the ball at waist height or below.
Finishing the rally. A precise volley into an open space or at the opponent’s feet often wins the point.
Return after serve. The serve in padel is relatively slow, and the returner can frequently play a volley after the ball bounces off the back wall.
Ready Position
Correct preparation for the volley starts with the ready position:
Grip: continental. It allows you to play both forehand and backhand volleys without switching grips. Imagine holding the racket like a hammer.
Racket: in front of you at chest height, the head of the racket slightly above the wrist. Both hands on the racket (one on the handle, the other supporting the throat).
Feet: shoulder-width apart, knees slightly bent, weight on the balls of the feet. Ready for a split-step before each opponent’s shot.
Body: leaning slightly forward, eyes tracking the ball.
Distance from the net: 1.5–2 metres. Closer and you risk being lobbed; further back and you lose pressure.
Forehand Volley
Forehand volley technique (right side for right-handers):
Preparation. From the ready position, perform a split-step. Once you determine the ball is coming to your right, turn your shoulders and take the racket back — short, no further than shoulder level. The backswing is minimal.
Step forward. Step with the left foot (for right-handers) forward and toward the ball. Transferring weight from the back foot to the front adds depth and control to the shot.
Contact. Meet the ball in front of you, at a height between shoulder and waist. The racket face is slightly open — this imparts a small amount of backspin and control. The wrist is firm; the shot is executed with the entire arm moving from the shoulder.
Follow-through. After contact, the racket continues a short motion forward and slightly downward. There is no need for a long follow-through — the volley is a compact, controlled shot.
Recovery. Immediately return the racket to the ready position in front of your chest.
Backhand Volley
Backhand volley technique (left side for right-handers):
Preparation. Split-step, shoulder turn to the left. The supporting hand on the racket throat helps guide the racket back. The backswing is even shorter than on the forehand.
Step forward. The right foot (for right-handers) steps forward to meet the ball. The body remains sideways to the net.
Contact. The contact point is in front of you, slightly to the left of the body’s centre. The racket face is slightly open. On the backhand, wrist firmness is especially critical — any “collapse” leads to loss of control.
Follow-through. A short motion forward. Do not rotate the body through — the backhand volley is executed with a compact, blocking motion.
Recovery. The racket returns to the position in front of the chest.
Parameter
Forehand Volley
Backhand Volley
Step forward
Left foot (right-hander)
Right foot (right-hander)
Backswing length
Short
Very short
Contact point
In front, right side
In front, left side
Typical difficulty
Moderate
Higher (weaker side for most players)
Slice Volley
The slice volley is a variation with pronounced backspin. It is used to control the pace of the rally and make the opponent’s attack more difficult.
Differences from the basic volley:
Racket path: high to low and forward, with the racket edge “cutting” under the ball.
Racket angle: more open, to create backspin.
Result: the ball stays low after the bounce, “sticks” to the floor, and does not rise into the opponent’s comfort zone.
When to use: when responding to low balls, to slow the rally down, or for a drop volley that lands just behind the net.
[EXPERT OPINION] The slice volley is the primary volley type in professional padel. Flat volleys are used far less frequently, as backspin provides better control and makes it harder for opponents to counter-attack.
Depth and Direction
Where to direct the volley is just as important as how to execute it. Key tactical principles:
Deep volley toward the back wall. The primary target: at the opponent’s feet or deep toward the back wall. This forces the opponent to play from an uncomfortable position and keeps them on the defensive.
Volley down the middle. A shot between the two opponents creates confusion over who should take the ball.
Drop volley. A soft volley just over the net when opponents are far from it. Requires excellent touch.
Volley into the side wall. A ball that hits the glass after bouncing off the floor creates a difficult-to-read rebound.
Drills
Volley-volley at the net. Two players stand on opposite sides of the net, 2–3 metres apart, exchanging volleys. Target: 30 shots in a row without an error. Start slowly and gradually increase the pace.
Forehand/backhand alternation. A partner feeds balls alternately to the right and left side. You respond with volleys, aiming at a designated zone. Series of 20 balls, then switch roles.
Volley with approach. Start from the service line and take a step toward the net with each volley. This develops the skill of approaching the net while maintaining ball control.
Volley under pressure (2 vs 1). Two players at the back wall send balls to one player at the net. The net player responds with volleys, choosing direction. The drill develops reaction speed and decision-making.
Video Tutorial
8 do's and don'ts for padel volleys by Otro Nivel Padel
Common Mistakes
Backswing too long. The volley is not a groundstroke. A long backswing costs time and reduces control. The racket should “wait” for the ball in front of you, not swing back as if preparing a baseline drive.
Contact point behind the body. If the contact point ends up beside or behind the body, the shot loses power and accuracy. Always strive to meet the ball in front of you.
Loose wrist. During a volley, the wrist must be firm. A “soft” wrist causes the racket face to collapse on contact, sending the ball in unpredictable directions.
Dropping the racket between shots. Between volleys, the racket should remain at chest height. If it drops to waist level or below, you will not have time to prepare for the next ball.
Standing still. The volley demands constant movement: split-step, step toward the ball, recovery. A static position at the net makes you an easy target for a lob.
The backhand is the weakest shot for most padel players. Statistically, the backhand volley produces 17.6% of unforced errors — more than any other shot. But it can be improved.
In padel, most balls travel through the centre of the court. If you play the right side, the backhand is your primary shot. Even on the left side, you need the backhand for defence and wall play.
Losing pairs commit more unforced errors on the backhand than any other shot (PMC, 2024).
Flat Backhand
When to Use
Ball below waist level — hit it flat.
Technique
Rotate your body — turn your shoulders and take the racket back
Bend knees and elbow — the elbow bend gives wrist flexibility
Lead with the elbow — the motion starts from the elbow, not the wrist
Contact point — slightly in front of the rear hip (right hip for right-handers)
Follow-through — the racket continues forward after contact
The Main Mistake
Hitting with the arm alone, without body rotation. The body = power and control.
Slice Backhand
When to Use
Ball above waist level — use slice. A cross-court slice against the side glass produces low, skidding rebounds.
Technique
Grip — towards an Eastern backhand grip
High preparation — the racket starts above the ball
Open racket face — slightly open for the undercut
High-to-low swing — think “sweep the crumbs off the table,” NOT “chop a log”
Brush under the ball — the racket passes under the ball, creating backspin
Backhand Volley
Technique
Continental grip — allows instant switching between forehand and backhand volleys
Short preparation — minimal backswing, focus on the contact point
Racket angle ~45° — knuckles slightly upward
Step forward — the front foot steps towards the ball on contact
Relaxed wrist — for angle control
Common Mistakes
No body rotation. Hitting with the arm only, without the shoulders, costs power and control.
Wrist bends on contact. The wrist must stay stable. Always.
Wrong contact point. Too far in front or too close to the body. Optimal: slightly ahead of the hip.
Not using the non-dominant hand. The left hand (for right-handers) should assist in the body turn and preparation.
Hitting early out of discomfort. Beginners strike the ball too early because they feel uneasy — this robs the shot of power.
Drills
Cross-court backhands. Both partners hit backhands only, diagonally. Goal: 10 consecutive balls without an error.
Alternating at the wall. Standing 3 metres from the wall, alternate forehand and backhand. 5 minutes non-stop.
Backhand only. Partner feeds all balls to the backhand. 3 sets of 15 balls, focusing on technique.
Rapid-fire volleys. Partner feeds balls alternately to the forehand and backhand at the net. Goal: smooth switching.
Backhand off the back wall. Partner hits balls into the back wall; you play the backhand after the rebound. 10 balls.
The bandeja is a defensive overhead shot in padel, played when retreating from the net. It allows players to neutralize opponents’ lobs while maintaining their net position without excessive aggression.
The bandeja is one of the most frequently used overhead shots in padel. It is applied when opponents hit a medium-height, medium-depth lob (globo) and you are positioned at the net or in the transition zone between the net and the service line.
Key situations for the bandeja:
Answering a medium-height lob. The ball is high enough to hit overhead but not deep or high enough for a full smash.
Maintaining net position. Unlike the smash, the bandeja does not require a full swing, allowing you to quickly return to your optimal net position.
Controlling the rally tempo. When the situation does not allow you to finish the point aggressively, the bandeja lets you retain the initiative and continue applying pressure.
[EXPERT OPINION] Professional players use the bandeja far more frequently than the smash. According to coaching estimates, the bandeja-to-smash ratio in an average match can reach 3:1 or even 4:1. This underscores the defensive nature of padel as a sport.
Technique
Grip
The bandeja uses a continental grip — the same grip used for serves, volleys, and most overhead shots in padel. Imagine picking up the racket like a hammer: the V-shaped crease between the thumb and index finger sits on the top edge of the handle.
Proper footwork is the foundation of a successful bandeja:
Shoulder turn. As soon as you identify the ball as a lob, turn sideways to the net. For right-handers, the left shoulder faces the net.
Moving back. Travel toward the ball using shuffle steps or the crossover step (carioca step). Never run backward — it is both dangerous and inefficient.
Hitting position. Position yourself so the ball is slightly in front of and to the side of you, roughly at front-foot level or slightly ahead.
Recovery to the net. Immediately after the shot, move forward to return to your optimal net position.
Swing and Contact
Preparation. Raise the racket behind your head, keeping the elbow at shoulder height. The non-hitting hand points at the ball — this helps track the trajectory and maintain balance.
Contact point. Strike the ball above and in front of your head. The racket face is slightly open (tilted back) to impart slice. The racket moves from high to low and forward, but without a powerful swing.
Slice. Apply backspin and a touch of sidespin to the ball. This slows the ball after the bounce and makes it harder for opponents to attack.
Follow-through. After contact, the racket continues forward and down, but with a shorter motion than a smash. The overall swing amplitude of the bandeja is significantly smaller.
Ball Trajectory
Bandeja Trajectory
The bandeja has a characteristic trajectory that distinguishes it from the smash and the vibora:
High arc. The ball travels along a parabolic path with considerable height.
Deep landing. The aim is to land the ball in the back third of the opponents’ court, close to the back wall.
Low bounce. Thanks to the slice, the ball stays low after bouncing and does not come far off the wall, making the return difficult.
Video Tutorial
Bandeja analysis by The Padel School: breaking down top players' technique
Common Mistakes
Hitting too flat. Without slice, the ball bounces high off the floor and wall, giving opponents a comfortable ball to attack. Always add slice.
Losing net position. Many players stay deep after the bandeja instead of recovering to the net. The bandeja is a shot designed to maintain your dominant position — do not give up this advantage.
Too much power. The bandeja is not an aggressive shot. Trying to hit with maximum force leads to loss of control and accuracy. Focus on ball placement and slice, not power.
Hitting from an awkward position. If the ball has gone too far behind you, do not force a bandeja — switch to another shot (such as a lob) and rebuild your position.
Incorrect contact point. Hitting behind the head or too low reduces control and slice effectiveness. Always strive to meet the ball in front of you.
Bandeja vs Vibora
The bandeja is often confused with the vibora, but there are fundamental differences:
Characteristic
Bandeja
Vibora
Purpose
Defense, control
Attack, pressure
Spin
Backspin (slice)
Sidespin
Trajectory
High arc
Flatter
Wall bounce
Low, “sticks”
Into the side glass
Difficulty
Intermediate
Intermediate-advanced
Drills
Target bandeja. Place cones or targets in the back third of the court. A partner feeds balls overhead, and you hit bandejas aiming at the target zone. Start with sets of 10, aiming for 7+ on target.
Bandeja with recovery. Execute a bandeja, then take 3-4 quick steps toward the net and play a volley. This builds the habit of recovering to the net after every overhead.
Lob-bandeja rally. One player at the back wall hits only lobs; the other at the net responds only with bandejas. Switch roles every 5 minutes.
Depth control. Divide the back section of the court into three zones. Practice bandejas into each zone: short, medium, and deep. This develops distance awareness.
Bandeja under pressure. In a 2v2 game situation, agree to respond to all lobs with bandejas only (no smashes). This forces you to refine your technique under real match conditions.
The smash (remate) is the most aggressive overhead shot in padel, designed to win the point outright. It includes several variations: the flat smash, X3 (ball exits via the side wall), and X4 (ball clears the 4-meter back wall).
Photo: Ramses Cervantes / UnsplashPhoto: Ramses Cervantes / Unsplash / Unsplash License
When to Use
The smash is the finishing blow in padel, applied when the situation allows you to win the point with a single stroke. Unlike the bandeja and the vibora, the smash is a fully committed aggressive shot with maximum power.
Situations for the smash:
Short lob. The opponent has played a weak lob; the ball is in the ideal hitting zone — high and close to the net.
Optimal position. You are in the zone between the net and the service line, with the ball directly above or slightly in front of you. This is the essential condition for an effective smash.
Opportunity to finish the point. The smash makes sense when you can realistically win the point — through a clean winner, X3, or X4.
High contact point. The ball is at the maximum height of your reach, allowing a full overhead swing downward.
According to PadelMBA research, approximately 25.9% of points in professional padel are finished with smashes. This makes the smash the most productive finishing shot in the sport.
Technique
Grip
The smash uses a continental grip — the universal grip for all overhead shots in padel. A slightly firmer grip pressure is acceptable compared to the bandeja, as the shot requires maximum energy transfer to the ball.
Footwork during the smash is critically important — poor positioning negates all the power of the shot:
Early turn. As soon as you identify the ball as a short lob, turn sideways to the net. For right-handers, the left shoulder leads.
Moving to the ball. Use shuffle and crossover steps. The smash position is closer to the net than the bandeja — typically 2-4 meters from the net.
Weight transfer. At the moment of the hit, transfer body weight from the back foot to the front foot. This adds power and directs the energy of the shot forward.
Recovery. After the smash, be ready for a return — not all smashes win the point. Quickly return to your optimal position.
Full swing. Unlike the bandeja, the smash is executed with a full swing. The racket goes behind the back, the elbow is high, and the body coils like a spring.
Non-hitting hand. Points at the ball — helps track the trajectory and maintain balance.
Contact point. As high and as far in front of the body as possible. The higher the contact point, the steeper the angle of attack and the harder it is for opponents to return.
Full body commitment. The entire body is engaged in the shot: hip rotation, shoulder turn, arm, and wrist. This is the kinetic chain that transfers maximum energy to the ball.
Follow-through. The racket finishes on the opposite side of the body. A complete follow-through is the hallmark of a properly executed shot.
Smash (Remate) Trajectory
Types of Smashes
Flat Smash
The basic smash variant:
The ball is struck from top to bottom with minimal spin
Maximum ball speed
Aimed into the court — goal: the ball bounces and flies toward the back wall, from where the opponent cannot return it
Most effective on short lobs when you are positioned close to the net
X3 — Smash Through the Side Wall
An advanced variation:
After bouncing off the floor, the ball hits the side glass and exits the court through the open section of the side wall
The name X3 refers to the ball crossing three surfaces: floor, side glass, and out through the side passage
Requires precise direction and good spin
Combines power with a lateral component — essentially a powerful vibora
X4 — Smash Over the Back Wall
The most spectacular shot in padel:
After bouncing off the floor, the ball clears the back wall (which is 4 meters high — hence the name X4)
X4 requires heavy topspin: the ball hits the floor, topspin amplifies the bounce, and the ball gains enough height to clear the 4-meter wall
Executed from a zone close to the net (typically 2-3 meters)
Demands perfect timing, positioning, and technique
A ball that clears the back wall is a winner — point won
[EXPERT OPINION] The X4 is an extremely spectacular but risky shot. Even at the professional level, it represents a relatively small percentage of total smashes. For most players, the flat smash and X3 are far more reliable and should be the training priority.
Topspin Smash
Adding topspin to the smash amplifies the ball’s “kick” after bouncing off the floor
After contact with the floor, the ball gains speed and height — making the return from the back wall much harder
Topspin is the key element for the X4 but is useful in regular smashes as well
Achieved by moving the racket from low to high and forward at the moment of contact, with emphasis on wrist action
Video Tutorial
Learn the padel smash in 5 simple steps by Otro Nivel Padel
Common Mistakes
X4 from the wrong position. Attempting an X4 from deep in the court (from the service line and beyond) almost always results in an error. The X4 requires a position close to the net — 2-3 meters. From deeper positions, it is better to play a bandeja or vibora.
Insufficient topspin. A flat smash into the back wall often gives the opponent a comfortable bounce. Topspin is the key to making the ball “accelerate” after the bounce and become unplayable.
Overhitting. Trying to hit with absolute maximum force leads to loss of control. The ball may fly out, hit the side wall without bouncing, or simply be inaccurate. Control matters more than absolute power.
Hitting a falling ball. The ideal contact point is at the peak of the ball’s trajectory or slightly after. Hitting a ball that has already dropped significantly reduces the angle of attack and effectiveness.
Ignoring opponent positioning. A smash to the center of the court when both opponents are standing in the center is often returned. Consider opponent positions: hit to open spaces or aim for X3/X4 directions.
Relaxing after the smash. Not all smashes are winners. Especially in padel, where the walls allow returns of even powerful shots. Be ready for the next ball immediately after the smash.
Smash Statistics in Professional Padel
According to PadelMBA, analyzing professional matches:
25.9% of points are finished with smashes — the highest percentage among all shot types
The smash has one of the best winner-to-error ratios
Professionals choose the smash only when the probability of success is high, preferring the bandeja or vibora in ambiguous situations
The X4 accounts for a relatively small share of total smashes even at the professional level
Drills
Smash off hand feeds. A partner throws balls by hand to a height of 3-4 meters from a distance of 3 meters from the net. Execute smashes aiming for a specific court zone. 3 sets of 10 balls.
Topspin against the wall. Stand 3-4 meters from a wall and execute topspin smashes, observing how the ball bounces. A ball with good topspin accelerates sharply upward after the bounce.
X3 to a target. Place a target (cone or towel) near the side exit of the court. A partner feeds balls; your goal is to execute an X3 so the ball exits through the side wall near the target zone.
Smash with decision-making. A partner feeds lobs of varying depths. You make the decision: short lob equals smash, medium equals vibora, deep equals bandeja. This develops tactical thinking and shot selection.
Match-play tracking. In 2v2 match conditions, track every smash: did it finish the point? If not, what could have been done better? Maintaining a mental log improves decision-making over time.
The globo, or lob, is a defensive shot in padel where the ball is sent in a high arc over the heads of opponents at the net. It is the primary defensive weapon, allowing players to push opponents back from the net and seize the initiative.
The globo is a fundamental shot in padel and arguably the most important defensive tool in every player’s arsenal. In padel, where controlling the net position is the key to winning, the lob is the primary way to strip opponents of that advantage.
Key situations for the lob:
Defense from the back of the court. When you are pushed back to the rear wall and cannot attack, the lob is the safest and most effective response.
Seizing the initiative. A well-placed lob forces opponents to retreat from the net, giving you the opportunity to take their place and gain control of the rally.
Buying time. A high lob gives you time to reposition, recover, and prepare for the next shot.
Against aggressive opponents. If opponents are playing very close to the net, a lob over their heads is the ideal tactical move.
Technique
Grip
For the basic lob, a continental grip or semi-western grip works well. The choice depends on which stroke you use to execute the lob:
Forehand lob: Many players use a semi-western grip, which provides a natural racket face opening to lift the ball.
Backhand lob: Continental or eastern backhand grip — depending on whether you play with one or two hands.
The key principle: the grip must allow you to open the racket face upward to send the ball on a high arc.
Footwork
Proper footwork during the lob is often underestimated:
Early positioning. Identify where the ball is going and move to the contact point early. Do not wait for the ball to come to you.
Stable stance. Transfer weight to the front foot at the moment of contact (for right-handers: left foot on the forehand, right foot on the backhand).
Low center of gravity. Bend your knees slightly. Many lobs are played off low balls — the lower you get, the easier it is to get the racket under the ball.
Forward movement after the shot. Immediately after the lob, begin moving toward the net. The lob is not just a defensive shot — it is the start of the transition from defense to attack.
Lob (Globo) Trajectory
Types of Lobs
Flat Lob
The basic lob for beginners:
The racket moves from low to high and forward
The racket face is open (tilted upward)
The ball travels on a high parabolic arc
Minimal spin — the ball flies predictably
Main target: the ball should pass over opponents’ heads and land in the back third of the court
Topspin Lob
An advanced technique:
The racket brushes up on the ball with additional forward rotation
Topspin causes the ball to drop faster after reaching its peak
The ball “dives” downward, making it harder to intercept
After bouncing, the ball accelerates and moves away from the back wall — extremely difficult to return
Requires significantly more skill and coordination
Direction
Direction choice is a key tactical element:
Cross-court (diagonal). The recommended option in most situations. A diagonal lob covers a longer path, providing a greater margin for height and depth. It also uses more of the court, increasing the chances of success.
Down the line. A riskier option with less margin for error. Used when the opponent on the line side is positioned far from the back wall, or for the element of surprise.
[EXPERT OPINION] Beginners are advised to play 70-80% of their lobs cross-court. This is the safest and most effective option. As your level improves, you can add down-the-line lobs for variety and tactical purposes.
Video Tutorial
How to play a good padel lob by Otro Nivel Padel
Common Mistakes
Lob too short. The most dangerous mistake. A short lob is a gift for opponents: an easy smash or vibora. It is better to overshoot past the back wall (out) than to give away an easy ball at the net. Height is your friend.
Insufficient height. Many beginners are afraid to hit high and play lobs that opponents easily intercept at head level. The ball must pass well above the opponents’ outstretched arms — at least 1-1.5 meters above.
Lob without moving forward. The lob is not only a shot but also a tactical tool for transitioning to the net. If you play a good lob but remain at the back wall, you have wasted half its value.
Same direction every time. If you consistently lob to the same spot, opponents will adapt. Alternate between cross-court and down the line; vary the depth.
Panic under pressure. Under pressure at the net, many players either try to drive the ball low (and make errors) or play a weak lob. Remember: in pressure situations, a deep lob is almost always the best choice.
The Lob as a Tactical Weapon
The globo is not merely a defensive shot. It is a central element of padel’s tactical system:
Lob + net approach. The classic combination: play a deep lob, and while opponents retreat, take up the net position. Learn more about positioning in Basic Positions.
Lob + chiquita. Alternating lobs and chiquitas from the back of the court creates maximum difficulty for opponents: they do not know whether to expect a high ball overhead or a low ball at their feet.
Lob as a reset. When the rally is going against you, a deep lob “resets” the situation and gives you a chance to start fresh.
Drills
Lob to the zone. Mark the back third of the court with cones. A partner at the net plays volleys; you respond only with lobs. Target: 7 out of 10 lobs land in the zone.
Cross-court vs down the line. A partner calls the direction (“cross!” or “line!”) before each shot. You execute the lob in the called direction. This develops directional control.
Lob + transition. Play a lob from the back of the court, then immediately sprint to the net and take the next ball as a volley. This trains the lob-to-net transition sequence.
Height and depth calibration. Stretch a rope or tape at 4 meters high across the court (at the height of the back wall). Your task is to hit the ball over the rope so it lands before the back wall. This calibrates your sense of height.
Lob under pressure. Two players at the net continuously attack (volleys, bandejas); two players at the back defend using only lobs. Goal: hold for 2 minutes using nothing but lobs.
The vibora (víbora) is an aggressive overhead shot in padel with heavy sidespin. After bouncing, the ball veers into the side glass, making the return extremely difficult for the opponent.
The vibora is an intermediate shot between the bandeja and the smash. It is more aggressive than the bandeja but safer than the smash, and it is one of the most effective tools for applying pressure on opponents.
Use the vibora in the following situations:
Medium-height, medium-depth lob. The ball allows an overhead shot, but it is not in the ideal zone for a full smash.
You need to apply pressure. You want to make the return difficult for the opponent without risking an error on a full smash.
Opponent is vulnerable near the side wall. The vibora is most effective when aimed so that the ball veers into the side glass on the opponent’s side after bouncing.
Maintaining net position. Like the bandeja, the vibora allows you to keep your net position while applying significantly more pressure.
The name “víbora” means “viper” in Spanish — the shot, like a snake, twists and changes direction after the bounce.
Technique
Grip
The vibora uses a continental grip, the same as the bandeja and other overhead shots. However, the wrist plays a far more active role in the vibora — it is the wrist snap at the moment of contact that gives the ball its characteristic sidespin.
Some advanced players shift the grip slightly toward an eastern forehand to enhance the sidespin, but this is individual and requires significant practice.
Footwork for the vibora is largely similar to the bandeja, with a few key nuances:
Shoulder turn. Turn sideways to the net as soon as you identify the ball trajectory. For right-handers, the left shoulder faces the net.
Movement. Travel toward the ball using shuffle or crossover steps (carioca). Avoid running backward.
Hitting position. The ball should be slightly in front of and to the side. The vibora allows a slightly more lateral position compared to the bandeja, which facilitates generating sidespin.
Recovery. Move forward immediately after the shot. The vibora typically puts the opponent in a difficult position — be ready for a weak return.
Swing and Contact
Preparation. The racket rises behind the head, elbow at or slightly above shoulder height. The non-hitting hand points at the ball for balance and tracking.
The key element — wrist snap. The fundamental difference between the vibora and bandeja is the active wrist action. At the moment of contact, the wrist snaps sharply, imparting intense sidespin to the ball.
Contact point. Strike the ball in front of and slightly to the side of your head. The racket path is not straight top-to-bottom but includes a lateral component — this is what generates the sidespin.
Direction. The goal is to direct the ball so that after bouncing off the floor, it veers into the side glass. For a right-hander hitting to the right side of the court, the ball moves right toward the side wall after the bounce.
Trajectory and Bounce
Vibora Trajectory
The vibora’s trajectory is fundamentally different from the bandeja:
Flatter arc. The vibora flies lower and faster than the bandeja.
Lateral movement after bounce. Thanks to the sidespin, the ball veers sharply to the side after hitting the floor — into the side glass.
Difficult glass bounce. A ball hitting the side glass with heavy spin bounces unpredictably — low and in a direction that is uncomfortable for the opponent.
Video Tutorial
Master the padel vibora in 12 steps by Otro Nivel Padel
Common Mistakes
Power instead of spin. The most common mistake is trying to hit as hard as possible. The vibora’s effectiveness comes from the quality of the spin, not the power. A ball with good sidespin, even at moderate speed, creates far more problems for the opponent.
Wrong ball selection. The vibora does not work on every lob. If the ball is too high and deep, a bandeja or a retreat for a smash is a better option. If the ball is in the perfect striking zone, finishing with a smash is preferable.
Insufficient wrist action. Without an active wrist snap, the vibora becomes a poor bandeja — without the needed spin, the ball does not veer into the side wall.
Wrong direction. The vibora is most effective when hit to specific zones. The ball should land so that it veers into the side glass after the bounce. This requires understanding the court geometry and bounce angles.
Losing position. As with the bandeja, you must immediately recover to the net after the vibora. Lingering in the back zone negates the advantage gained from a well-executed shot.
Vibora vs Bandeja: When to Choose Which
The choice between vibora and bandeja is one of the key tactical decisions at the net:
Bandeja — when reliable control is needed, the ball is not suitable for aggression, or the situation calls for a safe shot.
Vibora — when there is an opportunity to apply pressure, the ball is suitable for generating spin, and you want to make life difficult for opponents.
[EXPERT OPINION] Beginners and intermediate players are advised to first master the bandeja to a consistent level before moving on to the vibora. Attempting to play viboras without a confident bandeja leads to a high number of errors.
Drills
Wrist snap on the spot. Without a ball: stand in the overhead position and repeatedly perform the wrist snap motion, simulating contact. This develops the muscle memory for the wrist movement — the key element of the vibora.
Vibora into the side glass. A partner feeds balls overhead; your goal is to execute a vibora so that the ball hits the side glass after bouncing off the floor. Start from 2-3 meters behind the net. Target: 5 out of 10 balls into the glass.
Bandeja-vibora alternation. A partner feeds lobs; you alternate between bandeja and vibora on every other ball. This develops the ability to switch between shots and choose the right option.
Vibora with zone control. Divide the court into zones: left corner, center, right corner. Practice viboras into each zone, paying attention to the angle of the bounce toward the side wall.
Match-play integration. In 2v2 match conditions, consciously look for vibora opportunities. After each rally, evaluate: Was it the right moment? Did the ball veer effectively into the glass?
The chiquita is a low, soft shot in padel aimed at the opponents’ feet near the net. It is a key transition shot that allows players to take over the net position and shift from defense to attack.
The chiquita is one of the most important tactical shots in padel. The name comes from the Spanish word “chiquita” (small one), which perfectly describes the essence of the shot: small, soft, yet tactically powerful.
Key situations for the chiquita:
Transitioning to the net. The classic application: you are at the back of the court, play a chiquita at the opponent’s feet, and follow the ball forward to take up the net position.
Opponents 2-3 meters from the net. The chiquita works best when opponents are not right at the net but have stepped back slightly. In this case, the ball has time to drop to their feet.
Alternating with the lob. The lob + chiquita combination creates maximum uncertainty: opponents do not know whether to expect a high ball overhead or a low ball at their feet.
After a back wall bounce. A ball that bounces off the back wall is often at a comfortable height for executing a chiquita.
The chiquita forces the opponent to play a volley from below the waist (upward), giving you a chance to seize the initiative: a weak volley is your opportunity to attack.
Technique
Grip
The chiquita uses a continental grip or semi-western grip:
Continental — the universal option, allowing you to play the chiquita on both forehand and backhand without changing grip.
Semi-western — provides slightly more control on the forehand chiquita due to a more stable racket face.
The key element: the racket face should be slightly open (tilted back/upward). This allows the ball to clear the net on a low arc and then drop quickly.
Footwork
Footwork during the chiquita is critically important because the shot is inseparably linked to the forward movement toward the net:
Preparation. Identify the moment for the chiquita: the ball is at a comfortable height (between knee and waist), and opponents have moved back from the net.
Step forward. Step toward the shot with the front foot. This simultaneously provides balance and initiates the movement toward the net.
Low center of gravity. Bend your knees and lower your body. The chiquita is played on a low ball — you need to be at its level.
Continue forward. This is the most important element. Immediately after the shot, continue moving toward the net. A chiquita without a net approach is a wasted opportunity.
Swing and Contact
Short backswing. The chiquita does not require a large backswing. The racket is taken back minimally — most of the work is done by the wrist and forearm.
Soft contact. The keyword is “touch.” The ball should softly clear the net and drop at the opponent’s feet. This is not a power shot.
Open racket face. At the moment of contact, the racket face is slightly open. The motion is forward and slightly upward, similar to scooping the ball with your palm.
Light slice. Many players add a slight backspin so the ball drops faster after clearing the net and stays low. This is achieved by moving the racket slightly from high to low and forward.
Direction. The chiquita is aimed at the nearest opponent’s feet or at the space between the two opponents. The center of the court (between players) is often the best target zone.
Ball Trajectory
Chiquita Trajectory
The ideal chiquita has a characteristic trajectory:
Low arc over the net. The ball clears the net with minimal margin — the lower, the better (but not into the net!).
Quick descent. After crossing the net, the ball drops rapidly, arriving at the opponent’s feet.
Contact at or below waist level. The goal: force the opponent to play a volley from an uncomfortable low position.
Video Tutorial
The best padel chiquita lesson by Otro Nivel Padel with German Schafer
Common Mistakes
Too much power. The most common mistake. The chiquita is a soft shot. If you hit hard, the ball rises too high, giving the opponent a comfortable volley at chest level. Softness is the key to success.
Chiquita when opponents are right at the net. If opponents are standing directly at the net (less than 1-1.5 meters away), the chiquita is ineffective — they will intercept the ball before it drops to their feet. In this case, use a lob instead.
No net approach. A chiquita without following to the net is a half-wasted shot. Even if the chiquita is well executed, staying at the back gives the initiative right back to the opponent. Always move forward after the shot.
Predictability. If you play the chiquita every time from the same position, opponents will start anticipating and intercepting the ball early. Alternate the chiquita with lobs and other shots.
Hitting the net. When striving for a low trajectory, it is easy to overdo it and hit the net. Make sure the racket face is sufficiently open and the motion is directed forward and slightly upward.
Tactical Combinations with the Chiquita
The chiquita reaches its full potential in tactical combinations:
Chiquita + Net Approach
The basic combination:
Play a chiquita from the back of the court
Immediately move toward the net
The opponent is forced to volley from below the waist
You intercept the weak response from your advantageous net position
Chiquita + Lob
Alternation pattern:
Play a lob — opponents retreat
Opponents return to the net
Play a chiquita — ball at their feet
Opponents do not know what to expect and make errors
Chiquita to the Center
Advanced tactic:
Direct the chiquita exactly between the two opponents
This creates confusion: which of the two should play the ball?
Often leads to racket collisions or delayed reactions
Drills
Chiquita over the net. Stand at the service line with a basket of balls. Execute chiquitas over the net, aiming for the ball to land in the zone 1-2 meters beyond the net. This calibrates the softness of the shot and your sense of distance.
Chiquita + forward movement. A partner feeds the ball to your back court. Execute a chiquita and move toward the net, where you take the next ball as a volley. Repeat 10 times, then switch roles.
Lob-chiquita alternation. A partner stands at the net. Alternate: one shot is a lob, the next is a chiquita. This develops the ability to switch between shots and keep opponents guessing.
Chiquita to a target. Place a towel or cone 1.5-2 meters behind the net. Execute chiquitas aiming as close to the target as possible. Goal: 6 out of 10 balls within 1 meter of the target.
Match-play focus. In 2v2 match conditions, set a goal: every time you play a chiquita, you must follow to the net. Evaluate after each rally: Did I follow the ball forward? Did I manage to take the net?
Walls are not obstacles — they are tools. The ability to read rebounds and use walls turns a constraint into an advantage and sets padel apart from every other racket sport.
Wall play is what makes padel a unique sport. According to the wall play rules, after the ball touches the floor on your side, it can bounce off any wall and remains in play. This creates an entirely new dimension in strategy: shots that would be “dead” in tennis stay alive in padel.
For beginners, the walls often become a source of confusion. The ball flies toward the wall, and panic sets in — you cannot tell where it will bounce, when to swing, or what to do. But the key principle is simple: you have more time than you think. The ball slows down after each bounce, and the wall effectively gives you extra time to prepare for your shot.
Back Glass Rebounds
The back glass is the most common type of wall rebound. Your opponent hits a deep shot, the ball bounces off the floor, and strikes the back wall.
How the ball behaves:
After contacting the glass, the ball loses significant speed
The trajectory is predictable: the ball rebounds forward, back toward the center of the court
The harder the opponent’s shot, the farther from the wall the ball rebounds
A ball with underspin (slice) “sticks” to the wall and rebounds weakly
A ball with topspin rebounds higher and farther
How to play it:
Step away from the wall. The most common mistake is standing right up against the wall. Step back 1–2 meters and let the ball come to you.
Turn sideways. Do not face the wall — turn sideways so you can see both the wall and the net.
Wait for the rebound. Do not hit the ball before it bounces off the wall. Let physics do its work.
Use the time. The wall has given you extra seconds — use them for shot selection and positioning.
[EXPERT OPINION] Beginners often try to hit the ball between the floor and the wall, at the moment it is still traveling toward the wall. This almost always leads to an error. The rule: if the ball is heading for the wall — let it bounce. The only exception is a ball with very weak spin that might “die” against the wall.
Side Glass Rebounds
The side glass creates more complex rebounds because the ball changes direction horizontally.
Basic principle: the angle of incidence approximately equals the angle of reflection. A ball arriving at the side wall at a 45-degree angle will rebound at roughly the same angle in the opposite direction. However, spin on the ball can significantly alter this angle:
No spin: predictable rebound following the angle rule
Sidespin: the ball “drifts” to one side after the rebound
Topspin: the rebound is higher and faster
Underspin: the ball “sits down” after contacting the wall
How to play it:
Step away from the wall, giving the ball space to rebound.
Track the ball with your eyes from the moment of your opponent’s shot.
Anticipate the rebound direction based on the incoming trajectory.
Prepare your racket early — after a side wall rebound, there is little time for preparation.
Combined Rebounds
The most challenging type is the combined rebound, where the ball contacts multiple walls in sequence. The most common combination is back wall then side wall (or vice versa).
Back wall to side wall:
The ball rebounds off the back wall, moves forward and to the side, then contacts the side wall. After the double rebound, the ball typically ends up in the center of the back court, moving slowly and at a comfortable height. This is one of the best moments for a counterattack.
Side wall to back wall:
A ball arriving at a sharp angle first contacts the side wall, then the back wall. This rebound is harder to read because the ball changes direction twice. The key is to stay calm and let the ball complete both bounces.
Practical tip: during practice, ask your partner to hit balls into the corner of the court (where the side wall meets the back wall). Watch the trajectory without attempting to hit. Simply get used to the ball’s behavior. After 15–20 minutes of this practice, you will start to intuitively sense where the ball will go.
Positioning
Defensive position during wall play: our team (1, 2) behind the service line, opponents (3, 4) control the net
Correct positioning during wall play accounts for 90% of success. Here are the key rules:
Do not press against the wall. Always leave 1–2 meters between yourself and the wall. The ball will come to you — you do not need to go to it.
Stay behind the service line. When defending, your base position is behind the service line (approximately 1.8–2.5 m from the back wall). This gives you reaction time.
Do not get stuck in the corner. After a wall shot, move back to the center of your half of the court.
Use the walls for counterattacks. After a successful wall rebound, you have options: a defensive lob, a precise shot to the center, or an attacking drive. The wall gave you time — use it wisely.
After playing off the back wall, aim to position yourself 1.8–2.5 m from the back wall, or advance toward the net if the quality of your shot allows it.
Video Tutorial
How to play close to the glass: practical tips from The Padel School
Common Mistakes
Panicking near the glass. The wall is your friend, not your enemy. The ball slows down and becomes predictable. Breathe and wait.
Trying to hit too hard. After a wall rebound, the ball is already slow. A powerful shot is unnecessary — an accurate one is needed. A controlled deep lob or precise placement is far more effective.
Hitting before the wall rebound. If the ball is heading for the wall, let it bounce. Do not try to intercept it.
Standing right against the wall. You need space for your swing. Step back and let the ball come to you.
Ignoring the walls. Some beginners try to hit every ball before it reaches the wall. This is not tennis — let the wall work for you.
Misreading spin. A sliced ball behaves completely differently from a topspin ball. Pay attention to your opponent’s racket motion during the shot.
Exercises
Observation without hitting. A partner hits balls at the back wall with varying power. You stand and observe the rebound without attempting to hit. Goal: learn to predict where the ball will end up. 10 minutes.
Wall to center. A partner feeds balls into the back wall. You wait for the rebound and send the ball with a controlled shot to the center of the court. Focus on control, not power. 15 minutes.
Side wall practice. A partner hits balls at the side wall from different angles. You practice reading the rebound and returning the shot. 10 minutes on each side.
Corner rebounds. A partner hits balls into the corner (where the back wall meets the side wall). You wait for the combined rebound and play a defensive lob. 10 minutes.
Wall to lob rally. Rally drill: one player hits deep, the other plays off the wall with a lob. Goal: a consistent, deep lob after every wall rebound. 15 minutes.
The drop shot is a deceptive stroke that turns the opponent’s aggressive position into a desperate sprint to the net. Finesse, timing, and disguise are the keys to this shot.
Beyond the bandeja and the vibora lie the shots that elevate a game to elite level: the rulo, the gancho, and the kick smash. Each solves a specific tactical problem.
A soft overhead with topspin and sidespin aimed at the opponent’s side glass. From the Spanish “rulo” = “roll.”
The King of the Rulo: Franco Stupaczuk (Stupa) — the acknowledged master of this shot.
When to Use
The ball is behind your body — no clean smash available
You need to regain the attacking position at the net
NOT for winning the point outright — for creating problems for the opponent
Technique
Contact point: lower than the smash; above the left shoulder (for right-handers)
Wrist action: relaxed wrist, a “wrist slice” across the outside of the ball
Speed: intentionally soft — the feeling of a “gentle push,” not a hit
Result: the ball rebounds off the side wall on an unpredictable trajectory
The Main Mistake
Hitting too hard. The rulo is about spin, not power.
Gancho (“The Hook”)
What It Is
An overhead hook shot used when a lob flies over the non-dominant shoulder (left for right-handers) and there is no time to turn for a smash or bandeja.
When to Use
A lob sails over your left shoulder
No time to turn
The ball is behind you — the gancho lets you stay at the net
Technique
The loop: the racket travels from the ready position through a backward loop to the contact point above the head
MISTAKE: lifting the racket straight through the front of the body = a badminton-style shot (weak and predictable)
Contact: high, behind the head or above the non-dominant shoulder
The wrist is the last link: for directional control
Strategic Value
Allows you to stay at the net after a lob instead of retreating
Goal: direct the ball into the side glass for a difficult rebound
When executed well, it turns defence into attack
Kick Smash
What It Is
A topspin smash in which the ball changes direction after bouncing off the floor and back wall, kicking upward. The ultimate version — X3 (por tres): the ball exits the court over the 3-metre side wall.
Contact: above the head or slightly behind; the further back, the more topspin
Wrist snap: relaxed wrist, “rolling” up the back of the ball from low to high
Footwork: step back quickly behind the ball, stable base
The X3 Trajectory
The ball bounces roughly 1 m before the service line
Rebounds off the back wall about 2.5 m from the rear corner
With good topspin the ball “kicks” up and exits over the 3-metre side wall
The Key Principle
The kick smash is about topspin, not power. A common misconception: brute force will do the job. In reality, the kick smash demands finesse, timing, and spin.
Comparison Table
Shot
Purpose
Speed
Spin
When
Rulo
Control and position
Soft
Side + topspin
Ball behind the body
Gancho
Hold the net
Medium
Depends on situation
Lob over weak shoulder
Kick Smash
Win the point (X3)
Medium–hard
Topspin
High lob with time
Common Mistakes
Attempting before mastering the basics. Learn the bandeja and vibora before moving to advanced shots.
Power instead of spin. All three shots demand finesse. Brute force = loss of control.
Gancho without the loop. Lifting the racket straight up = badminton shot.
Wrong contact point. The rulo and gancho are struck behind the head, not in front.
Drills
Rulo at the wall. Toss the ball and hit a rulo into the side glass. Observe the rebound. 20 repetitions.
Gancho from a toss. Partner tosses the ball over your left shoulder; you execute the gancho. 15 repetitions.
Kick smash to target. Place a cone ~1 m before the service line. Hit kick smashes aiming for that zone. 10 out of 15 = good.
Match rotation. 2 vs 2, the attacking pair alternates rulo, gancho, and kick smash. Goal: confident switching.
Padel is a game of patience and positioning, not power. Simple tactical principles allow beginners to beat physically stronger but tactically unaware opponents.
The most important principle for beginners: placement beats power. In padel, there is no point in hitting with all your might — the ball will bounce off the glass and return to your opponents with extra pace. You are literally giving them free speed.
As Babolat notes in their padel tactics guide: “Positioning is the bedrock of all padel strategies.” This is not tennis, where an ace can win a point. In padel, the player who makes fewer errors and more consistently returns the ball wins.
Practical rules for consistency:
Hit at 70% of your maximum power — this is sufficient for a quality shot
Aim for safe zones, not the lines
A high ball (lob) is better than a risky flat shot
When in doubt — play deep to the center of the opponent’s court
Professional match statistics confirm this principle: most points in padel are won not through “killing” shots but through opponent errors. Your job is to avoid mistakes and force the other side into making them.
The Goal: Get to the Net
If you remember only one tactical rule, let it be this: get to the net and stay there. The pair that controls the net wins the vast majority of rallies.
Why the net matters so much:
At the net you attack; behind the service line you defend
A volley from the green zone gives you the best attacking angles
Opponents are forced to play more precisely and make more errors under pressure
You control the pace of the rally
How to reach the net:
Hit a quality deep shot (lob, deep drive)
Make sure the shot puts pressure on the opponent
Advance forward together with your partner
Take up position 2–3 meters from the net
Execute a split step and be ready for the response
[EXPERT OPINION] Do not approach the net after every shot. Only approach after a quality shot that forces the opponent to play from an uncomfortable position. Approaching after a weak shot is an invitation for the opponent to hit at your feet.
The Lob: Your Best Friend
The lob is a high, deep shot over the opponents standing at the net. For beginners, it is the most effective and safest shot in the arsenal.
Why the lob is so valuable:
It is safe — a high trajectory means a large margin over the net
It pushes opponents away from the net — they lose their attacking position
It gives you time — while the ball travels in an arc, you can regroup
It is simple to execute — no complex technique required
The ideal beginner lob:
Direction: cross-court (diagonal) — this is the longest path across the court, meaning more margin for error
Height: high enough that the opponent cannot intercept at the net (3–4 meters above the net)
Depth: the ball should land past the service line, closer to the back wall
After the lob: if it is deep — approach the net together with your partner
Playing to the Center
Hitting to the center of the opponent’s court is one of the most effective tactical tools at any level.
Advantages of hitting to the center:
Minimum risk. The center is the farthest point from the sidelines. Even an inaccurate shot stays in court.
Confusion between opponents. A ball to the center forces both opponents to decide who takes it. This provokes communication errors.
No angles for the response. From the center, it is harder for opponents to create a sharp angle for attack.
Hitting at the feet. If opponents are at the net, a shot to the center at their feet creates an extremely uncomfortable situation for them.
Aim to direct the ball between the opponents rather than at one specific player. The moment of uncertainty (“who takes it?”) is your advantage.
When to Attack, When to Defend
The decision to “attack or defend” is determined by your court position and the quality of the previous shot.
Attack when:
You and your partner are at the net (green zone)
The opponent is in an uncomfortable position (retreating, hitting off the wall, stretching for the ball)
The ball arrives high and is convenient for an overhead shot
You receive a short ball that can be played aggressively
Defend when:
You and your partner are behind the service line (red zone)
Opponents control the net
The ball arrives deep and you are playing off the wall
You have not reached the optimal position
In a transitional situation:
Play a neutral shot — deep, to the center, without risk
Wait for an opponent error or a weak response
Gradually advance forward without forcing
Simple Game Patterns
Here are three basic patterns that work at every level:
Pattern 1: Lob — Approach — Volley
From defense, send a deep cross-court lob
While the ball is in the air, advance forward with your partner
Take up position at the net
Play a volley to the center or at the opponent’s feet
Pattern 1: after a deep lob, our pair (1, 2) moves to the net while opponents (3, 4) retreat
This is the most reliable way to seize the initiative. A deep lob forces the opponents to retreat, and you take their place at the net.
Pattern 2: Deep Center Shots — Wait for the Error
Consistently send the ball deep to the center of the opponent’s court
Do not take risks, do not try to “kill” the ball
Wait for a weak response or an error
When you receive a short ball — attack and approach the net
This pattern is particularly effective against beginners who start forcing shots and making errors themselves.
Pattern 3: Serve — Volley to Feet — Partner Intercept
Execute a serve (moderate power, deep)
Approach the net after the serve
Direct the first volley at the receiver’s feet
Your partner intercepts the weak response and finishes the point
Pattern 3: server (1) approaches the net, partner (2) already at net. Receivers (3, 4) in defense
This pattern requires coordination with your partner but is very effective.
Using the Walls
The walls are not your enemy — they are your ally. Many beginners panic when the ball flies toward a wall and try to intercept it on the way. This is a mistake.
Rules for using the walls:
Let the ball bounce. The wall slows the ball and gives you extra time. Read more about this in Wall Play.
Do not hit hard toward the wall. A powerful shot into the opponent’s back wall will rebound and give them a comfortable ball.
Use the walls as reference points. If you are at the back wall — you are on defense. If your opponent is at the back wall — you should be at the net.
Faster balls rebound farther. Control your shot power so the ball “dies” near the back wall rather than rebounding to mid-court.
[EXPERT OPINION] The best advice for beginners: after every wall rebound, play a high deep lob. It is safe, it works, and it gives you time to regroup. Do not try to play “beautiful” shots off the wall until you have mastered the basics.
Common Mistakes
Hitting too hard. A powerful ball bounces off the glass faster and flies back to the opponents. You give them pace and time. Control your power.
Ignoring position. Beginners think only about the shot, forgetting about position. Where you stand is more important than how you hit.
Breaking the pair apart. One player approaches the net, the other stays back. This creates a “diagonal gap” in defense.
Wall panic. The walls give you additional time. Do not fear them — use them.
Impatience. Padel is a marathon, not a sprint. A rally can last 20–30 shots. Do not try to finish the point on the first hit.
No plan. Every shot should have a purpose: create pressure, approach the net, force an error. Aimless shots are a gift to the opponent.
Court position determines the outcome of a rally before the shot is even hit. Understanding court zones and correct pair placement is the foundation of tactical thinking in padel.
Net Zone (La Red)No Man's Land (Tierra de Nadie)Back Zone (El Fondo)Back Wall (Pared de Fondo)Side Wall (Pared Lateral)
Three Court Zones
The padel court is divided into three conceptual zones, each defining your role in the rally:
Green Zone (Attack)
Located 2–3 meters from the net. This is the zone of dominance: from here you control the rally and finish points. Shots from the green zone — volleys, bandejas, smashes — are the most effective.
Research on professional matches shows that approximately 36% of points are finished from the net zone, with 28.9% coming from volleys and 25.9% from smashes. The team that controls the net wins the vast majority of rallies.
Orange Zone (Transition)
Located between the service line and the net. This is the danger zone — “no man’s land.” Here you are too far from the net for an effective volley and too close for comfortable groundstrokes. Balls arrive at your feet, making it awkward to respond.
Rule: move through the orange zone, never stop in it. Move forward to the net or retreat behind the service line, but do not get stuck in between.
Red Zone (Defense)
Located behind the service line, in the back 2 meters of the court. This is the defensive zone: from here you play lobs, wall shots, and try to regain control of the rally. The objective from the red zone is not to win the point but to create conditions for moving forward.
Professional match analysis data shows that 41.4% of points are finished from the middle area of the court — confirming that the ability to transition between zones is critically important.
Attacking position: both players (1, 2) at the net control the rally. Opponents (3, 4) in defense
The Ideal: Both Players at the Net
The primary tactical goal in padel is to bring both players to the net. The statistics are clear: a pair at the net wins more than 70% of rallies. Here is why:
Angles of attack. At the net, you can direct the ball to virtually any spot on the opponent’s court.
Pressure. Opponents are forced to play accurately under pressure, increasing their error rate.
Time. You are closer to the opponent, meaning they have less time to react.
Finishing. Most “killing” shots — volleys and smashes — are executed from the net zone.
Ideal net position: both players stand 2–3 meters from the net, approximately 2–3 meters apart from each other. Knees slightly bent, racket held in front at chest level, ready for a split step.
Left Side and Right Side Roles
In padel, each side of the court implies a specific playing role. This is not a rigid rule, but understanding the specialization helps the pair work more effectively.
Right Side (Derecha)
The right-side player is the constructor. Their tasks:
Consistency and accuracy. Build the rally, control the pace of play.
Ball placement. Precise shots into uncomfortable zones, setting up attacks for the partner.
Backhand through the center. Most shots through the center of the court fall on the right-side player’s backhand.
Patience. The right side demands patient, positional play.
Left Side (Revés)
The left-side player is the finisher. Their tasks:
Aggressive overhead shots.Bandeja, vibora, smash — the primary weapons of the left-side player.
Center interceptions. The left player covers center lobs, which are often the most effective shots.
Decisiveness. The left side requires the ability to make quick decisions and close out points.
Forehand through the center. Center shots are most often played with the left player’s forehand.
[EXPERT OPINION] For beginner pairs, side selection is often straightforward: the more aggressive player goes to the left, the more consistent one to the right. Over time, you can experiment to find the optimal combination.
Moving as a Pair
One of the fundamental principles of padel positioning is synchronized pair movement. Imagine that you and your partner are connected by an invisible rope 3–4 meters long.
Rules for synchronized movement:
Both forward. If one player approaches the net, the other must also move forward.
Both back. If one retreats, the other retreats alongside.
Same line. Both players should be on approximately the same horizontal line (equal distance from the net).
Shift toward the ball. When the ball goes to the right corner, both players shift right. The left player covers the center.
Synchronized: both players (1, 2) on the same line at the net
What happens when synchronization breaks down:
If one player is at the net while the other is at the back wall, a “diagonal gap” forms between them. Opponents easily find this corridor and direct the ball where neither player can reach it.
Mistake: players (1, 2) split — one at net, one at back. Vulnerable gap between them
As the legendary Fernando Belasteguin has said: positioning and mental focus are what separate a good pair from a great one. Shot technique matters, but without correct court placement, it loses half its effectiveness.
Communication
Positioning is impossible without constant communication between partners. In padel, you should be talking during every rally.
Basic calls:
“Mine!” — you are taking the ball
“Yours!” — the ball is your partner’s
“Back!” — both retreat
“Up!” — both approach the net
“Switch!” — change sides
When communication is critical:
The ball travels to the center between both players — who takes it?
A lob goes over one player — retreat or leave it for the partner?
After the serve — move forward or stay back?
Silence on the court is a sure sign of a beginner pair. Experienced players communicate not only through words but also through gestures and eye contact between rallies.
Common Mistakes
Getting stuck in no man’s land. Between the service line and the net is the most disadvantageous position. Decide: forward or backward.
Asynchronous movement. One player at the net, the other at the back wall. This creates defensive gaps that opponents easily exploit.
Silence. Without communication, collisions and missed balls are inevitable, especially through the center.
Standing still. Padel is constant movement. If you are standing and waiting, you are already losing position.
Ignoring roles. Both players try to finish — nobody builds the rally. Or both play passively — nobody attacks.
Too close to the net. Standing right at the net is a trap. The optimal distance is 2–3 meters: close enough for volleys, far enough to react to lobs.
Padel is first and foremost a team sport. Even the most technically skilled player will lose to a pair that moves as a unit and communicates on court. Communication between partners is not merely a useful skill – it is the foundation of successful play.
Padel is the only major racket sport in which doubles is the primary and virtually the only format at all professional tournaments. Unlike tennis, where singles exists alongside doubles, in padel you almost always play as a pair (singles padel exists but remains a niche format). This means that coordination with your partner affects results just as much as individual technique.
At the professional level, pairs who have played together for a long time consistently defeat more technically gifted opponents through superior teamwork. [EXPERT OPINION] Coaches estimate that up to 40% of points at the amateur level are lost due to poor communication – collisions, missed balls down the middle, and uncoordinated movement.
Good communication addresses three key challenges:
Ball allocation. Who plays the ball when it comes down the middle?
Positional coordination. Both partners move in sync, covering the entire court.
Emotional support. A positive atmosphere helps maintain focus and confidence.
Verbal Signals
Voice communication is the backbone of on-court coordination. Calls should be short, clear, and loud enough for your partner to hear even in a noisy environment.
Call (EN)
Call (ES)
Meaning
“Mine!”
“Mía!”
I am taking this ball
“Yours!”
“Tuya!”
You take this ball
“Switch!”
“Cambio!”
Swap sides (after a lob or passing shot)
“Lob!”
“Globo!”
Warning: opponent is playing a lob
“Back!”
“Atrás!”
Move to the back of the court
“Net!” / “Up!”
“Red!”
Move forward to the net
“Middle!”
“Centro!”
Ball is coming down the centre – decide who plays it
“Leave it!”
“Deja!”
Do not touch the ball (it is going out)
[EXPERT OPINION] Many padel players use Spanish calls regardless of their native language. Spanish is the international “language of padel,” and knowing these terms is valuable.
Non-Verbal Signals
Beyond voice calls, experienced pairs use hand signals, especially before serves and returns. The most common technique involves hand signals behind the back by the player positioned at the net.
Open palm – “I will hold my position after the serve, covering my zone.”
Closed fist – “I will poach (cross-intercept) and move to the other side.”
Finger pointing left or right – “I am moving in the indicated direction.”
Open hand with fingers spread, rocking side to side – “I will decide based on the opponent’s return.”
These signals allow partners to coordinate tactics without opponents overhearing. They are used most actively in competitive play, but even in recreational matches they provide a clear advantage.
Synchronized Movement
One of the key principles of doubles play in padel is the “invisible rope” rule: both partners move as a single unit, as if connected by a rope approximately 3-4 metres long.
What this means in practice:
Forward together. When one partner moves up to the net, the other must also advance. Both players take up the net position simultaneously.
Back together. If the opponent executes a good lob and one of you is forced to retreat, the other drops back as well, maintaining the line.
Sideways together. When one partner shifts toward a side wall to play a ball, the other slides in the same direction, covering the space that opens up in the centre.
Breaking this principle creates “holes” – undefended zones on the court that opponents will gladly target. The classic mistake: one player at the net, the other at the back wall. In that configuration, a huge gap opens between them, making it easy for opponents to attack.
The Psychology of Partnership
Technical communication is only half the story. The emotional dimension of partnership is equally important, and at the amateur level it is often the deciding factor.
Positive reinforcement is the primary tool. After every good rally by your partner, show your approval: a fist bump, a “vamos!”, a high five. This is not just politeness – positive emotions increase confidence and reduce anxiety.
The “no blame” rule is considered an unwritten standard in padel. Even if your partner makes a costly mistake, the response should be supportive: “No worries, next one!” or “All good, let’s keep going.” Eye-rolling, sighing, and reproaches destroy team spirit faster than any technical error.
Tactical discussions are best conducted during calm moments: at changeovers, before the start of a set, or during a break. Analysing mistakes in the middle of a rally creates distraction and tension.
[EXPERT OPINION] The best pairs in the world are not simply those who play well together, but those who genuinely support each other. Watch any World Padel Tour match: after every rally, partners exchange gestures and words, regardless of the outcome.
5 Common Doubles Communication Mistakes
Not calling the ball. The most widespread error: both partners silently reach for the ball – or, conversely, both wait for the other to take it. Solution: always call “mine!” or “yours!”, especially on balls down the middle.
Breaking formation. One player rushes to the net while the other stays at the back wall. A huge gap opens between them. Solution: move together, remembering the invisible rope principle.
Silence after a partner’s error. No reaction is worse than criticism: the partner feels isolated. Solution: after every mistake, offer brief support – “Come on!”, “Next one is ours!”
Discussing tactics mid-rally. Shouting “Why did you hit it like that?!” during play does not help – it hinders. Solution: tactical conversations belong in pauses only.
Ignoring non-verbal signals. Your partner shows a fist behind their back before the serve, and you are not looking. Solution: develop the habit of checking your partner’s signals before every serve.
In padel, each player in the pair has a distinct role. The right side is the constructor; the left side is the finisher. Understanding the differences helps you choose your position and develop the right skills.
Padel is a doubles sport. Unlike tennis, where both players perform roughly the same function, in padel the two sides differ fundamentally in their tasks and the skills they demand.
The Right Side (Derecho)
The right-side player is the constructor. Their job: build the rally, keep the ball in play, and set up a comfortable ball for the partner.
Key Skills
Backhand volley — the critical shot, as most balls travel through the centre of the court
Patience — waiting for the right moment to attack rather than forcing the issue
Accuracy and control — placement over power
Anticipation — reading where the opponent will return the ball
Mixing short volleys to the sides with deep, low volleys
Those more comfortable constructing than finishing
The Left Side (Revés)
The left-side player is the finisher. Their job: aggressively close out rallies and dominate the overhead game.
Key Skills
Strong forehand — from the left side the forehand covers the centre of the court
Overhead game — command of the bandeja, vibora, and topspin smash
Speed and agility — covers more ground, responsible for central lobs
Aggression — the ability to end the rally in one shot
Who Suits the Left Side
Athletic players with good speed
Those confident with overhead shots
Players with a dominant forehand
Left-Handed Players: A Special Case
Left-handers nearly always play the right side. The reason: both players then have their forehand covering the centre, significantly strengthening central control and the overhead game.
The formula: “Lefty always to the right” — works in 90% of cases.
Exception: when both players are left-handed.
How to Choose Your Side
Criterion
Right Side
Left Side
Dominant shot
Backhand
Forehand
Play style
Constructive
Aggressive
Overhead game
Less critical
Essential
Court coverage
Moderate
Extensive
Temperament
Patient
Decisive
[EXPERT OPINION] Beginners are recommended to play both sides to develop all-round skills. Specialisation comes with experience.
Examples from the Professional Tour
Juan Lebrón — reached world No. 6 on the left, then switched to the right with Paquito Navarro and became No. 1. Later returned to the left with Martín Di Nenno
Arturo Coello and Agustín Tapia — an example of a successful left/right partnership
Alejandro Galán — an aggressive left-side finisher
Common Mistakes
Both players want to finish. If both play aggressively from the left side, there is no one to build the rally. One must be the constructor.
Ignoring the centre. There is a diagonal corridor between the two players — most balls are directed there. Both must cover the centre.
Rigid side assignment at a low level. At 2.0–3.0, it is more beneficial to switch sides for all-round development.
Drills
Backhand volley to the centre. Partner hits all balls through the centre; the right-side player takes them with the backhand. 3 sets of 10 balls.
Pair rotations. Play rounds of 10 rallies on each side. Compare how each feels and the results.
Centre coverage. One ball to the right-side player (backhand), the next to the left-side player (forehand). Focus on covering the diagonal.
The pair controlling the net dominates the rally. But approaching the net at the wrong moment is a mistake that costs points. Learn to pick the right moment.
In padel, the pair at the net holds the advantage. From the net position you control the angles, cover the diagonals, and close rallies with volleys. But you should only move forward after a quality shot.
Key rule: “Be patient at the back and play a good enough shot that gives you time to move forward.”
Signals to Approach
1. After a Good Chiquita
The chiquita drops at the opponents’ feet, forcing a weak volley. Move forward immediately after the shot.
2. After a Deep Lob
The lob must clear the opponent’s head, giving you time to take position.
3. After the Serve (for the Server)
A good server runs to the net immediately after serving.
4. After a Good Return
If the return does not touch the wall, the ball reaches the opponent more quickly, giving you time to advance.
Approach Technique
The Split Step
The split step is a small hop landing with feet apart. It is performed at the exact moment the opponent strikes the ball.
Too early → you fall onto your heels and lose reactivity
Too late → you are late to the ball’s trajectory
In padel the split step is lighter, quicker, and higher than in tennis
Land on the balls of the feet, knees bent
Moving as a Pair
The golden rule: both partners move together.
Together to the net → together back on a lob
If one stays back → a huge diagonal gap opens in the centre of the court
Synchronisation is the key difference between strong and weak pairs
When NOT to Approach
Situation
Why stay back
Lob did not clear the opponent’s head
The opponent will hit the ball before you take position
Return touched the back wall
The ball bounced comfortably for the opponent — they will attack
Partner stayed back
A diagonal gap opens — the opponent will target it
You are off balance
Running without control = a poor position for the volley
Common Mistakes
Approaching after a bad shot. If your ball did not trouble the opponent, stay where you are.
Sprinting instead of controlling. A sprint to the net instead of a controlled advance. You should be ready for the volley, not out of breath.
Too close to the net. Standing right at the net makes you easy to lob.
One goes, the other stays. Your partner must move with you. Communication before and during the rally is essential.
Trying to cover the whole court. Each player covers their half. Trust your partner.
Drills
Chiquita + transition. Hit a chiquita, immediately move forward, ready for the volley. 10 rallies.
Defence/attack rotation. Deep defence → lob → move to the net → finishing volley.
Split-step drill. Partner hits balls from the baseline; you are at the net performing a split step before every volley. 20 balls.
Synchronised movement. 2 vs 2, focus on sync: the coach calls “forward” or “back” and both partners move simultaneously.
“La Nevera” — Spanish for “the fridge.” A tactic in which all balls are directed at one player in the opposing pair. The other player “freezes” — losing rhythm, focus, and confidence.
The nevera is a tactic in which 70% of balls are directed at the weaker player in the opposing pair. The stronger player is “frozen”: receiving no balls, losing rhythm, and dropping out of the rally.
What Happens to the “Frozen” Player
Loses concentration — no balls, nothing to do
Loses confidence — feeling of uselessness
Physically cools down — muscles go cold without movement
Psychological pressure — a sense of guilt towards the partner
How to Execute the Nevera (Attack)
The 70/30 Rule
Direct 70% of balls to the weaker player and 30% to the stronger. A pure 100/0 split is too predictable — the strong partner will simply cover their teammate’s zone.
Keys to Success
Shot variety. Even when targeting one player, vary your shots: high lob, fast low lob, chiquita, block and volley, bandeja, drop shot
Team decision. Both partners must agree on the tactic — it cannot be a solo decision
Consistency. If the tactic is working, do not change it for the sake of risky shots
Finish on the strong player. When you have an easy ball to close the point, hit it at the strong player. This demoralises
How to Defend Against the Nevera
1. Switch Sides
The most effective counter. Swap sides with your partner — the opponents are automatically forced to play to both players.
2. Central Lob
An aggressive lob down the centre line forces the opponents to change direction.
3. Change Your Positioning
The “frozen” player stays at the net; the partner drops to the baseline. The opponents are forced to play differently.
4. Cover More Ground
The “stronger” player takes balls from the centre and even from the partner’s side. This works if both partners communicate well.
5. Communicate Immediately
Spotted a nevera? Discuss it with your partner right away — between rallies. Agree on a plan for the next few points.
Etiquette
Context
Is the nevera acceptable?
Tournament
✓ Fully legitimate tactic
Friendly match
✗ Considered disrespectful
Training
✓ If both sides agree
In friendly matches all four players are there to have fun. Using the nevera spoils the game for the opponents’ partner. In tournaments there are no restrictions — it is part of the tactical arsenal.
Common Mistakes When Executing
100% of balls to one player. Too predictable — the strong partner will cover the zone.
Monotonous shots. Even when targeting one player, you must vary the pace and type of shot.
Ignoring the opponents’ adaptation. If the opponents switch sides, adjust your tactic.
Drills
Training set with nevera. Play a set directing 70% of balls to one side. Track the results.
Counter-nevera. One pair executes the nevera; the other practises defensive countermeasures: side-switching, central coverage.
Communication drill. Between every rally, discuss out loud: who the opponents are targeting and how to respond.
In padel, defence is not just survival — it is a launching pad for attack. Research shows that the defending team wins approximately 53% of long rallies (12+ shots), proving that patience and smart transitions are more powerful than raw aggression.
Why Defence Wins Rallies
Padel is unique among racket sports: the enclosed court and glass walls mean that aggressive shots often come back. A powerful smash can rebound off the back wall into a comfortable position for the defending team. This is why the best teams in the world treat defence as a weapon, not a weakness.
Key statistics from professional match analysis:
Metric
Value
Long rallies won by defending team
~53%
Average rally length at professional level
5–7 shots
Unforced errors from attacking team in long rallies
38%
Points won at the net vs from the back
65% vs 35%
The goal of counter-attacking padel is clear: survive the opponent’s attack, neutralise their advantage, and create an opportunity to reclaim the net.
The Five Key Counter-Attack Shots
1. Chiquita (Low Reset)
The chiquita is the primary weapon for transitioning from defence to attack. A soft, low shot aimed at the feet of the net player forces them to volley upward, giving you time to advance.
When to use: After a smash that bounces off the back wall at a comfortable height. Aim cross-court at the feet of the volley player.
Why it works: The opponent must lift the ball, producing a weak volley that you can attack on the next shot.
2. Defensive Lob (Reset Lob)
A high, deep lob aimed over the heads of the net players. The purpose is not to win the point directly but to buy time, push the opponents back, and allow your pair to move forward.
When to use: When under heavy pressure and both opponents are close to the net. Target the deeper part of the court, ideally with slight topspin to make the ball kick off the back wall.
Why it works: Forces the opponents to retreat, reversing the positions — you advance to the net while they are pushed back.
3. Passing Shot (Paralela)
A fast, flat shot hit down the line, past the net player. This is the highest-risk counter-attack option but can be devastating when timed correctly.
When to use: When the net player leaves a gap on the line, or after a wide smash where the net player has drifted toward the centre.
Why it works: The speed and angle make it nearly impossible to volley. If the ball hits the side glass, the rebound is unpredictable.
4. Bajada (Counter off the Back Glass)
An attacking shot played after the ball bounces off the back glass. Instead of simply returning the ball, you drive it aggressively toward the opponents’ feet or into a gap.
When to use: When a smash or deep shot bounces high off the back wall, giving you enough time and height to attack. Requires good reading of the glass rebound.
Why it works: Turns a defensive situation into an attacking one by using the energy from the glass rebound.
5. Contra Pared (Wall Counter)
A shot played off the side wall that redirects the ball cross-court. The unpredictable angle from the wall bounce can wrong-foot the net player.
When to use: When a wide shot forces you toward the side wall. Rather than simply returning high, use the wall angle to redirect.
Why it works: The direction change after the wall bounce makes it difficult for the net player to anticipate the trajectory.
The Counter-Attack Cycle
The transition from defence to attack follows a predictable pattern:
Survive — block or deflect the initial attack, keeping the ball low and in play
Neutralise — use a lob or chiquita to disrupt the opponents’ rhythm
Transition — as the opponents are pushed back or forced into a weak shot, move forward together with your partner
Attack — take the net position and finish the point with a volley or smash
The key is patience. Do not rush the transition. Wait until you have played a quality shot — a deep lob that clears both opponents, or a low chiquita that forces a lifted volley — before advancing.
Pro Examples
Agustin Tapia
Known for his exceptional defensive skills and ability to turn defence into attack. Tapia’s philosophy: “Defend to regain the net.” He rarely attempts to win points from the back of the court. Instead, he constructs rallies, waiting for the right moment to play a chiquita or passing shot and sprint forward.
Arturo Coello
Master of the surgical backhand reset. Coello can absorb powerful smashes and redirect the ball with minimal backswing, placing chiquitas with pinpoint accuracy at the feet of the net players. His compact technique allows him to counter-attack even from difficult positions near the glass.
Martin Di Nenno
A strategic counter-puncher who reads opponents’ intentions through body language. Di Nenno’s strength lies in anticipation — he moves into position before the smash lands, giving himself extra time to choose between a lob, chiquita, or passing shot.
Eight Drills for Counter-Attack Practice
Drill 1: Smash-and-Block Rally
One pair at the net feeds smashes; the defending pair practises blocks and chiquitas. After five consecutive rallies, switch roles. Focus on keeping the block low and controlling the angle.
Drill 2: Lob-to-Net Transition
Player A lobs from the back of the court. The moment the lob clears the opponents, Player A and their partner sprint forward together. The drill trains the timing of the forward movement.
Drill 3: Chiquita + Split Step
Player defends a volley by playing a chiquita, then immediately performs a split step and moves forward. The partner feeds the next ball, which the advancing player must volley. Repeat 10 times per side.
Drill 4: Back Glass Bajada
A partner feeds high balls that bounce off the back glass. The defending player reads the rebound and drives the ball aggressively toward the opposite side of the court. Focus on footwork and timing the contact point.
Drill 5: 2v2 Defensive Rally
Both pairs play a set where the defending team starts every point from the back of the court. The defending team wins the rally by taking the net. Trains real-match decision-making.
Drill 6: Wall Redirect
Standing near the side wall, a partner feeds balls into the wall at varying speeds. The player practices redirecting the rebound cross-court, keeping the ball low. Builds muscle memory for contra pared shots.
Drill 7: Communication Under Pressure
Same as Drill 5, but after every defensive shot, the defending pair must call out their plan: “Lob!”, “Chiquita!”, “Switch!” Develops real-time communication habits.
Drill 8: 3-Shot Sequence
Sequence: (1) Defend a smash with a block → (2) Play a deep lob → (3) Advance and finish with a volley. The partner feeds the three-shot pattern. Builds the complete counter-attack cycle.
Common Mistakes
Mistake
Why it fails
Fix
Counter-attacking from a bad position
You are off-balance and the shot quality is low
Reset with a lob first, counter-attack only when balanced
Only one player advances
A gap opens in the centre of the court
Always move forward as a pair
Trying to win the point from the back
Low-percentage shots lead to unforced errors
Build the rally; the net wins points, not the baseline
Hitting the chiquita too hard
It rises above the net, giving the opponent an easy volley
Soft hands; the chiquita should barely clear the net
Lobbing without depth
A short lob gets smashed again
Target the back third of the court; if in doubt, lob higher
Not reading the smash type
Wrong counter-attack selection
Watch the opponent’s arm and body position before the contact
Key Principles
Defence is not passive. Every defensive shot should have a purpose: neutralise, buy time, or create a transition opportunity.
Move together. When one player advances, the partner must advance too. Separated pairs leave exploitable gaps.
Patience wins. The defending team wins the majority of long rallies. Trust the process.
Quality over speed. A well-placed chiquita is worth more than a rushed passing shot.
Communication is essential. Call your intentions: “I lob, you move!” The pair that communicates has better timing.
Technique and fitness make up 50% of success in padel. The other 50% is the mind. Managing nerves, maintaining focus, and bouncing back from errors separates good players from great ones.
2 minutes of mindful breathing to lower heart rate and focus on the present
3 minutes of visualisation: picture yourself playing with confidence — fluid movement, precise shots, the joy of winning points
Visualisation builds neural pathways that improve real performance (neuroplasticity)
An Anchor for Your Mindset
Create a ritual that switches you into “competition mode”: a song, a keyword, or a gesture. Use it before every match.
[UNVERIFIED] A 2024 study (European Journal of Sport Science) found that 30 minutes of cognitive load before a match significantly impaired shot accuracy. The takeaway: arrive on court mentally fresh.
Managing Nerves on Key Points
Techniques
Controlled breathing: a slow exhale before serving or returning lowers heart rate
Physical ritual: tapping the racket on the floor, adjusting your cap — an anchor that returns you to the present
Trigger phrase: “One point at a time” — repeat it internally to hold focus
Process over outcome: concentrate on what you control (positioning, shot selection) rather than the score
[EXPERT OPINION] Process-oriented players perform consistently. Outcome-oriented players often crack under pressure.
The “Next Point” Mentality
The Reset Rule
After an error:
One deep breath
Physical reset — adjust your cap, wipe the racket grip
Focus on the next point — the previous one no longer exists
Positive Self-Talk
“On to the next one”
“I can do this”
“An error is information, not a verdict”
According to Peter Consuegra (PadelMarket): “An error observed without judgement becomes valuable information. After the match, mentally review your most frequent mistakes, understand their causes, and turn them into goals for the next training session.”
Body Language and Confidence
Confident posture raises the energy of the entire pair — especially critical in doubles
A look, a nod, a pointing finger say as much as words
If your partner knows you have their back, they play with more confidence
An aggressive stance and readiness tell the opponent: “I am not giving up”
Read your opponents’ body language: are they preparing a lob, a drive, or a fake?
Patience as a Weapon
Slowing the pace leads to more opponent errors
When pushed back, lob with purpose and “let the rally breathe”
You do not need to win the point from the baseline — sometimes the best move is to survive and wait for the error
High, deep lobs buy time to regroup
Common Mental Traps
“I must win this point.” Putting pressure on yourself increases the chance of an error. One point = one point.
The error spiral. One error → anger → another error → more anger. Break the chain with a reset.
Fear of leading. Ahead in the score → fear of losing the advantage → cautious play → loss of initiative.
Negative communication. Criticising your partner hurts both players’ performance. Support = better results.
Fixation on the score. Down 1–5? Play every point as though it were 0–0.
Drills for Mental Resilience
Breathing between rallies. Three slow exhales before every serve or return. Train it until it is automatic.
Training match with restrictions. Negative emotions are banned — no fist-pumping in frustration, no sighs, no dropped shoulders. A penalty point for violations.
Visualisation. 5 minutes before training: close your eyes and replay rallies in your head. Picture the successful execution of each shot.
A padel racket is a solid, stringless bat with a perforated surface. Choosing the right racket depends on your level, playing style, and physical build.
Unlike tennis rackets, a padel racket (pala) has no strings. The hitting surface is solid, made of composite materials, with holes to reduce air resistance. According to FIP rules, the racket must meet strict specifications:
Parameter
Limit
Length
up to 45.5 cm
Width
up to 26 cm
Thickness
up to 38 mm
Wrist strap
mandatory
Surface
flat, with holes
How to Choose
Consider five key factors when selecting a racket:
1. Shape
The shape determines the balance between control and power:
Shape
Balance
Control
Power
Best for
Round (redonda)
Low
★★★★★
★★☆☆☆
Beginners, control players
Teardrop (lágrima)
Medium
★★★★☆
★★★☆☆
Intermediate, all-rounders
Diamond (diamante)
High
★★☆☆☆
★★★★★
Advanced, attacking players
Round — the most popular shape. The centre of gravity is closer to the handle, providing maximum control and forgiveness for off-centre hits. Ideal for learning grip technique.
Teardrop — a compromise between control and power. A larger sweet spot makes this shape versatile.
Diamond — the centre of gravity is shifted towards the head, delivering maximum power on smashes and aggressive shots. Requires good technique and physical fitness.
2. Core Material
EVA (foam): soft core, more control, better vibration absorption. Better for beginners.
FOAM: stiffer, provides more power and rebound. For intermediate and advanced players.
Hybrid: a combination of EVA and FOAM in different zones of the racket.
3. Face Material
Fibreglass: softer feel, more control. Recommended for beginners.
Carbon fibre: stiffer feel, more power. For advanced players.
Combined: one side carbon, the other fibreglass.
4. Weight
Category
Weight
Recommendation
Light
340–355 g
Women, beginners, juniors
Medium
355–370 g
All-round option
Heavy
370–390 g
Men, attacking players
A heavier racket delivers more power but fatigues the arm faster and increases the risk of injuries.
5. Balance
Low (towards handle) — control, manoeuvrability
Medium — versatility
High (towards head) — power, shot strength
Interactive Racket Finder
Not sure which racket to pick? Use our step-by-step wizard:
Find Your Racket
What is your playing level?
What is your playing style?
What is your budget?
Recommended rackets for you
Recommendations by Level
Beginner
[EXPERT OPINION] For beginners, the optimal racket has these characteristics:
Shape: round
Core: soft EVA
Face: fibreglass
Weight: 350–365 g
Balance: low
Budget: €50–100
A round shape and soft core forgive mistakes and help you learn the basics faster.
Intermediate
Shape: teardrop
Core: medium EVA or hybrid
Face: carbon / fibreglass
Weight: 360–375 g
Budget: €100–200
Advanced
Shape: teardrop or diamond (depending on playing style)
Core: FOAM or stiff EVA
Face: carbon
Weight: 365–385 g
Budget: €150–300+
Care and Replacement
When to Replace
When cracks or frame deformation appear
When the core “dies” (loses its bounce) — usually after 6–12 months of regular play
Your first padel racket should help you learn, not fight against you. Choosing the right beginner racket means prioritising control, comfort, and a forgiving sweet spot over power and brand prestige.
What Makes a Good Beginner Racket
Before looking at specific models, understand the four characteristics that matter most for a first racket:
Shape: Round
Round rackets have the sweet spot in the centre and the weight distributed towards the handle (low balance). This gives maximum control and forgiveness on off-centre hits — exactly what beginners need.
Shape
Sweet spot
Balance
Best for
Round
Large, centred
Low (towards handle)
Beginners, defensive players
Teardrop
Medium, slightly high
Medium
Intermediate, all-round players
Diamond
Small, high
High (towards head)
Advanced, attacking players
Start with round. Move to teardrop after 6–12 months of regular play once your technique is consistent. Diamond shapes are for experienced players with refined technique.
Core: Soft EVA
The core material determines how the racket feels on impact. For beginners, soft EVA is the best choice:
Core type
Feel
Control
Power
Comfort
Durability
EVA Soft
Soft, absorbing
High
Medium
High
High
EVA Medium
Balanced
Medium
Good
Medium
High
EVA Hard
Stiff, responsive
Low
Maximum
Low
Very high
FOAM
Very soft
High
Low
Very high
Low
Soft EVA absorbs vibrations (reducing injury risk), offers a large sweet spot, and provides enough power for learning. FOAM is an alternative if you have elbow issues, but it wears out faster. Avoid hard EVA as a beginner — the stiff feel amplifies off-centre vibrations.
Weight: Under 375 g
Lighter rackets reduce strain on the elbow, wrist, and shoulder. Beginners should aim for 350–375 g — the lighter end of this range is preferable. Manufacturer weight ranges are nominal (e.g. “360–375 g”); the actual racket can often be at the lighter end. Rackets above 375 g combined with imperfect technique significantly increase injury risk.
Surface: Fibreglass
Fibreglass faces offer a softer, more forgiving feel than carbon fibre. Most beginner rackets use fibreglass or a fibreglass-carbon hybrid. Pure carbon faces are stiffer and better suited to advanced players.
Budget Rackets (€40–80)
These rackets offer genuine quality at accessible prices. Any of them is a solid first racket.
Adidas Drive Blue 2026 — ~€66
Shape: Round | Weight: 360–375 g | Core: EVA Soft Performance | Surface: Fibreglass
Structural Reinforcement technology for durability
Designed specifically for complete beginners
Excellent price-to-quality ratio
Babolat Contact 2025 — ~€50–70
Shape: Round | Weight: 340 ±10 g | Core: EVA Soft | Surface: Fibreglass
The lightest option on this list — ideal if you want minimum arm strain
Carbon + fibreglass hybrid frame for durability
Head-light balance for quick reactions at the net
Nox X-Hero Blue 2026 — ~€60–70
Shape: Round | Weight: 360–375 g | Core: HR3 White EVA (medium-soft) | Surface: 3K Fibreglass
Carbon fibre frame for solid feel
Clean, simple design from one of padel’s most respected brands
Nox X-One 2025 — ~€65
Shape: Round | Weight: 360–375 g | Core: HR3 EVA | Surface: 3K Fibreglass
Very similar to the X-Hero with proven track record
Carbon frame, excellent entry-level option
Best budget pick: Adidas Drive Blue 2026 (best all-round value) or Babolat Contact (lightest weight).
Mid-Range Rackets (€80–150)
These offer better materials and construction while remaining beginner-appropriate. A good choice if you plan to play regularly.
Teardrop shape offers slightly more power than round while maintaining a large sweet spot
Dual-density core for balanced feel
A step up for beginners ready to transition
Lok Easy Flow Gen 2 2026 — ~€180
Shape: Round | Weight: ~360–370 g | Core: EVA (medium-soft) | Surface: Flex carbon fibre
Largest sweet spot in this price range
Carbon fibre construction for responsive feel
Round shape keeps it beginner-friendly despite premium materials
Best premium pick: Lok Easy Flow Gen 2 (if you want round shape with premium build) or Bullpadel Ionic Light (if you are ready for teardrop).
Common Beginner Mistakes
Buying a diamond-shaped racket
The most common mistake. Diamond shapes have a small sweet spot high on the face and a head-heavy balance. They require precise technique to use effectively. Roughly 80% of points in padel are won through control, placement, and consistency — not power.
Choosing too heavy a racket
Many players (especially men) instinctively pick the heaviest available. A heavy racket with imperfect technique multiplies the force on your elbow and wrist, increasing injury risk. Stay under 375 g — the lighter, the better for learning.
Prioritising power over control
Power comes from technique, not from your racket. A control-oriented racket helps you build good habits faster. The power will come naturally as your technique develops.
Buying based on price or design
An expensive racket is not a better beginner racket. Models above €200 are typically designed for advanced players. A €60–120 racket with the right characteristics (round, soft EVA, under 375 g) will serve a beginner better than a €300 pro model.
Copying professional players
Professionals use stiff, heavy, diamond-shaped rackets because they have years of refined technique. Their equipment choices are optimised for professional play, not for learning.
Skipping the demo
Every player is different. What works for one person may not work for another. Most clubs offer demo rackets — test before you buy. A coach can also assess your playing style and give a personalised recommendation.
Compare All Rackets
Filter by shape and click column headers to sort:
Filter by shape:
Brand
Model
Shape
Weight
Control
Power
Price
Adidas
Drive Blue 2026
round
360-375 g
★★★★★
★★☆☆☆
€66
Babolat
Contact 2025
round
330-350 g
★★★★★
★★☆☆☆
€60
Nox
X-Hero Blue 2026
round
360-375 g
★★★★☆
★★★☆☆
€65
Nox
X-One 2025
round
360-375 g
★★★★☆
★★★☆☆
€65
Bullpadel
Indiga CTR 2026
round
360-370 g
★★★★★
★★☆☆☆
€90
Head
Extreme EVO 2026
round
355-365 g
★★★★☆
★★★☆☆
€90
Nox
ML10 Pro Cup Silver 2025
round
360-375 g
★★★★★
★★★☆☆
€125
Nox
Equation Soft Advanced 2026
round
360-375 g
★★★★☆
★★★☆☆
€130
Bullpadel
Ionic Light 2026
teardrop
360-370 g
★★★★☆
★★★☆☆
€150
Lok
Easy Flow Gen 2 2026
round
360-370 g
★★★★★
★★★☆☆
€180
Head
Delta Motion 2026
teardrop
360-375 g
★★★☆☆
★★★★☆
€120
Adidas
Metalbone CTRL 2026
round
360-375 g
★★★★★
★★★☆☆
€200
Babolat
Viper Air 2026
diamond
365-380 g
★★☆☆☆
★★★★★
€250
Bullpadel
Hack Elite 2026
diamond
370-385 g
★★☆☆☆
★★★★★
€280
Nox
AT10 Genius 2026
teardrop
365-380 g
★★★☆☆
★★★★☆
€220
Quick Reference
What to look for
Recommended
Avoid
Shape
Round
Diamond
Core
EVA Soft or FOAM
EVA Hard
Weight
350–375 g
380+ g
Surface
Fibreglass or hybrid
Pure carbon
Balance
Low (head-light)
High (head-heavy)
Budget
€60–150
Overspending on pro models
When to Upgrade
Consider moving to a more advanced racket when:
You have played regularly for 6–12 months
Your technique is consistent enough that off-centre hits are rare
You feel limited by the racket’s power, not its control
A coach confirms you are ready for a different shape or balance
There is no rush. Many intermediate players continue using round rackets successfully. The shape is a preference, not a progression requirement.
A padel ball looks similar to a tennis ball but has lower pressure, resulting in a lower, more controlled bounce. This is one of the reasons why padel differs from tennis in rally dynamics.
A padel ball is a yellow, spherical ball with a felt covering. According to FIP standards, it must meet these specifications:
Parameter
Value
Diameter
6.35–6.77 cm
Weight
56–59.4 g
Bounce
135–145 cm (when dropped from 2.54 m onto a hard surface)
Internal pressure
4.6–5.2 kg/cm²
Colour
Yellow or white
By comparison, a tennis ball has a pressure of 5.5–6.4 kg/cm² and a higher bounce. The reduced pressure makes padel balls slower and more predictable — ideal for play in the enclosed space of a court.
How to Choose
Approved Balls
Only FIP-approved balls are used for official tournaments. Major brands include:
Head (Padel Pro, Padel Pro S) — official ball of Premier Padel
Bullpadel (Premium Pro) — popular in Spain
Wilson (Padel Rush, X3) — good value for money
Babolat (Padel+) — consistent pressure
What to Look For
Pressure. New balls from a can have optimal pressure. Balls without a can (in bags) may have already lost some pressure.
Felt covering. Should be even, with no bald spots.
Can. A sealed can preserves pressure. A hiss when opening indicates integrity.
Altitude. At courts located at high altitude, the ball bounces higher. Some manufacturers produce special “high-altitude” balls.
Types and Classification
By Pressure
Pressurised: balls with internal pressure. Supplied in sealed cans of 3. Optimal play for the first 2–4 hours.
Pressureless: the ball gets its elasticity from wall thickness. Retains characteristics longer but feels less comfortable. Suitable for training.
By Speed
Fast: for slow surfaces and cold weather
Standard (Regular): for most conditions
Slow (Padel+): for fast surfaces and hot weather
Recommendations by Level
Beginner: any standard balls. No need to pay extra for tournament-grade — the difference is imperceptible at entry level.
Intermediate: canned balls from reputable brands. Change balls every 2–3 matches.
Advanced: tournament balls (Head Padel Pro, Bullpadel Premium Pro). A fresh can for every match.
Care and Replacement
When to Change Balls
Padel balls lose pressure faster than tennis balls due to their initially lower pressure:
Tournaments: a fresh can for every match
Recreational play: every 2–4 matches (6–12 hours)
Training: balls can be used until the felt wears off
Signs of a Worn Ball
Low bounce (below knee height when dropped from an outstretched arm)
A “dead” feel on impact
Worn felt
The ball doesn’t produce the characteristic “ping” when squeezed
Storage
Unopened cans keep for up to 2 years
Opened balls can be placed in a pressuriser to extend their life
Do not store in heat or frost
Frequently Asked Questions
Can you play padel with tennis balls?
Technically yes, but it’s not recommended. Tennis balls bounce too high and fast for the enclosed court, disrupting rally dynamics.
How many balls do you need for a match?
The standard is 3 balls (one can). For longer sessions, it’s better to have 2 cans.
The right shoes are the foundation of safety and performance on a padel court. Specialised padel shoes provide grip on the surface, ankle support, and cushioning during sharp lateral movements.
A racket, balls, and shoes form the core of your padel kit. But it is the accessories that make the game comfortable, protect your gear, and help you stay focused on court.
An overgrip is a thin wrap applied over the base grip of your racket handle. It is one of the most important — and most affordable — accessories in padel.
Why You Need an Overgrip
Provides a secure grip, especially when your hands sweat
Increases comfort and reduces vibration
Allows slight adjustment of handle thickness
Easy to replace without changing the base grip
Types of Overgrips
Type
Characteristics
When to Use
Dry
Absorbs moisture, textured surface
Hot weather, heavy perspiration
Tacky
Sticky surface, firm contact
Cool weather, dry hands
Perforated
Ventilation holes
All-round option
Replacement Frequency
Replace your overgrip every 2–4 weeks with regular play (2–3 times a week). If the overgrip feels slippery or has lost its texture, it is time to swap it out — even if less time has passed.
[EXPERT OPINION] Popular brands include Wilson Pro Overgrip, Babolat VS Original, and Bullpadel. Any mid-range overgrip will serve a beginner well — the differences become noticeable at a more advanced level.
Racket Frame Protectors
A frame protector is protective tape applied to the rim of the racket. In padel, the court is enclosed by walls, and the racket frequently contacts the glass during wall shots — this is perfectly normal.
Why They Are Essential
Shields the frame from chips and cracks caused by wall contact
Extends racket lifespan by 30–50%
Costs a fraction of a new racket
Easily replaced when worn
Types of Protectors
Standard — thin transparent or coloured tape for the top section of the rim
[EXPERT OPINION] For beginners, at least a standard protector is a must. New players hit the walls more often, and without a protector the racket deteriorates quickly.
Vibration Dampeners
A vibration dampener is a small device fitted to the racket to reduce vibration on impact. They are less common in padel than in tennis but still have their following.
Pros and Cons
Pros
Cons
Reduces vibration on off-centre hits
May alter the feel of the shot
Helps with elbow or wrist issues
Minimal effect on soft-core EVA rackets
Inexpensive accessory
Not all models are compatible with padel rackets
[EXPERT OPINION] Most padel rackets with an EVA core already offer good vibration absorption. A dampener makes sense if you use a stiff racket with a FOAM core or if you experience discomfort in your arm.
Bags and Backpacks
A dedicated padel bag is not a luxury — it is a matter of convenience. A standard backpack is not designed for the shape of a padel racket and lacks the necessary compartments.
What to Look For
Capacity — room for 2–3 rackets (main plus spare)
Shoe compartment — a separate, ventilated pocket for your shoes
Thermal insulation — protects your racket from overheating (especially important in summer)
Accessory pockets — for overgrips, protectors, balls, a towel
Zip quality — cheap zips break quickly with regular use
Types of Bags
Type
Capacity
Best For
Backpack
1–2 rackets
Casual players, cycling or walking to court
Racket bag (paletero)
2–4 rackets
Regular players
Large bag
4–6 rackets
Advanced players, coaches
Comfort Accessories
Wristbands
Wristbands absorb sweat and prevent it from reaching the handle. They are particularly useful in hot weather or during intensive training sessions. Choose cotton or moisture-wicking synthetic options.
Headbands and Caps
These keep sweat and sun out of your eyes. On outdoor courts, a cap or visor is practically essential. Look for models with ventilation.
Sports Sunglasses
For outdoor play in sunny conditions, sports sunglasses are invaluable. Look for:
A secure fit (they must not slip during movement)
Polarised lenses (to reduce glare from the glass walls)
Impact-resistant lenses
Accessory Overview Table
Accessory
Purpose
Price Range
Necessity
Overgrip
Secure grip, comfort
€2–5 (pack of 3)
Essential
Frame protector
Protects rim from impacts
€3–8
Essential
Vibration dampener
Reduces vibration
€3–7
Optional
Padel bag
Transports your gear
€30–80
Recommended
Wristbands
Absorbs sweat
€5–10 (pair)
Recommended
Headband / cap
Sun and sweat protection
€10–20
Recommended (outdoor)
Sports sunglasses
Eye protection outdoors
€20–60
Optional (outdoor)
What a Beginner Needs
[EXPERT OPINION] The minimum starter accessory kit for a new player:
Overgrips (pack of 3) — ~€3–5
Frame protector — ~€5
Wristbands (pair) — ~€5–10
Backpack or bag — ~€30–50
Total starting budget: €40–70 — a modest investment that noticeably improves comfort and protects your racket.
Add other accessories as needed: a vibration dampener if you feel discomfort in your arm, sports sunglasses if you often play on outdoor courts.
Technology is transforming how padel is played, tracked, and improved. From booking courts to AI video analysis and smart sensors, the padel tech ecosystem has grown rapidly alongside the sport itself.
Court Booking
Playtomic
The dominant platform with 4.7 million players, 6,000+ clubs across 66 countries, and 18,000+ courts. Playtomic processes over €346 million in transactions annually.
Key features:
Book courts and split payments with friends
Join Open Matches — public games filtered by level and location
Dynamic rating system (0–7 scale) that adjusts after each match
Match statistics: wins, losses, and playing history
Playtomic offers a Premium tier that removes booking fees, adds priority notifications, and provides expanded statistics. Available on iOS, Android, and web.
MATCHi
A veteran platform (10+ years) with 2,600+ venues in 30 countries, primarily strong in Scandinavia and Northern Europe. Covers padel, tennis, badminton, and other racket sports. Features include court filtering by sport and surface type, inviting friends, memberships, and leagues.
Padel Mates
Focused on community with smart match suggestions based on skill level and preferred club. Features include map discovery, in-app chat, and tournament creation. PRO subscription available ($6/month). Partnered with Rocket Padel across UK and Denmark clubs.
Video Analysis and AI Cameras
AI-powered court cameras are one of the biggest technology trends in padel. These systems record matches, generate automatic highlights, and provide detailed performance statistics.
Clutch
AI camera system installed on the court. Automatically selects highlights, tracks shot statistics, analyses court coverage, and assigns a dynamic player level. Offers live streaming to YouTube. Clubs typically charge €5–10 per match for access. Two tiers: Camera Court (recording + streaming, €49/month) and AI Court (highlights + stats, €199/month).
Padelytics
AI video analysis that works with standard court cameras. Tracks distance and speed, generates heatmaps, analyses attack/defence/transition phases, measures partner synchronisation, and provides personalised coaching tips. Insights are delivered to a mobile app within minutes of finishing a match.
GameCam (GAMETRAQ)
4K AI camera system producing 30-second highlights, distance tracking, ball possession percentages, error analysis, and zone heatmaps. Clubs report ROI of €600–750 per month per court. Software license: €600/year after the first year.
PlaySight SmartCourt
Multi-angle camera installation (1–4 per court) offering instant replay, automatic highlights, SmartScore statistics, on-screen drawing tools, and slow-motion. Partnered with Padel Haus (30+ courts, 35 cameras). Cost for players: approximately €5 per match.
Smart Sensors
PadelPlay Sensor
An emerging technology: a 12-gram sensor that attaches to the racket handle and classifies shots in real time using a 6-axis accelerometer and gyroscope.
The sensor has 8 hours of battery life, IP54 protection for outdoor use, and fits approximately 85% of racket models. Funded through Kickstarter (€21,000+ raised) and named Startup of the Year at the Padel World Summit.
Wearable Tech
Padelio (Apple Watch)
The leading padel wearable app for Apple Watch. Uses machine learning to recognise shot types (lob, volley, bandeja, vibora, smash) and whether they are forehand or backhand. Tracks calories and heart rate. Features AI analysis of strengths and weaknesses, plus shareable statistics stickers for social media.
Smartwatch Support
Device
Padel support
Apple Watch
No native “Padel” mode — use Tennis or Other. Third-party apps: Padelio, PADEL’EM, Padel Stats AI
Garmin
Padel sport mode available in newer models (Vivoactive 6+), plus third-party Connect IQ apps
Fitbit
No padel support despite community requests since 2015
PADEL’EM
Tracks match scores through a smartwatch (Apple Watch WatchOS 10.6+ / WearOS 2+), records points and errors in real time, and generates performance graphs. Syncs fitness data (calories, heart rate, steps, distance) with Apple Health. Free.
Scoring and Tournament Apps
PadelMix
Free app for organising Americano and Mexicano tournaments. Automatically generates rounds, rotates pairs, handles odd player counts, and provides live result sharing. Available on iOS and Android.
Padel Stats AI
Records match statistics through Apple Watch: winning points, unforced errors, winning serves, return errors, double faults. The Pro version adds shot-type breakdowns (volley, smash, vibora). Shareable via QR code.
Rankedin
Platform for tournament management including brackets, scoring, official player rankings (integrated with national federations), and real-time score updates. The companion app Padelin provides tournament search and player statistics.
Training Apps
The Padel School
300+ video lessons from beginner to advanced with a personalised training roadmap, interactive challenges, video feedback from coaches, and Q&A sessions. Subscription: £15/month or £144/year.
Training Padel
300+ exercises with animations and video demonstrations, session builder, favourites, progress calendar, and ready-made training programmes. Subscription-based.
GOWOD
Mobility and stretching app covering 50+ sports including padel. Personalised protocols based on an initial assessment, pre-game and post-game routines (8–12 minutes). Reports +18% mobility improvement over 60 days. Price: $10/month. The exercise library (300+ exercises) is free.
Choosing the Right Tech
Goal
Recommended
Find partners and book courts
Playtomic (largest network)
Analyse your matches on video
Clutch or Padelytics (if installed at your club)
Track shots and fitness
Padelio (Apple Watch) or PADEL’EM
Organise social tournaments
PadelMix (free)
Improve technique with drills
The Padel School or Training Padel
Track detailed match stats
Padel Stats AI
Most of these tools are free or low-cost. Start with Playtomic for finding games, then add tracking and analysis tools as your interest in improvement grows.
A padel court is an enclosed space measuring 10 × 20 metres, surrounded by glass walls and metal fencing. Understanding exact dimensions and markings helps you grasp the logic behind the rules and improve your positional play.
Net Zone (La Red)No Man's Land (Tierra de Nadie)Back Zone (El Fondo)Back Wall (Pared de Fondo)Side Wall (Pared Lateral)
Overall Dimensions
According to the FIP (International Padel Federation) rules, a standard padel court has strictly defined dimensions:
Parameter
Size
Length
20 m
Width
10 m
Total area
200 m²
Each half
100 m² (10 × 10 m)
The FIP standard allows a tolerance of ±0.5% from the specified dimensions. The court is divided into two equal halves by the net.
Court Markings
All lines on the court must be white or light-coloured, with a width of 5 cm. Lines are considered part of the zone they delimit.
Service Lines
On each half of the court:
Centre service line — runs perpendicular to the net from the back wall to the service line, dividing the service area into two boxes (left and right)
Service line — runs parallel to the net at a distance of 6.95 m from it (3.05 m from the back wall)
Each service box therefore measures 5 × 6.95 m. The server stands behind the service line on the appropriate side, and the serve is hit diagonally.
The Net
Parameter
Size
Length
10 m (wall to wall)
Height at centre
88 cm
Height at posts/walls
92 cm (maximum)
Overhang beyond posts
up to 0.5 m on each side
The net is strung between two posts (or attached to the side walls). The upper edge is covered with a white tape 5–6.3 cm wide.
Walls and Fencing
The court walls are the defining feature of padel, setting it apart from tennis. According to FIP rules, walls are classified as follows:
Back Walls (fondo)
Height: 4 m across the full width of the court (10 m)
Lower section: solid material (glass or concrete) 3 m high
Upper section: metal fencing 1 m high (from 3 to 4 m)
A ball hitting the fencing remains in play under the wall play rules
Side Walls (lateral)
Side walls have a stepped construction:
Rear section (near back wall): solid material 3 m high, 2 m long
Middle section: solid material 2 m high, 2 m long
Remaining section to the net: metal fencing 3–4 m high
Overall Fencing Height
The entire structure (walls + fencing) reaches 4 m around the court perimeter.
Standard padel court dimensions: 10 × 20 m, service line 6.95 m from the net
Construction Materials
Glass
Tempered glass panels 10–12 mm thick are used for the walls. Glass provides:
Visibility for spectators and coaches
Predictable ball bounce
Aesthetic appearance
Metal Fencing
Galvanised fencing with a maximum mesh size of 7.08 × 7.08 cm (square side). The fencing must be rigid enough for a predictable ball rebound.
Floor Surface
The floor may be made of various materials. For more details on surface types, see Padel Court Surface Types.
Safety Zone
FIP standards require a clear zone around the court:
Behind back walls: minimum 2 m (for exiting through the door — salida por la puerta)
Behind side walls: minimum 1 m
Ceiling height: minimum 6 m (for indoor courts)
Doors
Each side of the court has 1 or 2 entrances placed symmetrically. Standard door:
Size: 1.05 × 2 m (or 2 × 0.72 × 2 m for double doors)
Positioned at the centre of the side wall or symmetrically on either side
Lighting
For tournament courts, FIP recommends:
Minimum 400 lux at playing surface level (for recreational use)
500–1,000+ lux for television broadcasts
Even distribution with no blinding spots
Frequently Asked Questions
Can you play on a non-standard court?
For official tournaments, the court must strictly comply with FIP standards. For recreational play, minor deviations are acceptable, but they affect gameplay quality and tactical decisions.
Why are the walls made of glass?
Glass provides better visibility for spectators and a more predictable ball bounce compared to concrete walls. Some club courts still use concrete for the lower wall sections.
How does a padel court differ from a tennis court?
A padel court is four times smaller in area (200 m² vs 648 m²), fully enclosed by walls, and has no doubles alleys. For a detailed comparison, see Padel vs Tennis.
The court surface directly affects game speed, ball bounce, injury risk, and player comfort. The most common type is artificial grass with silica sand, but other options exist.
Blue — the primary colour for Premier Padel tournaments
Green — the classic colour, popular in clubs
Terracotta — found in Spain and Argentina
Colour does not affect playing characteristics, but blue provides the best contrast with the yellow ball for spectators and cameras.
Surface Maintenance
For Artificial Grass with Sand
Task
Frequency
Clearing debris and leaves
Daily
Levelling the sand (rake / machine)
Weekly
Checking sand levels
Monthly
Sand top-up
1–2 times a year
Deep clean (anti-moss treatment)
Once a year
Surface replacement
Every 5–8 years
Weather Impact
Rain: artificial grass with drainage allows play in light rain. Concrete becomes slippery.
Heat: the surface heats up, causing the ball to bounce higher. Watering is recommended for cooling.
Frost: play is not recommended — the surface becomes hard and slippery.
How the Surface Affects Play
Surface
Speed
Playing Style
Grass with sand (standard)
Medium
Versatile, tactical
Concrete
High
Aggressive, fast
Grass without sand
High
Quick exchanges
On slower surfaces (grass with sand), rallies are longer, reaction time is greater, and tactics and positioning matter more. On fast surfaces (concrete), attacking players with powerful shots have the advantage.
Frequently Asked Questions
Which surface is best for beginners?
[EXPERT OPINION] Artificial grass with sand is the clear best choice. It forgives mistakes, allows more reaction time, and is gentler on the joints.
Does the surface affect shoe choice?
Yes. For grass with sand, omni or herringbone outsoles are suitable. For concrete, only herringbone. See Padel Shoes for details.
Choosing between an indoor and outdoor court affects not just comfort but also playing technique, ball speed, and strategy. Understanding the differences helps you adapt your game to any conditions.
Padel was born on outdoor courts in Mexico and Argentina, where warm climates allow year-round play. As the sport spread to Europe, indoor facilities emerged. [UNVERIFIED] In Spain, a significant share of courts are outdoor, while in Sweden and Finland the vast majority are indoor.
Comparison
Parameter
Indoor
Outdoor
Weather dependence
None
High
Wind
None
Significant factor
Lighting
Stable, artificial
Natural + artificial
Temperature
Controlled
Climate-dependent
Construction cost
High
Medium
Operating costs
High
Low
Seasonality
Year-round
Limited by climate
Indoor Courts
Advantages
Weather-independent — rain, snow, and wind don’t affect play
Consistent conditions — predictable ball bounce every session
No wind — the ball flies predictably, crucial for lobs
Sound insulation — less noise impact on residential areas
Year-round operation — no downtime in cold regions
Disadvantages
Higher construction cost — building, roofing, HVAC add to the budget
Operating expenses — heating, air conditioning, ventilation
Minimum ceiling height — FIP requires 6 m minimum, 8 m recommended for new facilities
Ventilation — poor airflow makes surfaces slippery
Outdoor Courts
Advantages
Lower construction cost — no building or roof needed
Minimal operating expenses — no heating required
Natural lighting — comfortable and free
Fresh air — pleasant atmosphere
Disadvantages
Weather-dependent — rain and strong wind make play impossible
Wind — significantly affects ball trajectory
Sun — glare during serves and overhead shots
Surface wears faster under UV, rain, and temperature changes
Seasonal — 3–6 months of downtime in cold climates
Weather Impact on Play
Wind
Wind speed
Impact
Light (up to 10 km/h)
Minimal
Moderate (10–25 km/h)
Lobs and bandejas need adjustment
Strong (25+ km/h)
Play becomes unpredictable
[EXPERT OPINION] Above 25 km/h, match quality drops significantly. Many clubs cancel bookings on outdoor courts.
Temperature
Heat (30°C+): ball bounces higher and faster. Extra hydration is essential.
Cold (0–10°C): ball becomes heavy and slow. Thorough warm-up is mandatory.
Building a padel court is an investment that requires understanding FIP standards, material selection, and infrastructure planning. This guide helps clubs, investors, and municipalities make informed decisions.
The Setúbal District and its neighbours on the south bank of the Tagus offer more than a dozen padel venues — from premium indoor centres with WPT-grade courts to affordable municipal facilities. This guide lists every club we could verify, grouped by city.
[UNVERIFIED] Prices and court counts were gathered from club websites, Playtomic, and AirCourts in February 2026. They may have changed — always confirm with the club before visiting.
Amenities: bar & lounge, free parking (24/7 surveillance), changing rooms with lockers, pro shop, racket rental. The club has hosted FIP Bronze Setúbal tournaments.
Amenities: bar with terrace (Terra Café), changing rooms, 230 m² fitness studio (GoodVibes classes), padel school for youth and adults. Open since June 2018.
Amenities: 3 covered courts + 1 outdoor panoramic, Novotel pool and gym access for members, bar & restaurant (hotel), parking. Founded by two certified coaches, open since May 2023.
Azeitão
Arrábida Padel
Detail
Info
Address
Rua Dr. Francisco Gonçalves de Oliveira, 2925-527 Vila Nogueira de Azeitão
Amenities: bar with terrace, changing rooms, pro shop (rackets & gear), views of Serra da Arrábida. The largest club in the area, open since March 2018.
[UNVERIFIED] This club opened in 2024 but had a delayed inauguration and limited online presence. We recommend calling to confirm it is currently operating before visiting.
Amenities: bar-lounge, parking, padel academy.
Palmela
Campos de Padel de Pinhal Novo
Detail
Info
Address
Rua Orlando Ribeiro, 2955-211 Pinhal Novo (Municipal Swimming Pool complex)
Amenities: lounge & restaurant (also on Uber Eats), bar & esplanade, children’s space, padel school. The largest indoor facility in the Palmela municipality.
Padel nas Pirâmides
Detail
Info
Address
Estrada dos Quatro Castelos, 2950-536 Quinta do Conde
Amenities: bar with chef-prepared menu, covered terrace, free private parking, changing rooms with lockers, pro shop (rackets, clothing, accessories), racket and ball rental.
A structured training programme for your first 4–8 weeks in padel. The goal is to master basic technique, get comfortable with the court and walls, and develop an initial feel for the ball.
A proper warm-up before playing padel reduces the risk of injury, improves reaction speed, and prepares joints, muscles, and the nervous system for rapid movements, shots, and sudden changes of direction.
Padel is a sport built on intense short bursts, sharp stops, and numerous overhead shots. Without preparation, muscles, ligaments, and joints are not ready for these demands, which significantly increases the likelihood of injury. The ankle, knees, shoulders, and lower back are particularly vulnerable.
A quality warm-up lasting 12–15 minutes serves several purposes: it raises body temperature and increases blood flow to the muscles, improves joint mobility and ligament elasticity, and activates the nervous system for better coordination and reaction time. Players who warm up before every session and match report a more confident start to their games — the opening games feel easier, shots are more accurate, and movement around the court is quicker.
[EXPERT OPINION] Many recreational players step onto the court and begin playing immediately, viewing the warm-up as wasted time. However, statistics show that the majority of muscle and joint injuries in amateur padel occur within the first 15–20 minutes of play — precisely when the body has not yet been warmed up.
Phase 1 — General Warm-Up (5 min)
The goal of the first phase is to raise the heart rate and warm up the major muscle groups. All exercises are performed at an easy pace.
Light jogging on the spot or around the court (1–2 min). Start with walking and gradually transition to a gentle jog. Do not rush — the aim is to warm up, not to tire yourself out.
High-knee running (30 sec). Lift your knees to waist height, pumping your arms in opposition.
Jumping jacks (30 sec). Legs apart — arms up, legs together — arms down.
Lateral shuffles along the court (1 min). Move in a low stance as if shuffling at the net. Change direction every 5–6 steps.
Phase 2 — Dynamic Stretching (5 min)
Dynamic stretching prepares joints and muscles for full-range movements. Unlike static stretching, each position is held for only 1–2 seconds rather than 20–30.
Arm circles (30 sec). Both arms simultaneously, forward and then backward. Gradually increase the range of motion.
Hip circles (15 sec per leg). Standing on one leg, rotate the other leg (knee bent) in a circle outward, then inward.
Forward lunges with torso rotation (5 per leg). Step into a deep lunge, then rotate the torso toward the front leg. This stretches the hip flexors and activates the core.
Front-to-back leg swings (10 per leg). Holding onto the wall or court fencing, swing a straight leg forward and backward with increasing amplitude.
Side-to-side leg swings (10 per leg). Same principle, but in the lateral plane — stretches the adductors and abductors.
Torso rotations (30 sec). Standing with feet shoulder-width apart and arms in front of the chest, rotate the torso left and right while keeping the hips still.
Ankle circles (15 sec per foot). Place the toe on the ground and make circular movements. The ankle is one of the most vulnerable joints in padel, especially during rapid direction changes.
Neck tilts and rotations (20 sec). Gentle tilts forward-backward, left-right. Avoid full circular rotations.
Phase 3 — Padel-Specific Movements (5 min)
The final phase mimics movements specific to padel and prepares the neuromuscular system for sport-specific patterns.
Split-step (1 min). Stand in a ready position: feet shoulder-width apart, knees slightly bent, weight on the balls of the feet. Perform a split-step every 2–3 seconds, landing on both feet simultaneously. For more detail, see Footwork.
Shadow swings (1–2 min). Without a ball, perform the main shots: forehand, backhand, volley, overhead. Focus on full range of motion and correct technique.
Lateral shuffles with volley simulation (1 min). Shuffle along the net, simulating volleys alternately on the forehand and backhand side.
Forward-backward movement (1 min). From the net position, retreat to the back wall using shuffle or crossover steps, simulate an overhead, then return to the net.
Mini-rally at low intensity (optional). If your partner is already on court, hit the ball back and forth over the net 10–15 times at 30–40% power. This helps “switch on” your ball feel.
Cool-Down After the Match
The cool-down is just as important as the warm-up. After a match or training session, spend 5–10 minutes on static stretching and gentle recovery.
Exercise
Muscle Group
Duration
Standing toe touch
Hamstrings
20–30 sec
Standing quad stretch (heel to glute)
Quadriceps
20–30 sec per leg
Calf stretch against the wall
Gastrocnemius, soleus
20–30 sec per leg
Cross-body shoulder stretch
Posterior deltoid
20–30 sec per arm
Overhead triceps stretch
Triceps, lats
20–30 sec per arm
Hands clasped behind back
Chest muscles
20–30 sec
Standing side bend
Obliques
15–20 sec per side
After stretching, drink water and allow your body to cool down before leaving the court.
Common Mistakes
Static stretching on cold muscles. Holding deep stretch positions before warming up can cause micro-tears in muscle fibres. Static stretching is appropriate only for the cool-down after play.
Skipping the warm-up. Starting a match or training session without a warm-up is one of the leading causes of injury in recreational padel. Even 5–7 minutes of light warm-up significantly reduce the risk.
Over-intensive warm-up. The purpose of the warm-up is to prepare the body, not exhaust it. If you are sweating heavily and out of breath before the game starts, you have overdone it.
Warming up only the upper body. Padel is a whole-body sport. The legs and core work just as hard as the arms. Pay attention to all muscle groups.
Skipping the cool-down. Omitting the cool-down leads to accumulated muscle fatigue, slows recovery, and increases muscle soreness the following day.
A set of eight targeted drills for players who have mastered the basics and are ready to step up their game. Focus areas include net play, overhead shots, reading the walls, and pair coordination.
[EXPERT OPINION] You do not need to complete all 8 drills in a single session. Pick 4–5 drills, focusing on the aspects that need the most attention. Rotate the selection from session to session.
You have been playing for months, but progress has stalled. You make the same mistakes, lose to the same opponents, and feel stuck. This is a plateau — and it can be overcome.
The learning curve in padel starts steep: rapid progress, noticeable improvement with every session. Then the curve flattens — progress slows, and eventually seems to stop altogether.
Root Causes
Skipping fundamentals. Players who did not work with a coach early on miss the technical foundation and hit a ceiling sooner
Same partners all the time. No variety in styles means no stimulus to adapt
Bad habits. Without correction, faulty movements become ingrained
Neglecting fitness. Insufficient endurance, strength, and mobility limit technique
Too much power, too little strategy. Trying to win through force instead of tactics
Not working with the walls.Wall play is a core padel skill
Breakthrough Strategies
1. Work with a Coach
Even experienced players benefit from a professional eye. A coach spots what you cannot see yourself — subtle errors in grip, footwork, or contact point.
2. Video Analysis
Recording matches and reviewing them with a coach is one of the most effective ways to find weaknesses. Platforms: CoachMyPadel, Hello Padel Academy, The Padel School.
3. Vary Your Opponents
Play with partners and opponents of different levels and styles. Every new opponent forces you to adapt and develops tactical flexibility.
4. Tournaments
Start with local tournaments. The Americano format is excellent for mixing partners and stepping out of your comfort zone.
5. Percentage Play
Choose shots with the highest probability of winning the point. Do not gamble on spectacular shots — pick the stable option.
6. Targeted Wall Work
Spend 15 minutes each session observing ball rebounds off the back wall without hitting. Then practise shots after the rebound.
7. Physical Training
Cardio — endurance for long rallies
Strength — stability in your shots
Mobility — injury prevention
Shadow play — padel movements without the ball
8. Mental Resilience
Consistency and patience in the absence of visible progress. Improvement is not always linear — there are periods of skill absorption.
Errors become conscious — you understand why they happened
You adapt your tactics to the specific opponent
[EXPERT OPINION] A plateau is not a dead end — it is a sign that you are ready for the next level. The most valuable skill is patience. Keep working, and the breakthrough will come.
No partner? No problem. Solo training gives you total control over pace, repetitions, and movement patterns. No distractions, no score pressure — pure skill refinement.
Tennis players have a head start in padel — but also carry habits that can hold them back. This guide provides specific drills to retrain the muscle memory that matters most, organised into a progressive 6-week programme.
Why Tennis Players Need Specific Drills
Coming from tennis, you already understand racket sports fundamentals: reading the ball, footwork, and competitive mindset. However, several deeply ingrained habits work against you in padel:
Tennis habit
Problem in padel
Drill category
Power-first mentality
Strong shots rebound off glass, helping the opponent
Control drills
Full backswing
No time on the small court; loss of accuracy
Compact swing drills
Eastern/semi-western grip
Limits versatility for volleys and wall play
Grip retraining
Staying behind the baseline
Loses net control; cannot attack
Positioning drills
Two-handed backhand
Limited reach near walls; cramped in tight spaces
One-hand backhand drills
Aggressive serve
Underhand serve in padel; power is not the goal
Serve placement drills
Expert insight (Mauri Andrini, former world champion): “Forget the power strategies and accept a patient, strategic approach. Padel rewards control, not force.”
Category 1: Grip Retraining
Drill 1.1: Continental Grip Wall Rally
Stand 2 m from the back wall. Rally against the wall using only the continental grip (the “handshake” grip). Alternate forehand and backhand without changing grip. Start at a slow pace and increase gradually.
Goal: 50 consecutive hits without changing grip
Focus: Feel the natural wrist angle for both sides
Duration: 10 minutes per session
Drill 1.2: Grip Check Volley
With a partner at the net, exchange volleys. After every fifth hit, check your grip — it should still be continental. Tennis players unconsciously rotate toward an eastern forehand. Reset if needed.
Goal: Maintain continental grip throughout 3-minute volley exchanges
Focus: Awareness over automatic rotation
Category 2: Wall Play Fundamentals
Drill 2.1: Back Glass Read and Return
A partner feeds balls that bounce off the back glass. Your job is to let the ball bounce, read the angle, and return it with a controlled shot. Start with slow feeds and progress to harder ones.
Goal: Return 8 out of 10 feeds with control
Focus: Patience — let the glass do the work; do not swat at the ball
Key tennis fix: Resist the urge to volley before the glass rebound
Drill 2.2: Side Wall Redirect
Stand near the side wall. A partner feeds balls into the wall at various angles. Practice redirecting the rebound cross-court. This builds the spatial awareness that tennis players lack.
Goal: Consistently redirect side wall rebounds into the opposite court
Duration: 15 minutes, alternating sides
Drill 2.3: Double Bounce Reading
A partner feeds deep shots that hit the back wall and then the side wall (or vice versa). The drill trains you to read complex trajectories — a skill that doesn’t exist in tennis.
Goal: Track the full ball path without panicking
Focus: Position yourself after the second bounce, not the first
Category 3: Compact Swing Drills
Drill 3.1: Short Backswing Rally
Play a baseline rally with your partner but limit your backswing to no more than 45 degrees. Place a cone or bag behind your shoulder as a physical barrier. If you hit the cone, the backswing was too big.
Goal: Maintain rally quality with half the swing
Focus: Wrist and forearm control, not shoulder rotation
Drill 3.2: Close-Quarters Volley Exchange
Both players stand 3 m from the net, exchanging rapid volleys. The short distance forces compact movements. No full swings possible — only touch, angle, and placement.
Goal: 30 consecutive exchanges
Focus: Soft hands, quick racket preparation
Category 4: Serve Adjustment
Drill 4.1: Target Box Serves
Mark four target zones in the service box (wide, T, centre, deep). Practice the underhand serve aiming for each zone in sequence. Focus on placement, not pace.
Goal: Hit each zone 3 out of 5 times
Focus: Slice and kick serve variations, not speed
Key tennis fix: Accept that the serve is a placement weapon, not a power weapon
Drill 4.2: Serve and Rush
Serve and immediately move forward to the net with your partner. The drill trains the post-serve transition that is natural in padel but foreign to baseline tennis players.
Goal: Reach the net position before the return crosses the net
Focus: Synchronised movement with partner
Category 5: Soft Shots and Touch
Drill 5.1: Chiquita from the Baseline
Stand at the back of the court. A partner at the net feeds volleys. Your goal is to play chiquitas — soft, low balls at their feet. The drill fights the tennis instinct to hit hard from the back.
Goal: 7 out of 10 chiquitas land below net height at the opponent’s feet
Focus: Soft grip pressure (3/10 on the “squeeze scale”)
Drill 5.2: Drop Shot Touch Exchange
Both players at the net, exchanging drop shots that barely clear the net. The drill builds the soft touch that tennis players often lack.
Goal: 10 consecutive drops that bounce within 1 m of the net
Duration: 5 minutes per set
Drill 5.3: Lob Accuracy
From the back of the court, lob over two net players toward the back wall. Aim for the lob to land in the back third of the court. Tennis players tend to hit lobs too flat and too fast.
Goal: 6 out of 10 lobs land in the back third without being smashed
Focus: Height over speed; arc over power
Category 6: Volley Retraining
Drill 6.1: Punch Volley Elimination
Play volleys with a partner, but any volley with a full swing (arm extending past the shoulder) loses the point. This eliminates the tennis “drive volley” that is counterproductive in padel.
Goal: Win 5 points using only compact punch volleys
Focus: Block, redirect, place — do not drive
Drill 6.2: Low Volley at the Net
A partner feeds low balls from the back. You stand at the net and practise volleys below net height. Continental grip, open racket face, step forward into the ball.
Goal: Return 8 out of 10 low feeds into the court
Key tennis fix: In padel, the low volley is defensive, not an approach shot
Category 7: Overhead Adjustment (Bandeja and Vibora)
Drill 7.1: Bandeja Shadow Swings
Without a ball, practise the bandeja motion: arm at shoulder height, slice downward with the continental grip, follow through across the body. Do 3 sets of 20 repetitions.
Focus: The motion is different from a tennis overhead — it is a slice, not a flat hit
Drill 7.2: Controlled Bandeja Rally
A partner lobs from the back. You hit bandejas aiming for the side glass, keeping the ball in the court. No power smashes — only controlled bandejas.
Goal: Land 7 out of 10 bandejas in the opponent’s half without them bouncing over the glass
Key tennis fix: The bandeja replaces the overhead in most situations
Category 8: Positioning and Movement
Drill 8.1: Net-to-Back Shuttle
Start at the net. A partner lobs. Sprint back, play the ball off the glass, then immediately return to the net. Repeat 10 times. Trains the constant forward-backward movement unique to padel.
Goal: Complete 10 cycles without losing ball control
Focus: Recovery speed and transition footwork
Drill 8.2: Pair Movement Sync
Play practice rallies where both partners must always be on the same horizontal line (both at the net or both at the back). If one player is forward and the other back, the point is lost.
Goal: Play 10 consecutive rallies maintaining pair alignment
Focus: Communication and spatial awareness
6-Week Progressive Programme
Week
Focus
Key drills
Sessions
1
Grip and wall basics
1.1, 1.2, 2.1
3× per week
2
Compact swings and serve
3.1, 3.2, 4.1
3× per week
3
Soft shots and touch
5.1, 5.2, 5.3
3× per week
4
Volley retraining + bandeja
6.1, 6.2, 7.1, 7.2
3× per week
5
Movement and positioning
8.1, 8.2, 2.2, 2.3
3× per week
6
Match play integration
Play sets, applying all drills; 4.2, 5.1 as warm-up
3× per week
Each session: 15 min warm-up + 30 min drills + 15 min match play.
10 Common Mistakes Tennis Players Make in Padel
#
Mistake
Impact
Solution
1
Hitting too hard
Ball rebounds off glass to opponent
Reduce power by 50%; control beats force
2
Ignoring the walls
Volleying balls that should bounce off glass
Let the glass work; play after the rebound
3
Eastern forehand grip
Poor volley control; no versatility
Switch to continental as default
4
Full backswing
Too slow for the small court; loss of accuracy
Compact, short movements (drills 3.1, 3.2)
5
Deep baseline position
Loses net control
Stand closer to net; be ready to move forward
6
Attempting passing shots
Court is enclosed; passing shots rarely work
Use lobs to push opponents back
7
Aggressive “dominate” mindset
Both pairs constantly transition attack/defence
Patience; build the rally to the right moment
8
Two-handed backhand
Limited space near walls and glass
Develop one-handed backhand with continental grip
9
Power serve
Padel serve is underhand; placement over power
Target zones, not speed (drill 4.1)
10
Flat-footed stance
Padel requires instant reactions
Stay on toes, racket up, ready position always
Expert Quotes
“Padel is a new sport — treat it as one! Don’t assume your tennis skills will transfer automatically.” — The Padel School
“It is much easier to build technique from scratch than to fix bad habits accumulated over years.” — Mauri Andrini, Hello Padel Academy
“The glass is your friend, not your enemy. Learn to use it and you’ll unlock a whole new dimension of play.” — Catherine Rose, The Padel Paper
Padel is one of the most child-friendly racket sports. The enclosed court keeps the ball in play, the rules are simple, and the doubles format teaches teamwork from day one. Children as young as 3–4 can start with mini padel, and junior competition circuits are growing rapidly worldwide.
Low-pressure balls (Stage 3/Red), smaller courts, rackets 280–320 g
Junior Padel
8–12
Stage 2/Orange or Green balls, standard courts, rackets 280–330 g
Youth Padel
12–18
Standard or Stage 1/Green balls, full-size courts, rackets 310–350 g
Most academies accept children from age 4–5. The optimal age to begin structured training is around 7–8, when coordination and attention span allow for more focused learning.
Courts for Kids
Mini Padel Courts
Mini padel courts measure 10 × 5 m — exactly one-quarter of a standard court — with walls approximately 1 m high and a net height of 1 m. These smaller dimensions are designed for children under 8.
Research (MDPI, 2025) confirms that reducing court size from 20 × 10 m to 10 × 6 m with low-pressure balls improves skill development in children aged 8–10 without reducing the physical workout.
Mini courts are available as fixed, mobile, or temporary installations and fit in schools, clubs, beaches, and even shopping centres. Adults can also play singles on mini courts.
Equipment
Rackets
Parameter
Kids (5–8)
Junior (8–12)
Youth (12–18)
Weight
230–280 g
280–330 g
310–350 g
Thickness
32–33 mm
33–36 mm
36–38 mm
Length
~45 cm
45–50 cm
Standard
Grip
Small
Small
Standard / adjustable
Shape
Round
Round / Teardrop
Teardrop / Diamond
Key principle: Start with a round shape for the largest sweet spot and best control. A racket that is too heavy can cause muscle strain and early injury.
Recommended models (2025–2026):
Wilson Minions Junior — fibreglass/EVA, ~300 g, designed for the youngest players
Adidas Arrow Hit Junior 2026 — beginner-focused
Head Coello Junior 2026 — teardrop, 310–330 g, versatile
Nox AT10 Genius Jr — inspired by Agustin Tapia’s model
The Stage 1/2/3 classification comes from tennis (ITF Play & Stay). In padel, both dedicated junior balls and tennis training balls are used.
Benefits for Children
Physical Development
Coordination: develops hand-eye coordination, agility, and balance
Cardiovascular fitness: moderate intensity (heart rate 140–160 bpm), gentler than tennis or squash
Strength: 8 weeks of training improves grip strength and jump performance in children aged 11–15 (PMC, 2021)
Cognitive stimulation: rapid decision-making and spatial awareness promote brain development
Low Injury Risk
Padel has an injury rate of approximately 2.75 per 1,000 hours of play — significantly lower than football (4–7 per 1,000 hours). The enclosed court prevents ball injuries, the soft ball and light racket reduce impact, and the small court means less running distance.
Social Skills
Padel is always played in pairs, which naturally teaches:
Communication and trust between partners
Sportsmanship — handling wins and losses together
Friendship through shared teamwork
Inclusivity — the sport’s low barrier to entry means children of different abilities can play together
Accessibility
Simple rules allow a quick start. The enclosed court “keeps” the ball in play, meaning longer rallies and more fun from the first session. Studies show that under-14 players demonstrate better psychological profiles: higher confidence and lower anxiety than older teenagers.
Teaching Methodology
Game-Based Learning
Scientific research confirms that search-based methodology (learning through varied game situations) is significantly more effective than traditional drill-based teaching for children.
Best practices:
Modified equipment (smaller court, lower net, softer balls) combined with game situations
Target-based exercises, scoring rallies, mini tournaments
The international junior circuit has grown dramatically:
Year
Tournaments
2021
3
2022
12
2023
18
2024
41
2025
90
Age categories: Under-12, Under-14, Under-16, Under-18 (boys and girls).
From 2026, FIP Promises adopts a continental structure (Europe, America, Asia/Oceania, Africa), each with its own rankings and finals. A planned Global Under-18 Circuit (from 2027) will feature 10 international tournaments plus a Master Final, with top-10 players earning access to Premier Padel and CUPRA FIP Tour events.
FIP Junior World Championships
National team competitions with categories U14, U16, and U18. The XIV edition (Asuncion, Paraguay, 2023) was won by Spain in both men’s and women’s categories. The XV edition took place in Reus, Spain (2025).
National Age Categories (Spain Example)
Category
Age
Benjamin
8–9
Alevin
10–11
Infantil
12–13
Cadete
14–15
Juvenil
16–18
Players Who Started Young
Player
Started padel at
Career highlight
Arturo Coello
~7 years old
World No. 1 at 21 — youngest ever
Agustin Tapia
~9 years old
No. 1 in U12/U14/U16 for 5 years
Fernando Belasteguin
~13 years old
World No. 1 for 16 consecutive years
Alejandra Salazar
~8 years old
One of the greatest female padel players
Juan Lebron
~7–8 years old
Multiple Spanish junior champion
Guide for Parents
Costs
Item
Approximate cost
Junior racket
€30–80 (beginner), €80–150 (advanced)
Balls (3-pack)
€5–10
Shoes
€40–80 (non-marking sole)
Court rental
€30–60/hour for 4 players (€7–15 per person)
Racket rental
€5–10 per session
Group lesson
€15–30 per person for 60–90 min
Private lesson
€50–120/hour
Tip: Many clubs offer racket rental and free introductory sessions. Start with rental before investing in equipment.
Supporting Without Pressure
Research in sports psychology consistently shows that excessive parental pressure reduces enjoyment and can cause lasting psychological harm. Autonomous support (rather than controlling behaviour) increases confidence, enjoyment, and long-term engagement.
Guidelines:
Praise effort, not results
Do not criticise after losses
Let the child determine their own level of involvement
Participate actively — play mini padel together
Choose a club with trial sessions and observe the coaching style
Use padel’s doubles format to encourage socialising with friends
Finding a Junior Programme
Check your national federation’s website (FEP, LTA, USPA, etc.)
Ask at local tennis clubs — many now offer padel
Search Decathlon or sports retailers for local programme information
Every padel player who plays regularly will benefit from working with a coach. The question is not “do I need a coach?” but “when and what format should I choose?”
[EXPERT OPINION] Do not wait until you hit a plateau. Investing in a coach early on prevents problems that are expensive to fix later. The Padel School reports noticeable results within 6 weeks.
Padel is considered a sport with a relatively low injury rate, but its specific movements — sharp turns, overhead shots, and lateral shuffles — put stress on certain joints and muscles. Knowing the typical injuries and prevention methods helps you play safely for years.
Research shows that injuries in padel occur less frequently than in tennis, squash, or badminton. The enclosed court limits running distance, and the underhand serve reduces shoulder load. Nonetheless, regular play without proper preparation and prevention leads to common problems.
Injury Statistics
Body Area
Share of Injuries
Lower limbs
~50%
Upper limbs
~30%
Back / torso
~15%
Head / face
~5%
Lower Limb Injuries
Ankle Sprain
The most common injury in padel. Occurs during sharp lateral movements, especially on wet or sandy surfaces.
Symptoms: pain around the ankle, swelling, restricted mobility.
Causes:
Unsuitable footwear (running shoes without lateral support)
Targeted exercises for vulnerable areas — ankle, knee, shoulder, elbow, and lower back — reduce the risk of common padel injuries. This routine takes 20–30 minutes and can be done at home or in the gym.
Padel places more stress on certain joints and muscles than on others. Targeted prehab differs from general fitness training by focusing on the weak links that are most frequently injured.
Frequency: 2–3 times per week, on rest days or after a light warm-up.
Ankle
Ankle sprains are one of the most common injuries in padel (alongside elbow epicondylitis). Lateral court movement demands stable ligaments and good proprioception.
Exercises
Exercise
Sets
Time / Reps
Single-leg stance
3
30 sec each side
Single-leg stance, eyes closed
2
20 sec
Double-leg calf raises
3
15 reps
Single-leg calf raises
2
10 each side
Foot “alphabet” (trace letters in the air)
1
A–Z each foot
Resistance band — eversion / inversion
2
15 each direction
Progression: start on a hard floor → move to an unstable surface (cushion, BOSU ball).
Knee
Sharp stops, pivots, and deep positions make the knee vulnerable. The key is strengthening the quadriceps, hamstrings, and glutes.
Exercises
Exercise
Sets
Reps
Single-leg squat to bench
3
8 each side
Glute bridge
3
15
Single-leg glute bridge
2
10 each side
Lateral lunges
3
10 each side
Terminal knee extension with band
3
15
Single-leg Romanian deadlift (dumbbell)
2
10 each side
Important: during squats, do not let the knee cave inward — keep it tracking over the toes.
Shoulder
Overhead shots — bandeja, víbora, smash — load the rotator cuff. Strengthening it is essential for injury prevention.
Exercises
Exercise
Sets
Reps
External rotation with band (elbow at side)
3
15 each side
Internal rotation with band
3
15 each side
Prone Y-T-W raises
2
10 of each letter
Face pulls with band
3
15
Plank with shoulder tap
2
10 each side
Shoulder Stretches
Sleeper stretch: lie on your side, arm bent 90°, press your forearm toward the floor. 30 sec × 2 each side.
Doorway stretch: hands at shoulder height on the door frame, step forward through the doorway. 30 sec × 3.
Elbow and Forearm
Lateral epicondylitis (“tennis elbow”) is the most common upper-limb issue in padel.
Exercises
Exercise
Sets
Reps
Eccentric wrist extension (1–2 kg dumbbell)
3
15
Towel wringing (both directions)
3
10 each way
Pronation / supination with dumbbell
2
15 each
Tennis ball squeeze
3
15 sec hold
Wrist extensor stretch
3
30 sec
Eccentric wrist extension technique: use the healthy hand to lift the weight up (wrist extension), then slowly lower (5 sec) with the working hand. This is the most evidence-supported exercise for epicondylitis.
Lower Back and Core
Frequent bending, twisting, and hitting from low positions load the lumbar spine. A strong core protects it.
Exercises
Exercise
Sets
Time / Reps
Plank (on elbows)
3
30–60 sec
Side plank
2
20–30 sec each side
Dead bug
3
10 each side
Bird-dog
3
10 each side
Pallof press (band rotation)
2
12 each side
25-Minute Routine
A ready-made programme combining key exercises from every section:
Warm-up (3 min) — marching in place, joint rotations
Prevention exercises do not replace treatment. If you experience acute pain, swelling, or joint instability, see a sports-medicine professional. For warning signs, see Common Injuries.
Padel demands a blend of endurance, agility, and strength. A well-structured off-court conditioning programme not only improves your game but also significantly reduces the risk of injury, helping you enjoy padel for years to come.
Padel is a dynamic sport that places complex demands on a player’s fitness. Understanding these demands helps you build an effective training programme.
Endurance. A match can last anywhere from 60 to 120 minutes. An aerobic base is essential for maintaining concentration and shot quality throughout the entire game.
Lateral agility. Padel is, above all, a sport of lateral movement. Players constantly shuffle side to side, covering a court width of 10 metres. The ability to change direction quickly is a key skill.
Shoulder and wrist strength. Overhead shots (bandeja, vibora, smash) require stable shoulders, while racket control depends on strong forearms and wrists.
Reaction speed. Net exchanges take place at a distance of just 3–4 metres from the opponent. Fast reactions and hand-eye coordination are critical for successful volleying.
Explosive leg power. Sudden starts, stops, and jumps all require well-developed lower-limb muscles.
Cardiovascular Training
Padel is characterised by interval-style effort: short bursts of high intensity alternate with recovery periods. Your cardio programme should mirror this rhythm.
HIIT (High-Intensity Interval Training)
The best format for simulating match rhythm:
20 seconds of maximum effort + 40 seconds of rest — 8–10 rounds
Exercises: burpees, jump squats, sprint on the spot, mountain climbers
Frequency: twice a week
Running and Cycling
Running: 20–30 minutes at a moderate pace, 1–2 times a week
Cycling / elliptical trainer: 30–40 minutes — a joint-friendly alternative
Skipping rope: 10–15 minutes — excellent for coordination and endurance
Strength Exercises
Strength training reinforces muscles and joints, boosting shot power and protecting against injury.
Core Exercise Programme
Exercise
Muscle Group
Sets
Reps
Dumbbell squats
Quadriceps, glutes
3
12–15
Lateral lunges
Legs, stabilisers
3
10 per leg
Plank
Core (abs and lower back)
3
30–60 sec
Standing dumbbell press
Shoulders, triceps
3
10–12
Wrist curls with dumbbell
Forearms
3
15–20
Band face pull
Rear delts, rotators
3
12–15
Dead bug
Deep core muscles
3
10 per side
Band rotation
Rotator cuff
2
15 per side
Recommendations
Beginners should use light weights with an emphasis on form
[EXPERT OPINION] Rotator-cuff exercises are an essential part of every padel player’s programme
Increase load gradually (no more than 10% per week)
Developing Agility
Agility and the ability to change direction quickly are what set a good padel player apart. You can train these qualities with simple drills.
Agility Ladder
High-knee run — through each rung
Lateral shuffles — simulating court movement
In-In-Out-Out — two steps in, two steps out
3–4 sets of each drill
Cone Drills
Place 5 cones in a line, 1.5 metres apart
Slalom between cones at speed
Shuttle run: touch the cone and return to the start
Proper nutrition helps you play with energy, recover faster, and reduces the risk of injuries. This guide covers pre-match, in-match, and post-match nutrition, as well as everyday principles for active padel players.
A padel match lasts 60–120 minutes. In intensity it is similar to doubles tennis, but with more frequent explosive efforts and shorter breaks.
Parameter
Value
Average calorie burn
400–700 kcal/hour
Heart-rate zone
125–160 bpm (peaks 170+)
Load type
Interval (aerobic-anaerobic)
Exact expenditure depends on body weight, playing intensity, and temperature.
Pre-Match Nutrition
3–4 Hours Before: Full Meal
The foundation is complex carbohydrates with moderate protein and a small amount of fat.
Good options:
Pasta with chicken and vegetables
Rice with fish
Oatmeal with banana and nut butter
Wholegrain bread with egg and avocado
Avoid:
Fatty or fried food (slow to digest)
Large portions of legumes (bloating)
Unfamiliar foods before an important match
1–1.5 Hours Before: Light Snack
If the full meal was earlier:
Banana
Granola bar
Toast with jam
Yoghurt with honey
During the Match
During play, the priority is hydration and fast energy.
Hydration
Timing
Volume
2 hours before play
400–600 ml of water
Every 15–20 minutes during play
150–200 ml
After the match
At least 500 ml
In hot weather (30°C+): add an isotonic drink or a pinch of salt and lemon juice to your water to replace electrolytes.
Signs of dehydration: dizziness, dark urine, reduced concentration, cramps. At the first sign — take a break and hydrate actively.
Between-Set Snack
During long matches (90+ minutes):
Banana (potassium + fast carbs)
Energy gel
2–3 dates
Isotonic drink
Post-Match Nutrition
Post-match recovery. The traditional 30–60 minute “anabolic window” has been revised by modern research: the body actively absorbs nutrients for several hours after exercise. Still, eating sooner helps kick-start recovery faster.
Immediately After (30 min)
Protein: 20–30 g (protein shake, yoghurt, milk)
Carbohydrates: 40–60 g (banana, juice, energy bar)
Fluids: 500–750 ml of water or isotonic drink
Full Meal (1–2 Hours After)
Chicken or fish with rice and vegetables
Pasta with meat sauce and salad
Omelette with potatoes and bread
Everyday Nutrition
[EXPERT OPINION] For an active padel player (3–5 sessions per week), a balanced diet with an emphasis on carbohydrates is optimal.
Macronutrients
Component
Share
Function
Carbohydrates
45–55%
Primary energy source
Protein
20–25%
Muscle repair and growth
Fats
20–25%
Hormones, vitamin absorption
Key Micronutrients
Nutrient
Purpose
Sources
Iron
Oxygen transport
Red meat, spinach, lentils
Calcium
Bone health
Dairy, broccoli
Magnesium
Muscle function, cramp prevention
Nuts, seeds, dark chocolate
Vitamin D
Bones, immunity
Oily fish, eggs, sunlight
Vitamin C
Tissue repair, antioxidant
Citrus fruits, peppers, berries
Omega-3
Anti-inflammatory
Oily fish, flaxseed oil, walnuts
Special Scenarios
Playing in the Heat
Increase fluid intake by 50%
Add electrolytes (sodium, potassium)
Light meals: salads, fruit, cold soups
Avoid caffeine before playing in the heat
Morning Matches
At least 1.5 hours before: oatmeal with banana or toast with honey
Short on time: banana + a glass of water 30 minutes before
Evening Matches
Full lunch at 13:00–14:00
Snack 1.5 hours before play
After the match: a light dinner (protein + vegetables); avoid heavy carbs before bed
Common Mistakes
Playing on an empty stomach — reduces energy and concentration, increases injury risk
Too much protein, not enough carbs — carbohydrates matter more for energy in an interval sport
Water only in the heat — electrolytes are essential
Alcohol after a match — slows recovery and dehydrates
Skipping the post-match meal — delays muscle recovery
Elbow pain is the most common injury in padel, affecting roughly 20% of all players at some point. Understanding why it happens and how to prevent it can keep you on court and pain-free.
Medical disclaimer: This article is for informational and educational purposes only and does not constitute medical advice. Always consult a qualified healthcare professional before starting any exercise programme or treatment plan. If you experience persistent elbow pain, seek evaluation from a sports medicine physician or orthopaedic specialist.
What Is Epicondylitis
Epicondylitis is a degenerative condition of the tendons that attach forearm muscles to the bony prominences (epicondyles) of the elbow. Despite the name “tennis elbow,” it is not an inflammatory condition — it is a process of tendon degeneration (tendinosis) caused by repetitive micro-trauma.
Lateral Epicondylitis (Tennis Elbow / Padel Elbow)
Affects the tendon of the extensor carpi radialis brevis (ECRB) on the outer side of the elbow. This is the more common form in padel, especially among beginners. Repetitive backhand strokes with a flexed wrist create eccentric stress on the wrist extensors, gradually damaging the tendon.
Medial Epicondylitis (Golfer’s Elbow)
Affects the flexor-pronator tendon on the inner side of the elbow. More common in advanced players who execute powerful overhead shots (smashes, viboras, bandejas) — the combination of wrist flexion and forearm pronation stresses the medial side. Accounts for 10–20% of epicondylitis cases.
Why Padel Is Particularly Risky
Padel has a higher incidence of elbow injuries than tennis and squash (systematic review, 2023). Several factors contribute:
No strings — the solid racket face transfers more impact directly to the arm
Small court (20 × 10 m) — more shots per unit of time than tennis
Wall play — frequent overhead shots and rapid direction changes
Eccentric contractions — repeated deceleration after ball contact stresses tendons
The area where the ECRB tendon attaches is naturally low in blood supply, slowing repair
Statistics
Metric
Value
Elbow injuries as % of all padel injuries
20–37%
Lateral epicondylitis specifically
20.5% of all injuries
Injury rate during matches
8 per 1,000 match-hours
Injury rate during training
3 per 1,000 training-hours
Severity: mild
65%
Severity: moderate
19–28%
Severity: severe
16%
Spontaneous recovery (general population)
80–90% within 1–2 years
Beginners are more prone to lateral epicondylitis (poor backhand technique). Advanced players are more prone to medial epicondylitis (powerful overhead shots).
Risk Factors
Technique
Hitting with a flexed wrist (especially on backhand)
Late contact with a bent arm
Gripping too tightly — increases load on wrist extensors
Excessive force without adequate control
Equipment
Factor
Risk
Better choice
Heavy racket (>375 g)
Higher arm load
340–360 g
Hard EVA core
More vibration
Soft EVA or FOAM
Diamond shape
High balance, more torque
Round shape
Pure carbon face
Stiff, transmits vibration
Fibreglass or hybrid
Wrong grip size
Compensatory gripping
Correct measurement
Worn overgrip
Lost cushioning
Replace every 5–10 hours of play
Training
Overplay (>2 hours of repetitive hitting daily)
No warm-up before playing
Rapid increase in frequency or intensity
Insufficient recovery days between sessions
Prevention
Correct Technique
Contact the ball with an extended (not flexed) wrist, especially on backhand
Hit with a straight arm at the point of contact
Maintain moderate grip pressure — do not squeeze
Learn proper biomechanics for backhand and overhead shots
Racket Selection
For players concerned about elbow health:
Core: Soft EVA or Ultra Soft EVA (absorbs vibration)
Shape: Round (low balance = less torque on the arm)
Weight: 340–360 g (lighter is easier on joints)
Surface: Fibreglass (softer than pure carbon)
Grip size: Correct measurement — when holding the racket, your little finger should fit between your fingertips and the base of your thumb
Overgrip Maintenance
Replace your overgrip every 5–10 hours of play (for recreational players, every 2–3 sessions). Consider an absorbing undergrip for additional cushioning. Padel overgrips are thicker and softer than tennis overgrips because the racket has no strings to absorb shock.
Forearm stretches: extensors and flexors — 30 seconds each side
Shadow strokes: forehand, backhand, smash without a ball (~1 min)
Light rally: gradually increasing power
Static stretching should be done after playing, not before.
Strengthening (Preventive)
Regular strengthening of the forearm extensors and flexors, rotator cuff, and scapular stabilisers significantly reduces injury risk.
Treatment
Phase 1: Acute (First 1–3 Days)
Follow the PEACE principle:
Protect — reduce load, avoid activities that cause pain
Elevate — raise the arm above heart level when resting
Avoid anti-inflammatories — NSAIDs may slow tissue healing in the early phase
Compress — elastic bandage or brace
Educate — understand that the body heals itself; avoid overtreatment
Ice can be used for pain relief (15–20 minutes, up to 3–4 times daily).
Phase 2: Early Rehabilitation
Isometric exercises (pain-free muscle activation without movement):
Press the back of your hand against a table — hold 10 seconds × 5–6 reps, 3–4 times daily
Squeeze a ball or towel — hold 10 seconds × 5–6 reps, 2–3 times daily
Progress when you can fully extend the wrist without pain.
Phase 3: Eccentric Exercises (Core Treatment)
Eccentric loading is the most evidence-based treatment for tendinosis.
Eccentric wrist extension with dumbbell:
Sit with forearm resting on thigh, palm down, wrist hanging over the knee
Use the other hand to help lift the wrist up (concentric phase)
Slowly lower over 4 seconds (eccentric phase)
3 sets × 15 reps, daily, 7 days a week
Start with 0.5–1 kg, increase by 0.1–0.5 kg per week as tolerated
Expect improvement after 4–6 weeks
Tyler Twist (with FlexBar):
A proven protocol (Tyler et al., 2010) showing 81% pain improvement (vs. 22% control) and 79% strength improvement (vs. 15%) over an average of 7 weeks.
Hold FlexBar in the affected hand with wrist extended
Grip the other end with the healthy hand
Twist the FlexBar with the healthy hand while keeping the affected wrist extended
Extend both arms forward
Slowly allow the FlexBar to unwind — the affected hand moves into flexion (eccentric phase)
When you can perform 5 kg × 20 reps of eccentric extension without pain:
Concentric/eccentric wrist extension: 3 × 10–15 with 1–5 kg
Wrist flexion: 3 × 10–15
Pronation/supination with dumbbell: 3 × 10–15
Grip strengthening: 3 × 15, hold 5 seconds
Rotator cuff with resistance band: 3 × 10
Scapular stabilisation rows: 3 × 10
Bracing
A counterforce strap worn 2 fingers below the painful point reduces tendon load by 13–15%. Wear during activity, remove during rest and sleep. Effective as a short-term adjunct (2–12 weeks) alongside exercises.
When to See a Doctor
Pain does not improve after 1–2 weeks of rest and home treatment
Pain worsens despite rest, ice, and anti-inflammatories
Inability to hold objects (a cup, a pen)
Numbness or tingling in the hand (possible nerve involvement — up to 15% of cases have concurrent radial tunnel syndrome)
Red flags (seek immediate medical attention):
Significant traumatic injury
Fever
Joint swelling
Severe night pain that does not subside
Progressive neurological symptoms
Advanced Treatments
If conservative treatment fails after 3–6 months:
Shockwave therapy
Ultrasound therapy
PRP (platelet-rich plasma) injections — evidence of effectiveness
Corticosteroid injections — short-term relief but may worsen long-term outcomes; avoid repeated injections
Surgery (debridement of the ECRB tendon) is a last resort after 6–12 months of failed conservative treatment, with 80–90% success rate.
Padel was invented in 1969 by Mexican businessman Enrique Corcuera, who adapted a squash-like area at his home in Acapulco. In just over half a century, this sport has grown from a backyard pastime into a global phenomenon with more than 35 million players.
The history of padel is generally traced back to 1969, when Mexican entrepreneur Enrique Corcuera built a court on the grounds of his estate “Las Brisas” in Acapulco, Mexico.
Corcuera wanted to create a tennis-like game area, but the space was limited by surrounding walls. Instead of fighting the constraints, he made the walls part of the game. Thus “Paddle Corcuera” — the ancestor of modern padel — was born.
Key features of the first court:
A 20 × 10 metre playing area (these dimensions remain unchanged today)
Walls around the perimeter
Rules based on tennis but allowing wall bounces
An underhand serve
Spain: Alfonso de Hohenlohe-Langenburg
In 1974, Corcuera’s friend, the Spanish-German aristocrat Alfonso de Hohenlohe-Langenburg, brought the idea of padel to Marbella (Spain). He built the first courts at his Marbella Club hotel on the Costa del Sol.
Hohenlohe-Langenburg made important changes:
Replaced solid walls with glass panels — for spectator visibility
Refined the rules
Began organising the first tournaments among hotel guests
Marbella became the launch pad for padel’s spread across Spain and Europe.
Argentina: A Mass Sport
In parallel with Spain, padel began to develop in Argentina. During the 1970s–1980s, Argentinians embraced the new sport en masse. Argentina became the first country where padel gained truly mass participation:
Thousands of clubs nationwide
Professional leagues from the 1980s
The Argentine school of padel — one of the strongest in the world
Argentine players dominated world padel for decades
Timeline
Year
Event
1969
Enrique Corcuera builds the first court in Acapulco
1974
Alfonso de Hohenlohe-Langenburg brings padel to Marbella
1970s
Padel spreads across Argentina
1980s
First professional tournaments in Argentina
1991
FIP (International Padel Federation) founded
1992
First World Padel Championship (won by Argentina)
2000s
Padel boom in Spain — thousands of courts built
2005
World Padel Tour (WPT) created in Spain
2013
FIP reaches 25 member countries
2022
FIP and Premier Padel launch a new international tour
2024
Padel considered as a candidate for the Olympic Games
2025
100+ national federations, 35+ million players, 77,300+ courts worldwide
FIP and Globalisation
The International Padel Federation (FIP) was founded in 1991 and became the governing body of world padel. FIP:
In 2022, FIP together with Qatar Sports Investments launched Premier Padel — a new global tour with Major tournaments on four continents.
Padel Today
According to the FIP World Padel Report 2025:
35+ million active players worldwide
100+ national federations
77,300+ courts in 110+ countries
Spain leads in court numbers (~24,000)
Player numbers growing 30–40% annually in Europe
Padel is the fastest-growing racket sport in the world
Padel is expanding rapidly in Scandinavian countries (Sweden has over 5,000 courts), Italy, the United Kingdom, France, and Middle Eastern nations.
Frequently Asked Questions
Why is the sport called “padel” and not “paddle”?
The English word “paddle” describes the racket shape. In Spanish, it was adapted as “pádel”. The international spelling per FIP standards is padel (no accent, no double “d”).
Is padel in the Olympic Games?
[UNVERIFIED] As of 2025, padel is not part of the Olympic programme, but FIP is actively lobbying for its inclusion. Padel has been recognised by the International Olympic Committee (IOC).
Where is padel most popular?
Spain remains the leader in court numbers and players. It is followed by Argentina, Italy, Sweden, and Portugal.
Spain is the undisputed world capital of padel. With over 17,000 courts and roughly 6 million players, padel has become the country’s second most popular sport after football, transforming from an elite pastime on the Costa del Sol into a national phenomenon.
The history of padel in Spain begins with one man — Alfonso de Hohenlohe-Langenburg, a Spanish-German aristocrat and owner of the legendary Marbella Club hotel on the Costa del Sol.
In 1974, after visiting Enrique Corcuera in Mexico, Hohenlohe was so taken with the new game that he decided to bring it to Spain. He built the first two courts at his hotel in Marbella. Among the first players were hotel guests drawn from European aristocracy, business leaders, and celebrities, including the legendary Spanish tennis player Manolo Santana — a four-time Grand Slam champion.
New courts soon began to appear along the Costa del Sol. In 1975, Argentine millionaire Julio Menditeguia discovered padel in Marbella and took the sport to his home country — sparking a parallel boom on another continent.
The 1990s Boom
Throughout the 1980s, padel spread gradually across Spain but remained largely a pastime for the well-to-do on the southern coast. Everything changed in the early 1990s.
Key milestones:
1992 — the Spanish Padel Federation (FEP) was founded, giving the sport official standing
1993 — padel was officially recognised by Spain’s Superior Council of Sports (Consejo Superior de Deportes)
A wave of court construction swept the country — from Andalusia to Catalonia, from Madrid to the Basque Country
The first professional tournaments were held on Spanish soil
[UNVERIFIED] By the end of the 1990s, Spain had more than 5,000 courts and over one million regular players.
Several factors drove padel’s transformation from an elite sport to a mass phenomenon:
Affordability: a padel court is cheaper to build and maintain than a tennis court
Social format: the doubles-only format (always four players) is perfect for groups of friends
Easy entry: basic skills are learned faster than in tennis
Climate: Spain’s mild weather allows year-round play
Spain — the World Capital
Today Spain leads the world of padel across every key metric.
Statistics
Metric
Figure
Number of courts
~17,300 (1st in the world)
Number of players
~6 million
Registered clubs
3,500+
Ranking among sports
2nd (after football)
Courts per capita
Among the highest in the world
According to the FIP World Padel Report 2025, Spain remains the absolute global leader in court numbers, ahead of Italy (10,220) and Argentina (7,000). In mature markets such as Spain, the number of padel courts has already surpassed the number of tennis courts.
The Culture of Padel
In Spain, padel is more than a sport. It is a social phenomenon and an integral part of everyday life.
Afterwork Padel
One of the most distinctive features of Spanish padel culture is “afterwork padel.” After the working day, colleagues and friends gather on court for a match that ends with dinner or drinks together. Booking a court for Thursday or Friday evening is as much a part of the social routine as going to a bar.
A Sport for Everyone
Age: players range from children of 5–6 to retirees in their 70s
Gender: padel is one of the few sports with near-equal male and female participation
A family sport: parents play alongside children; family leagues exist
A corporate sport: inter-company tournaments are common practice
Infrastructure
Padel clubs in Spain are full-fledged social centres with cafes, equipment shops, lounge areas, and playgrounds. Many municipalities build public courts available for booking at a minimal fee.
The Role of Stars
Spanish and Argentine champions competing in Spain have played a huge role in popularising the sport.
Fernando Belasteguin is considered by many to be the greatest padel player of all time. An Argentine who made Spain his second home, he held the world number-one ranking for 16 consecutive years and won 230 tournament titles. His career inspired a generation of Spanish players.
Carolina Navarro is one of the greatest Spanish padel players. Partnering with Cecilia Reiter, she dominated women’s padel from 2010 to 2014, winning 24 titles including the prestigious 2012 Master Final.
Gemma Triay, from Menorca, is one of the most dynamic and aggressive players on the current tour. Her powerful smashes and passionate on-court presence have won fans worldwide.
Arturo Coello is a rising star of Spanish padel. At just 23, partnering with Argentine Agustin Tapia, he reached the world number-one ranking, proving that the next generation of Spanish players is ready to carry the sport forward.
Current Status
Padel continues to grow in Spain and to consolidate its position as the country’s second most popular sport.
Premier Padel holds key tournaments in Spain, including the season-ending finals in Barcelona
The Spanish women’s team has won multiple World Padel Championships
Major sports brands (Adidas, Head, Bullpadel, Nox) have headquarters or key offices in Spain
Television broadcasts of matches attract audiences in the millions
Padel has been included in school sports programmes in several regions
[UNVERIFIED] Some estimates suggest that Spain could have more than 25,000 courts by 2030.
Growth Timeline
Period
Event
1974
Alfonso de Hohenlohe builds the first two courts in Marbella
1975
Julio Menditeguia takes padel from Marbella to Argentina
Late 1970s
First clubs beyond the Costa del Sol
1980s
Gradual spread across southern Spain
1992
Spanish Padel Federation (FEP) founded
1993
Padel officially recognised as a sport
1990s
Mass boom: thousands of courts built
2005
World Padel Tour (WPT) created — a professional tour based in Spain
2010s
Padel becomes the second most popular sport after football
From a private courtyard in Acapulco, padel has spread to six continents in half a century. Each region has brought its own flavour: Argentina — mass participation, Spain — infrastructure, Scandinavia — year-round indoor courts.
The global rise of padel can be divided into three waves:
Wave
Period
Regions
First
1970s–1990s
Mexico, Argentina, Spain
Second
2000–2015
Portugal, Brazil, UAE, Italy
Third
2015–present
Scandinavia, UK, France, USA, Asia
Latin America
Argentina
The birthplace of mass padel. By the 1980s, thousands of clubs operated across the country. The Argentine school has produced legendary players and coaches.
Courts: ~7,000 (FIP data, 2024)
Highlight: padel is the second-most popular sport after football
[UNVERIFIED] ~1.4 million registered players (FIP data)
Brazil
Growth began in the 2000s. Major cities (São Paulo, Rio de Janeiro) became development hubs.
Courts: ~3,000
Highlight: active new construction, strong youth interest
Mexico
The country where padel was born. Despite its historical primacy, mass adoption lags behind Argentina and Spain.
Courts: ~1,000
Highlight: focus on resort areas and the capital region
Europe
Spain
The undisputed leader in infrastructure. See Padel in Spain for details.
Courts: ~17,000 (2024, +5% YoY)
Players: ~6 million
Highlight: padel is embedded in the culture, available in every city
Sweden
Phenomenal growth between 2015 and 2025. The cold climate drove massive construction of indoor courts.
Courts: ~4,200
Highlight: the vast majority of courts are indoor; padel centres as a business model
[UNVERIFIED] Sweden has the second-highest number of courts per capita in Europe after Spain
Italy
Rapid growth since 2018. Clubs are opening all over the country, from Milan to Sicily.
Courts: ~10,000+ (2025, surpassed Sweden)
Highlight: high demand, active investment environment
Finland
A model similar to Sweden — predominantly indoor courts in urban areas.
Courts: ~1,500
Highlight: strong ties to tennis clubs, combined facilities
United Kingdom
Active growth since 2020, supported by the LTA (Lawn Tennis Association).
Courts: ~760+ (2024), growing fast
Highlight: many tennis clubs are adding padel courts to their existing infrastructure
France
Growth accelerated in 2022–2025. The French Tennis Federation (FFT) has integrated padel into its structure.
Courts: ~2,500
Highlight: government-level support through sports federations
Portugal
Geographic and cultural proximity to Spain ensured early adoption.
Courts: ~2,000
Highlight: popular in coastal resort areas
Middle East
UAE and Qatar
Extreme heat has led to a dominance of indoor courts (~70%).
Highlight: premium facilities, hosting Premier Padel events
Qatar is a strategic FIP partner through Qatar Sports Investments
North America
USA
[UNVERIFIED] Padel still trails pickleball in popularity, but interest is growing. Main hubs: Miami, Los Angeles, New York, Texas.
Courts: ~700 (2025, rapid growth)
Highlight: competing with pickleball for the racquet-sports audience
Asia
The least developed region, but growing:
Japan: ~50 courts, supported through tennis clubs
India, Thailand, China: a handful of venues, pilot projects
What Drives Growth?
Why is padel spreading so fast?
Low barrier to entry — you can start playing after one session
Social format — doubles on a compact court encourages interaction
Space-efficient — a court requires less room than a tennis court
From wooden paddles of the 1970s to carbon-fibre rackets with aerodynamic designs — padel equipment has undergone a transformation comparable to tennis rackets. Technology has made the game faster, more powerful, and more accessible.
Russia’s padel story is one of the fastest growth trajectories in the sport’s history: from zero courts in 2012 to over 560 in 2025, with a market valued at 6.2 billion rubles. The CIS region — Kazakhstan, Belarus, Georgia, and others — is following close behind.
How Padel Arrived in Russia
The Pioneer: Cristian Tarruella
Padel was brought to Russia by Cristian Tarruella, an Argentine-born padel enthusiast who built the country’s first court in Voronezh in 2013. Tarruella saw the potential in a country of 146 million people with virtually no awareness of the sport. His initial court served as a proof of concept: once Russians tried padel, they returned.
Early Growth (2013–2019)
The first years were slow. Courts were concentrated in Moscow and Voronezh, and padel was seen as an exotic curiosity. By 2019, Russia had approximately 30 courts, mostly in private fitness clubs.
Key milestones:
2013: First court built in Voronezh by Cristian Tarruella
2015: First courts appear in Moscow
2018: ~15 courts nationally; first informal tournaments
2019: ~30 courts; growing community of players in Moscow and St. Petersburg
The Explosion (2020–2025)
The COVID-19 pandemic paradoxically accelerated padel’s growth. As an outdoor or semi-outdoor sport played in small groups of four, padel was one of the first activities to resume after lockdowns. Investors noticed the global trend and began building courts rapidly.
Year
Courts in Russia
Growth
2019
~30
—
2020
~60
+100%
2021
~120
+100%
2022
~200
+67%
2023
~350
+75%
2024
~480
+37%
2025
~568
+18%
[UNVERIFIED] The 60× growth in court numbers over five years (2019–2025) makes Russia one of the fastest-growing padel markets in the world.
Key Statistics
Metric
Value
Courts (2025)
~568
Active players (estimated)
~20,000
Market size
6.2 billion RUB (~€57 million)
Public awareness (ВЦИОМ poll)
26% have heard of padel
Willingness to try (ВЦИОМ poll)
61% of those aware said they would try
Major cities with courts
Moscow, St. Petersburg, Voronezh, Kazan, Krasnodar, Sochi, Novosibirsk
The Federation Landscape
Федерация падел России (ФПР)
The Padel Federation of Russia (ФПР) was accredited by the FIP (Federación Internacional de Pádel) in 2024, giving Russia official standing in the international padel community.
ФПР organises:
National championship (since 2023)
Regional tournaments across major cities
Youth development programmes
Coach certification courses
[DISPUTED] The “Federation War”
Russia’s padel community has experienced a period of institutional conflict, with two competing organisations claiming to represent padel in the country. The dispute centred on which body had the right to represent Russia at FIP and organise national competitions.
The FIP’s accreditation of ФПР in 2024 largely resolved the issue at the international level, though some tensions remain at the regional level.
Russian Players on the International Stage
Yana Sharifova
The most prominent Russian padel player internationally. Sharifova reached #21 in the FIP world rankings, making her the highest-ranked Russian player in history. She competes on the international circuit and serves as an inspiration for the growing Russian padel community.
The Russian National Team
Russia has fielded national teams at FIP events since 2023. While not yet competitive with powerhouses like Spain, Argentina, or Italy, the team represents significant progress for a country that had zero padel infrastructure a decade ago.
Geography of Russian Padel
Moscow
The undisputed centre of Russian padel. Moscow has the largest concentration of courts, the most active tournament scene, and the highest-level players. Major clubs include facilities in the city centre, business districts, and suburban sports complexes.
St. Petersburg
The second city of Russian padel, with a growing community and several multi-court venues. The long winter makes indoor facilities essential — most St. Petersburg courts are covered or fully indoor.
Southern Russia
Krasnodar and Sochi benefit from milder climates, allowing longer outdoor seasons. Sochi’s tourism infrastructure has embraced padel as an amenity at resort hotels.
Other Cities
Courts are now present in Voronezh (historically the first), Kazan, Novosibirsk, Ekaterinburg, and Samara, among others. The geographic spread reflects padel’s transition from a Moscow curiosity to a national sport.
Market and Business
The Russian padel market is estimated at 6.2 billion rubles (~€57 million), encompassing:
Court construction — the largest segment; new venues are being built at a pace of 80–100 courts per year
Equipment sales — imported rackets, balls, and accessories (primarily from Spain)
Coaching — growing demand for certified instructors; many coaches are Spanish or Argentine expats
Tournaments — entry fees, sponsorships, and media coverage
Business Model Challenges
High construction costs — importing glass panels and specialised materials is expensive
Climate — most of Russia requires indoor or covered courts, adding to costs
Limited domestic manufacturing — almost all equipment is imported
Low awareness — despite growth, padel remains unknown to the majority of the population
CIS Countries
Kazakhstan
The most developed CIS padel market after Russia. Kazakhstan has approximately 17 courts (2025), concentrated in Almaty and Astana. The country’s growing middle class and interest in Western sports trends are driving adoption.
Belarus
Padel arrived in Belarus around 2021. The 375 Padel Club in Minsk operates 8 courts and serves as the primary hub for the Belarusian padel community. The country has begun organising local tournaments.
Georgia
Georgia has embraced padel with characteristic enthusiasm. The country has hosted FIP Bronze-level tournaments, attracting players from across the region. Tbilisi has several modern venues.
Azerbaijan
Baku’s luxury sports infrastructure has incorporated padel courts, particularly in high-end hotel and residential developments. The market is still nascent but growing.
Uzbekistan
The newest CIS entrant to padel. First courts appeared in Tashkent in 2023–2024, targeting the expatriate community and affluent locals.
Ukraine
Despite the ongoing conflict, padel infrastructure had been developing in Kyiv and Odessa before 2022. The long-term outlook depends on the geopolitical situation, but the pre-war trajectory was promising.
Challenges and Opportunities
Challenges
Climate: The long, cold Russian winter requires expensive indoor facilities
Awareness: 74% of Russians have never heard of padel (ВЦИОМ)
Cost: Court time remains expensive relative to average incomes, limiting mass adoption
Infrastructure: Importing construction materials and equipment adds significant costs
Coaching shortage: Qualified padel coaches are scarce; many rely on tennis coaches adapting their skills
Opportunities
Massive untapped market: 146 million people with growing sports participation
Tennis infrastructure: Existing tennis venues can add padel courts relatively easily
Youth appeal: Padel’s social, accessible nature resonates with younger demographics
Government support: Sports infrastructure development is a policy priority
CIS expansion: Russia can serve as a hub for padel development across the CIS region
Timeline
Year
Milestone
2013
First court in Voronezh (Cristian Tarruella)
2015
First courts in Moscow
2018
~15 courts; first informal tournaments
2019
~30 courts
2020
~60 courts; COVID accelerates interest in small-group outdoor sports
2021
~120 courts; first formal tournaments
2022
~200 courts; Padel Federation of Russia gains momentum
2023
~350 courts; first national championship; first FIP tournament entries
2024
~480 courts; ФПР accredited by FIP; Sharifova reaches #21 FIP
Premier Padel is the global professional padel tour organised by FIP and Qatar Sports Investments. It represents the highest level of competitive padel — the equivalent of the ATP Tour in tennis.
Premier Padel is the official global padel tour, launched in 2022 with the backing of FIP (International Padel Federation), Qatar Sports Investments (QSI), and the Professional Padel Association (PPA). The tour brings together the world’s best players and stages events on every continent.
Premier Padel was created in response to the need for a unified international professional padel structure, analogous to ATP/WTA in tennis.
Tour Structure
Tournament Categories
Premier Padel tournaments are divided into several tiers by significance:
Category
Ranking Points
Prize Money
Events per Season
Major
Maximum (2000)
Highest
4
P1
1000
High
6–8
P2
500
Medium
8–10
Challenger
250
Entry-level
12+
Major Tournaments
Majors are the flagship events of the season. Similar to tennis Grand Slams, they take place in key cities:
Italy Major (Rome)
France Major (Bordeaux/Paris)
Argentina Major (Buenos Aires)
Qatar Major (Doha)
Major tournaments attract all top-ranked pairs and carry the largest prize funds.
Ranking System
Premier Padel uses the FIP ranking system, similar to tennis rankings:
Points are awarded based on tournament results
Rankings are calculated from best results over a 52-week rolling period
Higher-category tournaments award more points
Rankings determine seedings and admission to Majors
Top Players
As of 2025, among the leaders of the men’s ranking:
Arturo Coello (Spain) — one of the youngest ranking leaders
Agustín Tapia (Argentina) — known for a brilliant, creative playing style
Alejandro Galán (Spain)
Federico Chingotto (Argentina)
[OUTDATED] Rankings are updated weekly. For the current ranking, visit premierpadel.com.
Tournament Format
Men’s and Women’s Draws
Main draw at Majors: 32 pairs
Qualifying: 16–32 pairs
All matches are doubles (2×2)
Format: best of 3 sets, with golden point at deuce
Television Broadcasts
Premier Padel is broadcast on global sports platforms:
Eurosport / Max (Europe)
ESPN (Latin America)
Sky Sports (United Kingdom)
DAZN (selected markets)
YouTube channel Premier Padel (free streams)
History of Professional Padel
Period
Tour
Features
2005–2022
World Padel Tour (WPT)
The first professional tour, based in Spain
2022–
Premier Padel
Global FIP tour, succeeded WPT
Before 2022, professional padel was represented by the World Padel Tour (WPT), which was held predominantly in Spain. In 2022, FIP created Premier Padel as a global alternative, eventually leading to the unification of both tours into a single structure.
Prize Money
Prize funds on Premier Padel have grown significantly compared to the WPT era:
Category
Approximate Prize Fund
Major
€500,000+
P1
€250,000–400,000
P2
€150,000–250,000
Challenger
€50,000–100,000
[UNVERIFIED] Prize funds continue to grow — FIP aims to bring them closer to the level of lower-tier tennis tournaments.
Frequently Asked Questions
How did Premier Padel differ from the World Padel Tour?
WPT was a private tour focused on Spain. Premier Padel is a global tour under FIP management, with tournaments on every continent, larger prize money, and a broader television audience.
How do you qualify for a Premier Padel tournament?
Through the FIP ranking system. Top-ranked pairs enter the main draw directly; others go through qualifying. For Challenger events, a national federation ranking may suffice.
Where can I watch matches?
Many matches are streamed free on the Premier Padel YouTube channel. They are also available on Eurosport, ESPN, and other platforms.
The World Padel Tour (WPT) was the professional padel circuit that served as the sport’s premier competitive platform for a decade (2013–2023). WPT laid the foundation for the professionalisation of padel and its global growth.
World Padel Tour (WPT) was a professional padel tour founded in 2013 in Madrid, backed by the Spanish brewing group Damm (through its subsidiary Setpoint Events) and the Association of Professional Padel Players (AJPP). WPT succeeded the Padel Pro Tour (PPT) and quickly became the world’s leading professional padel circuit.
For ten years, WPT set the standards for professional padel: tournament formats, ranking systems, television broadcasting, and prize funds.
History and Development
Predecessor: Padel Pro Tour (2005–2012)
Before WPT, there was the Padel Pro Tour (PPT) — the first professional tour, established in 2005 through an agreement between tournament organisers, AJPP, and the Spanish Women’s Padel Association (AFEP). Over eight years, PPT ran tournaments in 20 men’s and 8 women’s categories, primarily in Spain, before beginning international expansion in 2010.
The Rise of WPT (2013–2016)
In 2013, WPT replaced PPT following protracted legal disputes between the two circuits. The new tour attracted all top players and secured major sponsors. In 2014, the legendary pairing of Fernando Belasteguin and Juan Martin Diaz split, marking a generational shift in professional padel.
International Growth (2017–2021)
In 2017, WPT updated its competition format and expanded television coverage — broadcasts on Gol TV significantly increased viewership. By the early 2020s, the tour spanned 14 countries, had 17 global sponsors, and was broadcast in over 150 countries.
The Final Season (2023)
The last WPT season set records for international reach. The Boss Barcelona Master Final in 2023 served as the historic culmination of the tour’s ten-year journey.
Tournament Categories
WPT used a multi-tier tournament system, each tier offering different ranking points and prize money:
Category
Description
Approximate Prize Fund
Master
Top tier, elite pairs
~€120,000 per category
Open
Broad access, two sub-levels (Open 500, Open 1000)
€50,000–100,000
Challenger
Entry level for young and rising players
~€15,000–30,000
WPT prize funds were modest compared to tennis. A Master winner could earn around €10,500, while a round-of-16 participant at a Challenger received just €131. Nevertheless, WPT was the first platform where professional padel players could earn a living from their sport.
The Transition to Premier Padel
The Conflict (2022)
In 2022, FIP (International Padel Federation) together with Qatar Sports Investments (QSI) launched Premier Padel — a rival global tour. This sparked an open conflict: leading players and FIP filed a competition complaint with the European Commission, accusing Setpoint Events (operator of WPT) of violating EU antitrust law.
Throughout 2022–2023, professional padel was split between two tours, creating confusion for players and fans alike.
Unification (2023–2024)
On 24 August 2023, a historic agreement was announced: QSI acquired the World Padel Tour from the Damm group. Starting from the 2024 season, both tours were unified into a single structure — Premier Padel — under FIP governance. The World Padel Tour brand ceased to exist.
The Legacy of WPT
Over its ten years, the World Padel Tour accomplished a great deal:
Professionalisation — transformed padel from an amateur pastime into a professional sport with a regular tour, rankings, and prize money
Television reach — broadcasts in 150+ countries introduced millions of viewers to padel
Stars of the sport — WPT gave the world players like Agustin Tapia, Ale Galan, Paquito Navarro, Gemma Triay
International expansion — tournaments in 14 countries took padel beyond Spain and Argentina
Infrastructure — the ranking system, entry rules, and tournament organisation standards became the foundation for Premier Padel
Key Milestones
Year
Event
2005
Founding of Padel Pro Tour (PPT) — the first professional circuit
2013
Launch of World Padel Tour, replacing PPT
2014
Belasteguin–Diaz split, marking a generational shift
2017
Format overhaul, expanded TV broadcasting
2020
WPT continues during the pandemic with restrictions
2022
Launch of Premier Padel — a rival FIP/QSI tour
2023
QSI acquires WPT, unification announced
2024
Unified Premier Padel tour, WPT brand retired
How to Follow Padel Today
After the unification of WPT and Premier Padel, all professional padel is consolidated under Premier Padel. Here is how to stay up to date:
Premier Padel App — the official app with schedules, results, and rankings
YouTube — the Premier Padel channel streams many matches for free
Television — Eurosport / Max (Europe), ESPN (Latin America), Sky Sports (United Kingdom)
Social media — official Premier Padel accounts on Instagram, X (Twitter), TikTok
premierpadel.com — current rankings, schedules, news
[OUTDATED] Broadcasting details and platforms may change — check the official website for the latest information.
Padel tournaments come in many formats — from the classic single-elimination draw to the social “Americano”. The format determines the number of matches, duration, and spirit of the competition.
Your first tournament is a milestone for any padel player. It does not require a professional level: most competitions are open to amateurs. This guide will help you prepare and get the most out of the experience.
Do not overestimate your level. It is better to win in Category B than to lose every match in Category A. It is more enjoyable and better for your development.
Preparing for the Tournament
One Week Before
Play as normal — do not suddenly increase your workload
Work on weak spots — if your serve is inconsistent, dedicate time to it
Rest 1–2 days before the tournament
On the Day
Arrive early (at least 30 minutes before the start)
Focus on serve and return — a consistent serve gives a confident start
Communicate with your partner — agree on tactics before the match
Managing Nerves
Pre-tournament nerves are normal. What helps:
Focus on the process, not the result
Deep breathing between rallies
Positive communication with your partner
Remember: this is a game, and you are here to enjoy it
Between Matches
Light stretching
Replenish fluids and energy
Brief analysis of the previous match with your partner
Do not check other pairs’ results — stay focused on your game
Tournament Etiquette
Be on time — arriving late may lead to disqualification
Shake hands with opponents before and after each match
Line calls — give the benefit of the doubt to opponents (amateur tournaments usually have no referees)
Do not argue with opponents — if there is a dispute, refer to the organiser
Support your partner — even after their mistakes
After the Tournament
Cool down — 10–15 minutes of stretching
Review — what went well, what needs improvement
Write down takeaways — specific areas to work on in practice
Plan the next one — regular participation accelerates progress
FAQ
Can I enter without a regular partner?
Yes. Americano does not require a partner. Many clubs help match players for doubles tournaments.
How long does an amateur tournament last?
Americano: 2–3 hours. Single elimination with 8–16 pairs: 4–8 hours. League: several weeks (one match per week).
What if I lose every match?
That is normal for a first tournament. Losing to stronger opponents is the best learning experience. Analyse your mistakes and come back.
Agustín Tapia is an Argentine professional padel player and one of the most exciting and creative figures in world padel. He is famous for his spectacular shots, unorthodox decisions, and play on the left side of the court.
Tapia began playing padel in early childhood — from the age of 5 — in his hometown of Leones (Córdoba province). As a teenager, he attracted the attention of the professional community with his extraordinary style and spectacular technique.
In 2018, at the age of 17, Tapia debuted on the World Padel Tour, becoming one of the youngest players in the history of the professional tour.
Playing Style
Tapia is widely recognised as one of the most entertaining players in world padel. His hallmarks include:
Signature Shots
Víbora — one of the best in the world at this shot. His víbora combines power with side spin, creating unpredictable wall bounces.
Bandeja — steady and accurate, allowing him to hold his net position.
Smash — a powerful finishing shot, especially the “por tres” (exit through the back wall).
Trick shots — unorthodox plays: between-the-legs (gran willy), behind-the-back, delicate lobs. These earned Tapia the nickname “El Mago” (The Magician).
Court Position
Tapia plays on the left side — the attacking position that demands a strong backhand to finish rallies. As a left-side player, Tapia:
Controls the centre of the court with his backhand
Finishes rallies with smashes and víboras
Takes responsibility for the pair’s aggressive actions
Key Attributes
Creativity — Tapia is renowned for unpredictable decisions that wrong-foot opponents
Hand speed — lightning-fast reactions at the net
Emotion — an animated on-court presence that fans love
Athleticism — despite not being the tallest (177 cm), he compensates with speed and jumping ability
Career and Achievements
Key Titles
Year
Tournament
Partner
Result
2019
WPT Lugo Open
Sanyo Gutiérrez
Winner
2020
WPT Adeslas Madrid Open
Sanyo Gutiérrez
Final
2022
Premier Padel Rome Major
Sanyo Gutiérrez
Semi-final
2023
Premier Padel Major
Arturo Coello
Winner
2024
Premier Padel Major
Arturo Coello
Winner
[OUTDATED] This achievements table is incomplete. For current results, visit premierpadel.com.
Key Milestones
2018: WPT debut at age 17
2019: First professional title
2020–2022: Consistently in the world top 10
2023: Formed a new pair with Arturo Coello
2024–2025: Contending for the number-one world ranking
Statistics
Parameter
Value
Current ranking
Top 5 (≈ #2)
Highest ranking
#1
Professional titles
15+
Professional debut
2018
[OUTDATED] Rankings and statistics are updated weekly.
Partners
Current Partner
Arturo Coello (Spain) — since 2023. One of the most entertaining and successful pairs on the Premier Padel Circuit. The combination of Tapia’s creativity and Coello’s power creates a unique playing chemistry.
Former Partners
Sanyo Gutiérrez (Argentina) — from 2019 to 2023. An experienced Argentine player under whose guidance Tapia grew into a world-class competitor.
Impact on Padel
Tapia has had a significant influence on the popularisation of padel:
Attracting a younger audience — his spectacular style and social-media activity make padel appealing to young people
Raising the entertainment bar — Tapia’s trick shots have become a hallmark of modern padel
Inspiring beginners — his journey from a small Argentine town to the top of the world ranking motivates thousands of young players
Arturo Coello is a Spanish professional padel player and the youngest champion in World Padel Tour history. Together with Agustin Tapia, he forms the dominant pair in world padel, holding the number-one spot in the FIP rankings.
Arturo Coello was born on 8 March 2002 in Mojados — a small town in the province of Valladolid. Padel became part of his life from an early age: his father was an avid player, and Arturo first picked up a racket at the age of 7.
Coello’s talent was evident from the start. In junior tournaments, he quickly caught the attention of scouts thanks to a combination of power, height, and tactical maturity unusual for his age.
In 2019, at just 17 years old, Coello made his professional debut on the World Padel Tour, becoming one of the youngest participants in the history of the circuit. Despite his youth, he showed the composure and quality needed to compete with experienced professionals.
Partnership with Belastegui
The turning point in Coello’s career came in 2021, when padel legend Fernando Belastegui — a 16-time world champion — chose the young Spaniard as his partner. The decision surprised many: the most experienced player in the sport’s history had teamed up with a 19-year-old newcomer.
The partnership proved highly productive. In the 2022 season, the Coello/Belastegui pair won 4 WPT titles, including the Miami event. That victory made Coello the youngest champion in World Padel Tour history — he was just 19 at the time.
Working with Belastegui gave Coello invaluable experience:
Tactical education — Bela passed on a deep understanding of strategy and positional play
Mental toughness — the ability to handle pressure at the biggest tournaments
Professionalism — an approach to training, recovery, and match preparation at the highest level
At the end of 2022, the pair announced their split, and Coello embarked on a new chapter.
Coello and Tapia
Since December 2022, Arturo Coello has been partnered with Argentine Agustin Tapia. This partnership has become one of the most successful in the modern history of padel.
The 2024 Season
The 2024 season was historic for the Coello/Tapia pair:
A 45-match winning streak — one of the records of the professional tour
Victories in Doha, Madrid, Paris, Dubai, Acapulco, and other cities
World number one in the FIP rankings at the end of the season
The 2025 Season
In 2025, the pair continued their dominance:
Victories at the Qatar Major in Doha, the Buenos Aires P1, the Bordeaux P2, and other events
Coello’s win rate stood at 87.2% (39 wins from 45 matches by May 2025)
Confirmation of their world number-one status at the end of the season
[OUTDATED] Statistics for 2025–2026 are updated as the season progresses.
Playing Style
Coello is one of the most physically gifted players in world padel. At 190 cm tall and left-handed, he possesses a unique set of advantages on the right side of the court.
Strengths
Powerful smash — his height and athleticism allow Coello to finish rallies with devastating overhead shots. His “por tres” smash (exiting through the back wall) is among the most dangerous on tour
Vibora — aggressive and precise, with pronounced side spin
Centre control — as a left-hander on the right side, Coello covers the centre of the court with his forehand, putting constant pressure on opponents
Aerial game — dominance in the upper zone thanks to his height and jumping ability
Court Position
Coello plays on the right side (drive) — a position traditionally associated with stability and control. However, Coello brings uncharacteristic aggression to this role:
Being left-handed gives him an advantage on shots from the centre of the court
His tall frame ensures dominance in aerial duels
The combination of power and accuracy makes him one of the best right-side players in history
Key Attributes
Aggression — Coello prefers to finish rallies quickly and decisively
Physical power — one of the most athletic players on tour
Composure — in contrast to the emotional Tapia, Coello displays calm focus in decisive moments
Tactical intelligence — the legacy of his time with Belastegui shows in mature positional decisions
Key Achievements
Year
Tournament / Event
Partner
Result
2022
WPT Miami
F. Belastegui
Winner
2022
WPT Madrid
F. Belastegui
Winner
2022
WPT Amsterdam
F. Belastegui
Winner
2024
Premier Padel Doha Major
A. Tapia
Winner
2024
Premier Padel Madrid P1
A. Tapia
Winner
2024
Premier Padel Paris P1
A. Tapia
Winner
2024
Premier Padel Acapulco P1
A. Tapia
Winner
2024
World #1 (end-of-season)
A. Tapia
—
2025
Premier Padel Doha Major
A. Tapia
Winner
2025
World #1 (end-of-season)
A. Tapia
—
[OUTDATED] This achievements table is incomplete. For current results, visit padelfip.com.
Statistics
Parameter
Value
Current ranking
#1 (FIP)
Highest ranking
#1
Professional titles
30+
Titles with Tapia
33+
Professional debut
2019
[OUTDATED] Rankings and statistics are updated weekly.
Gemma Triay is a Spanish professional padel player from Menorca and a five-time world champion with the Spanish national team. A former tennis player who switched to padel and reached the top of the world rankings within a few years, she is one of the most decorated players in the history of women’s padel.
Gemma Triay was born on 28 June 1992 in Menorca — one of the Balearic Islands. She began her sporting journey at the age of 4 with tennis and trained seriously throughout her youth, aiming for a professional career.
However, fate had other plans. An injury sustained shortly before selection for the professional tennis circuit put an end to those ambitions. In 2010, at the age of 19, a discouraged Triay left tennis behind, moved to Barcelona, and enrolled at university to study languages.
The break from sport lasted three years. In 2013, at the age of 21, her competitive spirit got the better of her, and Triay gave padel a try. Her tennis foundation — shot technique, coordination, and an understanding of ball sports — gave her an enormous advantage. Her progress was rapid: within just 4 years, she had reached the international level.
Rise to Number One
With Lucia Sainz (2016–2020)
Triay’s first major partner was Lucia Sainz. Their partnership began in 2016 and lasted five years. During that time, the pair won 12 WPT titles, and in 2020 Triay and Sainz reached first place in the World Padel Tour rankings.
Triay won her first two professional titles with Sainz in 2017. That same season, she was named the best player on the WPT circuit — an impressive achievement for someone who had taken up padel just four years earlier.
With Alejandra Salazar (2021–2022)
After splitting with Sainz at the end of 2020, Triay teamed up with Alejandra Salazar — another former world number one. Together, they held the top ranking throughout 2021 and 2022, confirming Triay’s status as the strongest left-side player in women’s padel.
With Delfina Brea (2025–present)
In January 2025, Triay began a new partnership with Argentine Delfina Brea. This pairing has become the most successful of Triay’s career to date.
Partnerships
Triay’s ability to dominate with different partners is one of the defining features of her career:
Period
Partner
Key Results
2016–2020
Lucia Sainz
12 WPT titles, world #1 (2020)
2021–2022
Alejandra Salazar
World #1 (2021, 2022)
2025–present
Delfina Brea
9 titles, world #1 (2025)
With each new partner, Triay has not merely maintained her level — she has reached new heights. Three different partners, and with each one — the number-one spot in the world.
Playing Style
Triay plays on the left side (reves) — the attacking position that requires a strong backhand and the ability to finish rallies. Her style is a blend of tactical intelligence and consistency inherited from her tennis background.
Strengths
Tactical thinking — Triay reads the game several moves ahead. Her tennis experience shows in a deep understanding of court geometry and positional play
Consistency — a minimal number of unforced errors. Triay can sustain long rallies, waiting for the opponent to make a mistake
Backhand — one of the best in women’s padel. Precise and powerful, it allows her to control the centre of the court
Overhead shots — confident aerial play, including the bandeja and smash
Mental resilience — the ability to perform at the highest level in decisive moments
Key Attributes
Intellectual approach — Triay prefers to win through strategy rather than brute force
Adaptability — the ability to adjust her game to different partners and opponents
Leadership — on court, Triay takes charge of the pair’s tactical organisation
Win percentage — a career rate above 81% — one of the best in the history of women’s padel
Achievements
Titles with the Spanish National Team
Year
Tournament
Result
2016
World Championship (teams)
Gold
2017
European Championship
Gold
2018
World Championship (teams)
Gold
2020
World Championship (teams)
Gold
2021
World Championship (teams)
Gold
2024
World Championship (teams)
Gold
Career Milestones
2013: Began playing padel
2017: First WPT titles, named best player on tour
2020: World number one (with Sainz)
2021–2022: Held number one (with Salazar)
2025: 9 titles, Major with Brea, world number one at end of season
Statistics
Parameter
Value
Current ranking
#1 (FIP)
Highest ranking
#1
Career titles
35+
Win percentage
81.6%
World championship titles
5 (with Spanish national team)
[OUTDATED] Rankings and statistics are updated weekly.
Impact on Padel
Triay is not only an outstanding athlete but also a public figure in the padel world:
IPPA Vice President (International Padel Players Association) — actively involved in protecting players’ interests
A story of second chances — her transition from tennis to padel inspires athletes who have faced career setbacks
Promoting women’s padel — Triay’s consistent results draw attention to the women’s tour
A comprehensive A-to-Z glossary of padel terminology. This reference covers key concepts from rules, technique, tactics, and equipment, including the original Spanish terms used on courts worldwide. Suitable both for newcomers learning the sport and experienced players looking to consolidate their knowledge.
Terms are arranged in Latin alphabetical order. Many entries include the original Spanish term in parentheses, since padel originated in Spanish-speaking countries and Spanish terminology is universally used on courts around the world. Each definition briefly explains the concept, and cross-links help you explore specific topics in greater depth.
A
Advantage (ventaja) — a scoring state within a game when one pair has won a point after deuce. Winning the next point secures the game; losing it returns the score to deuce. For more on scoring, see the official padel rules.
ATP shot (around the post) — a spectacular shot in which the ball travels around the outside of the net post. It is executed when the ball bounces off the wall and exits the court through the side opening. The term is borrowed from pickleball, where around-the-post shots are also a notable part of the game. One of the most visually impressive shots in padel, requiring precise trajectory calculation.
B
Bajada — an attacking shot played against a ball that has bounced off the back wall. Executed with a downward motion, its purpose is to seize the initiative and advance toward the net. A critical element for transitioning from a defensive position to an offensive one.
Bandeja — a half-smash performed at head or eye level with backspin. The name comes from the Spanish word for “tray,” reflecting the flat, tray-like motion of the racket during the stroke. Unlike a full smash, the bandeja is a controlled shot that allows the player to maintain their position at the net without sacrificing accuracy. One of the key shots at intermediate and advanced levels.
Bote pronto — a shot struck immediately after the ball bounces off the floor, virtually at the moment of contact with the surface. This technique demands excellent timing and allows players to accelerate the pace of a rally, giving opponents less time to prepare.
C
Chiquita — a short, soft shot aimed low over the net at the feet of opponents standing at the net. The primary goal is to force the opponents to play the ball from below, creating an opportunity to move into an attacking position. A key tactical element from the technique arsenal.
Continental grip — a universal racket grip in which the palm is placed on the top edge of the handle (as if shaking hands). In padel, this is considered the foundational grip suitable for most shots: volleys, serves, bandejas, and viboras.
Contrapared — a shot in which the ball is directed into the back wall on one’s own side of the court so that it crosses over to the opponent’s side on an unexpected trajectory. A sophisticated tactical maneuver used in defensive situations.
Corner (esquina) — the area of the court where the back wall meets the side wall. Shots aimed at the corner create difficult bounces that are hard to read and return. Deliberate targeting of corners is an important tactical element.
D
Deuce (iguales) — a tied score of 40-40 within a game. After deuce, a pair must win two consecutive points (advantage, then game) to win the game. In some tournaments, the golden point rule is used instead.
Double bounce — a situation in which the ball bounces twice on the floor on one side of the court. This results in the loss of the point for the pair on whose side the double bounce occurred. Wall bounces do not count — the ball may bounce off the walls any number of times between floor contacts.
Drive — a flat or slightly spun forehand or backhand shot played after the ball bounces. A fundamental attacking stroke, similar to its tennis equivalent but typically executed with less aggression in padel due to the compact court.
E
Eastern grip — a racket grip in which the palm is placed on the side of the handle. Used less frequently than the continental grip in padel but may be employed for forehand shots when additional control is needed on flat strokes.
F
Flat (shot) — a shot struck without spin. The ball travels on a straighter trajectory at higher speed but behaves less predictably when bouncing off walls. Used for powerful finishing shots.
Foot fault — a serving violation that occurs when the server steps on or beyond the baseline before making contact with the ball. The serve is counted as a fault. For details, see the serving rules.
FIP (Federación Internacional de Pádel) — the International Padel Federation, the principal governing body of world padel. Founded in 1991, it unites national federations, regulates official rules, and organizes world championships. Learn more in What is Padel.
G
Game (juego) — the basic scoring unit in padel. Points within a game are counted as 0 (love), 15, 30, 40. To win a game, a pair must score four points with a margin of at least two (or win the golden point at deuce, if the applicable rules are in effect).
Golden point (punto de oro) — a deciding-point format played at deuce, in which the next point wins the game. The receiving pair chooses which side the serve is directed to. The golden point rule is used in many professional tournaments to speed up match play.
Globo — see Lob.
H
Half-volley — a shot played immediately after the ball bounces off the floor, when the ball is at its lowest point. A technically demanding stroke, often used in the transition zone between the back of the court and the net.
K
Kick (effect) — a type of spin that causes the ball to bounce higher than normal and deviate to the side after landing. Kick spin is applied in serves and smashes to create awkward bounces off the walls and floor.
L
Let — a service replay awarded when the ball clips the top of the net cord and lands in the correct service box. The serve is replayed without penalty. A let is also called when there is an obstruction on the court.
Lob (globo) — a high, arcing shot directed over the heads of opponents positioned at the net. One of the most important tactical tools in padel — the lob forces opponents to retreat toward the back wall, surrendering control of the net.
Love — zero in the tennis (and padel) scoring system. The term is thought to derive from the French “l’oeuf” (egg — resembling a zero in shape).
M
Malla / Rejilla (metallic mesh/fence) — a structural element of the court enclosure, located in the upper portion of the side walls and above the back walls. A ball that strikes the metallic mesh behaves differently from one that hits the glass: it loses more energy and rebounds less predictably.
Match point — a situation in which one pair is a single point away from winning the match.
N
Net (red) — the barrier dividing the court into two equal halves. The net stands 88 cm high at the center and up to 92 cm at the side posts. Touching the net with the racket or body during a rally results in the loss of the point.
O
Out (fuera) — a ball that has left the playing area. In padel, a ball is considered “out” if it exits the court over the top of the walls or through the side openings without first bouncing on the opponent’s floor.
Overhead — a general term for any shot executed above the head: smash, bandeja, vibora. Dominance in the overhead game is one of the keys to controlling the net.
P
Pala (racket) — the padel racket. Unlike a tennis racket, it has no strings — it is a solid structure made from composite materials (carbon fiber, fiberglass, EVA foam) with a perforated surface. For more details, see the equipment section.
Par — a designation for court type: indoor or outdoor. Indoor courts are shielded from wind and rain, providing more consistent playing conditions.
Punto de oro — see Golden point.
R
Rally — a continuous exchange of shots between the two pairs from the moment of the serve until the point ends. Rallies in padel are typically longer than in tennis, thanks to the walls and the defensive possibilities they create.
Remate — see Smash.
Return (resto) — the shot played to receive the serve. In padel, the ball must bounce on the floor before the returner strikes it. A quality return is the foundation for seizing the initiative in a rally.
S
Saque — see Serve.
Serve (saque) — the shot that begins every point. In padel, the serve must be struck underhand: the ball is bounced and hit at or below waist level. The serve must be directed diagonally into the opponent’s service box. For details, see the rules.
Set — a segment of a match composed of games. To win a set, a pair must win 6 games with a lead of at least 2. At 6-6, a tiebreak is played. A standard match is played as best of three sets.
Side spin — spin applied around the ball’s vertical axis, causing it to curve sideways after bouncing. Especially effective on shots that subsequently hit a wall, producing unpredictable trajectories.
Slice — a shot struck with backspin (underspin). The ball travels on a flatter trajectory, bounces low, and decelerates after hitting a wall. Slice is the primary spin type for the bandeja and many defensive shots.
Smash (remate) — a powerful finishing overhead shot aimed at winning the point outright or forcing a weak reply. In padel, the smash is frequently directed at the back wall or glass to generate a difficult bounce.
Sweet spot — the central area of the racket’s hitting surface that delivers maximum power and control on contact.
T
Tiebreak — a shortened game played at 6-6 in a set. Scoring is by individual points (1, 2, 3…), and the first pair to reach 7 points with a margin of 2 wins the tiebreak and the set.
Topspin — forward rotation of the ball that causes it to dip faster and bounce higher. In padel, topspin is used less frequently than in tennis because of the walls: a high bounce off the back wall gives opponents additional time to react.
Tray — see Bandeja.
V
Vibora (víbora) — an attacking overhead shot with side spin and a lower trajectory. Unlike the bandeja, the vibora is more aggressive and is executed with pronounced side spin, creating a difficult bounce off the side wall.
Volea (volley) — a shot struck before the ball touches the floor. The volley is the primary stroke for a pair controlling the net position. There are forehand volleys (volea de derecha) and backhand volleys (volea de revés).
W
WPT (World Padel Tour) — one of the largest professional padel tournament series, running since 2013. Together with Premier Padel, it forms the elite tier of world professional padel.
Wall play (juego de paredes) — the use of walls during play, the fundamental element that distinguishes padel from other racket sports. The ball may bounce off the back and side walls after touching the floor and still remain in play. The ability to read wall bounces is a crucial skill for players at every level. Learn more about court construction.
Padel was born in Mexico and flourished in Spain, making Spanish the sport’s lingua franca. Knowing key Spanish commands and phrases will help you communicate confidently on court, connect with partners from different countries, and follow professional broadcasts with deeper understanding.
Even if you play padel far from Spain, Spanish terminology permeates the sport at every level. Professional commentators use Spanish shot names. Coaches trained in Spain or Argentina often give instructions in Spanish. At international tournaments, Spanish calls ring out on every court.
Moreover, many padel terms have no precise equivalents in other languages. The word bandeja (bahn-DEH-hah) describes a very specific shot that cannot be adequately conveyed as “tray shot” — the meaning is lost in translation. Knowing the original terminology makes your communication more precise.
Partner Communication
Communication between partners is the foundation of successful padel play. In a doubles sport, a split second can determine the outcome of a rally, so commands must be short, loud, and unambiguous. Spanish commands are perfectly suited for this: they are concise and intuitive.
¡Tuya! (TOO-yah) — “Yours!” The most common call on court. Shout it when the ball is heading into your partner’s zone and you are not going to play it. Clear ball assignment prevents collisions and missed shots.
¡Mía! (MEE-yah) — “Mine!” The opposite call: you are taking this ball. Especially important when the ball is flying between you and your partner.
¡Déjala! (deh-HAH-lah) — “Leave it!” Do not play this ball — it will go out. Requires good trajectory reading and trust between partners.
¡Sube! (SOO-beh) — “Come up!” A command for your partner to move forward to the net. Net control is a key tactical position in padel, and a well-timed approach often decides the rally.
¡Atrás! (ah-TRAHS) — “Back!” Move away from the net toward the back wall. Used when opponents are preparing a lob or deep shot.
¡Cambia! (KAHM-byah) — “Switch!” A call to swap court positions: the player on the right moves to the left side and vice versa. Switching sides is a common tactic for creating unusual situations.
¡Tuya, tuya! (TOO-yah, TOO-yah) — repeated for emphasis. When the situation is urgent, doubling the call helps your partner react faster.
¡Yo! (YOH) — “Me!” A brief alternative to “¡Mía!” One syllable — maximum communication speed.
Scoring and Play
The scoring system in padel is identical to tennis, but in Spanish the score sounds different. Understanding these words is essential when you play without an umpire and call the score yourselves.
Saque (SAH-keh) — serve. The first shot in each rally, performed underhand.
Iguales (ee-GWAH-les) — “Equal,” the equivalent of deuce (40-40). In Spanish padel clubs, you will hear this word dozens of times per match.
Ventaja (ben-TAH-hah) — advantage. The point after iguales gives one pair ventaja.
Juego (HWEH-goh) — game. “Juego para nosotros” — “Game for us.”
Set (SET) — set. Used unchanged, just as in tennis.
Cambio (KAHM-byoh) — change of ends. Occurs after every odd game.
Punto (POON-toh) — point. “Primer punto” (pree-MEHR POON-toh) — first point.
Falta (FAHL-tah) — a fault on the serve. “Doble falta” (DOH-bleh FAHL-tah) — double fault.
Let (LET) — a serve replay when the ball clips the net. Borrowed from English.
Shot Names
Many padel shots have only Spanish names, which have become firmly established in international terminology. Knowing these words is essential for understanding tactical discussions and coaching instructions.
Bandeja (bahn-DEH-hah) — “tray.” A controlled overhead shot executed when approaching the net. One of padel’s signature strokes with no tennis equivalent. Learn more about basic strokes.
Vibora (VEE-boh-rah) — “viper.” An aggressive variant of the bandeja with sharp sidespin. After bouncing off the glass, the ball veers sideways, making the opponent’s return difficult.
Globo (GLOH-boh) — lob, a high shot over the opponents toward the back wall. The primary tool for wresting net control away from the opposing pair.
Remate (reh-MAH-teh) — smash, a powerful finishing overhead shot. “Remate por tres” (reh-MAH-teh pohr TREHS) — a smash where the ball exits the court over the back wall.
Chiquita (chee-KEE-tah) — “little one.” A soft, low shot aimed at the opponents’ feet near the net. Used to create an opportunity to approach the net.
Bajada (bah-HAH-dah) — a shot played on the descent after the ball bounces off the back wall.
Volea (boh-LEH-ah) — volley, a shot hit before the ball bounces on the ground.
Rulo (ROO-loh) — a shot with topspin and sidespin that causes the ball to “stick” to the wall after bouncing.
Encouragement and Emotion
Padel is an emotional sport, and supporting your partner plays a huge role in team dynamics. Spanish phrases of encouragement bring energy and create a positive atmosphere on court.
¡Vamos! (VAH-mohs) — “Let’s go!” / “Come on!” The universal call you will hear on every padel court in the world. Used both for self-motivation and to support your partner.
¡Buena! (BWEH-nah) — “Nice shot!” The standard praise after a good stroke.
¡Grande! (GRAHN-deh) — “Great!” / “Huge!” A more emotional form of praise.
¡Bien jugado! (byehn hoo-GAH-doh) — “Well played!” An appreciation of a tactically smart rally, not necessarily a powerful shot.
¡Qué punto! (keh POON-toh) — “What a point!” An exclamation after a particularly beautiful or intense rally.
¡Eso es! (EH-soh EHS) — “That’s it!” / “Exactly!” Approval of the right decision or shot.
¡Venga! (BEHN-gah) — “Come on!” / “Go for it!” An equivalent of “¡Vamos!” widely used in Spain.
Court and Equipment
Court-related terminology is frequently used when discussing tactics and in coaching instructions. Knowing these words will help you navigate Spanish-language training materials.
Pista (PEES-tah) — court. In Spain, the word “pista” is used rather than “cancha” (more common in Latin America).
Red (REHD) — the net dividing the court.
Pared (pah-REHD) — wall. “Pared de fondo” (pah-REHD deh FOHN-doh) — back wall.
Cristal (krees-TAHL) — glass. The back walls and part of the side walls are made of glass.
Malla (MAH-yah) / Rejilla (reh-HEE-yah) — metallic mesh. The upper portion of the side walls and part of the court structure.
Pala (PAH-lah) — padel racket. Do not confuse it with the tennis “raqueta” (rah-KEH-tah).
Pelota (peh-LOH-tah) — ball.
Grip (GREEP) — racket grip/wrap. Borrowed from English.
Overgrip (OH-vehr-greep) — additional wrap applied over the base grip.
A padel court is more than a rectangle. Each zone has tactical significance and specific names used by coaches and commentators. This reference will help you navigate the geography of the court.
A padel court measures 20 × 10 metres and is divided by a net into two halves. Each half is split by the service line into a front zone and a back zone.
┌─────────────────────────────┐
│          Back wall          │
│                             │
│     Back zone (Fondo)       │
│                             │
├─ ─ ─ ─ ─ Service line ─ ─ ─┤
│                             │
│     Front zone (Red)        │
│                             │
╞════════════ Net ════════════╡
│                             │
│     Front zone (Red)        │
│                             │
├─ ─ ─ ─ ─ Service line ─ ─ ─┤
│                             │
│     Back zone (Fondo)       │
│                             │
│          Back wall          │
└─────────────────────────────┘
Interactive Court Zone Map
Click a zone to learn more
Net Zone (La Red)No Man's Land (Tierra de Nadie)Back Zone (El Fondo)Back Wall (Pared de Fondo)Side Wall (Pared Lateral)
Main Zones
Front Zone (La Red / La Zona de Red)
The area from the net to the service line (~3 metres from the net).
Tactical significance: the dominant position. The pair controlling the net controls the rally.
The defining feature of padel that sets it apart from tennis
Side Walls (Paredes Laterales)
Stepped construction: glass near the back wall, metal mesh nearer the net
A ball can bounce off the side wall and remain in play
The junction of glass and mesh is a “dead zone” where the ball loses energy
Corner (La Esquina)
The junction of the back wall and a side wall.
Balls hitting the corner bounce unpredictably
One of the hardest zones to defend
Attacking shots into the corner are an effective tactic
Service Zones
Service Box (Cuadro de Saque)
Each half of the court is divided by the service line and centre line into two boxes:
Right box (deuce side): serves begin each game here
Left box (advantage side): serves when the total points are odd
The server stands behind the service line and directs the ball into the opponent’s diagonally opposite box.
Tactical Zones
The “T” (La T)
The intersection of the service line and the centre line. Named after the “T” shape it forms.
Significance: the optimal net position, allowing coverage of both corners
A net pair aims to position themselves on either side of the T
The Corridor (El Pasillo)
The narrow space along the side wall.
A shot “down the corridor” (por el pasillo) is a powerful straight shot along the side wall
One of the main finishing shots in padel
Centre of the Court (El Centro)
The space between the two players of a pair.
A shot “through the centre” — between the two opponents — causes confusion
[EXPERT OPINION] A shot through the centre is often more effective than a shot down the line because it forces opponents to decide who plays the ball
FAQ
What does “coming to the net” mean?
Moving from the back zone to the front zone after a quality shot. The aim is to take the dominant position.
Why is “no-man’s land” dangerous?
At the service line, the ball arrives at knee height — too low for a comfortable volley and too high for a clean groundstroke.
Same service and end-change rules as a regular tie-break
Match Scoring
Match Format
Format
Description
Used in
Best of 3
First to win 2 sets
Professional tournaments
2 sets + super tie-break
2 sets; if 1–1, a super tie-break to 10
Amateur tournaments
Calling the Score
The score is always called with the serving pair’s score first.
Examples:
“15–0” — the serving pair leads
“30–40” — the receiving pair has a break point
“Deuce” — 40–40
“Advantage server” — the serving pair leads after deuce
Key Moments
Break Point (Punto de Break)
A situation where the receiving pair can win the game on the opponent’s serve. One of the most important moments in a match.
1 break point: score 30–40 or Ad-out
2 break points: score 15–40
3 break points: score 0–40
Set Point (Punto de Set)
A point that could clinch the set for one of the pairs.
Match Point (Punto de Partido)
A point that could decide the entire match. The most intense moment.
Slang and Jargon
Term
Meaning
Bagel
Winning a set 6–0 (the zero looks like a bagel)
Breadstick
Winning a set 6–1 (the 1 looks like a breadstick)
Hold
Winning a game on your own serve
Break
Winning a game on the opponent’s serve
Straight sets
Winning a match without dropping a set (2–0)
Flashcards: Test Your Knowledge
Click each card to flip and reveal the definition:
Click a card to reveal the definition
FAQ
Why 15, 30, 40 instead of 1, 2, 3?
The system is inherited from tennis. The exact origin is debated — possibly linked to a clock face (15, 30, 45 → simplified to 40).
What is a “love game”?
A game won without conceding a point (40–0).
Content licensed under CC BY-SA 4.0. When copying or republishing, a link to the original article is required.
About the Project
The FolkUp Padel Encyclopedia is a free, open, trilingual (English, Russian, Portuguese) knowledge base about padel — created by enthusiasts for the global padel community.
Our mission: Make quality padel knowledge accessible to everyone, regardless of language or budget.
How to Contribute
We welcome contributions from the padel community:
Write articles — share your knowledge about technique, tactics, or training
Translate — help us reach more players in different languages
Fact-check — verify article accuracy against official rules and expert sources
Report issues — spot a typo or broken link? Let us know
Suggest topics — what articles are missing?
Interested? Email us at [email protected] — we’d love to hear from you.
Sponsors
This project is 100% volunteer-driven and free for everyone. We do not run ads or paywalls. If you find this encyclopedia useful, consider supporting us:
Keep This Encyclopedia Free
Every donation helps cover hosting costs and keeps the content free and open for the entire padel community.