Padel is a game of patience and positioning, not power. Simple tactical principles allow beginners to beat physically stronger but tactically unaware opponents.
The most important principle for beginners: placement beats power. In padel, there is no point in hitting with all your might — the ball will bounce off the glass and return to your opponents with extra pace. You are literally giving them free speed.
As Babolat notes in their padel tactics guide: “Positioning is the bedrock of all padel strategies.” This is not tennis, where an ace can win a point. In padel, the player who makes fewer errors and more consistently returns the ball wins.
Practical rules for consistency:
Hit at 70% of your maximum power — this is sufficient for a quality shot
Aim for safe zones, not the lines
A high ball (lob) is better than a risky flat shot
When in doubt — play deep to the center of the opponent’s court
Professional match statistics confirm this principle: most points in padel are won not through “killing” shots but through opponent errors. Your job is to avoid mistakes and force the other side into making them.
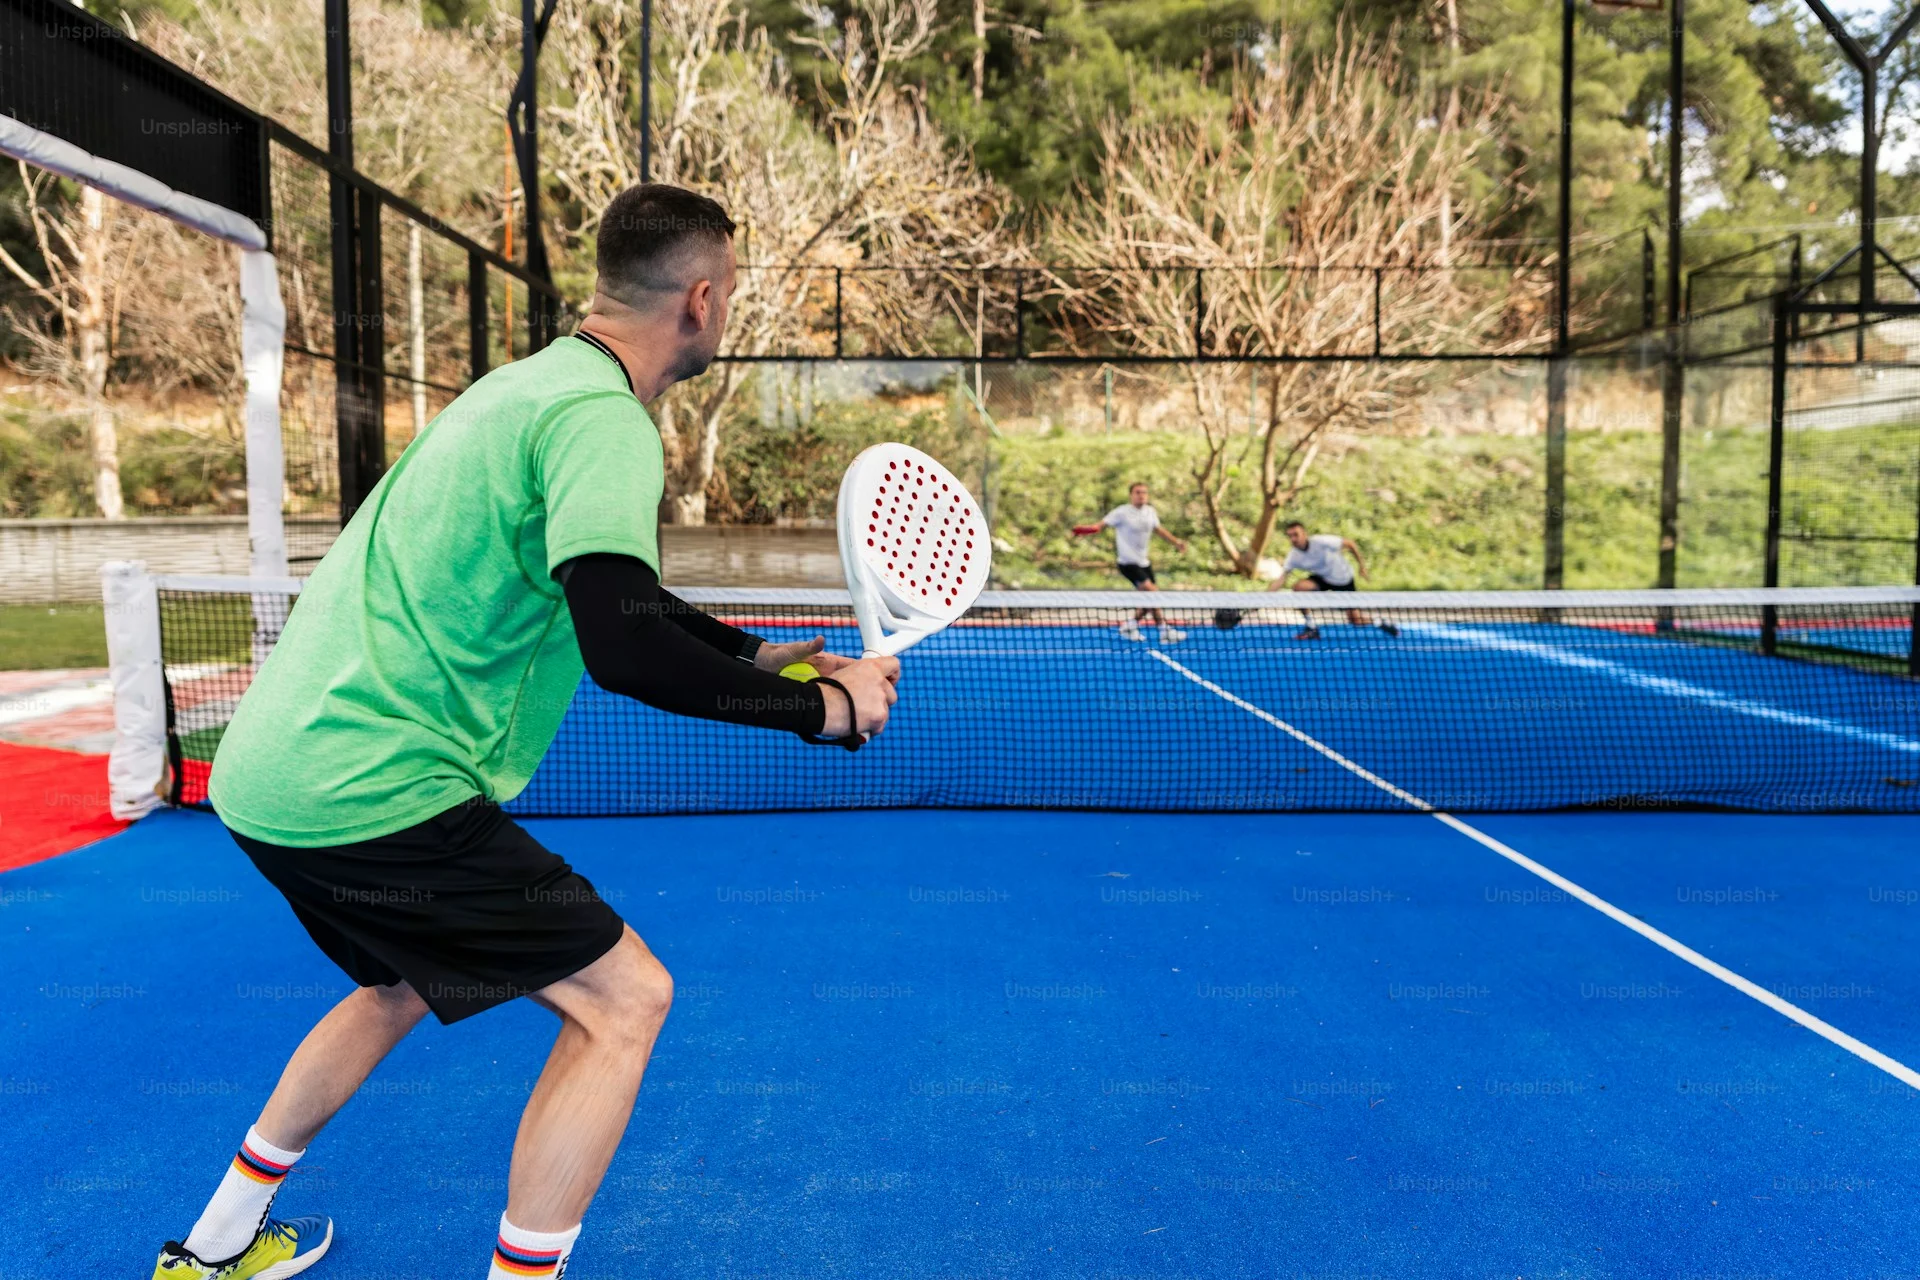
The Goal: Get to the Net
If you remember only one tactical rule, let it be this: get to the net and stay there. The pair that controls the net wins the vast majority of rallies.
Why the net matters so much:
At the net you attack; behind the service line you defend
A volley from the green zone gives you the best attacking angles
Opponents are forced to play more precisely and make more errors under pressure
You control the pace of the rally
How to reach the net:
Hit a quality deep shot (lob, deep drive)
Make sure the shot puts pressure on the opponent
Advance forward together with your partner
Take up position 2–3 meters from the net
Execute a split step and be ready for the response
[EXPERT OPINION] Do not approach the net after every shot. Only approach after a quality shot that forces the opponent to play from an uncomfortable position. Approaching after a weak shot is an invitation for the opponent to hit at your feet.
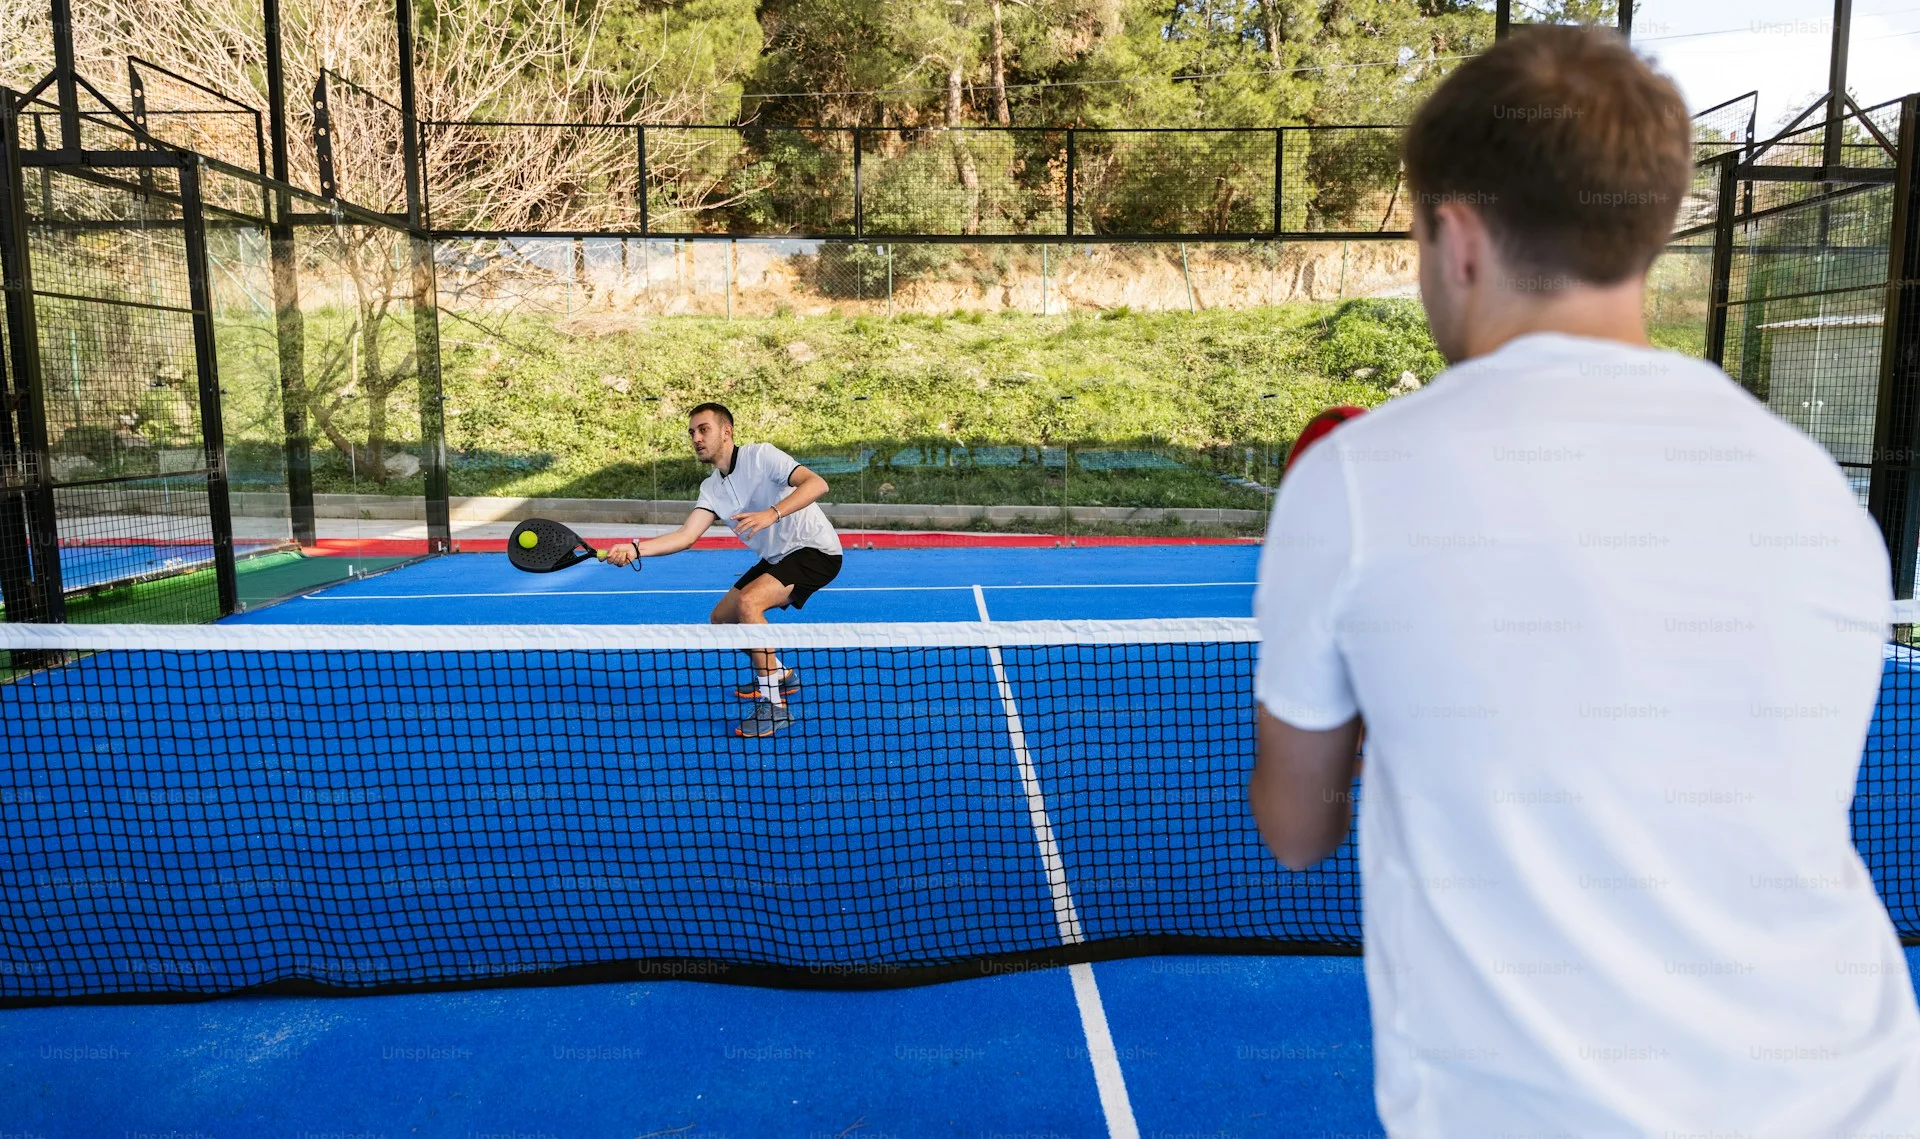
The Lob: Your Best Friend
The lob is a high, deep shot over the opponents standing at the net. For beginners, it is the most effective and safest shot in the arsenal.
Why the lob is so valuable:
It is safe — a high trajectory means a large margin over the net
It pushes opponents away from the net — they lose their attacking position
It gives you time — while the ball travels in an arc, you can regroup
It is simple to execute — no complex technique required
The ideal beginner lob:
Direction: cross-court (diagonal) — this is the longest path across the court, meaning more margin for error
Height: high enough that the opponent cannot intercept at the net (3–4 meters above the net)
Depth: the ball should land past the service line, closer to the back wall
After the lob: if it is deep — approach the net together with your partner
Playing to the Center
Hitting to the center of the opponent’s court is one of the most effective tactical tools at any level.
Advantages of hitting to the center:
Minimum risk. The center is the farthest point from the sidelines. Even an inaccurate shot stays in court.
Confusion between opponents. A ball to the center forces both opponents to decide who takes it. This provokes communication errors.
No angles for the response. From the center, it is harder for opponents to create a sharp angle for attack.
Hitting at the feet. If opponents are at the net, a shot to the center at their feet creates an extremely uncomfortable situation for them.
Aim to direct the ball between the opponents rather than at one specific player. The moment of uncertainty (“who takes it?”) is your advantage.
When to Attack, When to Defend
The decision to “attack or defend” is determined by your court position and the quality of the previous shot.
Attack when:
You and your partner are at the net (green zone)
The opponent is in an uncomfortable position (retreating, hitting off the wall, stretching for the ball)
The ball arrives high and is convenient for an overhead shot
You receive a short ball that can be played aggressively
Defend when:
You and your partner are behind the service line (red zone)
Opponents control the net
The ball arrives deep and you are playing off the wall
You have not reached the optimal position
In a transitional situation:
Play a neutral shot — deep, to the center, without risk
Wait for an opponent error or a weak response
Gradually advance forward without forcing
Simple Game Patterns
Here are three basic patterns that work at every level:
Pattern 1: Lob — Approach — Volley
From defense, send a deep cross-court lob
While the ball is in the air, advance forward with your partner
Take up position at the net
Play a volley to the center or at the opponent’s feet
Pattern 1: after a deep lob, our pair (1, 2) moves to the net while opponents (3, 4) retreat
This is the most reliable way to seize the initiative. A deep lob forces the opponents to retreat, and you take their place at the net.
Pattern 2: Deep Center Shots — Wait for the Error
Consistently send the ball deep to the center of the opponent’s court
Do not take risks, do not try to “kill” the ball
Wait for a weak response or an error
When you receive a short ball — attack and approach the net
This pattern is particularly effective against beginners who start forcing shots and making errors themselves.
Pattern 3: Serve — Volley to Feet — Partner Intercept
Execute a serve (moderate power, deep)
Approach the net after the serve
Direct the first volley at the receiver’s feet
Your partner intercepts the weak response and finishes the point
Pattern 3: server (1) approaches the net, partner (2) already at net. Receivers (3, 4) in defense
This pattern requires coordination with your partner but is very effective.
Using the Walls
The walls are not your enemy — they are your ally. Many beginners panic when the ball flies toward a wall and try to intercept it on the way. This is a mistake.
Rules for using the walls:
Let the ball bounce. The wall slows the ball and gives you extra time. Read more about this in Wall Play.
Do not hit hard toward the wall. A powerful shot into the opponent’s back wall will rebound and give them a comfortable ball.
Use the walls as reference points. If you are at the back wall — you are on defense. If your opponent is at the back wall — you should be at the net.
Faster balls rebound farther. Control your shot power so the ball “dies” near the back wall rather than rebounding to mid-court.
[EXPERT OPINION] The best advice for beginners: after every wall rebound, play a high deep lob. It is safe, it works, and it gives you time to regroup. Do not try to play “beautiful” shots off the wall until you have mastered the basics.
Common Mistakes
Hitting too hard. A powerful ball bounces off the glass faster and flies back to the opponents. You give them pace and time. Control your power.
Ignoring position. Beginners think only about the shot, forgetting about position. Where you stand is more important than how you hit.
Breaking the pair apart. One player approaches the net, the other stays back. This creates a “diagonal gap” in defense.
Wall panic. The walls give you additional time. Do not fear them — use them.
Impatience. Padel is a marathon, not a sprint. A rally can last 20–30 shots. Do not try to finish the point on the first hit.
No plan. Every shot should have a purpose: create pressure, approach the net, force an error. Aimless shots are a gift to the opponent.
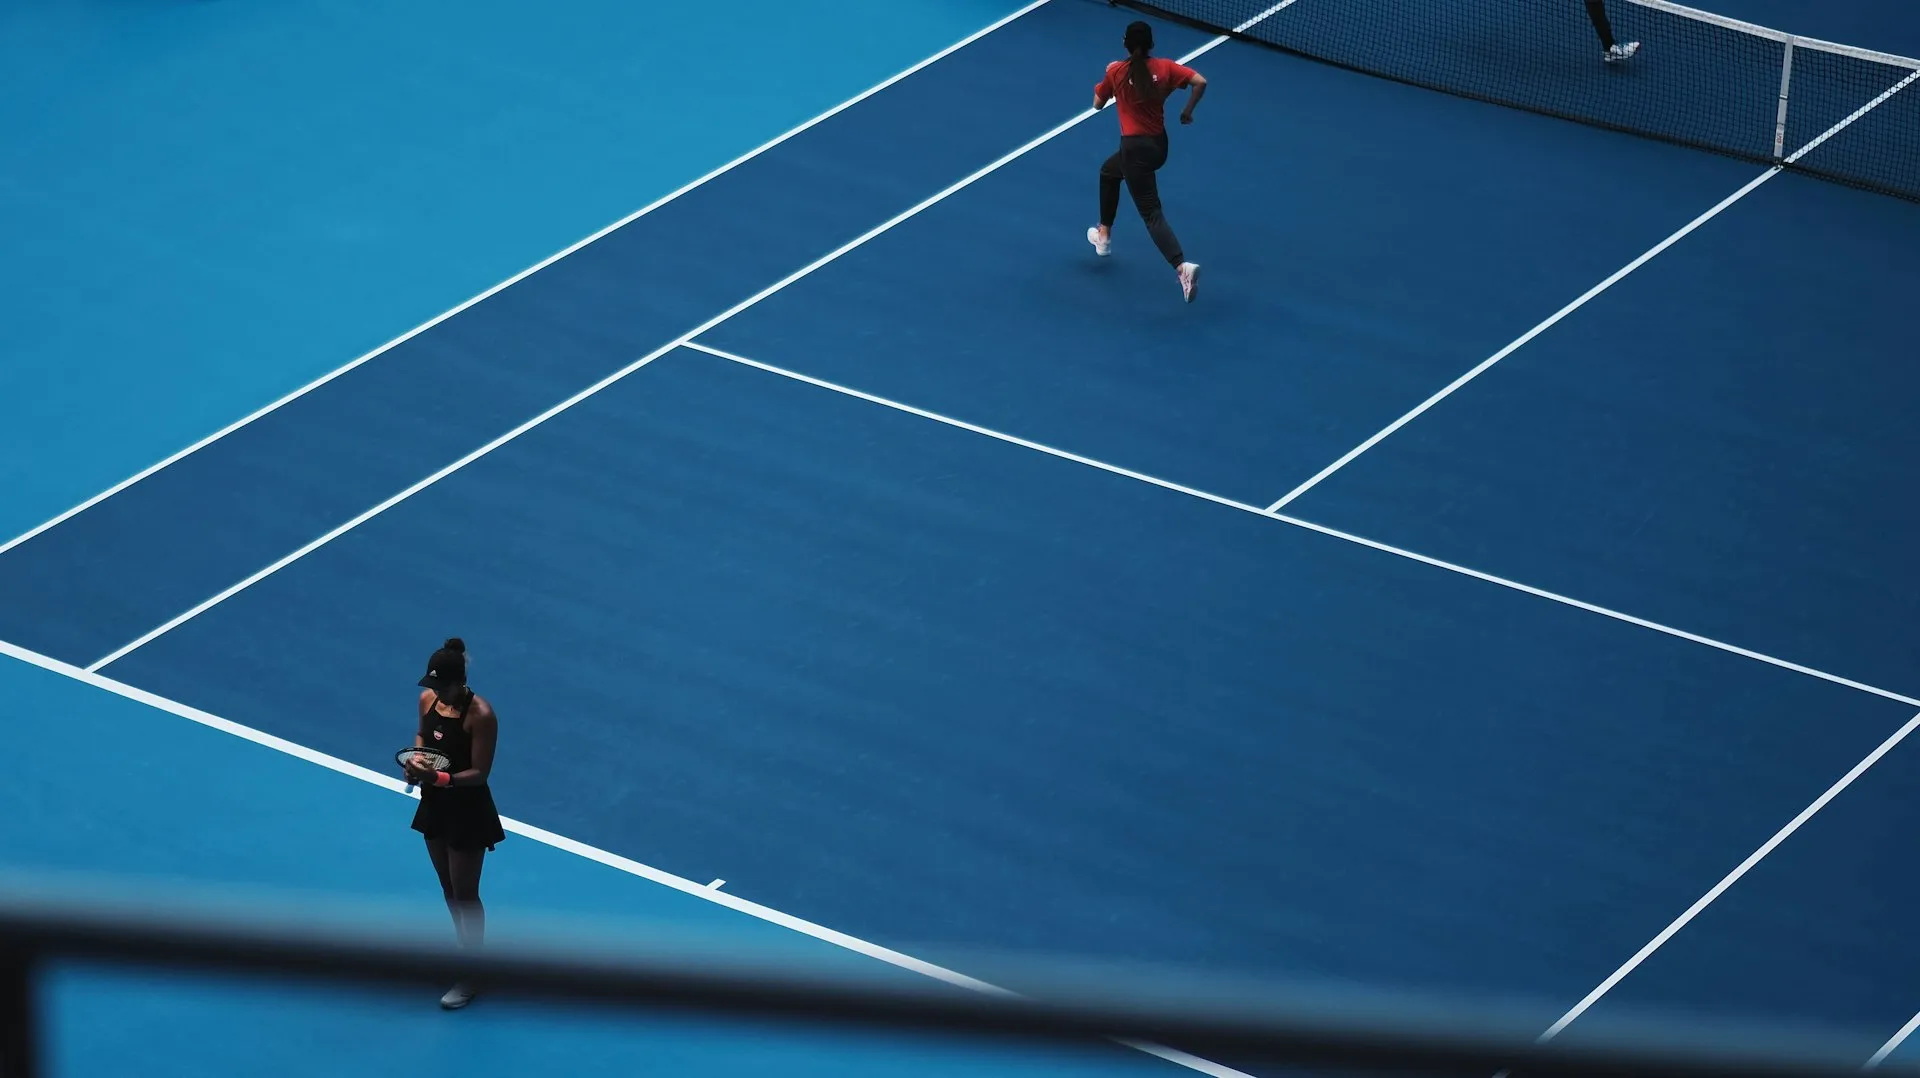
Court position determines the outcome of a rally before the shot is even hit. Understanding court zones and correct pair placement is the foundation of tactical thinking in padel.
Net Zone (La Red)No Man's Land (Tierra de Nadie)Back Zone (El Fondo)Back Wall (Pared de Fondo)Side Wall (Pared Lateral)
Three Court Zones
The padel court is divided into three conceptual zones, each defining your role in the rally:
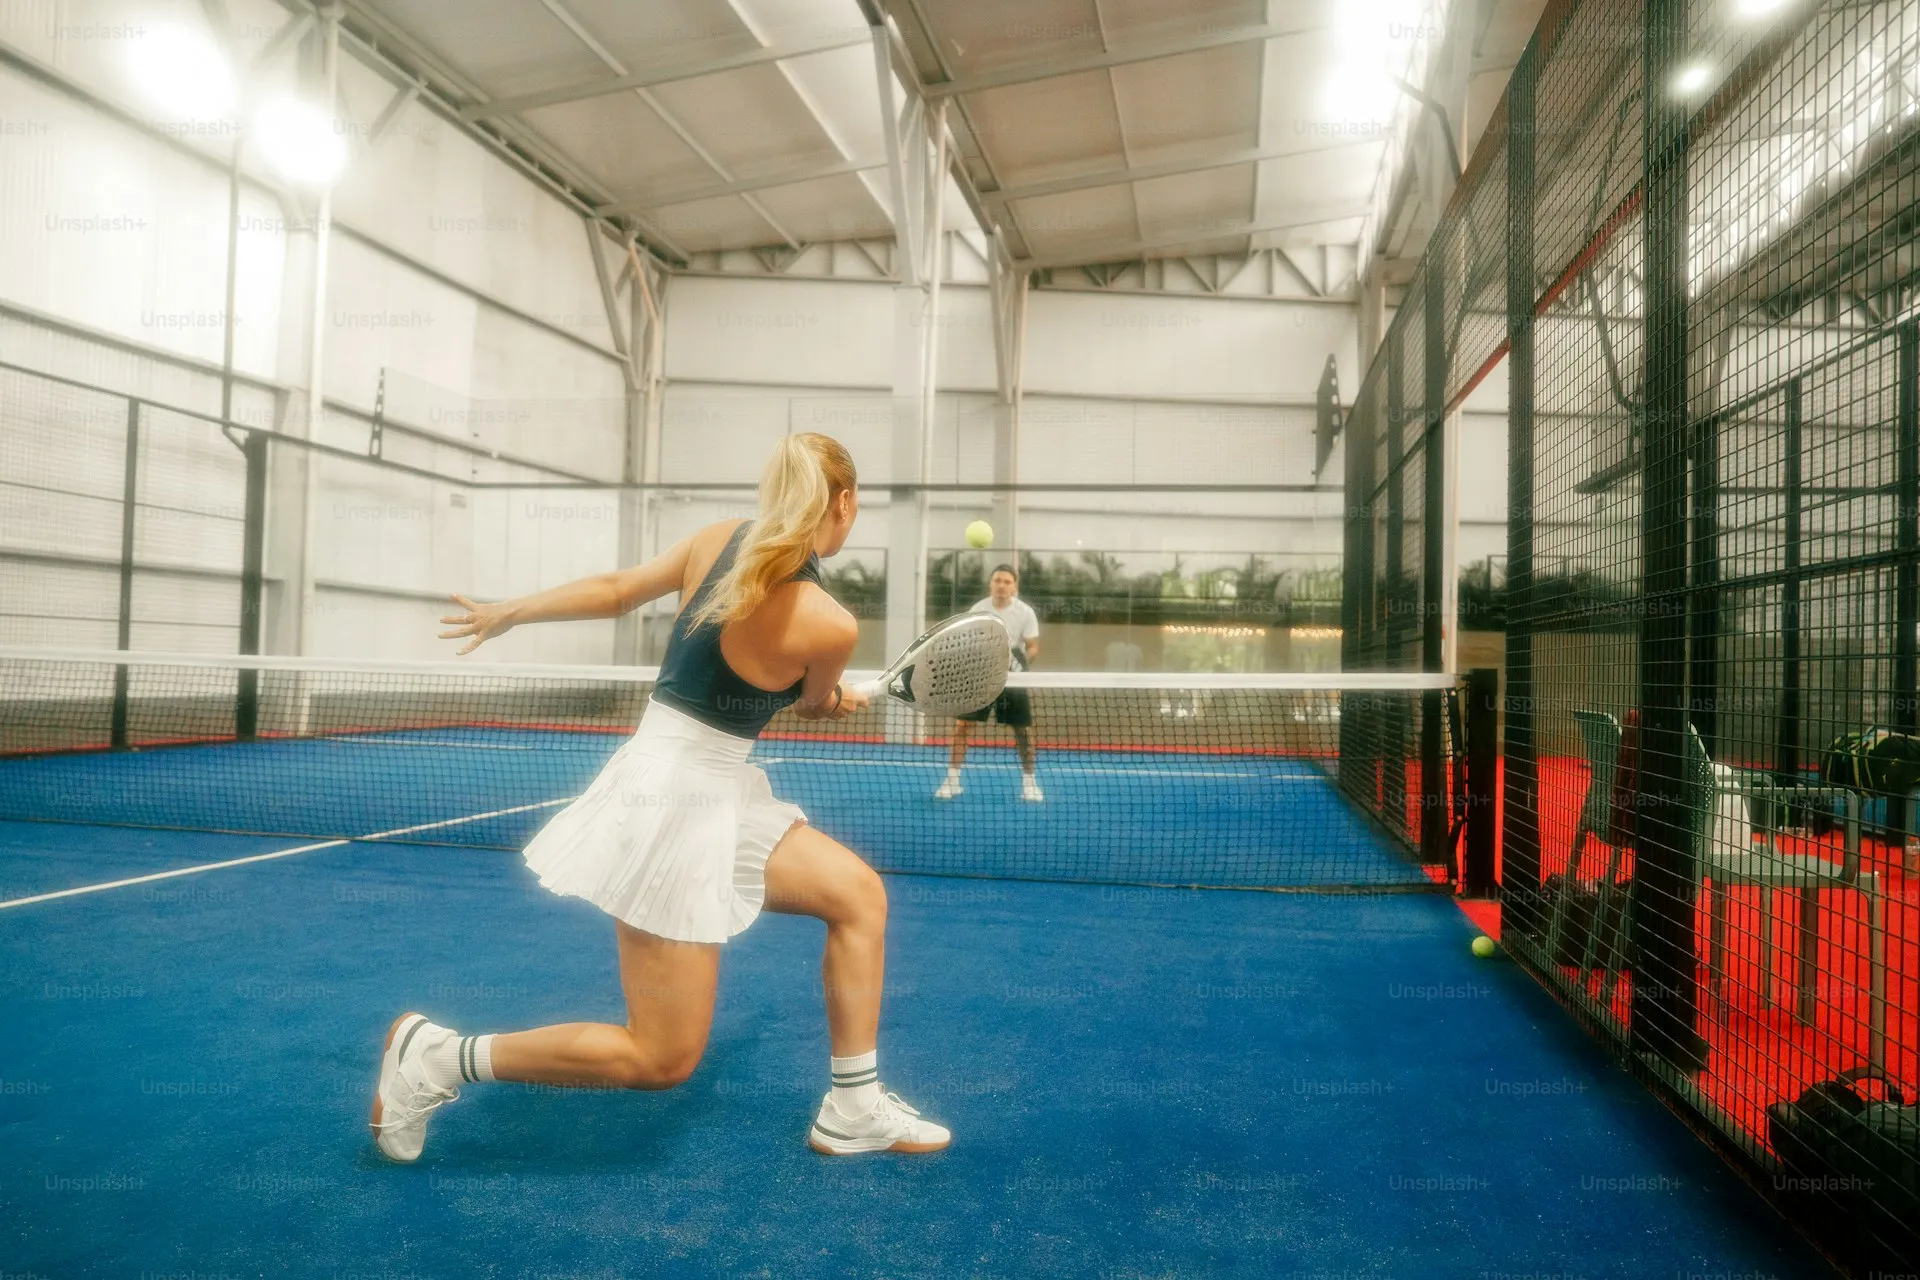
Green Zone (Attack)
Located 2–3 meters from the net. This is the zone of dominance: from here you control the rally and finish points. Shots from the green zone — volleys, bandejas, smashes — are the most effective.
Research on professional matches shows that approximately 36% of points are finished from the net zone, with 28.9% coming from volleys and 25.9% from smashes. The team that controls the net wins the vast majority of rallies.
Orange Zone (Transition)
Located between the service line and the net. This is the danger zone — “no man’s land.” Here you are too far from the net for an effective volley and too close for comfortable groundstrokes. Balls arrive at your feet, making it awkward to respond.
Rule: move through the orange zone, never stop in it. Move forward to the net or retreat behind the service line, but do not get stuck in between.
Red Zone (Defense)
Located behind the service line, in the back 2 meters of the court. This is the defensive zone: from here you play lobs, wall shots, and try to regain control of the rally. The objective from the red zone is not to win the point but to create conditions for moving forward.
Professional match analysis data shows that 41.4% of points are finished from the middle area of the court — confirming that the ability to transition between zones is critically important.
Attacking position: both players (1, 2) at the net control the rally. Opponents (3, 4) in defense
The Ideal: Both Players at the Net
The primary tactical goal in padel is to bring both players to the net. The statistics are clear: a pair at the net wins more than 70% of rallies. Here is why:
Angles of attack. At the net, you can direct the ball to virtually any spot on the opponent’s court.
Pressure. Opponents are forced to play accurately under pressure, increasing their error rate.
Time. You are closer to the opponent, meaning they have less time to react.
Finishing. Most “killing” shots — volleys and smashes — are executed from the net zone.
Ideal net position: both players stand 2–3 meters from the net, approximately 2–3 meters apart from each other. Knees slightly bent, racket held in front at chest level, ready for a split step.
Left Side and Right Side Roles
In padel, each side of the court implies a specific playing role. This is not a rigid rule, but understanding the specialization helps the pair work more effectively.
Right Side (Derecha)
The right-side player is the constructor. Their tasks:
Consistency and accuracy. Build the rally, control the pace of play.
Ball placement. Precise shots into uncomfortable zones, setting up attacks for the partner.
Backhand through the center. Most shots through the center of the court fall on the right-side player’s backhand.
Patience. The right side demands patient, positional play.
Left Side (Revés)
The left-side player is the finisher. Their tasks:
Aggressive overhead shots.Bandeja, vibora, smash — the primary weapons of the left-side player.
Center interceptions. The left player covers center lobs, which are often the most effective shots.
Decisiveness. The left side requires the ability to make quick decisions and close out points.
Forehand through the center. Center shots are most often played with the left player’s forehand.
[EXPERT OPINION] For beginner pairs, side selection is often straightforward: the more aggressive player goes to the left, the more consistent one to the right. Over time, you can experiment to find the optimal combination.
Moving as a Pair
One of the fundamental principles of padel positioning is synchronized pair movement. Imagine that you and your partner are connected by an invisible rope 3–4 meters long.
Rules for synchronized movement:
Both forward. If one player approaches the net, the other must also move forward.
Both back. If one retreats, the other retreats alongside.
Same line. Both players should be on approximately the same horizontal line (equal distance from the net).
Shift toward the ball. When the ball goes to the right corner, both players shift right. The left player covers the center.
Synchronized: both players (1, 2) on the same line at the net
What happens when synchronization breaks down:
If one player is at the net while the other is at the back wall, a “diagonal gap” forms between them. Opponents easily find this corridor and direct the ball where neither player can reach it.
Mistake: players (1, 2) split — one at net, one at back. Vulnerable gap between them
As the legendary Fernando Belasteguin has said: positioning and mental focus are what separate a good pair from a great one. Shot technique matters, but without correct court placement, it loses half its effectiveness.
Communication
Positioning is impossible without constant communication between partners. In padel, you should be talking during every rally.
Basic calls:
“Mine!” — you are taking the ball
“Yours!” — the ball is your partner’s
“Back!” — both retreat
“Up!” — both approach the net
“Switch!” — change sides
When communication is critical:
The ball travels to the center between both players — who takes it?
A lob goes over one player — retreat or leave it for the partner?
After the serve — move forward or stay back?
Silence on the court is a sure sign of a beginner pair. Experienced players communicate not only through words but also through gestures and eye contact between rallies.
Common Mistakes
Getting stuck in no man’s land. Between the service line and the net is the most disadvantageous position. Decide: forward or backward.
Asynchronous movement. One player at the net, the other at the back wall. This creates defensive gaps that opponents easily exploit.
Silence. Without communication, collisions and missed balls are inevitable, especially through the center.
Standing still. Padel is constant movement. If you are standing and waiting, you are already losing position.
Ignoring roles. Both players try to finish — nobody builds the rally. Or both play passively — nobody attacks.
Too close to the net. Standing right at the net is a trap. The optimal distance is 2–3 meters: close enough for volleys, far enough to react to lobs.
Padel is first and foremost a team sport. Even the most technically skilled player will lose to a pair that moves as a unit and communicates on court. Communication between partners is not merely a useful skill – it is the foundation of successful play.
Padel is the only major racket sport in which doubles is the primary and virtually the only format at all professional tournaments. Unlike tennis, where singles exists alongside doubles, in padel you almost always play as a pair (singles padel exists but remains a niche format). This means that coordination with your partner affects results just as much as individual technique.
At the professional level, pairs who have played together for a long time consistently defeat more technically gifted opponents through superior teamwork. [EXPERT OPINION] Coaches estimate that up to 40% of points at the amateur level are lost due to poor communication – collisions, missed balls down the middle, and uncoordinated movement.
Good communication addresses three key challenges:
Ball allocation. Who plays the ball when it comes down the middle?
Positional coordination. Both partners move in sync, covering the entire court.
Emotional support. A positive atmosphere helps maintain focus and confidence.
Verbal Signals
Voice communication is the backbone of on-court coordination. Calls should be short, clear, and loud enough for your partner to hear even in a noisy environment.
Call (EN)
Call (ES)
Meaning
“Mine!”
“Mía!”
I am taking this ball
“Yours!”
“Tuya!”
You take this ball
“Switch!”
“Cambio!”
Swap sides (after a lob or passing shot)
“Lob!”
“Globo!”
Warning: opponent is playing a lob
“Back!”
“Atrás!”
Move to the back of the court
“Net!” / “Up!”
“Red!”
Move forward to the net
“Middle!”
“Centro!”
Ball is coming down the centre – decide who plays it
“Leave it!”
“Deja!”
Do not touch the ball (it is going out)
[EXPERT OPINION] Many padel players use Spanish calls regardless of their native language. Spanish is the international “language of padel,” and knowing these terms is valuable.
Non-Verbal Signals
Beyond voice calls, experienced pairs use hand signals, especially before serves and returns. The most common technique involves hand signals behind the back by the player positioned at the net.
Open palm – “I will hold my position after the serve, covering my zone.”
Closed fist – “I will poach (cross-intercept) and move to the other side.”
Finger pointing left or right – “I am moving in the indicated direction.”
Open hand with fingers spread, rocking side to side – “I will decide based on the opponent’s return.”
These signals allow partners to coordinate tactics without opponents overhearing. They are used most actively in competitive play, but even in recreational matches they provide a clear advantage.
Synchronized Movement
One of the key principles of doubles play in padel is the “invisible rope” rule: both partners move as a single unit, as if connected by a rope approximately 3-4 metres long.
What this means in practice:
Forward together. When one partner moves up to the net, the other must also advance. Both players take up the net position simultaneously.
Back together. If the opponent executes a good lob and one of you is forced to retreat, the other drops back as well, maintaining the line.
Sideways together. When one partner shifts toward a side wall to play a ball, the other slides in the same direction, covering the space that opens up in the centre.
Breaking this principle creates “holes” – undefended zones on the court that opponents will gladly target. The classic mistake: one player at the net, the other at the back wall. In that configuration, a huge gap opens between them, making it easy for opponents to attack.
The Psychology of Partnership
Technical communication is only half the story. The emotional dimension of partnership is equally important, and at the amateur level it is often the deciding factor.
Positive reinforcement is the primary tool. After every good rally by your partner, show your approval: a fist bump, a “vamos!”, a high five. This is not just politeness – positive emotions increase confidence and reduce anxiety.
The “no blame” rule is considered an unwritten standard in padel. Even if your partner makes a costly mistake, the response should be supportive: “No worries, next one!” or “All good, let’s keep going.” Eye-rolling, sighing, and reproaches destroy team spirit faster than any technical error.
Tactical discussions are best conducted during calm moments: at changeovers, before the start of a set, or during a break. Analysing mistakes in the middle of a rally creates distraction and tension.
[EXPERT OPINION] The best pairs in the world are not simply those who play well together, but those who genuinely support each other. Watch any World Padel Tour match: after every rally, partners exchange gestures and words, regardless of the outcome.
5 Common Doubles Communication Mistakes
Not calling the ball. The most widespread error: both partners silently reach for the ball – or, conversely, both wait for the other to take it. Solution: always call “mine!” or “yours!”, especially on balls down the middle.
Breaking formation. One player rushes to the net while the other stays at the back wall. A huge gap opens between them. Solution: move together, remembering the invisible rope principle.
Silence after a partner’s error. No reaction is worse than criticism: the partner feels isolated. Solution: after every mistake, offer brief support – “Come on!”, “Next one is ours!”
Discussing tactics mid-rally. Shouting “Why did you hit it like that?!” during play does not help – it hinders. Solution: tactical conversations belong in pauses only.
Ignoring non-verbal signals. Your partner shows a fist behind their back before the serve, and you are not looking. Solution: develop the habit of checking your partner’s signals before every serve.
In padel, each player in the pair has a distinct role. The right side is the constructor; the left side is the finisher. Understanding the differences helps you choose your position and develop the right skills.
Padel is a doubles sport. Unlike tennis, where both players perform roughly the same function, in padel the two sides differ fundamentally in their tasks and the skills they demand.
The Right Side (Derecho)
The right-side player is the constructor. Their job: build the rally, keep the ball in play, and set up a comfortable ball for the partner.
Key Skills
Backhand volley — the critical shot, as most balls travel through the centre of the court
Patience — waiting for the right moment to attack rather than forcing the issue
Accuracy and control — placement over power
Anticipation — reading where the opponent will return the ball
Mixing short volleys to the sides with deep, low volleys
Those more comfortable constructing than finishing
The Left Side (Revés)
The left-side player is the finisher. Their job: aggressively close out rallies and dominate the overhead game.
Key Skills
Strong forehand — from the left side the forehand covers the centre of the court
Overhead game — command of the bandeja, vibora, and topspin smash
Speed and agility — covers more ground, responsible for central lobs
Aggression — the ability to end the rally in one shot
Who Suits the Left Side
Athletic players with good speed
Those confident with overhead shots
Players with a dominant forehand
Left-Handed Players: A Special Case
Left-handers nearly always play the right side. The reason: both players then have their forehand covering the centre, significantly strengthening central control and the overhead game.
The formula: “Lefty always to the right” — works in 90% of cases.
Exception: when both players are left-handed.
How to Choose Your Side
Criterion
Right Side
Left Side
Dominant shot
Backhand
Forehand
Play style
Constructive
Aggressive
Overhead game
Less critical
Essential
Court coverage
Moderate
Extensive
Temperament
Patient
Decisive
[EXPERT OPINION] Beginners are recommended to play both sides to develop all-round skills. Specialisation comes with experience.
Examples from the Professional Tour
Juan Lebrón — reached world No. 6 on the left, then switched to the right with Paquito Navarro and became No. 1. Later returned to the left with Martín Di Nenno
Arturo Coello and Agustín Tapia — an example of a successful left/right partnership
Alejandro Galán — an aggressive left-side finisher
Common Mistakes
Both players want to finish. If both play aggressively from the left side, there is no one to build the rally. One must be the constructor.
Ignoring the centre. There is a diagonal corridor between the two players — most balls are directed there. Both must cover the centre.
Rigid side assignment at a low level. At 2.0–3.0, it is more beneficial to switch sides for all-round development.
Drills
Backhand volley to the centre. Partner hits all balls through the centre; the right-side player takes them with the backhand. 3 sets of 10 balls.
Pair rotations. Play rounds of 10 rallies on each side. Compare how each feels and the results.
Centre coverage. One ball to the right-side player (backhand), the next to the left-side player (forehand). Focus on covering the diagonal.
The pair controlling the net dominates the rally. But approaching the net at the wrong moment is a mistake that costs points. Learn to pick the right moment.
In padel, the pair at the net holds the advantage. From the net position you control the angles, cover the diagonals, and close rallies with volleys. But you should only move forward after a quality shot.
Key rule: “Be patient at the back and play a good enough shot that gives you time to move forward.”
Signals to Approach
1. After a Good Chiquita
The chiquita drops at the opponents’ feet, forcing a weak volley. Move forward immediately after the shot.
2. After a Deep Lob
The lob must clear the opponent’s head, giving you time to take position.
3. After the Serve (for the Server)
A good server runs to the net immediately after serving.
4. After a Good Return
If the return does not touch the wall, the ball reaches the opponent more quickly, giving you time to advance.
Approach Technique
The Split Step
The split step is a small hop landing with feet apart. It is performed at the exact moment the opponent strikes the ball.
Too early → you fall onto your heels and lose reactivity
Too late → you are late to the ball’s trajectory
In padel the split step is lighter, quicker, and higher than in tennis
Land on the balls of the feet, knees bent
Moving as a Pair
The golden rule: both partners move together.
Together to the net → together back on a lob
If one stays back → a huge diagonal gap opens in the centre of the court
Synchronisation is the key difference between strong and weak pairs
When NOT to Approach
Situation
Why stay back
Lob did not clear the opponent’s head
The opponent will hit the ball before you take position
Return touched the back wall
The ball bounced comfortably for the opponent — they will attack
Partner stayed back
A diagonal gap opens — the opponent will target it
You are off balance
Running without control = a poor position for the volley
Common Mistakes
Approaching after a bad shot. If your ball did not trouble the opponent, stay where you are.
Sprinting instead of controlling. A sprint to the net instead of a controlled advance. You should be ready for the volley, not out of breath.
Too close to the net. Standing right at the net makes you easy to lob.
One goes, the other stays. Your partner must move with you. Communication before and during the rally is essential.
Trying to cover the whole court. Each player covers their half. Trust your partner.
Drills
Chiquita + transition. Hit a chiquita, immediately move forward, ready for the volley. 10 rallies.
Defence/attack rotation. Deep defence → lob → move to the net → finishing volley.
Split-step drill. Partner hits balls from the baseline; you are at the net performing a split step before every volley. 20 balls.
Synchronised movement. 2 vs 2, focus on sync: the coach calls “forward” or “back” and both partners move simultaneously.
“La Nevera” — Spanish for “the fridge.” A tactic in which all balls are directed at one player in the opposing pair. The other player “freezes” — losing rhythm, focus, and confidence.
The nevera is a tactic in which 70% of balls are directed at the weaker player in the opposing pair. The stronger player is “frozen”: receiving no balls, losing rhythm, and dropping out of the rally.
What Happens to the “Frozen” Player
Loses concentration — no balls, nothing to do
Loses confidence — feeling of uselessness
Physically cools down — muscles go cold without movement
Psychological pressure — a sense of guilt towards the partner
How to Execute the Nevera (Attack)
The 70/30 Rule
Direct 70% of balls to the weaker player and 30% to the stronger. A pure 100/0 split is too predictable — the strong partner will simply cover their teammate’s zone.
Keys to Success
Shot variety. Even when targeting one player, vary your shots: high lob, fast low lob, chiquita, block and volley, bandeja, drop shot
Team decision. Both partners must agree on the tactic — it cannot be a solo decision
Consistency. If the tactic is working, do not change it for the sake of risky shots
Finish on the strong player. When you have an easy ball to close the point, hit it at the strong player. This demoralises
How to Defend Against the Nevera
1. Switch Sides
The most effective counter. Swap sides with your partner — the opponents are automatically forced to play to both players.
2. Central Lob
An aggressive lob down the centre line forces the opponents to change direction.
3. Change Your Positioning
The “frozen” player stays at the net; the partner drops to the baseline. The opponents are forced to play differently.
4. Cover More Ground
The “stronger” player takes balls from the centre and even from the partner’s side. This works if both partners communicate well.
5. Communicate Immediately
Spotted a nevera? Discuss it with your partner right away — between rallies. Agree on a plan for the next few points.
Etiquette
Context
Is the nevera acceptable?
Tournament
✓ Fully legitimate tactic
Friendly match
✗ Considered disrespectful
Training
✓ If both sides agree
In friendly matches all four players are there to have fun. Using the nevera spoils the game for the opponents’ partner. In tournaments there are no restrictions — it is part of the tactical arsenal.
Common Mistakes When Executing
100% of balls to one player. Too predictable — the strong partner will cover the zone.
Monotonous shots. Even when targeting one player, you must vary the pace and type of shot.
Ignoring the opponents’ adaptation. If the opponents switch sides, adjust your tactic.
Drills
Training set with nevera. Play a set directing 70% of balls to one side. Track the results.
Counter-nevera. One pair executes the nevera; the other practises defensive countermeasures: side-switching, central coverage.
Communication drill. Between every rally, discuss out loud: who the opponents are targeting and how to respond.
In padel, defence is not just survival — it is a launching pad for attack. Research shows that the defending team wins approximately 53% of long rallies (12+ shots), proving that patience and smart transitions are more powerful than raw aggression.
Why Defence Wins Rallies
Padel is unique among racket sports: the enclosed court and glass walls mean that aggressive shots often come back. A powerful smash can rebound off the back wall into a comfortable position for the defending team. This is why the best teams in the world treat defence as a weapon, not a weakness.
Key statistics from professional match analysis:
Metric
Value
Long rallies won by defending team
~53%
Average rally length at professional level
5–7 shots
Unforced errors from attacking team in long rallies
38%
Points won at the net vs from the back
65% vs 35%
The goal of counter-attacking padel is clear: survive the opponent’s attack, neutralise their advantage, and create an opportunity to reclaim the net.
The Five Key Counter-Attack Shots
1. Chiquita (Low Reset)
The chiquita is the primary weapon for transitioning from defence to attack. A soft, low shot aimed at the feet of the net player forces them to volley upward, giving you time to advance.
When to use: After a smash that bounces off the back wall at a comfortable height. Aim cross-court at the feet of the volley player.
Why it works: The opponent must lift the ball, producing a weak volley that you can attack on the next shot.
2. Defensive Lob (Reset Lob)
A high, deep lob aimed over the heads of the net players. The purpose is not to win the point directly but to buy time, push the opponents back, and allow your pair to move forward.
When to use: When under heavy pressure and both opponents are close to the net. Target the deeper part of the court, ideally with slight topspin to make the ball kick off the back wall.
Why it works: Forces the opponents to retreat, reversing the positions — you advance to the net while they are pushed back.
3. Passing Shot (Paralela)
A fast, flat shot hit down the line, past the net player. This is the highest-risk counter-attack option but can be devastating when timed correctly.
When to use: When the net player leaves a gap on the line, or after a wide smash where the net player has drifted toward the centre.
Why it works: The speed and angle make it nearly impossible to volley. If the ball hits the side glass, the rebound is unpredictable.
4. Bajada (Counter off the Back Glass)
An attacking shot played after the ball bounces off the back glass. Instead of simply returning the ball, you drive it aggressively toward the opponents’ feet or into a gap.
When to use: When a smash or deep shot bounces high off the back wall, giving you enough time and height to attack. Requires good reading of the glass rebound.
Why it works: Turns a defensive situation into an attacking one by using the energy from the glass rebound.
5. Contra Pared (Wall Counter)
A shot played off the side wall that redirects the ball cross-court. The unpredictable angle from the wall bounce can wrong-foot the net player.
When to use: When a wide shot forces you toward the side wall. Rather than simply returning high, use the wall angle to redirect.
Why it works: The direction change after the wall bounce makes it difficult for the net player to anticipate the trajectory.
The Counter-Attack Cycle
The transition from defence to attack follows a predictable pattern:
Survive — block or deflect the initial attack, keeping the ball low and in play
Neutralise — use a lob or chiquita to disrupt the opponents’ rhythm
Transition — as the opponents are pushed back or forced into a weak shot, move forward together with your partner
Attack — take the net position and finish the point with a volley or smash
The key is patience. Do not rush the transition. Wait until you have played a quality shot — a deep lob that clears both opponents, or a low chiquita that forces a lifted volley — before advancing.
Pro Examples
Agustin Tapia
Known for his exceptional defensive skills and ability to turn defence into attack. Tapia’s philosophy: “Defend to regain the net.” He rarely attempts to win points from the back of the court. Instead, he constructs rallies, waiting for the right moment to play a chiquita or passing shot and sprint forward.
Arturo Coello
Master of the surgical backhand reset. Coello can absorb powerful smashes and redirect the ball with minimal backswing, placing chiquitas with pinpoint accuracy at the feet of the net players. His compact technique allows him to counter-attack even from difficult positions near the glass.
Martin Di Nenno
A strategic counter-puncher who reads opponents’ intentions through body language. Di Nenno’s strength lies in anticipation — he moves into position before the smash lands, giving himself extra time to choose between a lob, chiquita, or passing shot.
Eight Drills for Counter-Attack Practice
Drill 1: Smash-and-Block Rally
One pair at the net feeds smashes; the defending pair practises blocks and chiquitas. After five consecutive rallies, switch roles. Focus on keeping the block low and controlling the angle.
Drill 2: Lob-to-Net Transition
Player A lobs from the back of the court. The moment the lob clears the opponents, Player A and their partner sprint forward together. The drill trains the timing of the forward movement.
Drill 3: Chiquita + Split Step
Player defends a volley by playing a chiquita, then immediately performs a split step and moves forward. The partner feeds the next ball, which the advancing player must volley. Repeat 10 times per side.
Drill 4: Back Glass Bajada
A partner feeds high balls that bounce off the back glass. The defending player reads the rebound and drives the ball aggressively toward the opposite side of the court. Focus on footwork and timing the contact point.
Drill 5: 2v2 Defensive Rally
Both pairs play a set where the defending team starts every point from the back of the court. The defending team wins the rally by taking the net. Trains real-match decision-making.
Drill 6: Wall Redirect
Standing near the side wall, a partner feeds balls into the wall at varying speeds. The player practices redirecting the rebound cross-court, keeping the ball low. Builds muscle memory for contra pared shots.
Drill 7: Communication Under Pressure
Same as Drill 5, but after every defensive shot, the defending pair must call out their plan: “Lob!”, “Chiquita!”, “Switch!” Develops real-time communication habits.
Drill 8: 3-Shot Sequence
Sequence: (1) Defend a smash with a block → (2) Play a deep lob → (3) Advance and finish with a volley. The partner feeds the three-shot pattern. Builds the complete counter-attack cycle.
Common Mistakes
Mistake
Why it fails
Fix
Counter-attacking from a bad position
You are off-balance and the shot quality is low
Reset with a lob first, counter-attack only when balanced
Only one player advances
A gap opens in the centre of the court
Always move forward as a pair
Trying to win the point from the back
Low-percentage shots lead to unforced errors
Build the rally; the net wins points, not the baseline
Hitting the chiquita too hard
It rises above the net, giving the opponent an easy volley
Soft hands; the chiquita should barely clear the net
Lobbing without depth
A short lob gets smashed again
Target the back third of the court; if in doubt, lob higher
Not reading the smash type
Wrong counter-attack selection
Watch the opponent’s arm and body position before the contact
Key Principles
Defence is not passive. Every defensive shot should have a purpose: neutralise, buy time, or create a transition opportunity.
Move together. When one player advances, the partner must advance too. Separated pairs leave exploitable gaps.
Patience wins. The defending team wins the majority of long rallies. Trust the process.
Quality over speed. A well-placed chiquita is worth more than a rushed passing shot.
Communication is essential. Call your intentions: “I lob, you move!” The pair that communicates has better timing.
Technique and fitness make up 50% of success in padel. The other 50% is the mind. Managing nerves, maintaining focus, and bouncing back from errors separates good players from great ones.
2 minutes of mindful breathing to lower heart rate and focus on the present
3 minutes of visualisation: picture yourself playing with confidence — fluid movement, precise shots, the joy of winning points
Visualisation builds neural pathways that improve real performance (neuroplasticity)
An Anchor for Your Mindset
Create a ritual that switches you into “competition mode”: a song, a keyword, or a gesture. Use it before every match.
[UNVERIFIED] A 2024 study (European Journal of Sport Science) found that 30 minutes of cognitive load before a match significantly impaired shot accuracy. The takeaway: arrive on court mentally fresh.
Managing Nerves on Key Points
Techniques
Controlled breathing: a slow exhale before serving or returning lowers heart rate
Physical ritual: tapping the racket on the floor, adjusting your cap — an anchor that returns you to the present
Trigger phrase: “One point at a time” — repeat it internally to hold focus
Process over outcome: concentrate on what you control (positioning, shot selection) rather than the score
[EXPERT OPINION] Process-oriented players perform consistently. Outcome-oriented players often crack under pressure.
The “Next Point” Mentality
The Reset Rule
After an error:
One deep breath
Physical reset — adjust your cap, wipe the racket grip
Focus on the next point — the previous one no longer exists
Positive Self-Talk
“On to the next one”
“I can do this”
“An error is information, not a verdict”
According to Peter Consuegra (PadelMarket): “An error observed without judgement becomes valuable information. After the match, mentally review your most frequent mistakes, understand their causes, and turn them into goals for the next training session.”
Body Language and Confidence
Confident posture raises the energy of the entire pair — especially critical in doubles
A look, a nod, a pointing finger say as much as words
If your partner knows you have their back, they play with more confidence
An aggressive stance and readiness tell the opponent: “I am not giving up”
Read your opponents’ body language: are they preparing a lob, a drive, or a fake?
Patience as a Weapon
Slowing the pace leads to more opponent errors
When pushed back, lob with purpose and “let the rally breathe”
You do not need to win the point from the baseline — sometimes the best move is to survive and wait for the error
High, deep lobs buy time to regroup
Common Mental Traps
“I must win this point.” Putting pressure on yourself increases the chance of an error. One point = one point.
The error spiral. One error → anger → another error → more anger. Break the chain with a reset.
Fear of leading. Ahead in the score → fear of losing the advantage → cautious play → loss of initiative.
Negative communication. Criticising your partner hurts both players’ performance. Support = better results.
Fixation on the score. Down 1–5? Play every point as though it were 0–0.
Drills for Mental Resilience
Breathing between rallies. Three slow exhales before every serve or return. Train it until it is automatic.
Training match with restrictions. Negative emotions are banned — no fist-pumping in frustration, no sighs, no dropped shoulders. A penalty point for violations.
Visualisation. 5 minutes before training: close your eyes and replay rallies in your head. Picture the successful execution of each shot.